Pagination Implementation with Axios

JavaScriptJavaScriptBeginner
Practice Now

Introduction

In this project, you will learn how to implement pagination functionality for a course list. Pagination is an essential feature in front-end web development, and this project will guide you through the process of fetching data from a JSON file, displaying the data in a paginated format, and handling the previous and next page functionality.

👀 Preview
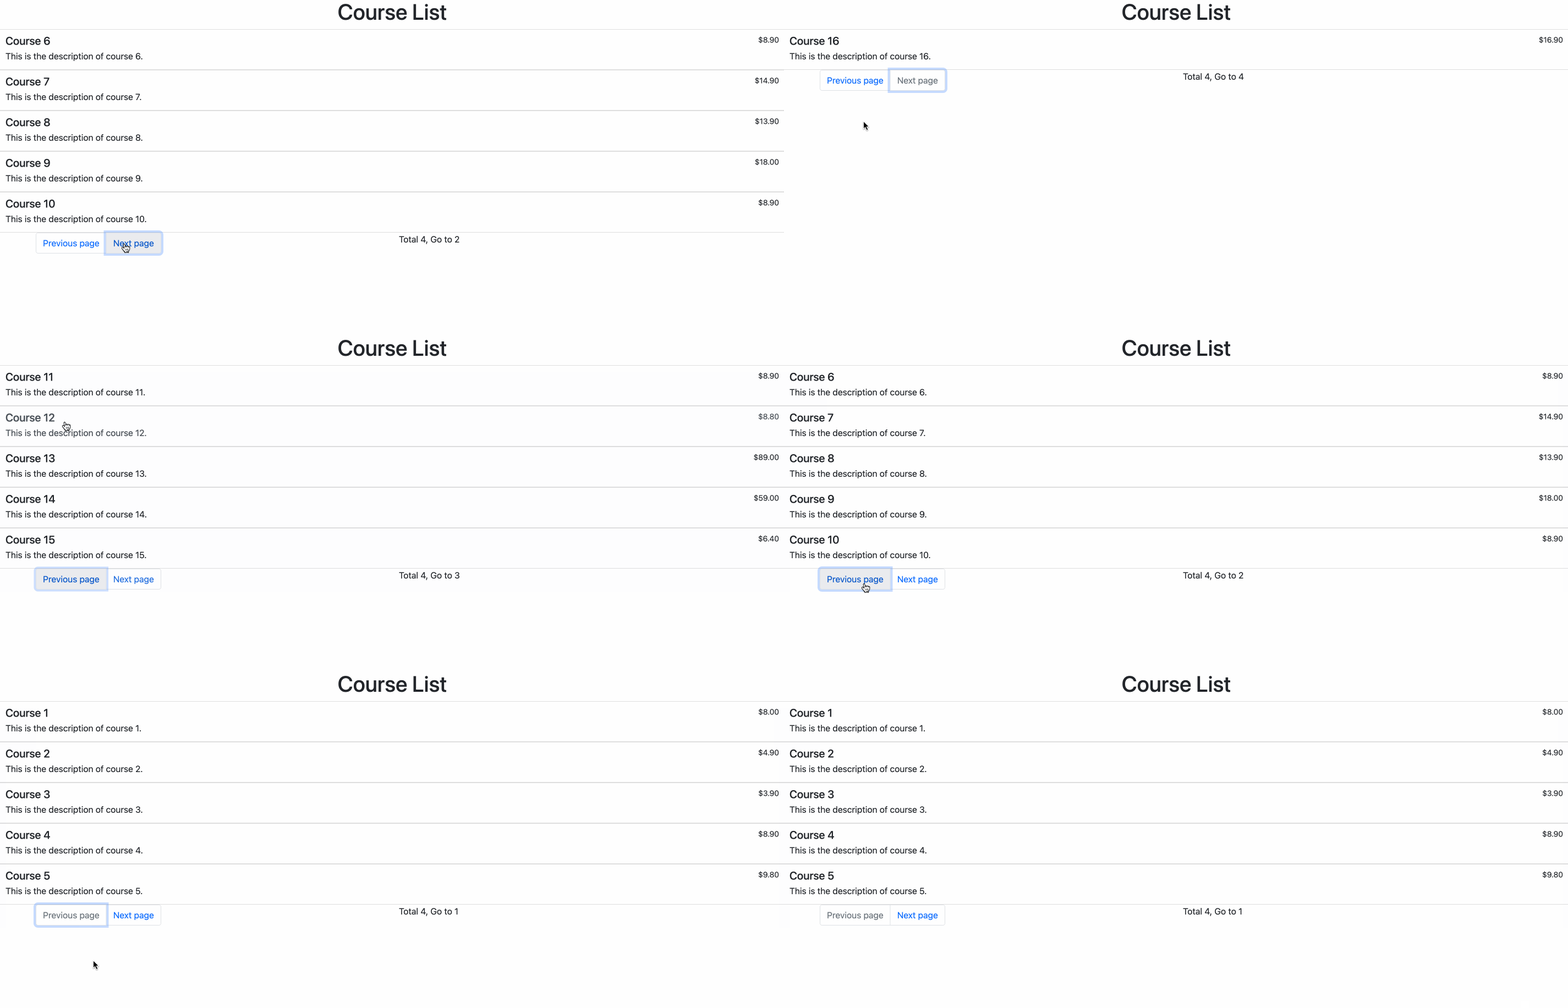
Effect

🎯 Tasks

In this project, you will learn:

  • How to fetch data from a JSON file using the Axios library
  • How to display the course data in a paginated format, with 5 items per page
  • How to implement the functionality for the previous and next page buttons
  • How to disable the previous and next page buttons when appropriate (first and last page)
  • How to update the pagination display to show the current page number and the total number of pages

🏆 Achievements

After completing this project, you will be able to:

  • Fetch data from a JSON file using Axios
  • Implement pagination functionality for a course list
  • Handle user interactions with the previous and next page buttons
  • Conditionally disable buttons based on the current page
  • Update the UI to display the current page and total pages

Skills Graph

%%%%{init: {'theme':'neutral'}}%%%% flowchart RL javascript(("`JavaScript`")) -.-> javascript/BasicConceptsGroup(["`Basic Concepts`"]) javascript(("`JavaScript`")) -.-> javascript/AdvancedConceptsGroup(["`Advanced Concepts`"]) javascript(("`JavaScript`")) -.-> javascript/NetworkingGroup(["`Networking`"]) javascript/BasicConceptsGroup -.-> javascript/functions("`Functions`") javascript/AdvancedConceptsGroup -.-> javascript/es6("`ES6 Features`") javascript/NetworkingGroup -.-> javascript/http_req("`HTTP Requests`") subgraph Lab Skills javascript/functions -.-> lab-299861{{"`Pagination Implementation with Axios`"}} javascript/es6 -.-> lab-299861{{"`Pagination Implementation with Axios`"}} javascript/http_req -.-> lab-299861{{"`Pagination Implementation with Axios`"}} end

Set Up the Project Structure

In this step, you will set up the project files and structure. Follow the steps below to complete this step:

Open the project folder. The directory structure is as follows:

├── css
│   └── bootstrap.css
├── index.html
└── js
    ├── axios.js
    ├── carlist.json
    └── index.js

In this structure:

  • css/bootstrap.css is the Bootstrap style file used in the project.
  • index.html is the main webpage.
  • js/carlist.json is the data file needed for the request.
  • js/axios.js is the axios file used for the request.
  • js/index.js is the JavaScript file that needs to be completed.

Click on Go Live button in the bottom right corner of WebIDE, to run the project.

Next, open "Web 8080" on the top of the VM and refresh it manually and you will see the page. The effect is as follows:

Initial Effect

Fetch Data From the JSON File

In this step, you will learn how to fetch data from the carlist.json file and store it in the data variable.

  1. Locate the js/index.js file and find the // TODO: Requesting data from the carlist.json file comment.
  2. Use the axios.get() method to fetch the data from the ./js/carlist.json file.
  3. Once the data is fetched, store it in the data variable.
  4. Calculate the maximum number of pages by dividing the total number of items by the number of items per page (5). Store this value in the maxPage variable.
  5. Call the showPagination() function and pass the maxPage and pageNum (which is set to 1 by default) as arguments to display the current page number and the total number of pages.
  6. Call the getPageData() function and pass the data as an argument to get the data for the first page (items 1-5). Store this in the pageData variable.
  7. Call the renderHtml() function and pass the pageData as an argument to render the HTML for the first page.

Your code should look like this:

let data;
let pageData;
// TODO: Requesting data from the carlist.json file
axios.get("./js/carlist.json").then((res) => {
  data = res.data;
  maxPage = Math.ceil(data.length / 5);
  showPagination(maxPage, pageNum);
  pageData = getPageData(data);
  renderHtml(pageData);
});

Implement the Previous Page Functionality

In this step, you will learn how to implement the functionality for the previous page button.

  1. Locate the click event handler for the previous page button (prev.onclick).
  2. Inside the event handler, first remove the disabled class from the next page button (next.classList.remove("disabled")).
  3. Decrement the pageNum variable by 1 to move to the previous page.
  4. If the pageNum is less than or equal to 1, it means we are on the first page, so add the disabled class to the previous page button (this.classList.add("disabled")), and set the pageNum to 1.
  5. Call the showPagination() function and pass the maxPage and pageNum as arguments to update the pagination display.
  6. Call the getPageData() function and pass the data as an argument to get the data for the current page. Store this in the pageData variable.
  7. Call the renderHtml() function and pass the pageData as an argument to render the HTML for the current page.

Your code should look like this:

// Click on the previous page
let prev = document.getElementById("prev");
prev.onclick = function () {
  // TODO
  next.classList.remove("disabled");
  pageNum--;
  if (pageNum <= 1) {
    this.classList.add("disabled");
    pageNum = 1;
  }
  showPagination(maxPage, pageNum);
  pageData = getPageData(data);
  renderHtml(pageData);
};

Implement the Next Page Functionality

In this step, you will learn how to implement the functionality for the next page button.

  1. Locate the click event handler for the next page button (next.onclick).
  2. Inside the event handler, first remove the disabled class from the previous page button (prev.classList.remove("disabled")).
  3. Increment the pageNum variable by 1 to move to the next page.
  4. If the pageNum is greater than or equal to maxPage, it means we are on the last page, so add the disabled class to the next page button (this.classList.add("disabled")), and set the pageNum to maxPage.
  5. Call the showPagination() function and pass the maxPage and pageNum as arguments to update the pagination display.
  6. Call the getPageData() function and pass the data as an argument to get the data for the current page. Store this in the pageData variable.
  7. Call the renderHtml() function and pass the pageData as an argument to render the HTML for the current page.

Your code should look like this:

// Click on the next page
let next = document.getElementById("next");
next.onclick = function () {
  // TODO
  prev.classList.remove("disabled");
  pageNum++;
  if (pageNum >= maxPage) {
    this.classList.add("disabled");
    pageNum = maxPage;
  }
  showPagination(maxPage, pageNum);
  pageData = getPageData(data);
  renderHtml(pageData);
};

Now, you have completed the implementation of the pagination functionality for the course list. You can test the functionality by clicking on the previous and next page buttons to see the course data being displayed correctly.

A gif of all the functions completed is as follows:

Completed Effect

Summary

Congratulations! You have completed this project. You can practice more labs in LabEx to improve your skills.

Other JavaScript Tutorials you may like