Introduction
In this project, you will learn how to implement AJAX (Asynchronous JavaScript and XML) requests using JavaScript to fetch data from a backend server and display the results on a web page.
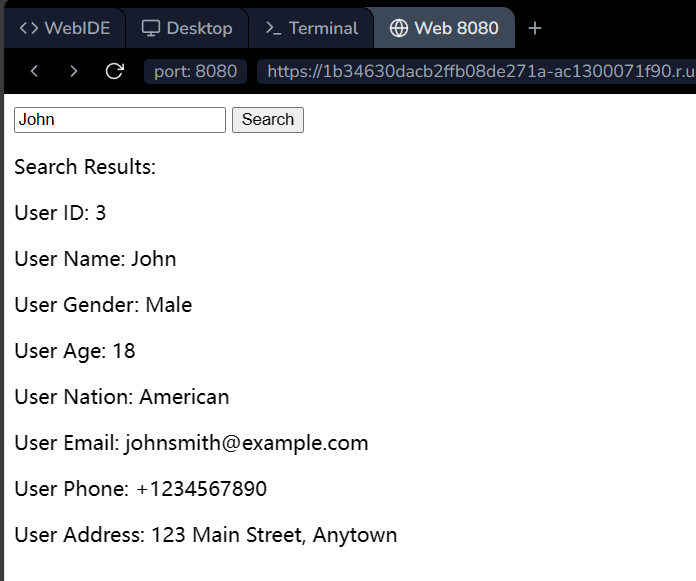
👀 Preview
🎯 Tasks
In this project, you will learn:
- How to create a search box and search button on a web page using HTML
- How to bind an event to the search button and retrieve the search text from the input field
- How to use JavaScript to send an AJAX GET request to a backend server with the search text as a parameter
- How to parse the JSON data returned from the server and display the search results on the web page
🏆 Achievements
After completing this project, you will be able to:
- Implement AJAX (Asynchronous JavaScript and XML) requests using JavaScript to fetch data from a backend server
- Display the search results on a web page by dynamically creating and appending HTML elements
- Format and display the search results in a user-friendly way
Set up the search box and search button
In this step, you will learn how to create the search box and search button on the index.jsp page.
- Open the
index.jspfile located in the/src/main/webapp/directory. - Add the following HTML code inside the
<body>section:
<input type="text" id="searchInput" />
<button id="searchButton"
<div id="searchResults"></div>
This creates a text input field with the ID searchInput and a button with the ID searchButton. The button has an onclick attribute that calls the search() function when clicked. 3. Save the index.jsp file.
Implement the search functionality
In this step, you will learn how to add the JavaScript code to handle the search functionality.
- Inside the
<head>section of theindex.jspfile, add the following JavaScript code:
    <script>
        function search() {
            var searchText = document.getElementById("searchInput").value;
            console.log("Search Text:", searchText); // Output search text to console
            var xhr = new XMLHttpRequest();
            xhr.open("GET", "/UserServlet?username=" + searchText, true); // Send GET request and append username as parameter to URL
            xhr.setRequestHeader("Content-Type", "application/json");
            xhr.onreadystatechange = function () {
                if (xhr.readyState == 4 && xhr.status == 200) {
                var response = JSON.parse(xhr.responseText);
                displayResults(response);
                }
            };
            xhr.send();
            }

            function displayResults(results) {
            var searchResultsDiv = document.getElementById("searchResults");
            searchResultsDiv.innerHTML = "<p>Search Results:</p>";

            // Check if results is an array
            if (Array.isArray(results)) {
                // Loop through each user object in the results array
                results.forEach(function (user) {
                // Create a new div element for displaying user information
                var userDiv = document.createElement("div");
                userDiv.className = "user-info"; // Add a class for styling

                // Add user information to the new div element
                userDiv.innerHTML = `
                            <p>User ID: ${user.userId}</p>
                            <p>User Name: ${user.userName}</p>
                            <p>User Gender: ${user.userGender === 1 ? "Male" : "Female"}</p>
                            <p>User Age: ${user.userAge}</p>
                            <p>User Nation: ${user.userNation}</p>
                            <p>User Email: ${user.userEmail}</p>
                            <p>User Phone: ${user.userPhone}</p>
                            <p>User Address: ${user.userAddr}</p>
                        `;

                // Append the new div element to the search results div
                searchResultsDiv.appendChild(userDiv);
                });
            } else {
                // If results is not an array, display corresponding message
                searchResultsDiv.innerHTML = "<p>No results found</p>";
            }
        }
    </script>
This JavaScript code handles the search functionality. When the user clicks the "Search" button, the search() function is called, which sends an AJAX request to the /UserServlet with the search text as a parameter. The response from the server is then parsed and displayed in the searchResults div using the displayResults() function. 2. Save the index.jsp file.
Now, you have completed the implementation of the AJAX requests using JavaScript. You can run the project and test the search functionality.
Run
Finally, you can compile and run the code in the terminal using the following commands:
cd ServletAjaxProject
mvn tomcat7:run
You can refer to the following running effects:
Summary
Congratulations! You have completed this project. You can practice more labs in LabEx to improve your skills.