
Introduction
In this Lab, Alex's journey through the development of the personal finance tracker enters an advanced stage, focusing on enhancing the application's interactivity through sophisticated event handling techniques. The scene is set in a brainstorming session at the tech startup, where Alex proposes adding a drag-and-drop feature to reorder financial records. This ambitious goal aims to provide users with an intuitive way to organize their records, reflecting the fluid nature of personal finance management. Achieving this requires Alex to explore advanced DOM events and manipulate elements in a way that's both visually appealing and user-friendly.
In this Lab, you'll dive deep into advanced event handling in JavaScript, learning how to implement drag-and-drop functionality to reorder items dynamically in a list. This skill is invaluable for creating modern, interactive web applications that prioritize user experience.
Knowledge Points:
- Drag and Drop API (
dragstart,dragover,drop)
DragEvent
DragEvent is an event interface for handling drag-and-drop operations. It extends from MouseEvent, so it includes all mouse event properties plus some additional properties specific to drag-and-drop operations.
Setting Up Drag and Drop
To make an element draggable, you need to set its draggable attribute to true. Then, you can add event listeners to handle the drag-and-drop events.
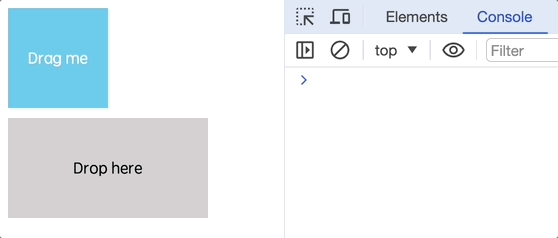
<div id="drag-item" draggable="true">Drag me</div>
or
setAttribute("draggable", true);
Handling Drag-and-Drop Events
Drag-and-drop operations involve several events, including dragstart, drag, dragend, dragenter, dragover, dragleave, and drop.
dragstart: Triggered when the user starts dragging an element.drag: Continuously triggered while an element is being dragged.dragend: Triggered when the drag-and-drop operation ends.
For example, Adding event listeners to an element:
<!doctype html>
<html lang="en">
  <head>
    <meta charset="UTF-8" />
    <title>Drag and Drop Example</title>
    <style>
      #drag-item {
        width: 100px;
        height: 100px;
        background-color: rgb(87, 196, 238);
        color: white;
        line-height: 100px;
        text-align: center;
        margin-bottom: 10px;
        cursor: pointer;
      }
      #drop-zone {
        width: 200px;
        height: 100px;
        background-color: rgb(214, 210, 210);
        line-height: 100px;
        text-align: center;
      }
    </style>
  </head>
  <body>
    <div id="drag-item" draggable="true">Drag me</div>
    <div id="drop-zone">Drop here</div>

    <script>
      const dragItem = document.getElementById("drag-item");

      dragItem.addEventListener("dragstart", function (event) {
        // Set the drag data
        event.dataTransfer.setData(
          "text/plain",
          "This is the data being dragged"
        );
      });

      dragItem.addEventListener("dragend", function (event) {
        // Operations after dragging ends
        console.log("Drag ended");
      });
    </script>
  </body>
</html>
Handling Drop
To allow an element to receive dropped items, you need to handle dragover and drop events.
For example:
<!doctype html>
<html lang="en">
<head>
<meta charset="UTF-8" />
<title>Drag and Drop Example</title>
<style>
#drag-item {
width: 100px;
height: 100px;
background-color: rgb(87, 196, 238);
color: white;
line-height: 100px;
text-align: center;
margin-bottom: 10px;
cursor: pointer;
}
#drop-zone {
width: 200px;
height: 100px;
background-color: rgb(214, 210, 210);
line-height: 100px;
text-align: center;
}
</style>
</head>
<body>
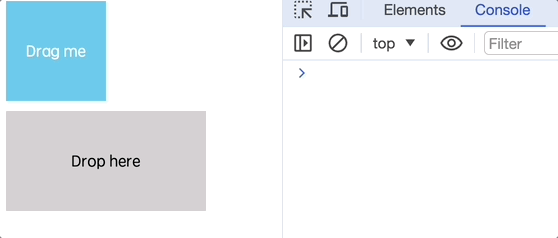
<div id="drag-item" draggable="true">Drag me</div>
<div id="drop-zone">Drop here</div>
<script>
// JavaScript code goes here
const dragItem = document.getElementById("drag-item");
const dropZone = document.getElementById("drop-zone");
// Drag start event
dragItem.addEventListener("dragstart", function (event) {
event.dataTransfer.setData("text/plain", "Drag Successful");
});
// Drag over event
dropZone.addEventListener("dragover", function (event) {
event.preventDefault(); // Necessary to allow dropping
});
// Drop event
dropZone.addEventListener("drop", function (event) {
event.preventDefault();
const data = event.dataTransfer.getData("text/plain");
console.log("Dropped data:", data);
dropZone.textContent = `Dropped: ${data}`;
});
</script>
</body>
</html>
Implementing Drag-and-Drop for Reordering
In this step, you and Alex will enhance the personal finance tracker by adding the ability for users to reorder their financial records using drag-and-drop. This involves capturing several events: dragstart, dragover, drop, and ensuring the DOM is updated accordingly.
First, modify the renderRecords function in script.js to make each record draggable and to handle these events:
document.addEventListener("DOMContentLoaded", function () {
  const renderRecords = () => {
    recordsList.innerHTML = "";
    records.forEach((record, index) => {
      const recordElement = document.createElement("div");
      recordElement.setAttribute("draggable", true);
      recordElement.classList.add("record-item");
      recordElement.innerHTML = `
                ${record.description} - ${record.amount} (${record.type}) <button
            `;
      recordElement.addEventListener("dragstart", (e) => {
        draggedIndex = index;
      });
      recordElement.addEventListener("dragover", (e) => {
        e.preventDefault();
      });
      recordElement.addEventListener("drop", (e) => {
        const temp = records[draggedIndex];
        records[draggedIndex] = records[index];
        records[index] = temp;
        saveRecords();
      });
      recordsList.appendChild(recordElement);
    });
  };
});
This implementation enables users to drag a financial record and drop it in a new position within the list, with the application automatically updating the order of the records.
Summary
In this lab, your journey with Alex has led to the successful implementation of an advanced feature in the personal finance tracker: drag-and-drop functionality for reordering financial records. This enhancement not only improves the application's usability but also introduces you to complex event handling and dynamic UI updates in web development. Through this process, you've gained valuable insights into creating interactive and intuitive web applications that respond to user actions in sophisticated ways.
Exploring advanced event handling techniques like drag-and-drop has expanded your toolkit as a web developer, enabling you to tackle more complex UI/UX challenges. This knowledge is crucial for building modern web applications that meet the high expectations of today's users for interactivity and responsiveness.


