Building a Modern Expense Splitter Web App

JavaScriptJavaScriptBeginner
Practice Now

Introduction

In this step-by-step project, we will create a modern and visually appealing Expense Splitter web application using HTML, CSS, and JavaScript. This application will allow you to split expenses among a group of people and calculate who owes what to whom. We will start from scratch and cover each step to build the project progressively.

👀 Preview
Expense Splitter

🎯 Tasks

In this project, you will learn:

  • How to create a responsive web page layout using HTML and CSS
  • How to implement interactive features with JavaScript to calculate expenses and balances
  • How to style the web page to have a modern and visually appealing design
  • How to handle user inputs for adding expenses and displaying results dynamically
  • How to implement error handling to ensure data accuracy and prevent issues

🏆 Achievements

After completing this project, you will be able to:

  • Create project files and set up the basic structure for a web application
  • Build the HTML structure for an Expense Splitter app, including input fields and placeholders
  • Style a web application using CSS to achieve a modern and colorful design
  • Implement JavaScript functionality to handle adding expenses, updating the expense list, and calculating the expense summary
  • Add event listeners to make the app interactive
  • Create functions in JavaScript to perform specific tasks, such as adding expenses and updating the summary

Create the HTML Structure

Requirements:

  • Inside the <body> of index.html, create the HTML structure for your app.

  • Include placeholders for adding expenses, displaying the expense list, and showing the expense summary.

Functionality:

  • Create a visual structure for the app with input fields and buttons.

Steps:

Open index.html and update the HTML structure as follows:

<!-- Inside the <body> tag -->

<div class="container">
  <h1>Expense Splitter</h1>

  <div class="input-card">
    <h2>Add an Expense</h2>
    <div class="input-group">
      <label for="name">Name:</label>
      <input type="text" id="name" placeholder="Enter name" />
    </div>
    <div class="input-group">
      <label for="expense">Expense:</label>
      <input type="number" id="expense" placeholder="Enter expense" />
    </div>
    <button id="addExpense">Add Expense</button>
  </div>

  <div class="expense-card">
    <h2>Expenses:</h2>
    <ul id="expenses"></ul>
  </div>

  <div class="summary-card">
    <h2>Expense Summary:</h2>
    <ul id="summary"></ul>
  </div>
</div>
✨ Check Solution and Practice

Style the App with CSS

Requirements:

  • In styles.css, add CSS rules to style the app.
  • Create a modern and colorful design with CSS.

Functionality:

Apply CSS styles to make the app visually appealing.

Steps:

Open styles.css and add the following CSS code:

body {
  font-family: Arial, sans-serif;
  background: linear-gradient(135deg, #ff7f50, #ff3399);
  margin: 0;
  padding: 0;
  color: #333;
}

.container {
  display: flex;
  flex-direction: column;
  align-items: center;
  min-height: 100vh;
  padding: 20px;
}

h1 {
  font-size: 2rem;
  margin: 20px 0;
  color: #fff;
  text-shadow: 2px 2px 4px rgba(0, 0, 0, 0.2);
}

.input-card,
.expense-card,
.summary-card {
  background: rgba(255, 255, 255, 0.9);
  box-shadow: 0px 0px 20px rgba(0, 0, 0, 0.2);
  border-radius: 10px;
  padding: 20px;
  margin: 20px 0;
  width: 100%;
  max-width: 400px;
  text-align: left;
}

.input-card h2,
.expense-card h2,
.summary-card h2 {
  color: #007bff;
  font-size: 1.5rem;
  margin-bottom: 15px;
}

.input-group {
  margin-bottom: 15px;
}

label {
  display: block;
  margin-bottom: 5px;
  font-weight: bold;
}

input[type="text"],
input[type="number"] {
  width: 100%;
  padding: 10px;
  border: 1px solid #ccc;
  border-radius: 5px;
}

button {
  background: linear-gradient(135deg, #ff3399, #ff7f50);
  color: #fff;
  padding: 10px 20px;
  border: none;
  border-radius: 5px;
  cursor: pointer;
  font-weight: bold;
  transition: background 0.3s ease;
}

button:hover {
  background: linear-gradient(135deg, #ff7f50, #ff3399);
}

ul {
  list-style: none;
  padding: 0;
  margin: 0;
}

li {
  margin-bottom: 10px;
}

/* Animation for cards */
@keyframes fade-in {
  from {
    opacity: 0;
    transform: translateY(-10px);
  }

  to {
    opacity: 1;
    transform: translateY(0);
  }
}

.input-card,
.expense-card,
.summary-card {
  animation: fade-in 0.5s ease;
}
✨ Check Solution and Practice

Add Event Listeners

Now, it's time to add functionality to our Expense Splitter app using JavaScript. We will handle adding expenses, updating the expense list, and calculating the expense summary.

Requirements:

  • Add event listeners to the buttons in your HTML.
  • Ensure that the event listeners trigger the appropriate actions when users interact with the app.

Functionality:

  • Make the app interactive by listening for button clicks.

Steps:

Open script.js and add the following code to handle button clicks:

// Event listener for the "Add Expense" button
document.getElementById("addExpense").addEventListener("click", addExpense);
✨ Check Solution and Practice

Implement the addExpense Function

Requirements:

  • Create a JavaScript function named addExpense in script.js.
  • This function should extract values from input fields, validate them, and add expenses to an array.

Functionality:

Allow users to add expenses to the app.

Steps:

Open script.js and add the following code:

const expenses = [];
// Implement the addExpense function
function addExpense() {
  const name = document.getElementById("name").value;
  const amount = parseFloat(document.getElementById("expense").value);

  if (name && amount) {
    // Add the expense to the expenses array
    expenses.push({ name, amount });

    // Update the expense list and summary
    updateExpenseList();
    document.getElementById("name").value = "";
    document.getElementById("expense").value = "";
  }
}
✨ Check Solution and Practice

Implement the updateExpenseList Function

Requirements:

  • Create a JavaScript function named updateExpenseList in script.js.
  • This function should update the expense list displayed on the web page.

Functionality:

Display the list of expenses on the web page as users add them.

Steps:

Open script.js and add the following code:

// Implement the updateExpenseList function
function updateExpenseList() {
  const expensesList = document.getElementById("expenses");
  expensesList.innerHTML = "";

  for (const expense of expenses) {
    const li = document.createElement("li");
    li.textContent = `${expense.name}: $${expense.amount.toFixed(2)}`;
    expensesList.appendChild(li);
  }

  // Call the updateSummary function
  updateSummary();
}
✨ Check Solution and Practice

Implement the updateSummary Function

Requirements:

  • Create a JavaScript function named updateSummary in script.js.
  • This function should calculate and display the expense summary, including who owes what to whom.

Functionality:

  • Provide users with an overview of the expense summary.

Steps:

Open script.js and add the following code:

// Implement the updateSummary function
function updateSummary() {
  const summaryList = document.getElementById("summary");
  summaryList.innerHTML = "";

  const totalExpense = expenses.reduce(
    (total, expense) => total + expense.amount,
    0
  );
  const averageExpense = totalExpense / expenses.length;

  for (const expense of expenses) {
    const balance = expense.amount - averageExpense;
    const li = document.createElement("li");

    if (balance > 0) {
      li.textContent = `${expense.name} owes $${balance.toFixed(2)} to others.`;
    } else if (balance < 0) {
      li.textContent = `${expense.name} is owed $${(-balance).toFixed(
        2
      )} by others.`;
    } else {
      li.textContent = `${expense.name} is settled up.`;
    }

    summaryList.appendChild(li);
  }
}
✨ Check Solution and Practice

Running the App

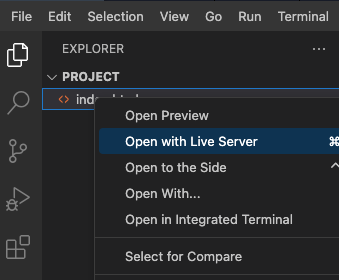
  • Open index.html in a web browser.
    open web
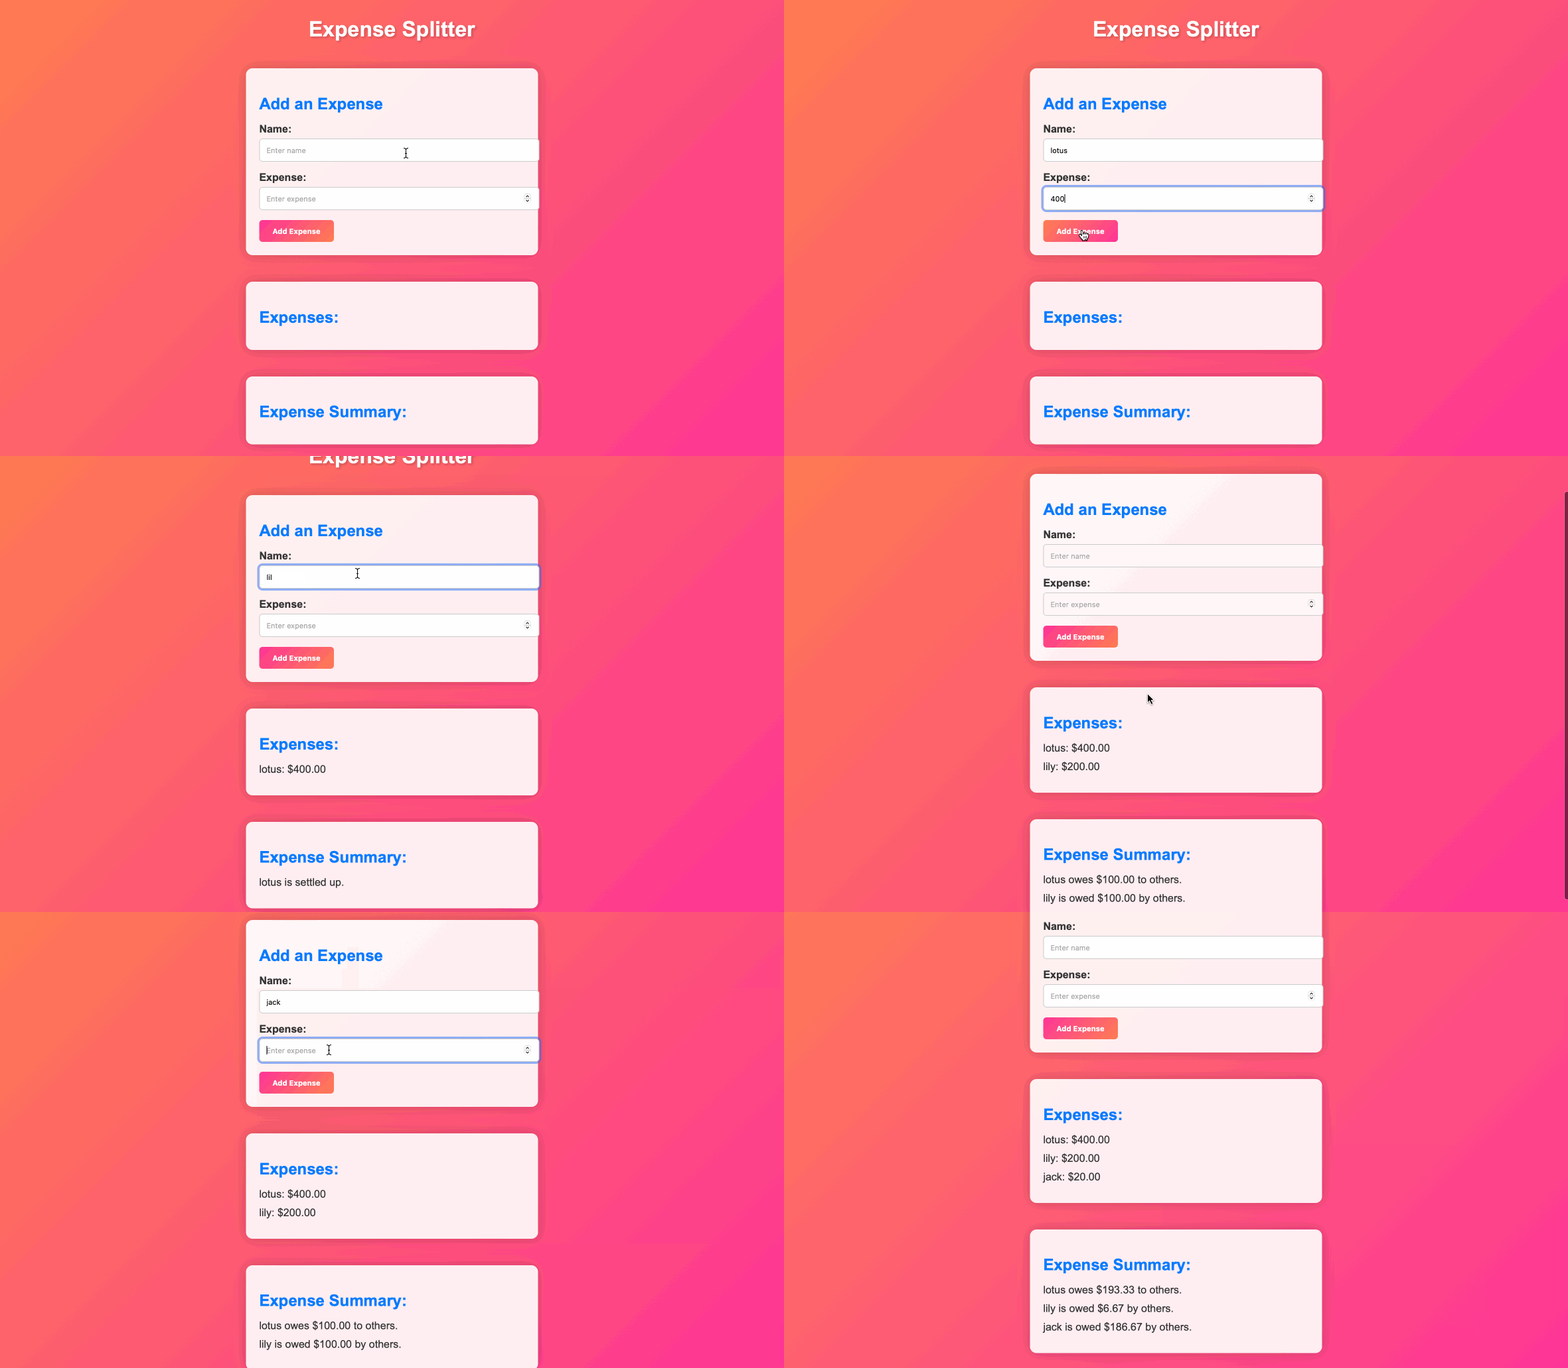
  • Test the application by adding expenses and verifying that the expense list and summary update correctly.
  • The effect of the page is as follows:
    effect
✨ Check Solution and Practice

Summary

In this project, we have built a modern Expense Splitter web app step by step. We created the project files, set up the HTML structure, added CSS styles, and implemented JavaScript functionality. The app now allows you to add expenses, view the expense list, and see the expense summary. You can further customize the styles and add more features to enhance the app's functionality and appearance.

Other JavaScript Tutorials you may like