Getting Started with Flask Web Framework

FlaskFlaskBeginner
Practice Now

This tutorial is from open-source community. Access the source code

Introduction

This lab will guide you through the process of getting started with Flask, a lightweight web framework for Python. You will learn how to create a basic Flask application, run it locally, and understand the basic concepts of routing and rendering templates.

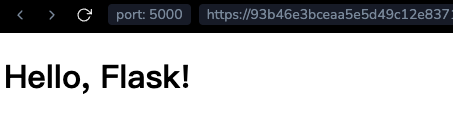
Note: You need to create the code file yourself and run it in the environment. You can preview the Flask service status on Web 5000.


Skills Graph

%%%%{init: {'theme':'neutral'}}%%%% flowchart RL flask(("`Flask`")) -.-> flask/CoreConceptsGroup(["`Core Concepts`"]) flask(("`Flask`")) -.-> flask/DevelopmentToolsGroup(["`Development Tools`"]) flask(("`Flask`")) -.-> flask/DataHandlingGroup(["`Data Handling`"]) flask/CoreConceptsGroup -.-> flask/application_object("`Application Object`") flask/DevelopmentToolsGroup -.-> flask/blueprint_objects("`Blueprint Objects`") flask/DataHandlingGroup -.-> flask/incoming_request_data("`Incoming Request Data`") flask/DataHandlingGroup -.-> flask/response_objects("`Response Objects`") flask/CoreConceptsGroup -.-> flask/sessions("`Sessions`") flask/CoreConceptsGroup -.-> flask/useful_internals("`Useful Internals`") subgraph Lab Skills flask/application_object -.-> lab-136334{{"`Getting Started with Flask Web Framework`"}} flask/blueprint_objects -.-> lab-136334{{"`Getting Started with Flask Web Framework`"}} flask/incoming_request_data -.-> lab-136334{{"`Getting Started with Flask Web Framework`"}} flask/response_objects -.-> lab-136334{{"`Getting Started with Flask Web Framework`"}} flask/sessions -.-> lab-136334{{"`Getting Started with Flask Web Framework`"}} flask/useful_internals -.-> lab-136334{{"`Getting Started with Flask Web Framework`"}} end

Setting up Flask

To get started with Flask, you need to install it and set up a new project. Follow the instructions below:

  1. Install Flask by running the following command in your terminal or command prompt:

    pip install flask
  2. Open a new file and save it as app.py.

    cd ~/project
    touch app.py
  3. Import the Flask module and create an instance of the Flask class:

    from flask import Flask
    
    app = Flask(__name__)

Creating a Basic Route

Routes in Flask define the URL patterns for your application. Let's create a basic route that displays a "Hello, World!" message.

  1. Add the following code to your app.py file:

    @app.route("/")
    def hello_world():
        return "Hello, World!"
  2. Save the file.

Running the Application

Now that you have set up your Flask application and created a basic route, let's run the application and see it in action.

  1. In your terminal or command prompt, navigate to the directory where your app.py file is located.

  2. Run the following command to start the Flask development server:

    flask run --host=0.0.0.0

--host=0.0.0.0 is used to make the application publicly available. If you don't specify this, the application will only be available on your local machine.

Then, switch to the tab Web 5000 and refresh the page.

Adding HTML Templates

Flask uses Jinja2 templates to generate HTML content. Let's create a template file and render it in our route.

  1. Create a new directory in your project called templates.

  2. Inside the templates directory, create a new file called index.html.

  3. Open the index.html file and add the following HTML code:

    <!doctype html>
    <html>
      <head>
        <title>Flask Quickstart</title>
      </head>
      <body>
        <h1>Hello, Flask!</h1>
      </body>
    </html>
  4. Modify your app.py file to render the index.html template:

    from flask import render_template
    
    @app.route("/")
    def hello_world():
        return render_template("index.html")

Running the Application Again

Now that we have added an HTML template, let's run the application again and see the rendered template.

  1. Stop the Flask development server if it is still running (press Ctrl+C).

  2. Run the following command to start the server again:

    flask run --host=0.0.0.0

You should now see the "Hello, Flask!" message displayed in the HTML template.

Hello, Flask!

Adding Dynamic Content

Flask allows us to pass dynamic content to our templates. Let's modify our route to pass a name parameter and display a personalized greeting.

  1. Modify your app.py file to accept a name parameter in the route:

    @app.route("/<name>")
    def hello(name):
        return render_template("index.html", name=name)
  2. Open the index.html file and modify the <h1> tag to display the personalized greeting:

    <h1>Hello, {{ name }}!</h1>

Running the Application Again

Let's run the application again and test the dynamic content feature.

  1. Stop the Flask development server if it is still running (press Ctrl+C).

  2. Run the following command to start the server again:

    flask run --host=0.0.0.0
  3. Copy the URL of the tab Web 5000 and paste it into a new tab in your browser.

    copy-url
  4. Append /LabEx to the end of the URL and press Enter.

    hello-labex
  5. Change the value of the name parameter in the URL and press Enter.

Summary

In this lab, you learned how to get started with Flask by setting up a new project, creating routes, rendering templates, and passing dynamic content. Flask is a powerful tool for building web applications, and this lab provides a solid foundation for further exploration and development.

Other Flask Tutorials you may like