Building Flask REST API with SQLite

FlaskFlaskBeginner
Practice Now

Introduction

In this project, we will learn how to build a REST API in Flask using SQLite as the database. We will start by creating a sample SQLite database and populating it with some data. Then, we will build a Flask application with endpoints to perform CRUD (Create, Read, Update, Delete) operations on the data in the SQLite database.
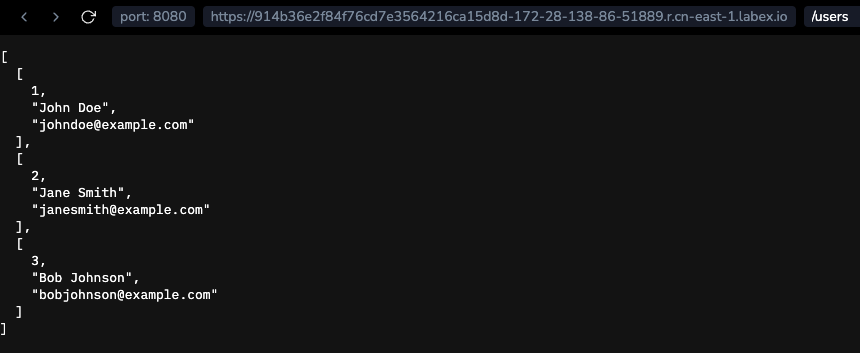
šŸ‘€ Preview

Alt text

šŸŽÆ Tasks

In this project, you will learn:

  • How to create a Flask application with SQLite as the database backend
  • How to create a sample SQLite database and table
  • How to populate the database table with sample data
  • How to implement endpoints to retrieve all users, retrieve a specific user by ID, create a new user, update an existing user, and delete a user
  • How to test the REST API endpoints using cURL or a browser

šŸ† Achievements

After completing this project, you will be able to:

  • Build a Flask application with SQLite as the database
  • Perform CRUD operations on data in a SQLite database using Flask
  • Implement and test REST API endpoints for a Flask application

Skills Graph

%%%%{init: {'theme':'neutral'}}%%%% flowchart RL flask(("`Flask`")) -.-> flask/CoreConceptsGroup(["`Core Concepts`"]) flask(("`Flask`")) -.-> flask/DevelopmentToolsGroup(["`Development Tools`"]) flask(("`Flask`")) -.-> flask/DataHandlingGroup(["`Data Handling`"]) flask/CoreConceptsGroup -.-> flask/application_object("`Application Object`") flask/DevelopmentToolsGroup -.-> flask/blueprint_objects("`Blueprint Objects`") flask/DataHandlingGroup -.-> flask/incoming_request_data("`Incoming Request Data`") flask/DataHandlingGroup -.-> flask/response_objects("`Response Objects`") flask/CoreConceptsGroup -.-> flask/sessions("`Sessions`") flask/CoreConceptsGroup -.-> flask/useful_internals("`Useful Internals`") flask/CoreConceptsGroup -.-> flask/class_based_views("`Class-Based Views`") flask/DevelopmentToolsGroup -.-> flask/command_line_interface("`Command Line Interface`") subgraph Lab Skills flask/application_object -.-> lab-298842{{"`Building Flask REST API with SQLite`"}} flask/blueprint_objects -.-> lab-298842{{"`Building Flask REST API with SQLite`"}} flask/incoming_request_data -.-> lab-298842{{"`Building Flask REST API with SQLite`"}} flask/response_objects -.-> lab-298842{{"`Building Flask REST API with SQLite`"}} flask/sessions -.-> lab-298842{{"`Building Flask REST API with SQLite`"}} flask/useful_internals -.-> lab-298842{{"`Building Flask REST API with SQLite`"}} flask/class_based_views -.-> lab-298842{{"`Building Flask REST API with SQLite`"}} flask/command_line_interface -.-> lab-298842{{"`Building Flask REST API with SQLite`"}} end

Create the project files

Let's start by creating the necessary project files for our Flask application.

  1. cd into the ~/project directory.
  2. Inside the project directory, create a new Python file called app.py.
  3. Create a new file called create_database.py in the same directory.
cd ~/project
touch app.py create_database.py

Your project structure should look like this:

project/
ā”œā”€ā”€ app.py
ā””ā”€ā”€ create_database.py

Create a sample SQLite database

Next, let's create a SQLite database and populate it with sample data using Python and the SQLite library.

In the create_database.py file, add the following code to import the required modules:

import sqlite3

Add the following code to create the database and table:

## Create a connection to the database
conn = sqlite3.connect('example.db')

## Create a cursor object to execute SQL statements
cursor = conn.cursor()

## Create a table called "users"
cursor.execute('''CREATE TABLE IF NOT EXISTS users (
                    id INTEGER PRIMARY KEY,
                    name TEXT,
                    email TEXT
                )''')

Next, let's insert some sample data into the table:

## Insert sample data into the "users" table
users = [
    ('John Doe', 'johndoe@example.com'),
    ('Jane Smith', 'janesmith@example.com'),
    ('Bob Johnson', 'bobjohnson@example.com')
]
cursor.executemany('INSERT INTO users (name, email) VALUES (?, ?)', users)

## Commit the changes to the database
conn.commit()

## Close the cursor and the database connection
cursor.close()
conn.close()
cd ~/project
python create_database.py

After running this code, you will have a SQLite database file named example.db with the "users" table containing the sample data. This database will be used in our Flask application to retrieve and manipulate data.

Build a REST API in Flask

Now, let's build a REST API in Flask using the SQLite database example.db that we created earlier.

In the app.py file, add the following code to import the required modules:

from flask import Flask, jsonify, request
import sqlite3

Add the following code to create the Flask application:

## Create the Flask application
app = Flask(__name__)

Now, let's define the endpoints for our REST API:

Endpoint to retrieve all users

## Endpoint to retrieve all users
@app.route('/users', methods=['GET'])
def get_users():
    ## Connect to the database
    conn = sqlite3.connect('example.db')
    cursor = conn.cursor()

    ## Execute the SQL query to retrieve all users
    cursor.execute('SELECT * FROM users')
    users = cursor.fetchall()

    ## Close the cursor and the database connection
    cursor.close()
    conn.close()

    ## Return the users as JSON
    return jsonify(users)

In this code, we first connect to the SQLite database using the connect() method. Then, we create a cursor object to execute SQL statements using the cursor() method. Next, we execute the SQL query to retrieve all users from the "users" table using the execute() method. Finally, we close the cursor and the database connection using the close() method and return the users as JSON using the jsonify() method.

Endpoint to retrieve a specific user by ID

## Endpoint to retrieve a specific user by ID
@app.route('/users/<int:user_id>', methods=['GET'])
def get_user(user_id):
    ## Connect to the database
    conn = sqlite3.connect('example.db')
    cursor = conn.cursor()

    ## Execute the SQL query to retrieve the user by ID
    cursor.execute('SELECT * FROM users WHERE id = ?', (user_id,))
    user = cursor.fetchone()

    ## Close the cursor and the database connection
    cursor.close()
    conn.close()

    ## Check if the user exists
    if user:
        return jsonify(user)
    else:
        return jsonify({'message': 'User not found'}), 404

This endpoint is similar to the previous one, except that it retrieves a specific user by ID instead of all users. We use the fetchone() method to retrieve a single user from the "users" table.

Endpoint to create a new user

## Endpoint to create a new user
@app.route('/users', methods=['POST'])
def create_user():
    ## Get the user data from the request body
    data = request.get_json()
    name = data['name']
    email = data['email']

    ## Connect to the database
    conn = sqlite3.connect('example.db')
    cursor = conn.cursor()

    ## Execute the SQL query to insert a new user
    cursor.execute('INSERT INTO users (name, email) VALUES (?, ?)', (name, email))
    conn.commit()

    ## Close the cursor and the database connection
    cursor.close()
    conn.close()

    ## Return a success message
    return jsonify({'message': 'User created successfully'})

This endpoint is used to create a new user in the "users" table. We use the get_json() method to get the user data from the request body. Then, we use the execute() method to insert the new user into the "users" table.

Endpoint to update an existing user

## Endpoint to update an existing user
@app.route('/users/<int:user_id>', methods=['PUT'])
def update_user(user_id):
    ## Get the updated user data from the request body
    data = request.get_json()
    name = data['name']
    email = data['email']

    ## Connect to the database
    conn = sqlite3.connect('example.db')
    cursor = conn.cursor()

    ## Execute the SQL query to update the user
    cursor.execute('UPDATE users SET name = ?, email = ? WHERE id = ?', (name, email, user_id))
    conn.commit()

    ## Close the cursor and the database connection
    cursor.close()
    conn.close()

    ## Return a success message
    return jsonify({'message': 'User updated successfully'})

This endpoint is used to update an existing user in the "users" table. We use the get_json() method to get the updated user data from the request body. Then, we use the execute() method to update the user in the "users" table.

Endpoint to delete a user

## Endpoint to delete a user
@app.route('/users/<int:user_id>', methods=['DELETE'])
def delete_user(user_id):
    ## Connect to the database
    conn = sqlite3.connect('example.db')
    cursor = conn.cursor()

    ## Execute the SQL query to delete the user
    cursor.execute('DELETE FROM users WHERE id = ?', (user_id,))
    conn.commit()

    ## Close the cursor and the database connection
    cursor.close()
    conn.close()

    ## Return a success message
    return jsonify({'message': 'User deleted successfully'})

This endpoint is used to delete a user from the "users" table. We use the execute() method to delete the user from the "users" table.

Finally, let's add the following code to run the Flask application:

if __name__ == '__main__':
    app.run(debug=True, host='0.0.0.0', port=8080)

Run the Flask application

To run the project and start the Flask application, open a terminal or command prompt, navigate to the project directory, and execute the following command:

cd ~/project
python app.py

You should see output similar to the following:

* Serving Flask app 'app' (lazy loading)
* Environment: production
WARNING: This is a development server. Do not use it in a production deployment.
Use a production WSGI server instead.
* Debug mode: on
* Running on http://0.0.0.0:8080/ (Press CTRL+C to quit)

This means that the Flask application is running locally on your machine. You can now test the REST API endpoints using a tool like cURL or an API testing tool like Postman.

Test the REST API endpoints

  1. Open a new terminal or command prompt.
  2. Use the following cURL commands to test each endpoint:
  • Retrieve all users:
curl http://localhost:8080/users
  • Retrieve a specific user by ID (replace <user_id> with an actual user ID):
curl http://localhost:8080/users/<user_id>
  • Create a new user:
curl -X POST -H "Content-Type: application/json" -d '{"name":"John Doe","email":"johndoe@example.com"}' http://localhost:8080/users
  • Update an existing user (replace <user_id> with an actual user ID):
curl -X PUT -H "Content-Type: application/json" -d '{"name":"Updated Name","email":"updated@example.com"}' http://localhost:8080/users/<user_id>
  • Delete a user (replace <user_id> with an actual user ID):
curl -X DELETE http://localhost:8080/users/<user_id>

Make sure to replace <user_id> with the actual ID of a user in the database when testing the corresponding endpoints.

By running these cURL commands, you can test the functionality of the REST API endpoints and verify if they are working correctly.

Alternatively, you can switch to Web 8080 tab to test the REST API endpoints using the Browser.

Alt text

With these testing steps, you can ensure that the Flask application and its REST API endpoints are functioning as expected.

Summary

In this project, we learned how to build a REST API in Flask with SQLite as the database. We created a sample SQLite database and populated it with data. Then, we built a Flask application with endpoints to retrieve, create, update, and delete users from the database. By following the step-by-step instructions, you should now have a functional Flask application that provides a REST API to interact with the SQLite database.

Other Flask Tutorials you may like