
Introduction
Hi there, glad to meet you! In this first lab, we'll introduce you to everything you need to know about LabEx, including how to use the environment to get maximum positive outcomes. And, get this - you will create your first program "Hello LabEx" in the real-time virtual environment. Please tell me I'm not the only one feeling excited. Hooray!
Now, click the Next Step button below to go to the next step in this lab.
What is LabEx
Practice is an indispensable part of learning to code. Thanks to all those excellent talents who wrote top-notch quality tutorials, plus LabEx's virtual environment, you can learn and practice simultaneously.
Now, jump on to create your first program "Hello LabEx".
But as a friend, I highly recommend you skim through the "How To" part. It will take a little time.
Most of us must remember how vital practice is when learning to code. Like what an experienced coder would suggest, we give the entire package a 70/30 split between practicing and reading tutorials.
There are many tutorials, but most need an environment to practice. Therefore, LabEx aims to seek and collect all the alpha-quality coding courses and ensure they are compatible with the virtual environment we provide so that you guys can learn, practice, and get creative with your code simultaneously. If you want to submit a tutorial to let more people use your work, shoot us a message.
Every lab has two sections: text tutorials and a virtual environment already configured. The entire lab design intends to help you understand and experience the actual computer program with our robust realization process.
We divide the learning process into three zones:
- Comfort Zone
- Actively Learning Zone
- Panic Zone
LabEx focuses on Learning Zone, where you are expected to think actively and critically since only some details will be provided and taught in the tutorial. You learn when you are critically processing, evaluating, and analyzing information.
Again, programming relies heavily on practice. Learning by doing will never be wrong. You will have a more vivid experience once you start interacting with LabEx.
Alright, enough with the lecturing. Let's get to the real stuff.
How to Use LabEx
It is straightforward in terms of how to use the site. Just choose a subject you're interested in, click Start Lab, wait a couple of seconds, and voila, there you go!
You'll enter the lab environment upon clicking on Default VM.
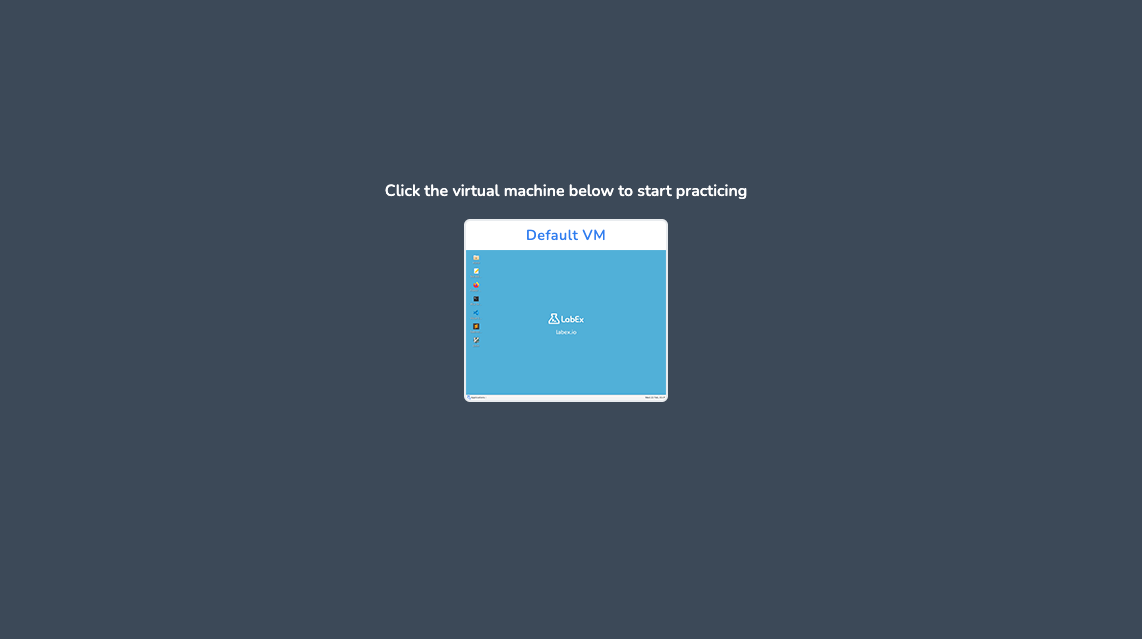
The system will automatically create a virtual desktop for you. It takes a couple of seconds to load, so please be patient.
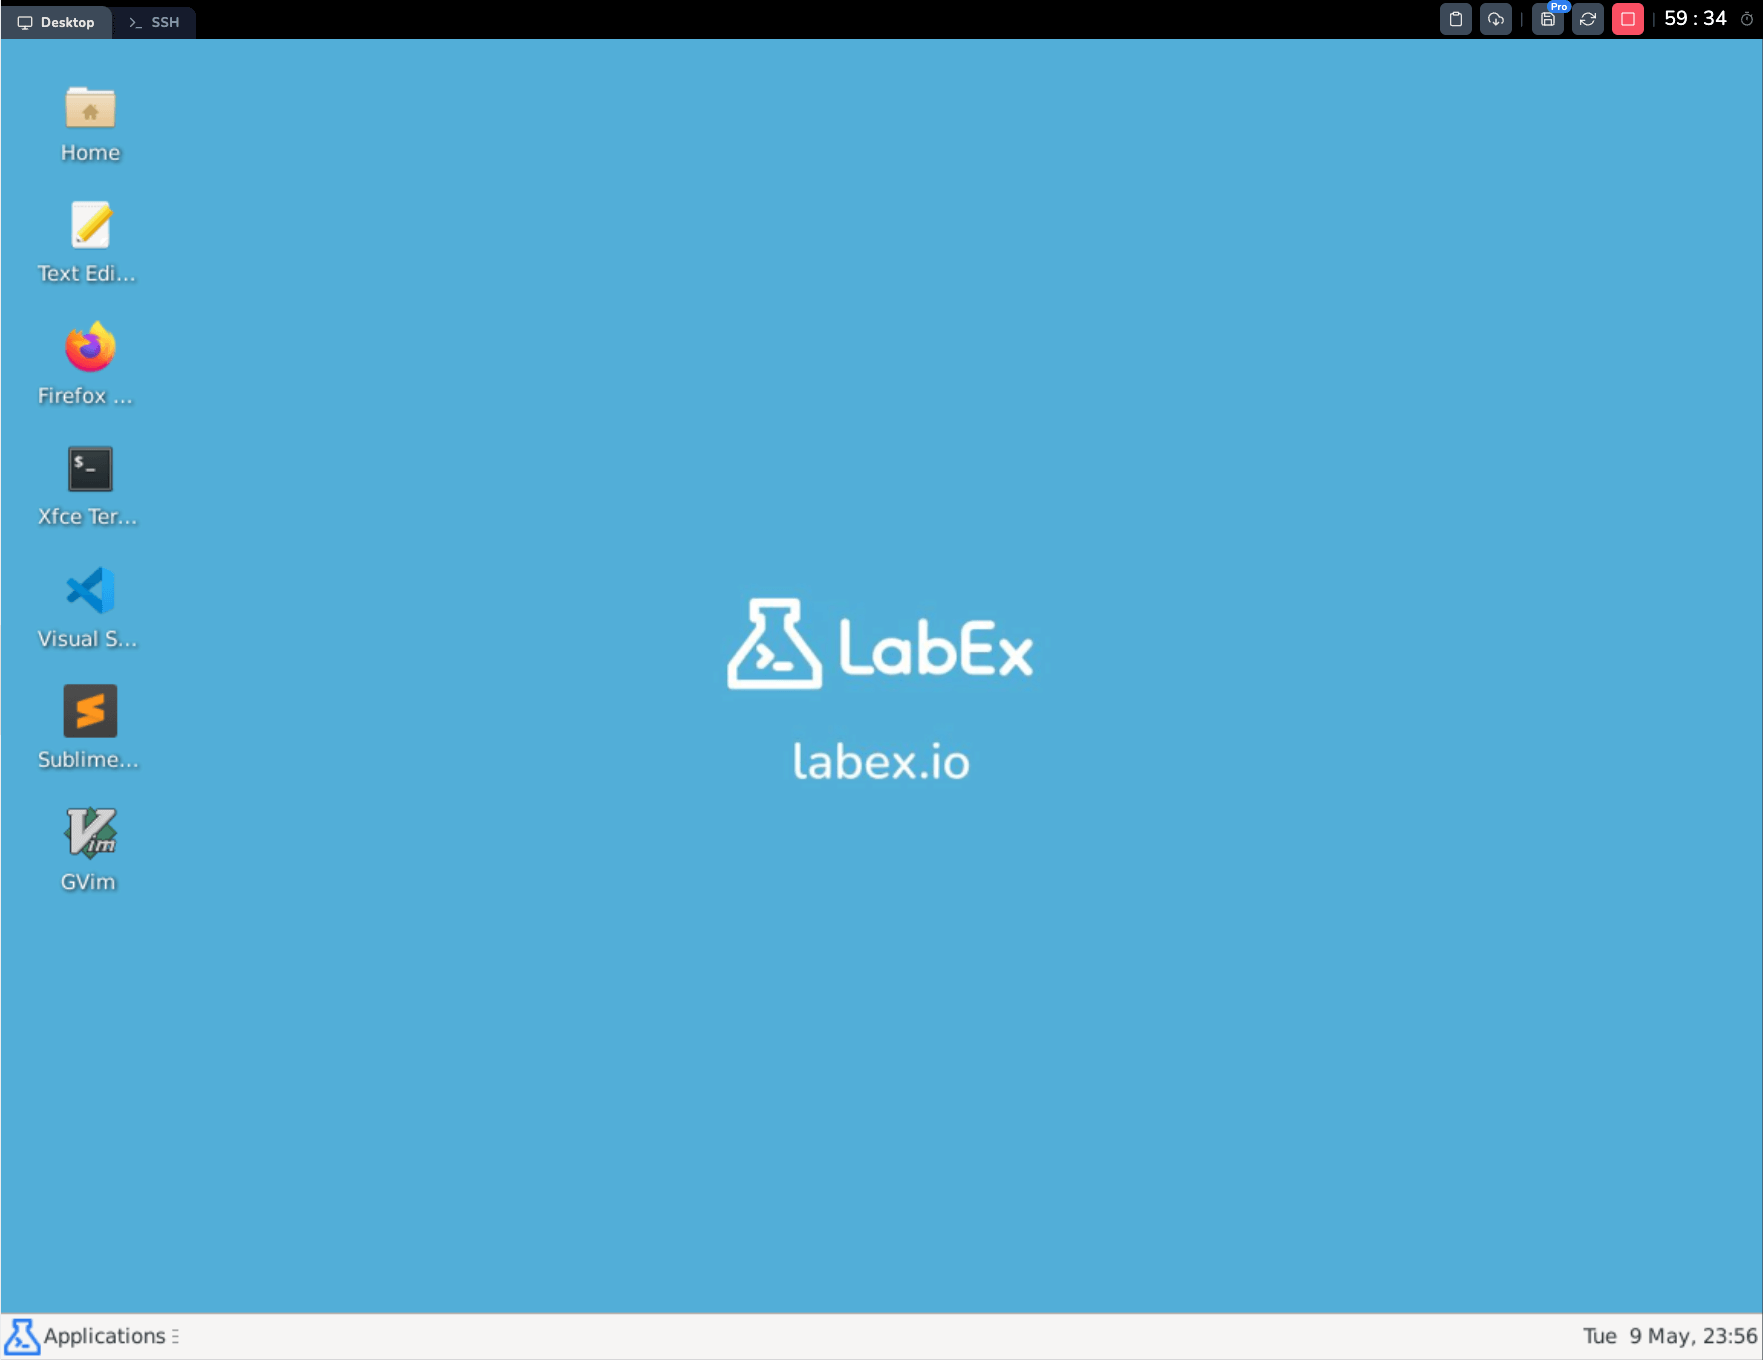
You will see a page like the one below. The step-by-step tutorial with the Next Step button is on the left. On the right is your virtual desktop - Linux. This is where you can experience hands-on operations, get creative and try the code out.
Some tools you may want to know:
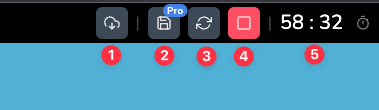
- Download: download the code you wrote in the virtual desktop to your local computer.
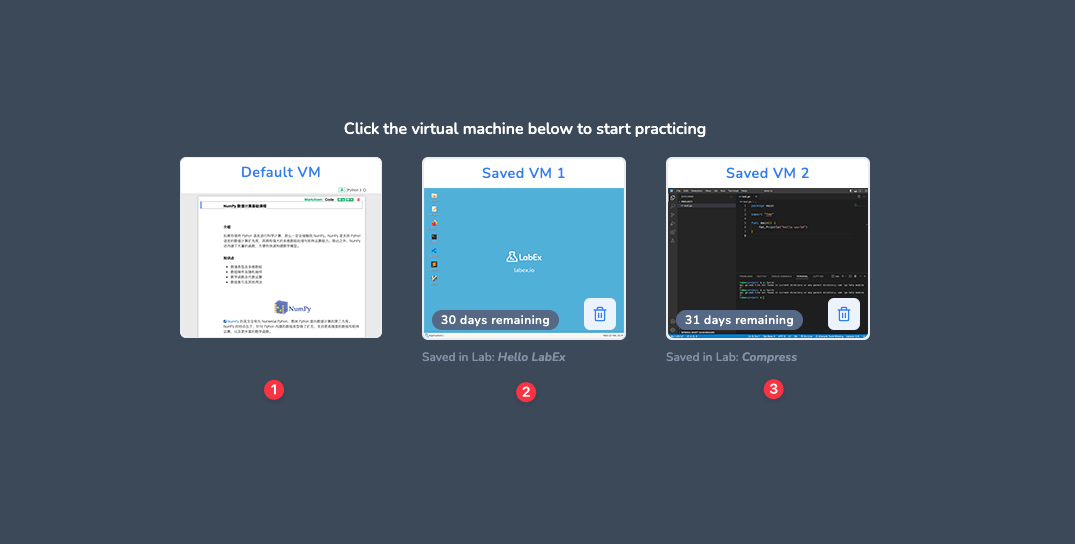
- Save VM: save the current VM environment. You can load it later.
- Restart VM: restart the current virtual desktop.
- Stop VM: stop the current virtual desktop. The system will delete the current environment when you leave.
- Extend: extend the current lab session for another hour.
The Lab Environment
All labs in LabEx are designed in a Linux environment, and you will get a virtual Linux VM when you start any lab.
LabEx's virtual environment can be divided into Desktop, WebIDE and Jupyter Notebook.
- Jupyter Notebook: A web-based interactive computational environment for creating Jupyter notebook documents. It is widely used in data science and machine learning. You can use it to run Python code, R code, and other languages.
- Desktop: A Linux desktop environment. You can use it to run Linux commands and programs.
- VS Code: A code editor. You can use it to write and run code.
All environments are based on the Ubuntu 22.04 operating system. In most cases, LabEx will choose the most suitable environment for you. But you can also switch between them by clicking the tabs on the top left corner.

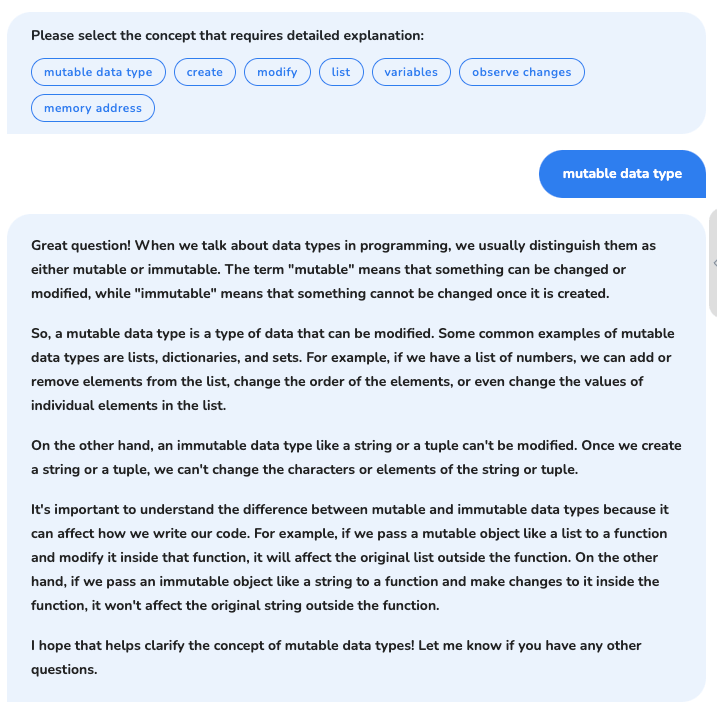
AI Assistant
LabEx provides an AI assistant to help you learn labs and complete challenges. You can click the AI Assistant button on the bottom right corner to open it.
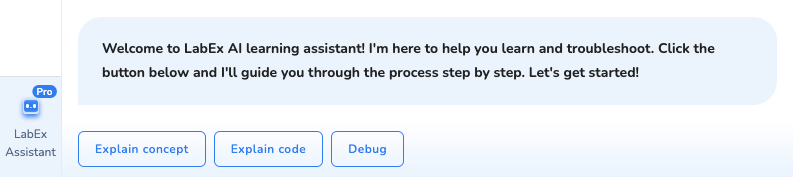
Now, the AI assistant will provide you with the following services:
- Explain concept: Explain the concept of the current step.
- Explain code: Explain the code of the current step.
- Debug: Help you debug the code of the current step.
We will provide more services in the future.
First Mini Lab: Hello, LabEx
Well, it looks like you are well prepared. So, let's take the first step in LabEx, developing your first program: "Hello, LabEx". This program is developed in C language.
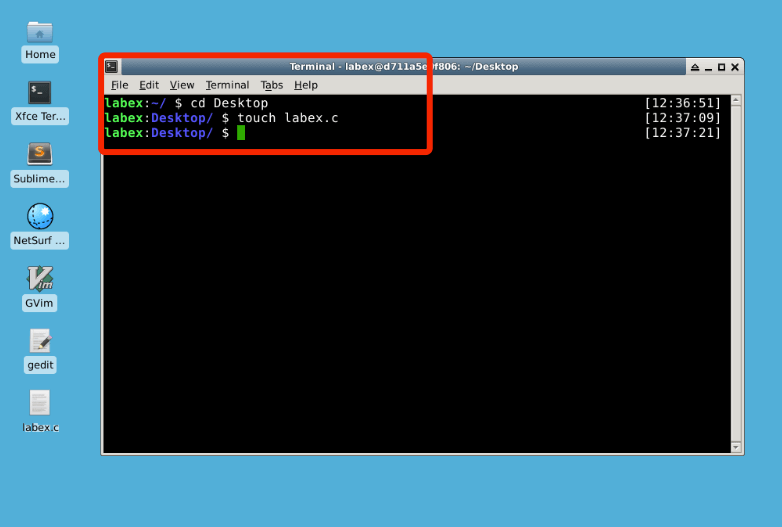
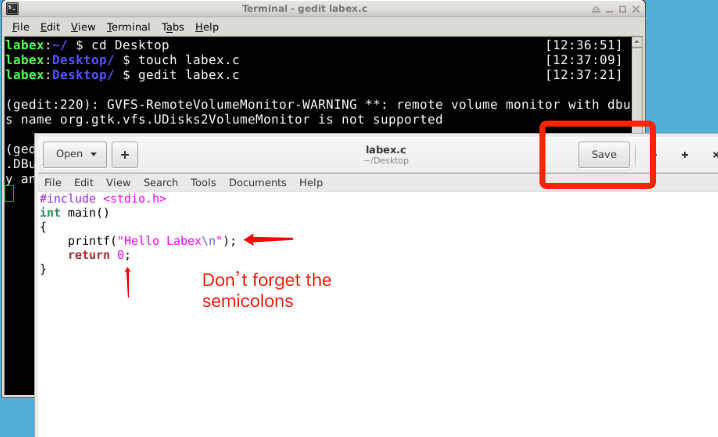
First, double-click on the Xfce Terminal in the virtual desktop environment and enter cd ~/Desktop to switch to the Desktop directory, where you'll create the source file.
Then enter touch labex.c. You should now see a labex.c file on your desktop (It corresponds to the Desktop directory!).
cd ~/Desktop
touch labex.c
Next, run gedit labex.c to open and edit the labex.c source file with the gedit editor.
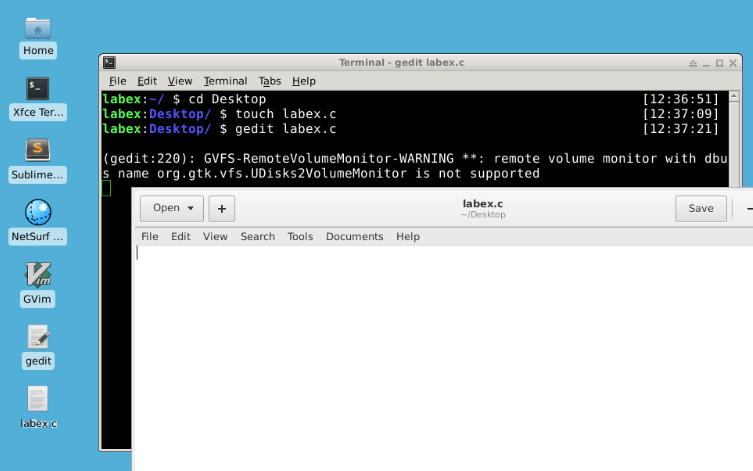
Add the following lines of C code in gedit. Then click Save at the top of gedit to save this file:
#include <stdio.h>
int main()
{
    printf("Hello LabEx!");
    return 0;
}
Compile and Run
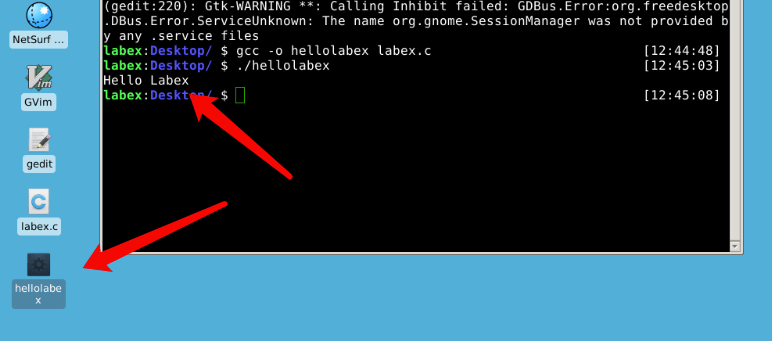
Then, close the gedit and run gcc -o hellolabex labex.c (note that it is o, the letter "oh", not the digit zero) in Xfce Terminal to compile the source code. This command generates an executable file called "hellolabex" on the desktop.
Next, switch back to Xfce Terminal and run the executable file:
gcc -o hellolabex labex.c
./hellolabex
If "Hello LabEx" shows up in the terminal, congratulations! You have just completed your first program in LabEx.
Your first program has been completed! Please share what you learned in LabEx with your friends, and let them see this milestone!
Summary
Congratulations! You have completed your first LabEx Lab. The Linux course below is highly recommended. It's straightforward for beginners, enabling you to use LabEx more efficiently.
You can also click "Stop" at the top to cease and exit the current environment. Visit Courses to view other popular courses . Or you can watch the video to learn more about LabEx.
Programming is a long journey, but Next Lab is just one click away. Let's do it!


