
Introduction
Every day, we receive numerous emails but often remain unaware of the underlying mechanics of how emails are sent and received. Setting up a mail server might seem daunting, but with the right environment, it's entirely possible. This lab provides hands-on experience to not only understand the workings of a mail server but also to configure one yourself. Dive into the practical side of technology and empower your digital communication skills!
🎯 Tasks
In this project, you will learn:
- How to install and configure the Postfix mail server
- How to edit Postfix configuration files using Vim
- How to create a local user and set up email address mapping for routing emails
- How to send a test email and check its delivery
🏆 Achievements
After completing this project, you will be able to:
- Install and configure a mail server using Postfix
- Edit configuration files to customize mail server settings
- Create local users and set up email address mappings for efficient email routing
- Test the server's functionality by sending and receiving emails
Installation of Postfix
In this step, you will familiarize yourself with common mail server software that is pivotal for sending and receiving emails. We will be focusing on Postfix for this lab, a modern MTA (Mail Transfer Agent) known for its efficiency and modular design. Postfix continues to be actively developed, making it suitable for high-traffic environments.
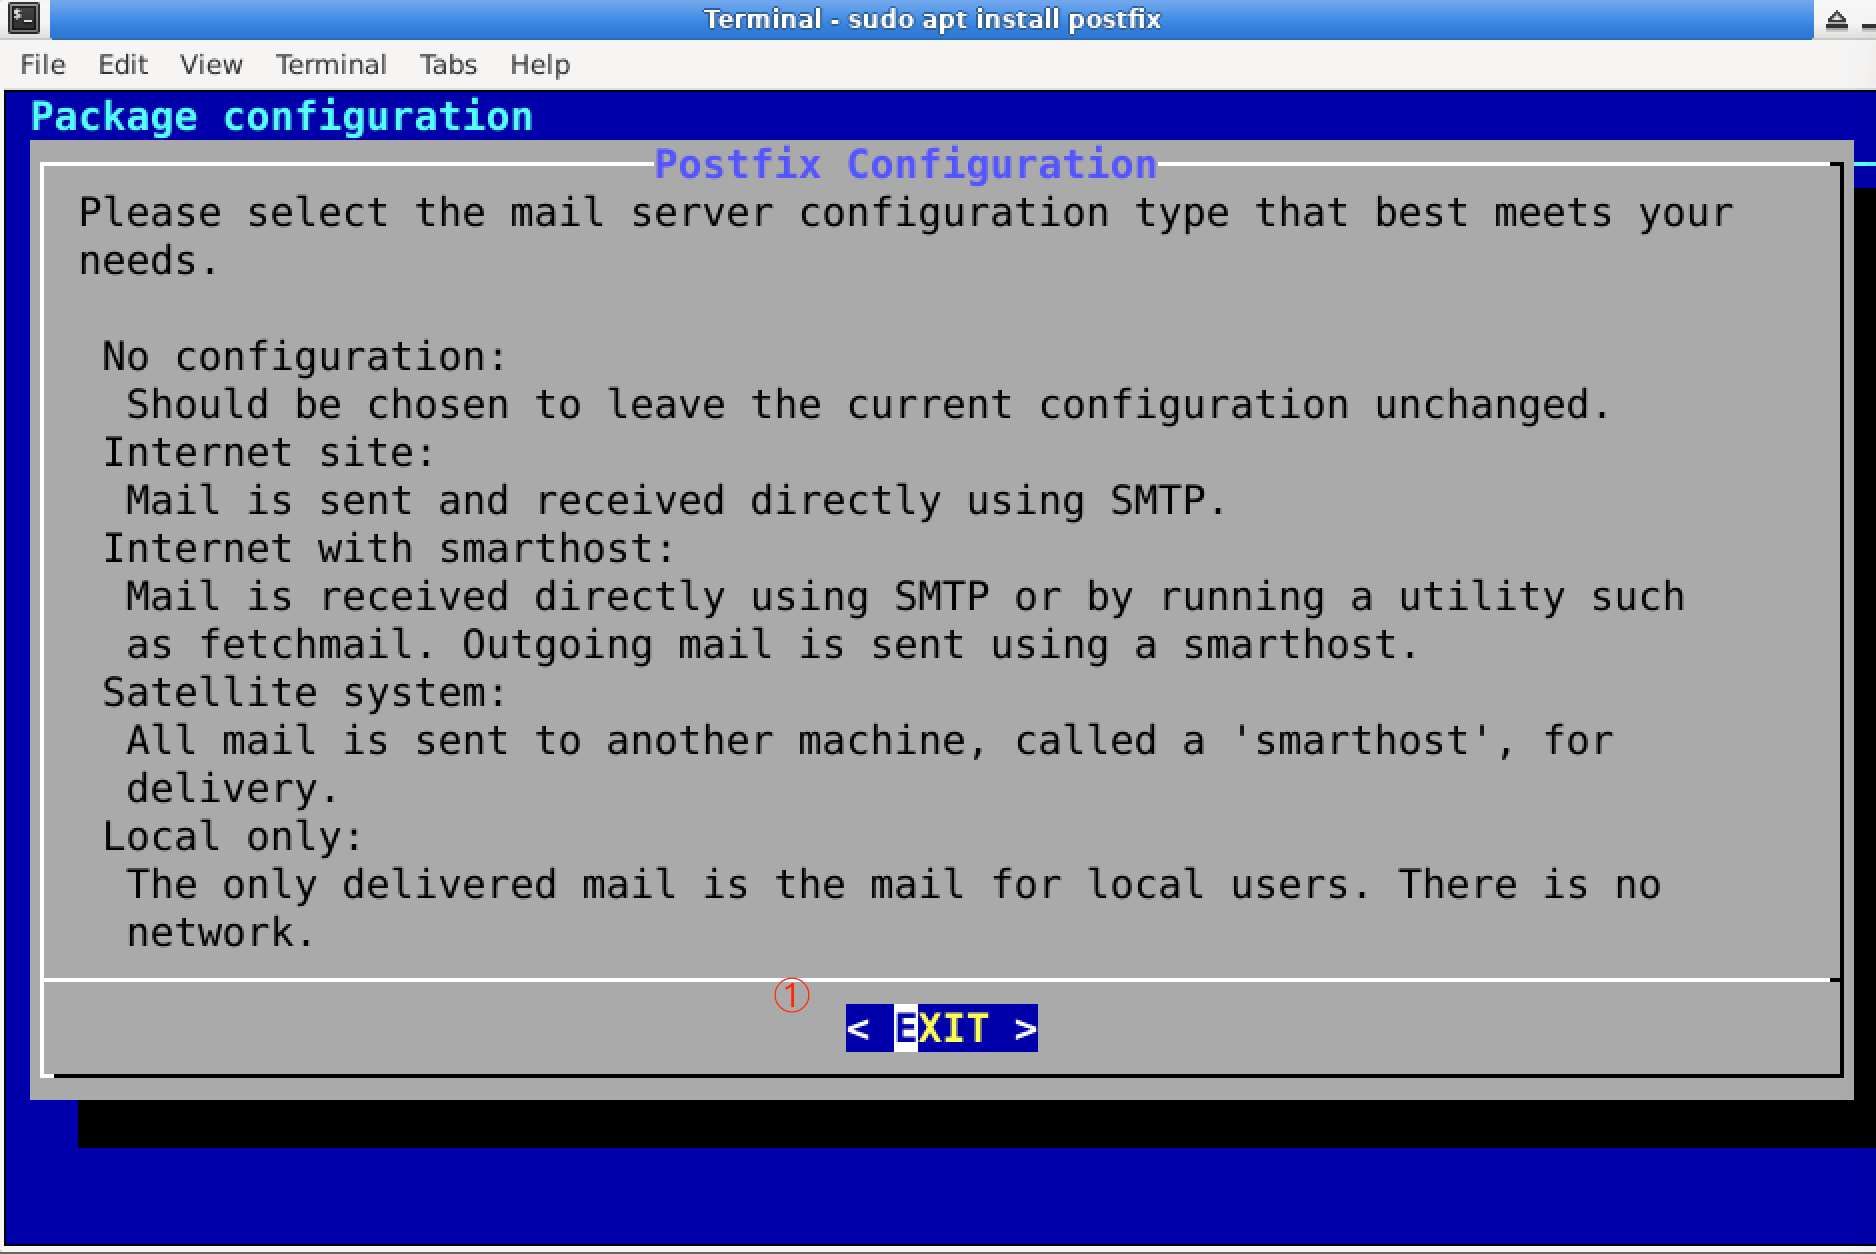
Open the terminal, and install Postfix by the following command:
sudo apt-get update
sudo apt-get install postfix
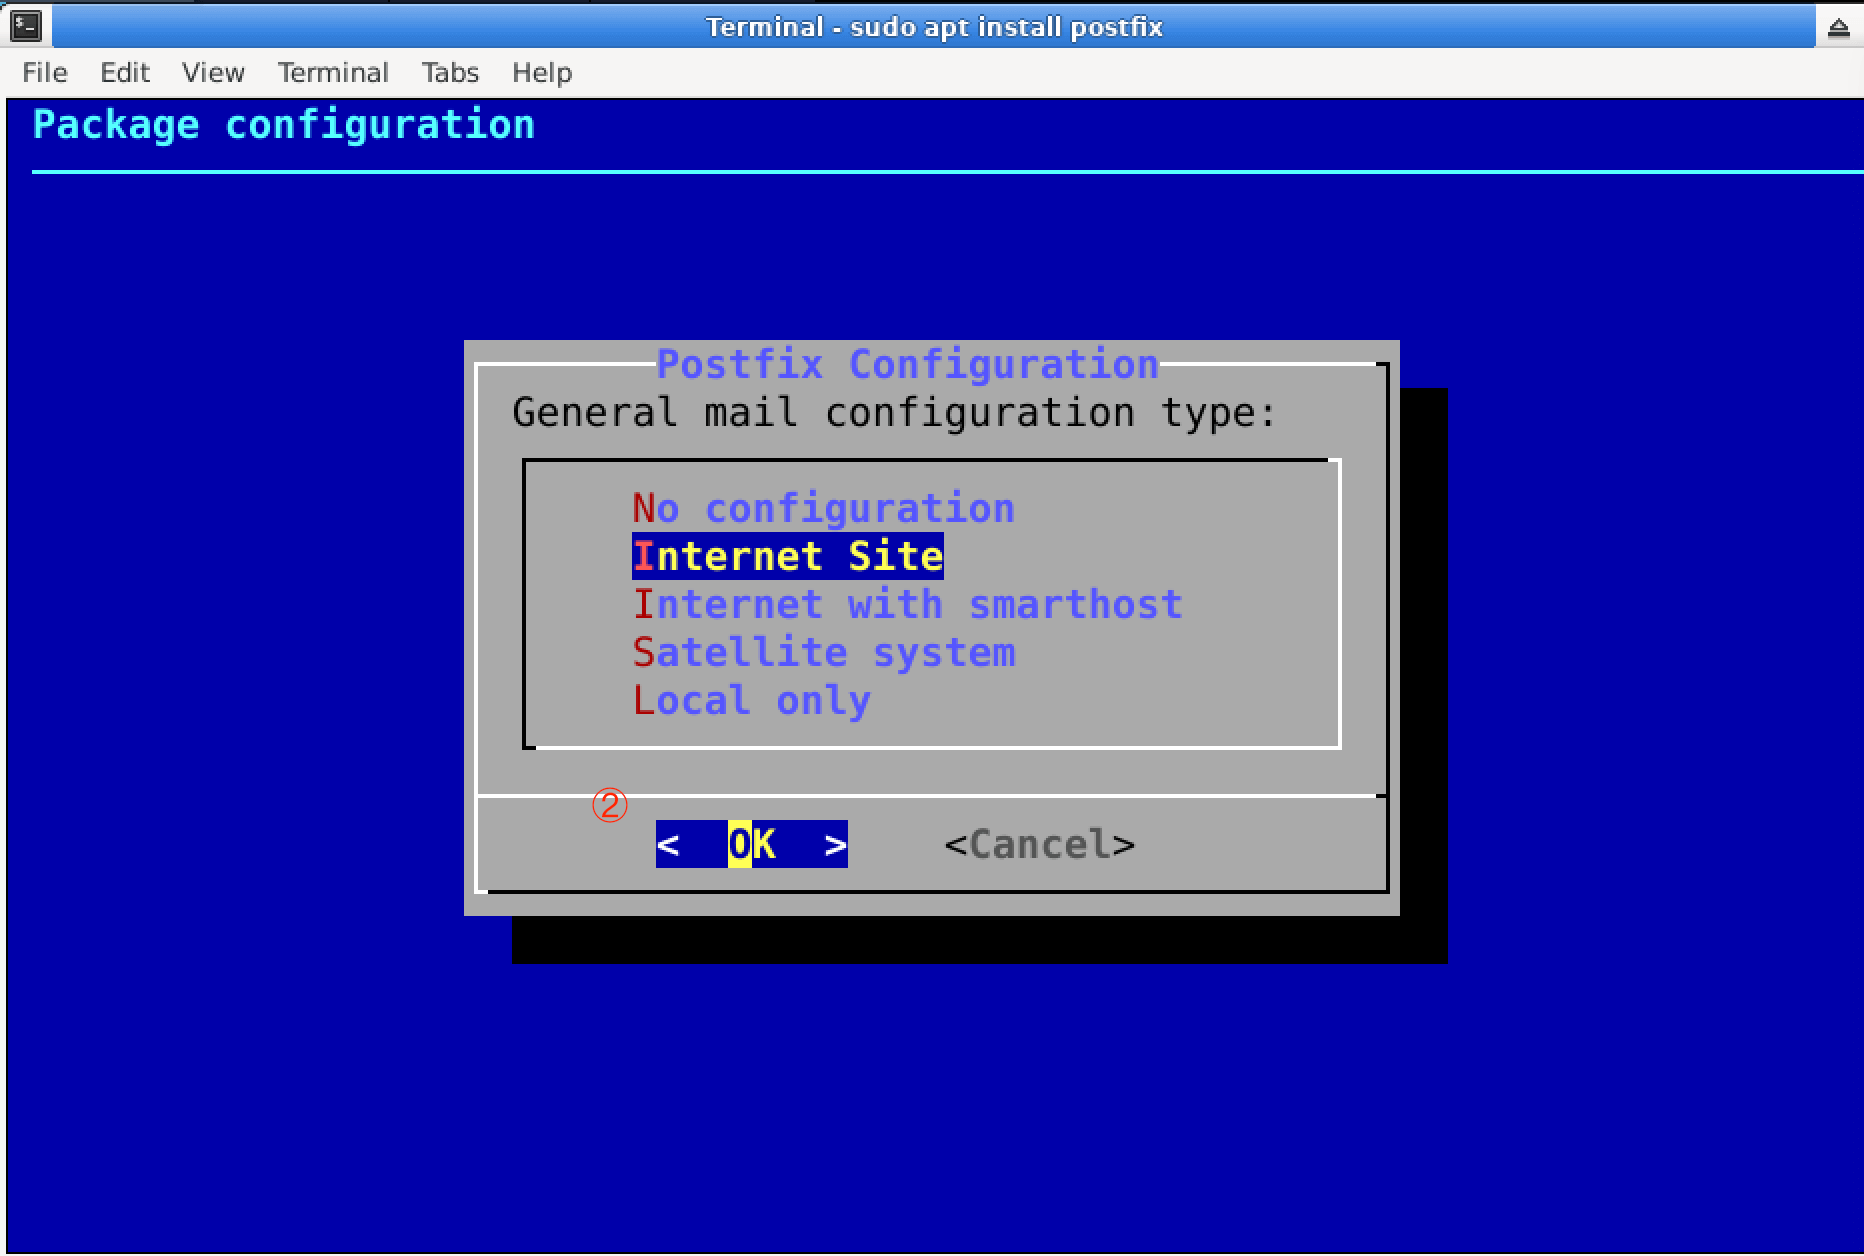
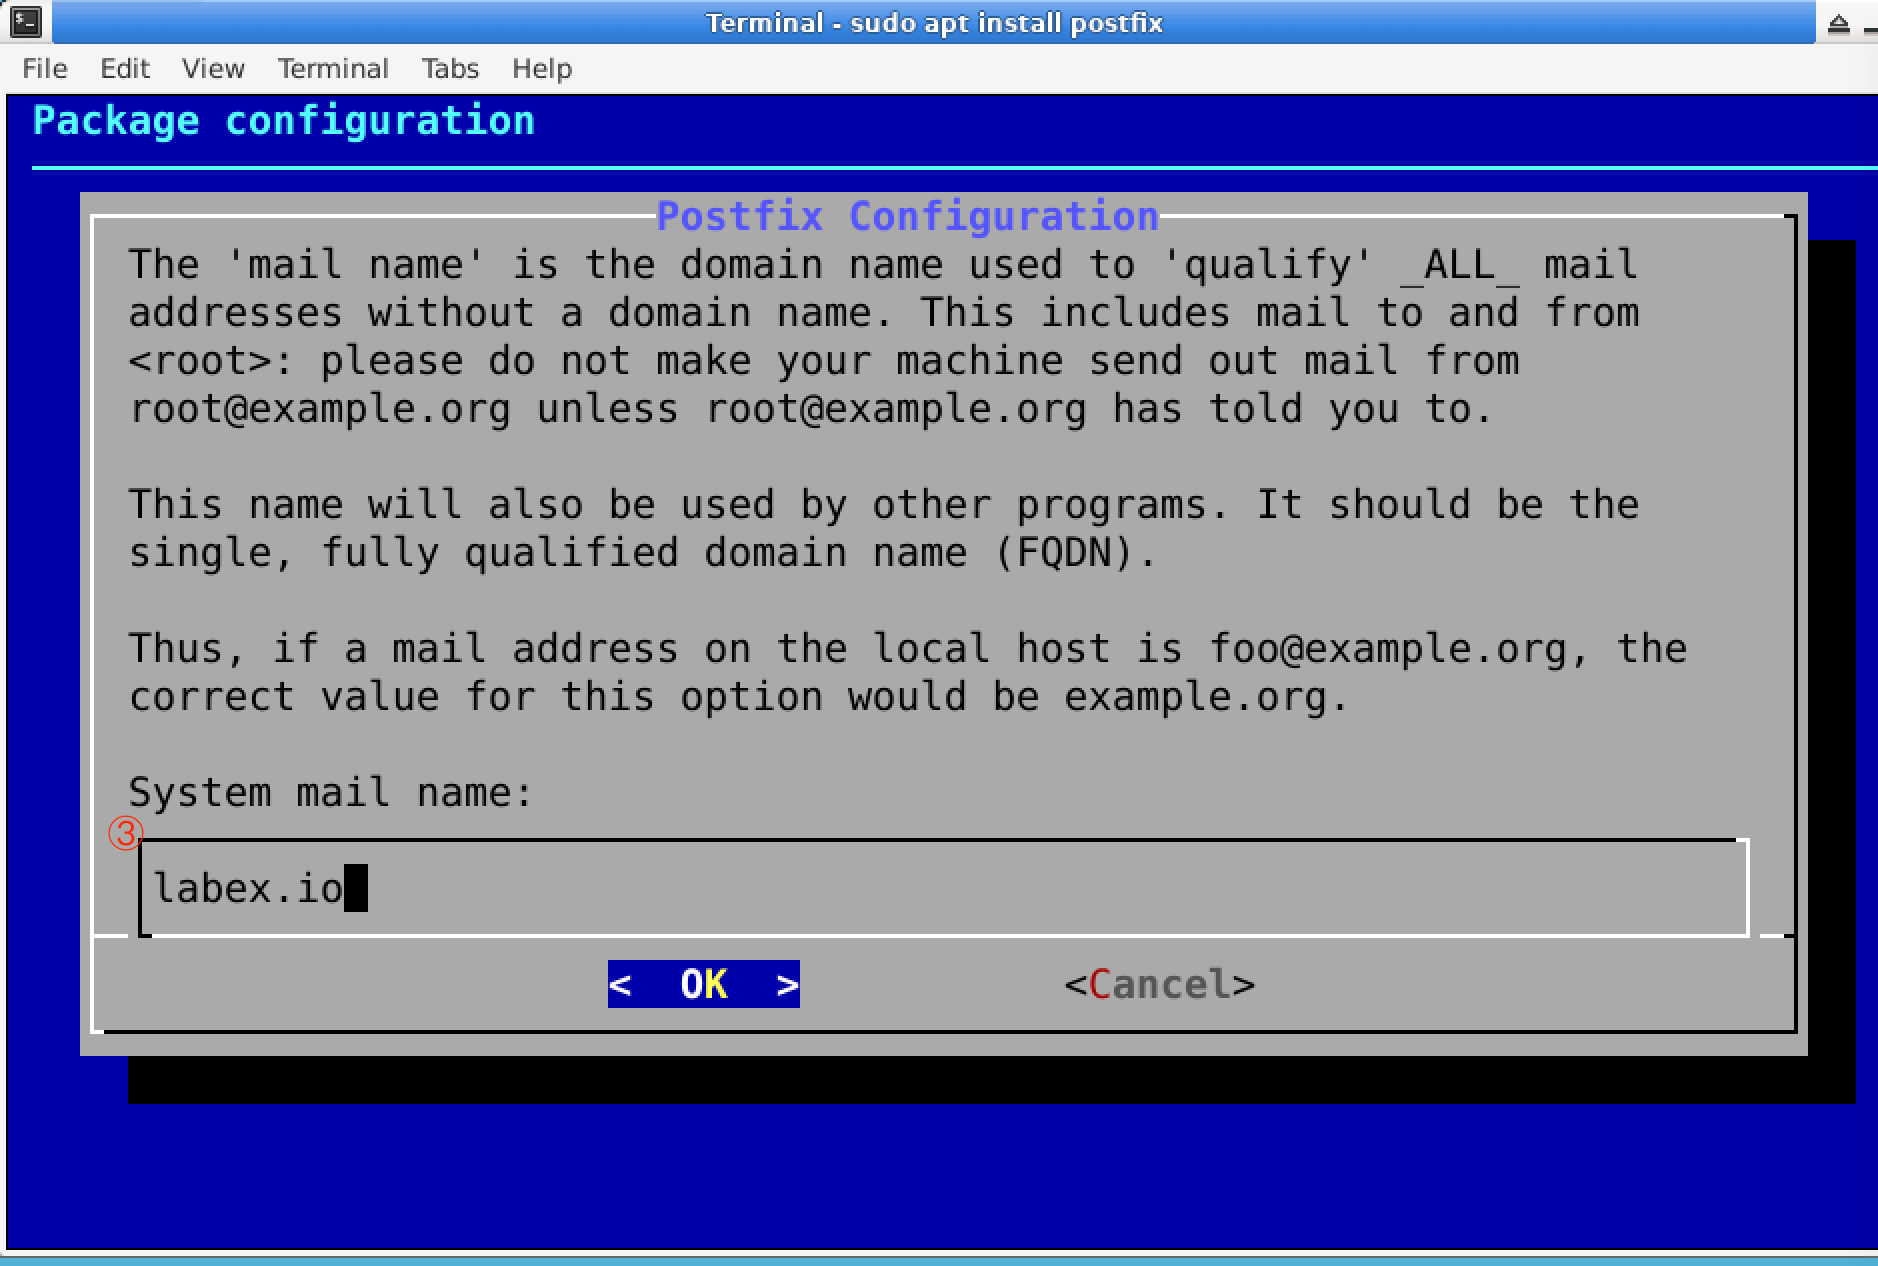
During the installation, select Internet Site as the server type since it matches our server configuration needs. Set the domain name to labex.io when prompted.
Configuration of Postfix
In this step, you'll edit the Postfix configuration file using Vim, a popular text editor in Linux environments. Vim can be complex for beginners, so follow these instructions carefully to modify your Postfix configuration.
Open the Configuration File
Enter the following command in terminal to open the main.cf file by Vim:
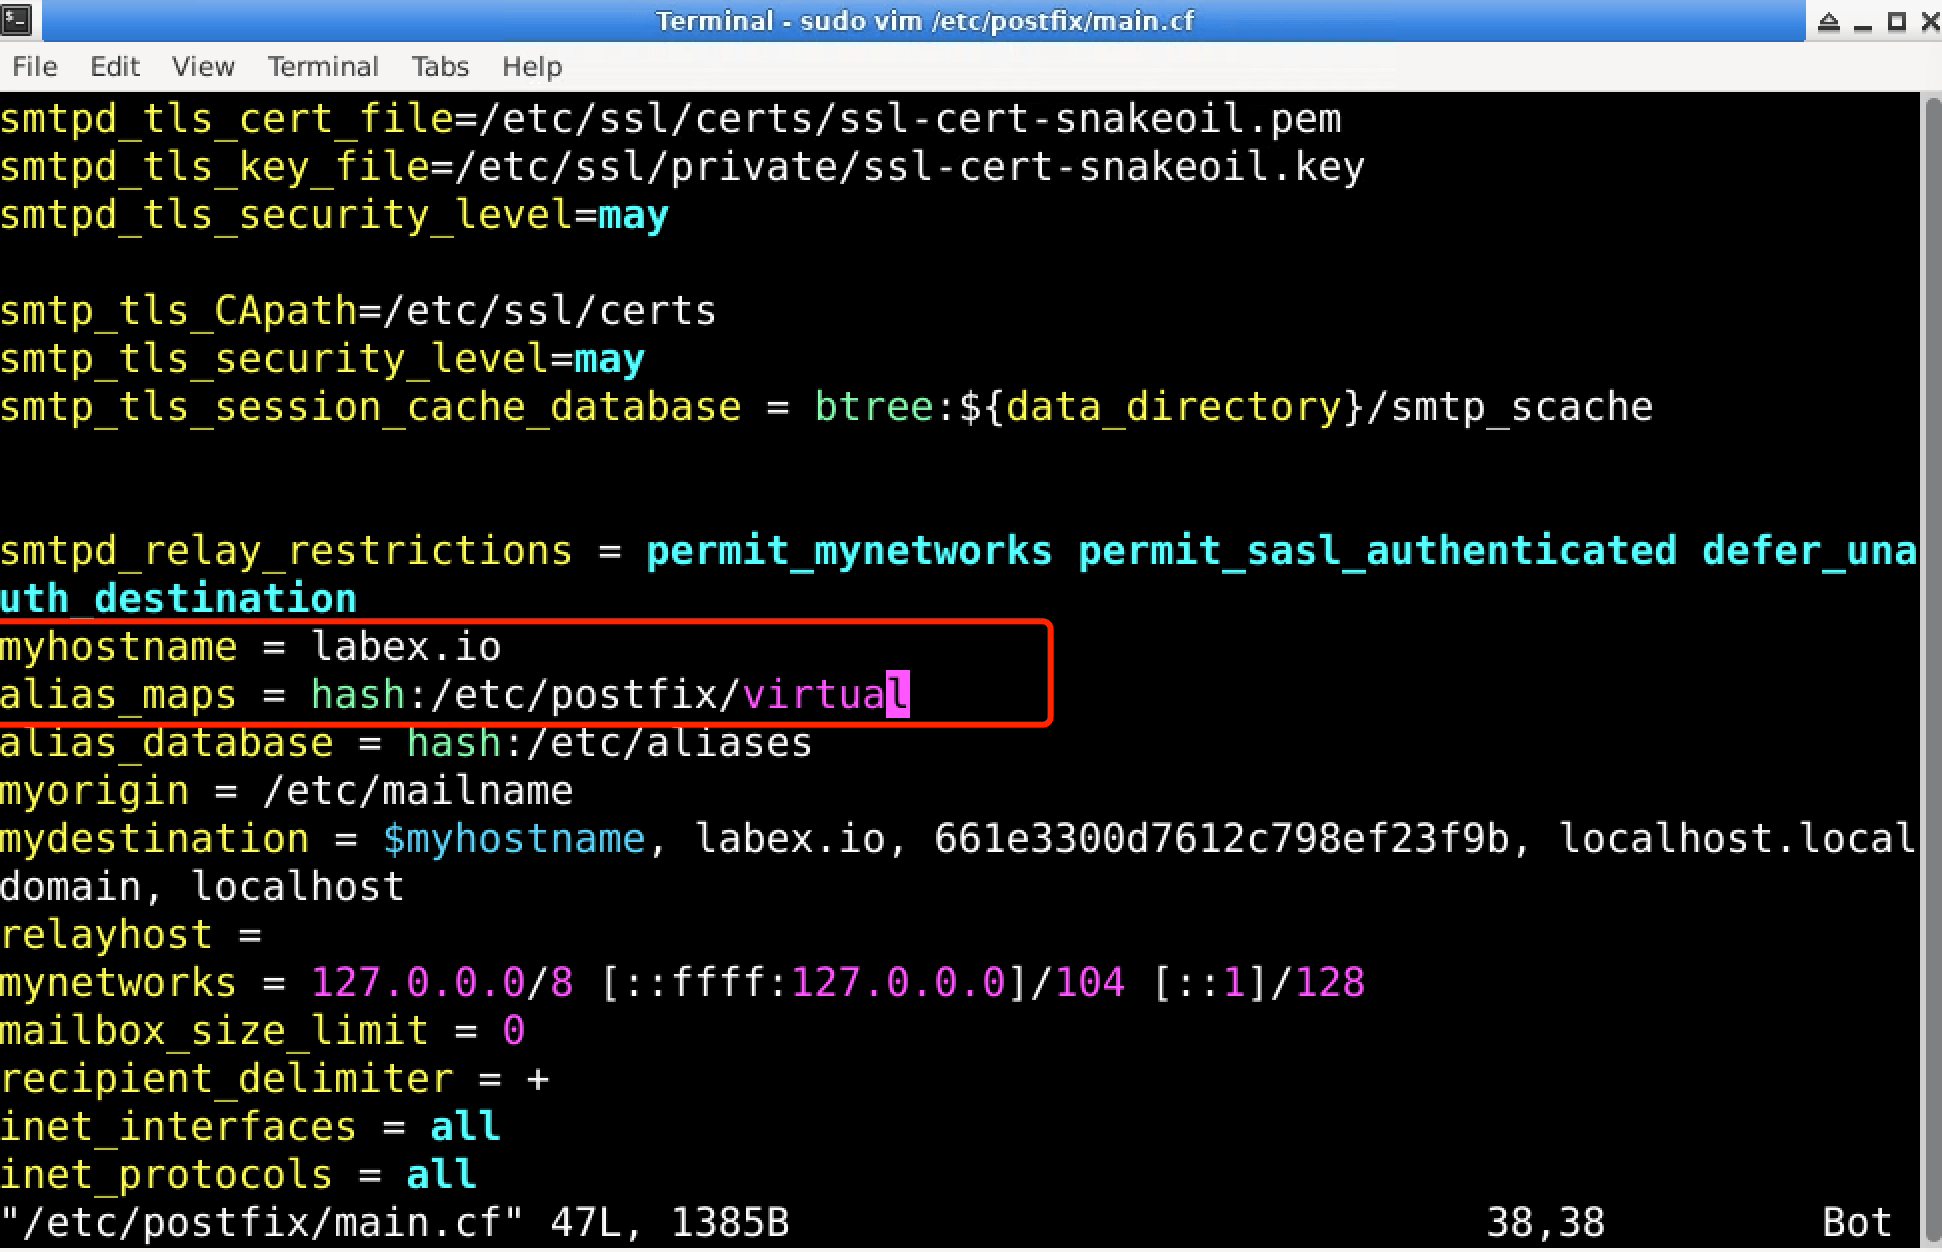
sudo vim /etc/postfix/main.cf
Enter Insert Mode
By default, Vim starts in "normal" mode, where you can navigate through the file but cannot edit text. Press the i key on your keyboard to enter "insert" mode, which allows you to make changes to the file.
Make the Necessary Changes
Use the arrow keys to navigate to the lines you need to change. Here are the modifications you need to make:
- Find the line starting with
myhostnameand change it tomyhostname = labex.io - Modify the line for
alias_mapstoalias_maps = hash:/etc/postfix/virtual
Optionally, we can aslo set the mynetworks section, which defines the hosts that can use this server. Here we'll just use the default local address.
Save and Exit
- After making the necessary changes, press the
Esckey to exit insert mode and return to normal mode. - To save the changes and exit Vim, type
:wq(write and quit) and pressEnter. - If you want to exit without saving changes, type
:q!and pressEnter.
Adding a Local User
Create a user named 'master' with a home directory and set a password.
sudo useradd -m -d /home/master master
sudo passwd master
## Set the password to "123456"
This command creates a user named master, where the -d and -m options are used to create a home directory /usr/master for the login name master (the default user home directory is in the /usr parent directory).
Editing Email Address Mapping
Prepare the email address mapping file which Postfix will use to route the emails.
echo "master@labex.io master" | sudo tee -a /etc/postfix/virtual
This command appends a new line to the /etc/postfix/virtual file, mapping the email address master@labex.io to the local user master. Postfix uses this file to determine how to route emails to local users.
Applying the Mapping
We can call the following command to implement our mapping:
sudo postmap /etc/postfix/virtual
The postmap command processes the changes made to the virtual file, updating the database that Postfix uses to route emails.
Then we restart Postfix to complete our modifications:
sudo service postfix restart
Restarting Postfix ensures that all configuration changes take effect immediately.
Sending a Test Email
Install mailutils and send an email from another user to 'master'.
sudo apt update
sudo apt-get install mailutils
mailutils is installed to provide the mail command, which is used to send emails from the command line.
echo "Hello, this is a test email." | mail -s "Test Email" master@labex.io
The echo command pipes a test message into mail, which sends an email with the subject "Test Email" to master@labex.io. This step tests the server's ability to receive emails.
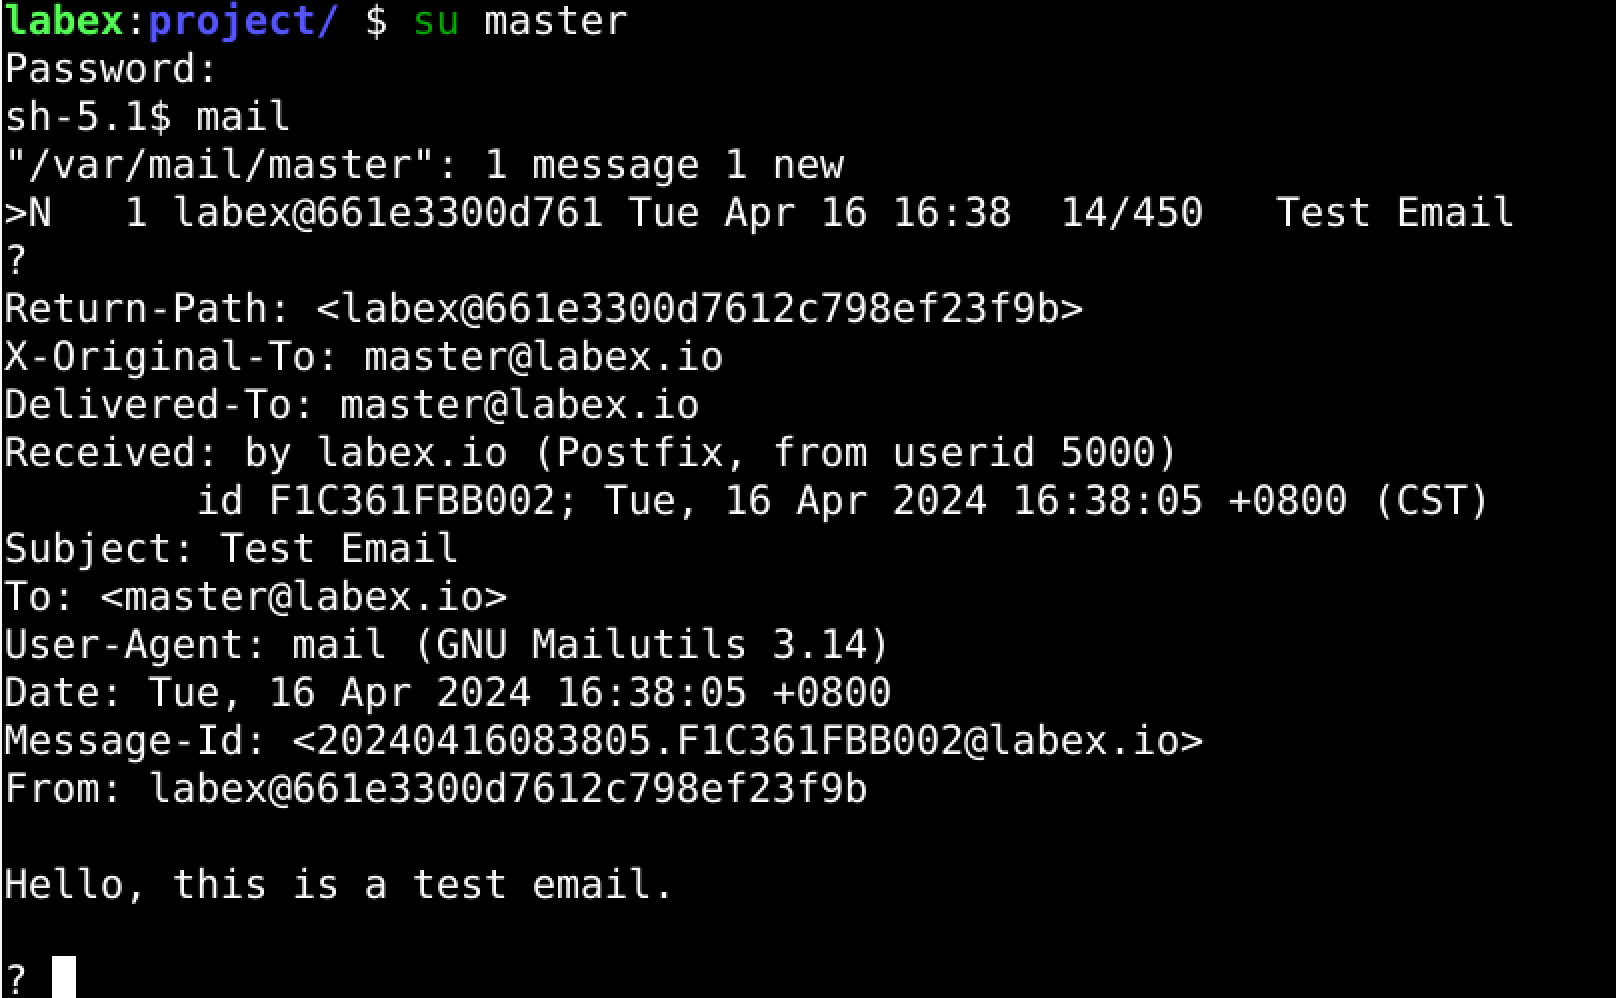
Check the Email
Then we switch to the master user to check our email.
## Enter the password "123456" we set before
su master
## Check the email
mail
These commands switch to the user master and open the mail client in the terminal. It allows you to view the inbox and confirm that the test email has been received, demonstrating that Postfix is configured correctly to handle incoming mail.

Press Enter to get the full content of the email.
Summary
In this lab, we've navigated through the process of setting up a Postfix mail server on Linux, from installation to sending a test email. By understanding and implementing the configuration and management of a mail server, you've taken a significant step towards mastering the backend of email communication. This knowledge not only enhances your technical skillset but also provides a foundation for further exploration into network and server management.


