Vue.js Search Functionality Development

HTMLHTMLBeginner
Practice Now

Introduction

In this project, you will learn how to create a simple search function using Vue 2. The search function allows users to search for content and displays the relevant results. This project will help you understand the basics of Vue.js and how to implement a search feature in a web application.

๐Ÿ‘€ Preview

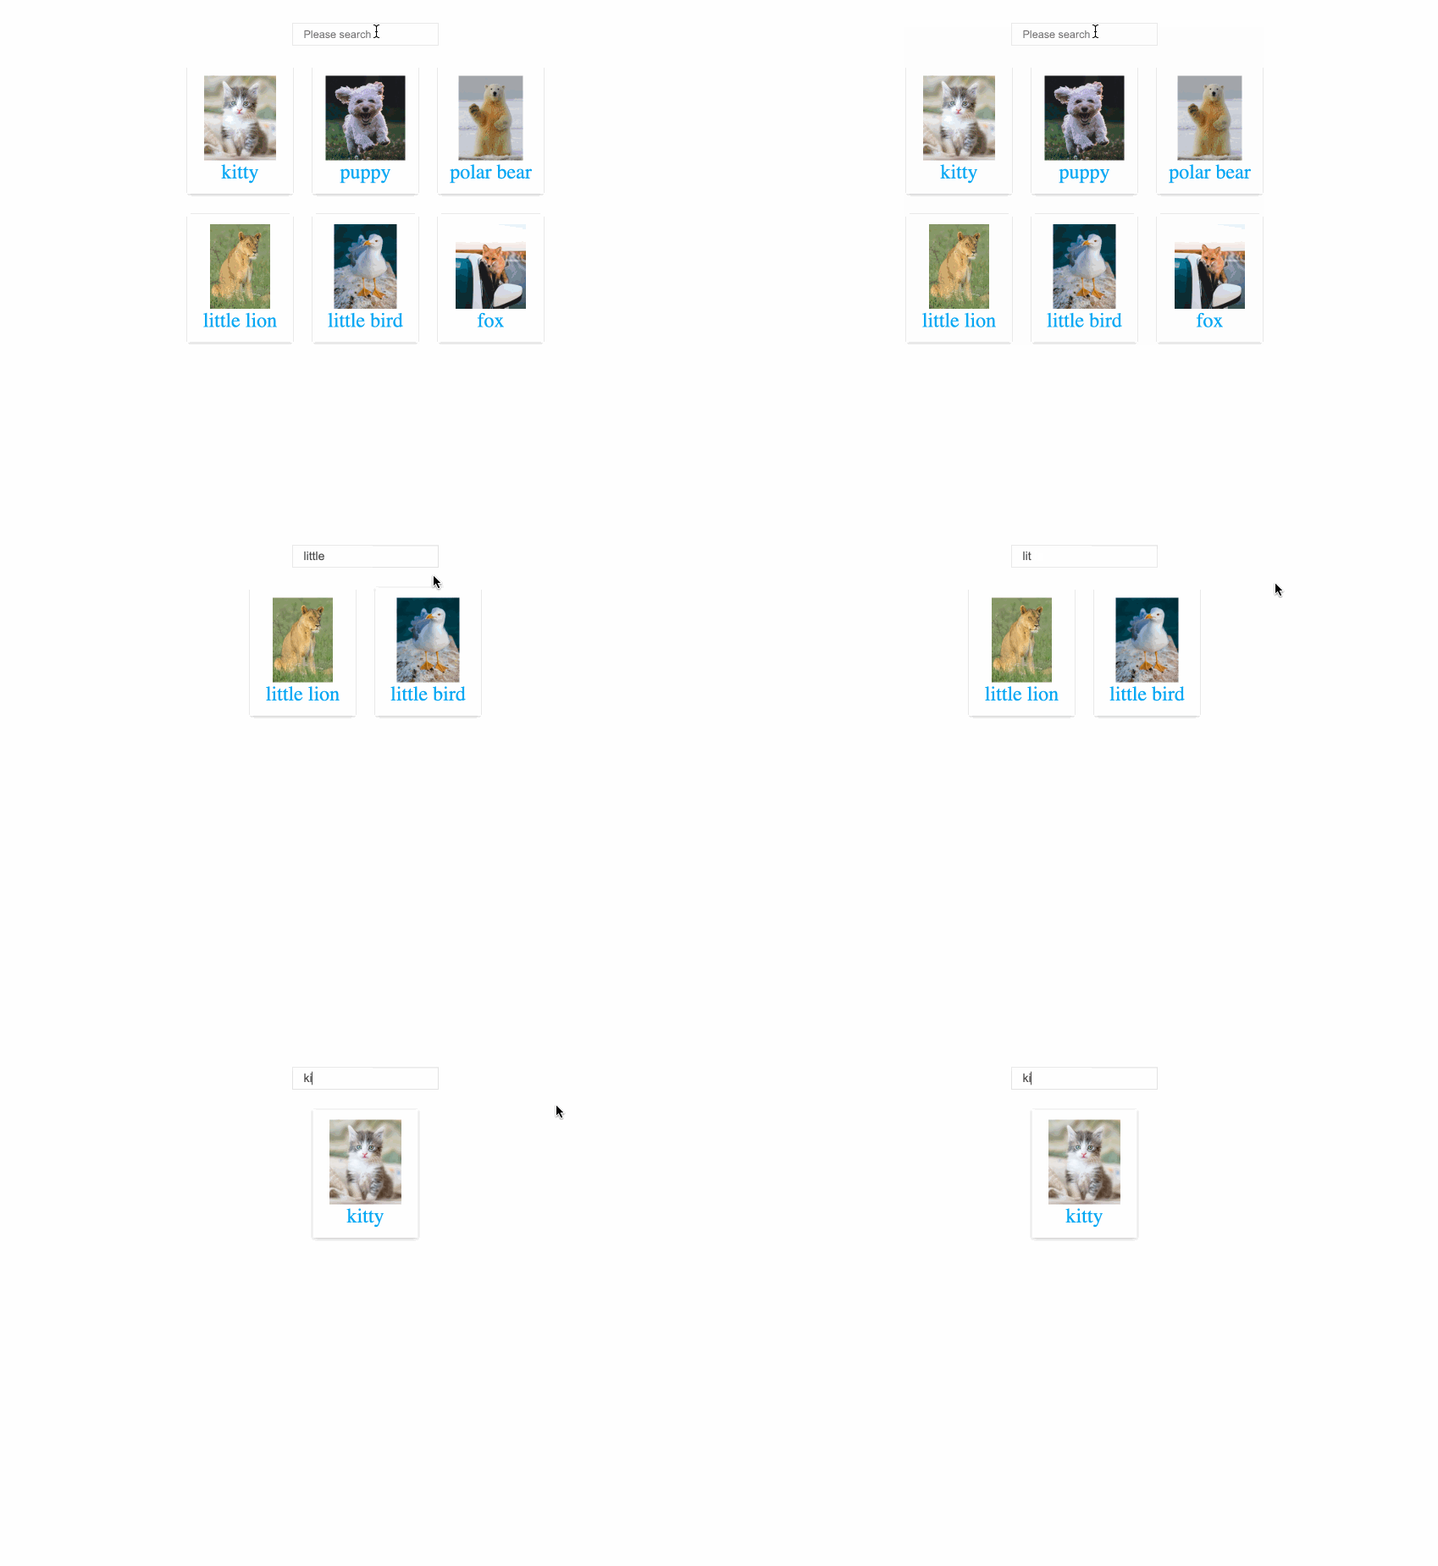
preview

๐ŸŽฏ Tasks

In this project, you will learn:

  • How to set up the project structure and prepare the necessary files and folders
  • How to add the HTML structure to the index.html file
  • How to implement the JavaScript logic to handle the search functionality
  • How to style the search input and the search results using CSS

๐Ÿ† Achievements

After completing this project, you will be able to:

  • Use Vue.js to create a responsive and interactive user interface
  • Implement a search feature that filters and displays relevant content
  • Integrate HTML, CSS, and JavaScript to create a complete web application
  • Work with data and computed properties in Vue.js

Set up the project structure

In this step, you will set up the project structure and prepare the necessary files and folders.

The initial code for this question has already been provided. Open the coding environment, and the directory structure is as follows:

โ”œโ”€โ”€ css
โ”‚   โ””โ”€โ”€ style.css
โ”œโ”€โ”€ images
โ”‚   โ”œโ”€โ”€ bar.png
โ”‚   โ”œโ”€โ”€ birds.png
โ”‚   โ”œโ”€โ”€ cat.png
โ”‚   โ”œโ”€โ”€ dog.png
โ”‚   โ”œโ”€โ”€ fox.png
โ”‚   โ””โ”€โ”€ lion.png
โ”œโ”€โ”€ index.html
โ””โ”€โ”€ vue.min.js

The css folder contains the style.css file, which will be used to style the search input and the search results. The images folder contains the images that will be displayed in the search results. The index.html file is the main HTML file for the project, and the vue.min.js file is the Vue.js library.

The main goal of the project is to complete the index.html file by adding the necessary HTML structure, JavaScript logic, and CSS styles to implement the search functionality.

Add the HTML structure

In this step, you will add the HTML structure to the index.html file.

Open the index.html file and add the following code:

<!doctype html>
<html lang="en">
  <head>
    <meta charset="UTF-8" />
    <meta name="viewport" content="width=device-width, initial-scale=1.0" />
    <title>Search Function</title>
    <script src="vue.min.js"></script>
    <link rel="stylesheet" href="./css/style.css" />
  </head>

  <body>
    <div id="app">
      <div class="search-wrapper">
        <input type="text" v-model="search" placeholder="Please search" />
      </div>
      <div class="wrapper">
        <div class="card" v-for="post in filteredList">
          <a v-bind:href="post.link" target="_blank">
            <img v-bind:src="post.img" />
            {{ post.title }}
          </a>
        </div>
      </div>
    </div>
    <script>
      // JavaScript code will be added in the next step
    </script>
  </body>
</html>

This HTML structure includes a search input field and a wrapper to display the search results. The search input field is bound to the search data property, and the search results are displayed using the v-for directive to iterate over the filteredList array.

Add the JavaScript logic

In this step, you will add the JavaScript logic to the index.html file.

Inside the <script> tag, add the following code:

class Post {
  constructor(title, link, img) {
    this.title = title;
    this.link = link;
    this.img = img;
  }
}

const app = new Vue({
  el: "#app",
  data: {
    search: "",
    postList: [
      new Post(
        "kitty",
        "https://unsplash.com/s/photos/cat",
        "./images/cat.png"
      ),
      new Post("puppy", "https://unsplash.com/@joeyc", "./images/dog.png"),
      new Post(
        "polar bear",
        "https://unsplash.com/@hansjurgen007",
        "./images/bar.png"
      ),
      new Post(
        "little lion",
        "https://unsplash.com/@hansjurgen007",
        "./images/lion.png"
      ),
      new Post(
        "little bird",
        "https://unsplash.com/@eugenechystiakov",
        "./images/birds.png"
      ),
      new Post(
        "fox",
        "https://unsplash.com/@introspectivedsgn",
        "./images/fox.png"
      )
    ]
  },
  computed: {
    filteredList() {
      return this.postList.filter((post) => {
        return post.title.includes(this.search);
      });
    }
  }
});

This JavaScript code defines a Post class and creates a new Vue instance with the necessary data and computed properties to handle the search functionality.

  1. The Post class is used to create instances of posts with a title, link, and image properties.
  2. The Vue instance (app) is created with the following properties:
    • el: Specifies the element to mount the Vue instance.
    • data: Contains the search property for the search input and an array of postList items.
    • computed: Defines a filteredList computed property that filters the postList based on the search input.

Modify the CSS styles

css/style.css has been provided with some initial styles.

If you want to customize the styles further, you can modify the CSS file to change the appearance of the search input and the search results.

Or, you can leave the styles as they are and proceed to the next step.

Run the project

Click on Go Live button in the bottom right corner of WebIDE, to run the project.

Next, open "Web 8080" on the top of the VM and refresh it manually and you will see the page.

Image Description
โœจ Check Solution and Practice

Summary

Congratulations! You have completed this project. You can practice more labs in LabEx to improve your skills.

Other HTML Tutorials you may like