
Introduction
Git is a powerful version control system that enables developers to collaborate on software projects effectively. Understanding how to work with Git branches is crucial for managing your codebase and tracking changes. In this tutorial, you will learn how to check the current branch in your Git repository, as well as explore basic branch management techniques.
Understanding Git Branches
Git is a distributed version control system that allows developers to manage and track changes to their codebase. One of the key features of Git is its support for branching, which enables developers to create and work on multiple parallel lines of development simultaneously.
What is a Git Branch?
A Git branch is a lightweight, movable pointer to a specific commit in the repository's history. Branches allow developers to experiment with new features, fix bugs, or collaborate on different aspects of a project without affecting the main codebase.
Importance of Branches in Git
Branches are essential in Git for several reasons:
- Parallel Development: Branches enable multiple developers to work on different features or bug fixes concurrently, without interfering with each other's work.
- Experimentation: Branches provide a safe environment for trying out new ideas or features without affecting the main codebase.
- Collaboration: Branches facilitate collaboration by allowing developers to work on separate parts of a project and then merge their changes back into the main branch.
- Easier Maintenance: Branches help in maintaining a clean and organized repository, making it easier to track and manage changes.
In the next step, you will learn how to check which branch you are currently working on.
Checking the Current Branch
Knowing the current branch you are working on is essential when using Git. Here are a few ways to check the current branch in your Git repository.
Navigate to the Git repository directory in the terminal:
cd /home/labex/project/my-git-repo
Using the git branch Command
The most straightforward way to check the current branch is to use the git branch command. This command will list all the branches in your repository, and the currently active branch will be marked with an asterisk (*).
Execute the following command in your terminal:
git branch
You should see output similar to this, indicating that you are currently on the master branch:
* master
Using the git status Command
Another way to check the current branch is to use the git status command. This command will not only show the current branch but also provide additional information about the state of your repository.
Execute the following command in your terminal:
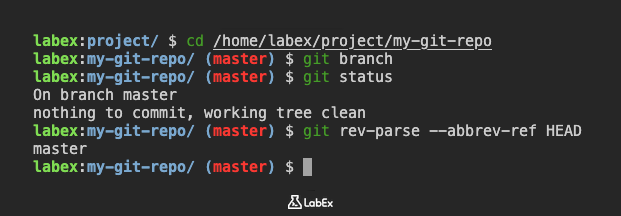
git status
You should see output similar to this, confirming you are on the master branch:
On branch master
Your branch is up to date with 'origin/master'.

nothing to commit, working tree clean
Using the git rev-parse --abbrev-ref HEAD Command
If you prefer a more programmatic approach, you can use the git rev-parse --abbrev-ref HEAD command to get the name of the current branch.
Execute the following command in your terminal:
git rev-parse --abbrev-ref HEAD
This command will output the name of the current branch without any additional information:
master
Knowing how to check the current branch is essential when working with Git, as it helps you understand the context of your work and ensure that you are making changes to the correct branch.
Basic Branch Management
Now that you know how to check the current branch, let's practice some basic branch management operations.
Navigate to the Git repository directory if you are not already there:
cd /home/labex/project/my-git-repo
Creating a New Branch
To create a new branch, use the git branch command followed by the name of the new branch. Let's create a branch named feature/add-new-file.
Execute the following command:
git branch feature/add-new-file
This command creates the new branch but does not switch to it. You can verify the new branch exists by running git branch again:
git branch
You should see both branches listed:
feature/add-new-file
* master
Switching Branches
To switch to the new branch, use the git checkout command followed by the branch name.
Execute the following command to switch to the feature/add-new-file branch:
git checkout feature/add-new-file
You should see output indicating the switch:
Switched to branch 'feature/add-new-file'
Now, if you run git branch again, you will see that feature/add-new-file is the current branch:
git branch
Output:
* feature/add-new-file
  master
You have successfully created and switched to a new branch. In the next step, you will learn how to delete a branch.
Deleting a Branch
After you have finished working on a branch and its changes have been merged into another branch (like master), you can delete the branch to keep your repository clean.
Navigate to the Git repository directory if you are not already there:
cd /home/labex/project/my-git-repo
Before deleting the feature/add-new-file branch, you need to switch back to another branch, for example, the master branch. You cannot delete the branch you are currently on.
Switch back to the master branch:
git checkout master
Output:
Switched to branch 'master'
Your branch is up to date with 'origin/master'.
Now, you can delete the feature/add-new-file branch using the git branch -d command. The -d flag is a safe way to delete a branch because Git prevents you from deleting the branch if it contains unmerged changes.
Execute the following command to delete the branch:
git branch -d feature/add-new-file
Output:
Deleted branch feature/add-new-file (was abcdefg).
(Note: The commit hash abcdefg will be different in your output.)
You can verify that the branch is deleted by listing the branches again:
git branch
Output:
* master
The feature/add-new-file branch is now gone.
If you ever need to delete a branch that has unmerged changes (use with caution!), you can use the -D flag instead of -d.
You have successfully learned how to check the current branch, create a new branch, switch between branches, and delete a branch.
Summary
In this Git tutorial, you have learned how to check the current branch using various commands like git branch, git status, and git rev-parse. You also practiced basic branch management operations, including creating a new branch, switching between branches, and deleting a branch. These fundamental skills are crucial for navigating and managing your Git repositories effectively.


