Develop Markdown Editor with Live Preview

JavaScriptJavaScriptBeginner
Practice Now

Introduction

In this project, we will create a simple web-based Markdown editor that offers live HTML preview as you type. Using libraries like Ace Editor, marked, and highlight.js, you'll develop an intuitive editor that not only allows writing in Markdown but also saves data across browser sessions and highlights code snippets in the preview.

👀 Preview
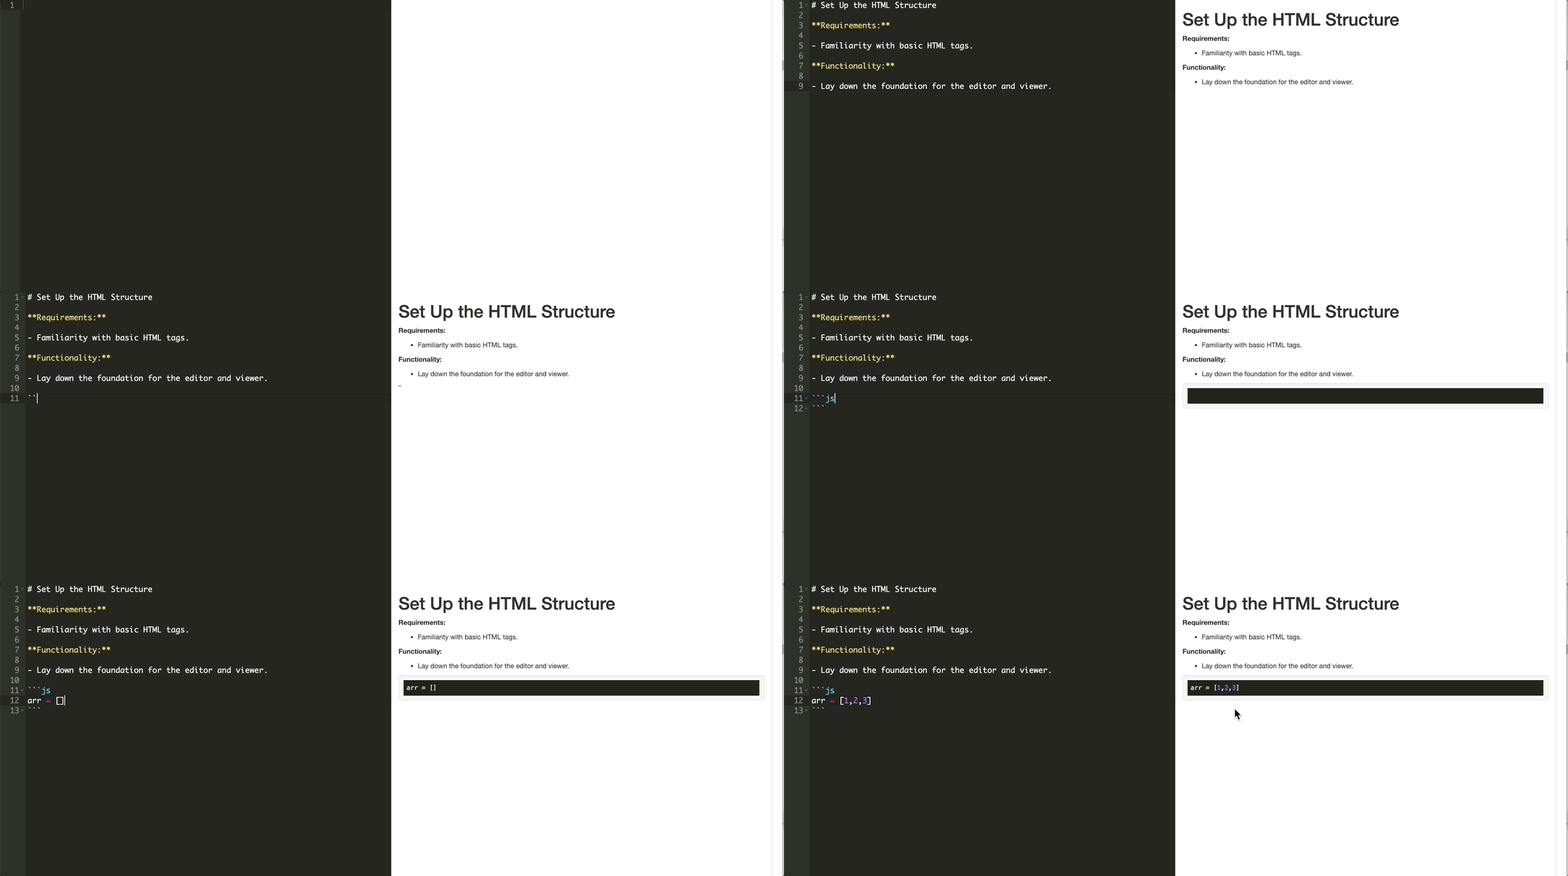
effect

🎯 Tasks

In this project, you will learn:

  • How to set up the HTML structure for the editor and viewer
  • How to style the editor and viewer for a pleasing user experience
  • How to implement the editor initialization logic
  • How to parse Markdown to HTML and display it in the viewer
  • How to synchronize scrolling between the editor and viewer

🏆 Achievements

After completing this project, you will be able to:

  • Develop a web-based Markdown editor with live HTML preview
  • Utilize libraries like Ace Editor, marked, and highlight.js to enhance the editor's functionality
  • Implement data persistence across browser sessions
  • Provide code syntax highlighting in the Markdown preview
Set Up the HTML Structure

Requirements:

  • Familiarity with basic HTML tags.

Functionality:

  • Lay down the foundation for the editor and viewer.

In index.html, set up a basic HTML structure for the editor and viewer. Include space for both the editor and preview pane.

<!doctype html>
<html lang="en">
  <head>
    <meta charset="utf-8" />
    <meta http-equiv="X-UA-Compatible" content="IE=edge" />
    <meta name="viewport" content="width=device-width, initial-scale=1" />
    <title>markdown editor</title>

    <!-- Import CSS files -->
    <link rel="stylesheet" href="libs/bootstrap/css/bootstrap.min.css" />
    <link rel="stylesheet" href="libs/highlightjs/default.min.css" />
    <link rel="stylesheet" href="libs/highlightjs/monokai_sublime.min.css" />
    <link rel="stylesheet" href="style.css" />
  </head>
  <body>
    <div class="container-fluid">
      <div class="row">
        <!-- markdown editor div -->
        <div class="col-md-6" id="md-editor"></div>
        <!-- markdown preview box div -->
        <div class="col-md-6" id="md-viewer"></div>
      </div>
    </div>
    <!-- Import JavaScript files -->
    <script src="libs/jquery.min.js"></script>
    <script src="libs/bootstrap/js/bootstrap.min.js"></script>
    <script src="libs/ace/ace.js"></script>
    <script src="libs/marked.min.js"></script>
    <script src="libs/highlightjs/highlight.min.js"></script>
    <script src="main.js"></script>
  </body>
</html>
✨ Check Solution and Practice

Style the Editor and Viewer

Requirements:

  • Basic CSS knowledge.

Functionality:

  • Style the editor and viewer for a pleasing user experience.

Insert the provided styles into style.css. This will ensure both editor and viewer are styled correctly and occupy half the screen each.

/* style.css */

/* Editing Area */
#md-editor {
  position: absolute;
  top: 0;
  right: 0;
  bottom: 0;
  left: 0;
  font-size: 16px;
}

/* Preview Area */
#md-viewer {
  position: absolute;
  top: 0;
  right: 0;
  bottom: 0;
  left: 50%;
  overflow-y: scroll;
}

This CSS ensures the editor and viewer take up half the screen each and sit side by side.

✨ Check Solution and Practice

Implement the Editor Initialization

Requirements:

  • A basic understanding of JavaScript.

Functionality:

  • Set up the Ace Editor with desired settings.

Start the main.js with the editor initialization logic.

/* main.js */

/**
 * Initialize the editor
 *
 */
function initEditor() {
  // Initialize the editor
  var editor = ace.edit("md-editor");

  editor.setTheme("ace/theme/monokai"); // Set theme style
  editor.getSession().setMode("ace/mode/markdown"); // Set editor mode
  editor.getSession().setTabSize(4); // Set Tab to 4 spaces
  editor.getSession().setUseWrapMode(true); // Enable word wrap

  // Load data from local storage
  editor.setValue(localStorage.localData || "");
}
✨ Check Solution and Practice

Implement Markdown Parsing

Requirements:

  • Familiarity with JavaScript and jQuery.

Functionality:

  • Convert Markdown to HTML.
  • Display the HTML in the viewer.
/**
 * Parse markdown
 *
 * @params {object} editor - Editor instance
 * @return {object} - Preview box
 */
function parseMarkdown(editor) {
  var viewer = $("#md-viewer"); // Document preview box
  var data = editor.getValue(); // Get editor data

  // Save data to local storage
  localStorage.localData = data;
  // Parse markdown
  data = marked(data);
  viewer.html(data);

  // Highlight code in markdown document
  $("pre > code", viewer).each(function () {
    hljs.highlightBlock(this);
  });

  // Return viewer
  return viewer;
}
✨ Check Solution and Practice

Synchronize Scrolling Between Editor and Viewer

Requirements:

  • Understanding of JavaScript events.

Functionality:

  • Sync the scrolling of the editor and viewer.
/*
 * Control the scrollbar
 * Synchronize scrolling between the editor and preview box
 *
 * @params {object} editor - Editor instance
 * @params {object} viewer - Preview box
 */
function fixScrollBar(editor, viewer) {
  var session = editor.getSession();

  // Scroll to the first line by default
  session.setScrollTop(0);

  // Bind scroll event to the editor
  session.on("changeScrollTop", function () {
    var sTop = session.getScrollTop();
    // Set the scrollbar for the preview box
    viewer.scrollTop(sTop);
  });

  // Set scroll event for the preview box
  viewer.on("scroll", function () {
    var sTop = viewer.scrollTop();
    // Set the scrollbar for the editor
    session.setScrollTop(sTop);
  });
}
✨ Check Solution and Practice

Integrate All Functions and Initialize the Editor

Requirements:

  • A grasp of function calling in JavaScript.

Functionality:

  • Merge all previous steps into a unified code.
  • Initialize the editor and apply all functionalities.
/* main.js */

initEditor();

/**
 * Initialize the editor
 *
 */
function initEditor() {
  // Initialize the editor
  var editor = ace.edit("md-editor");

  editor.setTheme("ace/theme/monokai"); // Set theme style
  editor.getSession().setMode("ace/mode/markdown"); // Set editor mode
  editor.getSession().setTabSize(4); // Set Tab to 4 spaces
  editor.getSession().setUseWrapMode(true); // Enable word wrap

  // Load data from local storage
  editor.setValue(localStorage.localData || "");

  // Parse the data loaded from local storage
  var viewer = parseMarkdown(editor);
  // Control scrollbar
  fixScrollBar(editor, viewer);

  // Real-time markdown parsing
  editor.getSession().on("change", function (e) {
    parseMarkdown(editor);
  });
}
✨ Check Solution and Practice

Running the Project

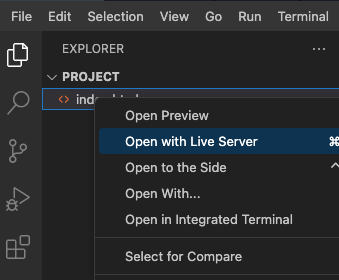
  • Open index.html in a web browser.
    open web
  • To view and test your markdown editor.
  • The effect of the page is as follows:
    effect
✨ Check Solution and Practice

Summary

Congratulations! You've just created a web-based Markdown editor with live preview functionality. Now you can write Markdown content, view its live HTML representation, and even highlight code snippets within. Remember, the content you write will persist across browser sessions thanks to localStorage. Happy coding!

Other JavaScript Tutorials you may like