Custom Docker Images

DockerDockerBeginner
Practice Now

Introduction

Docker is a popular tool for packaging and distributing applications as containers. Docker images are at the heart of this process. An image is a pre-built package that contains everything needed to run an application, including the code, dependencies, and configuration. Docker images can be downloaded from public or private registries, or created locally. In this lab, you will learn how to create custom Docker images that add value to your applications by including additional software, libraries, or configurations.


Skills Graph

%%%%{init: {'theme':'neutral'}}%%%% flowchart RL docker(("`Docker`")) -.-> docker/ContainerOperationsGroup(["`Container Operations`"]) docker(("`Docker`")) -.-> docker/ImageOperationsGroup(["`Image Operations`"]) docker(("`Docker`")) -.-> docker/DockerfileGroup(["`Dockerfile`"]) docker/ContainerOperationsGroup -.-> docker/run("`Run a Container`") docker/ImageOperationsGroup -.-> docker/images("`List Images`") docker/DockerfileGroup -.-> docker/build("`Build Image from Dockerfile`") subgraph Lab Skills docker/run -.-> lab-8196{{"`Custom Docker Images`"}} docker/images -.-> lab-8196{{"`Custom Docker Images`"}} docker/build -.-> lab-8196{{"`Custom Docker Images`"}} end

Create a Simple Docker Image

The first step is to create a simple Docker image that runs a simple web server. We will use the nginx web server as an example.

  1. Create a new directory called docker for this lab at this path /home/labex/project, and navigate to it.
cd /home/labex/project
mkdir docker
cd docker
  1. Create a new file called Dockerfile in docker directory, and add the following lines:
FROM nginx
COPY index.html /usr/share/nginx/html/

This Dockerfile defines a new image based on the official nginx image, and copies a file called index.html to the default document root directory of nginx.

  1. Create a new file called index.html in docker directory, and add some simple HTML content, such as:
<!doctype html>
<html>
  <head>
    <title>Hello Docker!</title>
  </head>
  <body>
    <h1>Hello Docker!</h1>
  </body>
</html>
  1. Build the Docker image using the following command:
cd docker
docker build -t my-nginx .

This command builds a new Docker image with the tag my-nginx.

The -t is a parameter that specifies a tag for the built image.

The . at the end of the command indicates that the Dockerfile and index.html file are located in the current directory.

View the output:

Sending build context to Docker daemon  3.584kB
Step 1/2 : FROM nginx
latest: Pulling from library/nginx
2f44b7a888fa: Pull complete
8b7dd3ed1dc3: Pull complete
35497dd96569: Pull complete
36664b6ce66b: Pull complete
2d455521f76c: Pull complete
dc9c4fdb83d6: Pull complete
8056d2bcf3b6: Pull complete
Digest: sha256:4c0fdaa8b6341bfdeca5f18f7837462c80cff90527ee35ef185571e1c327beac
Status: Downloaded newer image for nginx:latest
 ---> a8758716bb6a
Step 2/2 : COPY index.html /usr/share/nginx/html/
 ---> 2c53fed5d822
Successfully built 2c53fed5d822
Successfully tagged my-nginx:latest
  1. Verify that the image was created successfully by running the following command:
docker images

You should see the my-nginx image listed in the output.

  1. Run a container based on the new image using the following command:
docker run -p 8080:80 my-nginx

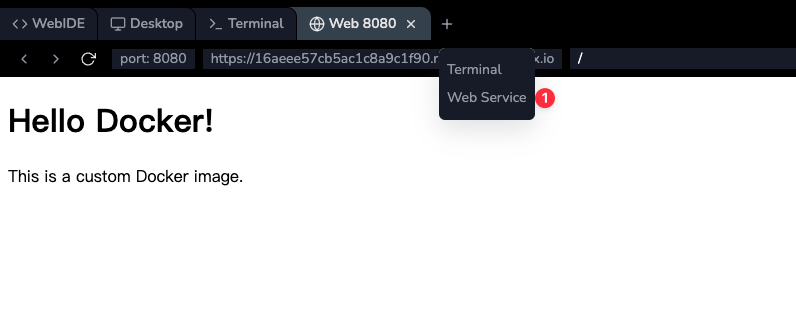
This command starts a new container based on the my-nginx image, and maps port 8080 on the host to port 80 in the container. You should be able to access the web server by navigating to http://localhost:8080 in your web browser.

  1. Open the index.html file in the container and view the result:
lab-custom-docker-images-1-1

Add Custom Software to the Image

The second step is to add custom software to the Docker image. We will use the curl utility as an example.

  1. Modify the Dockerfile to include the following lines:
FROM nginx
RUN apt-get update && apt-get install -y curl
COPY index.html /usr/share/nginx/html/

This Dockerfile adds a new RUN instruction that updates the package index and installs the curl utility using the apt-get package manager.

  1. Rebuild the Docker image using the following command:
docker build -t my-nginx-curl .

This command builds a new Docker image with the tag my-nginx-curl that includes the curl utility.

  1. Verify that the image was created successfully by running the following command:
docker images

You should see the my-nginx-curl image listed in the output.

  1. Run a container based on the new image using the following command:
docker run -d --name curl -it my-nginx-curl

-it: This is a combination of the two options, -i to run the container interactively, and -t to allocate a pseudo-terminal (tty).

This command starts a new container based on the my-nginx-curl image, and opens a Bash shell inside the container.

  1. Test the curl utility by running the following command inside the container:
docker exec -it curl bash
curl http://localhost:80

You should see the HTML content of the index.html file displayed in the console.

<!doctype html>
<html>
  <head>
    <title>Hello Docker!</title>
  </head>
  <body>
    <h1>Hello Docker!</h1>
  </body>
</html>

You can type exit to exit the container's Bash shell.

Use Environment Variables in the Image

The third step is to use environment variables in the Docker image to customize its behavior. We will use the NGINX_PORT variable as an example.

  1. Modify the Dockerfile to include the following lines:
FROM nginx
ENV NGINX_PORT 8080
RUN sed -i "s/listen\s*80;/listen $NGINX_PORT;/g" /etc/nginx/conf.d/default.conf
COPY index.html /usr/share/nginx/html/

This Dockerfile adds a new ENV instruction that sets the value of the NGINX_PORT variable to 8080. It also adds a new RUN instruction that replaces the default listen directive in the nginx configuration file with a new directive that uses the value of the NGINX_PORT variable.

  1. Rebuild the Docker image using the following command:
docker build -t my-nginx-env .

This command builds a new Docker image with the tag my-nginx-env that uses environment variables.

  1. Verify that the image was created successfully by running the following command:
docker images

You should see the my-nginx-env image listed in the output.

  1. Run a container based on the new image using the following command:
docker run -p 8080:8080 -e NGINX_PORT=8080 my-nginx-env

This command starts a new container based on the my-nginx-env image, maps port 8080 on the host to port 8080 in the container, and sets the value of the NGINX_PORT variable to 8080.

  1. Verify that the web server is running by navigating to http://localhost:8080 in your web browser.

Summary

In this lab, you learned how to create custom Docker images that add value to your applications by including additional software, libraries, or configurations. You also learned how to use environment variables to customize the behavior of Docker images. With these skills, you can create custom Docker images that meet the specific needs of your applications and deploy them easily and reliably using Docker.

Other Docker Tutorials you may like