
Introduction
Docker is a powerful tool for packaging and distributing applications as containers. At the core of this process are Docker images, which are pre-built packages containing everything needed to run an application, including the code, dependencies, and configuration. In this lab, you will learn how to create custom Docker images that enhance your applications by incorporating additional software, libraries, or configurations.
Throughout this lab, we'll be using WebIDE (VS Code) to edit files. WebIDE provides a familiar and user-friendly interface for file editing, making it easier to work with configuration files and code.
Set Up the Project Environment
Let's begin by creating a project directory and navigating to it.
Throughout this lab, we'll be using WebIDE (VS Code) to edit files. WebIDE provides a familiar and user-friendly interface for file editing, making it easier to work with configuration files and code.
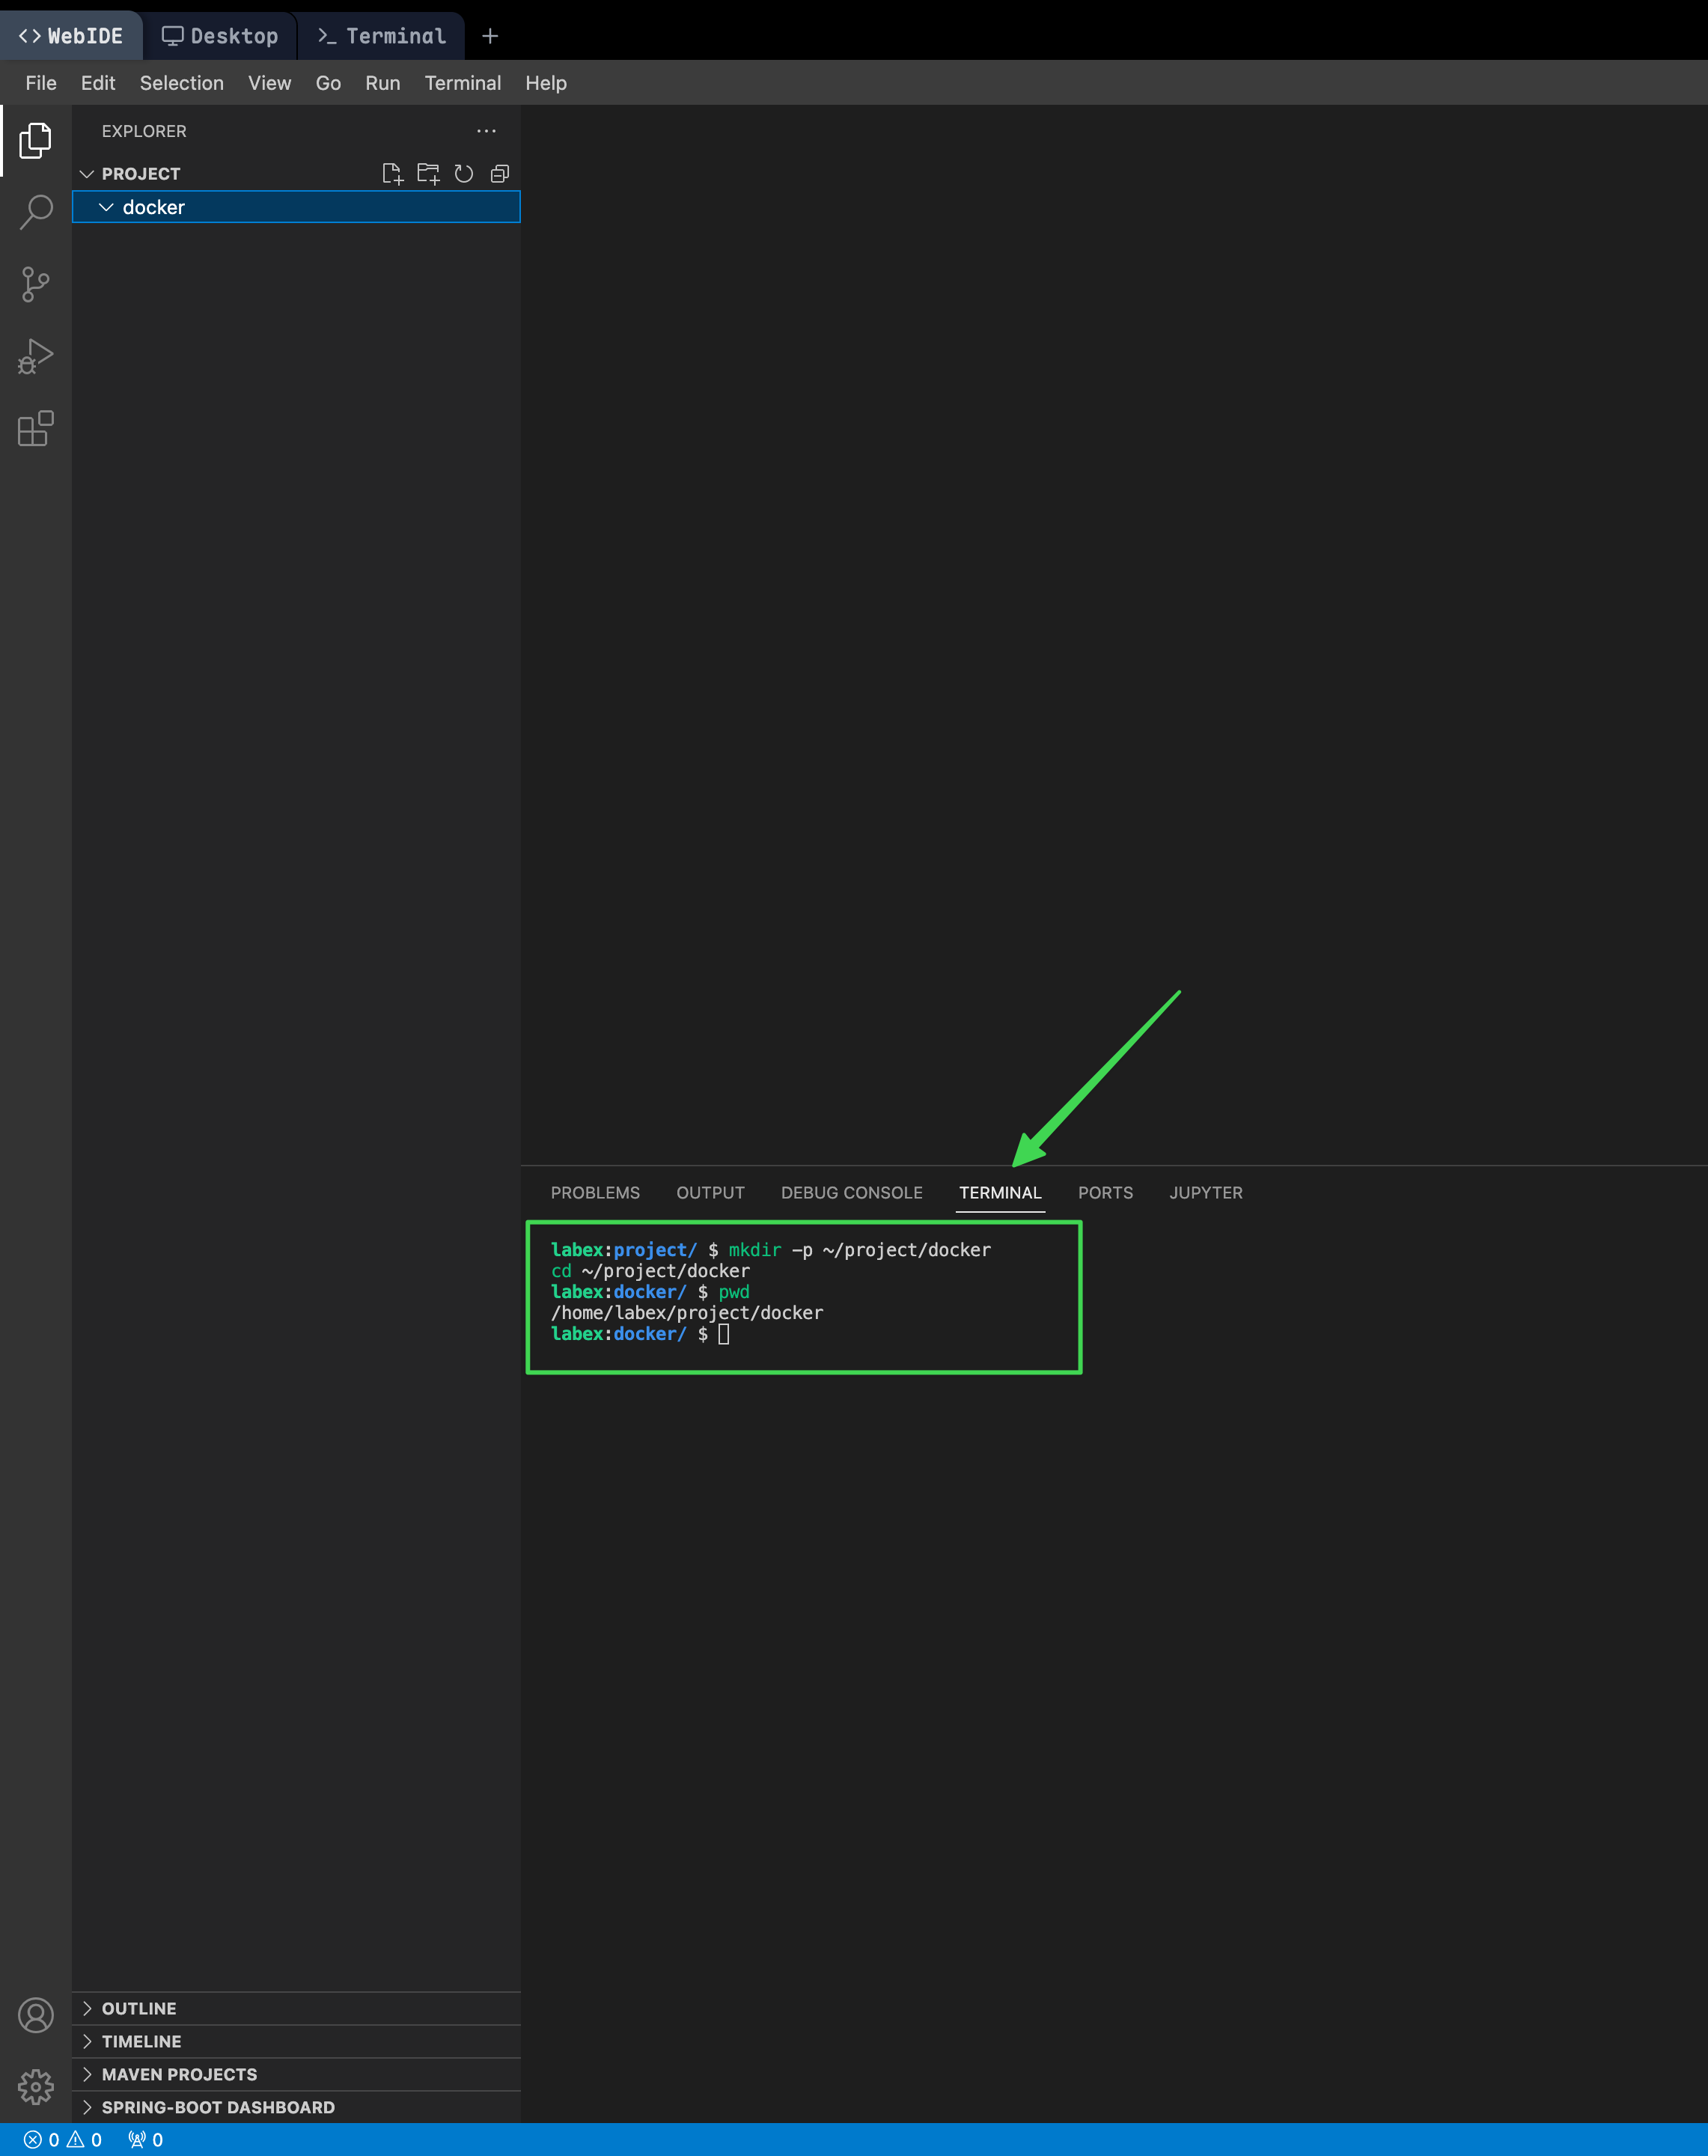
- Open a terminal in WebIDE. You can do this by clicking on "Terminal" in the top menu, then selecting "New Terminal".
- In the terminal, run the following commands:
mkdir -p ~/project/docker
cd ~/project/docker
This creates a new directory called docker in the ~/project folder and changes the current working directory to it.
- Verify that you're in the correct directory:
pwd
You should see /home/labex/project/docker as the output.
Understanding these commands:
mkdir -p: This command creates a directory. The-pflag allows it to create parent directories if they don't exist.cd: This command changes the current directory.pwd: This command prints the current working directory.
Create a Simple Docker Image
Now, let's create a simple Docker image that runs an Nginx web server.
- In WebIDE, navigate to the File Explorer (usually the first icon in the left sidebar).
- Right-click in the File Explorer pane and select "New File". Name it
Dockerfile(with a capital 'D' and no file extension). - Open the
Dockerfileby clicking on it in the File Explorer. Add the following content:
FROM nginx
COPY index.html /usr/share/nginx/html/
This Dockerfile defines a new image based on the official Nginx image and copies a file called index.html to the default document root directory of Nginx.
Understanding the Dockerfile:
FROM nginx: This line specifies the base image we're building from. In this case, we're using the official Nginx image.COPY index.html /usr/share/nginx/html/: This line copies ourindex.htmlfile into the container's web root directory.
- Create a new file called
index.htmlin the same directory. You can do this by right-clicking in the File Explorer pane again and selecting "New File". - Open
index.htmland add the following content:
<!doctype html>
<html lang="en">
<head>
<meta charset="UTF-8" />
<meta name="viewport" content="width=device-width, initial-scale=1.0" />
<title>Hello Docker!</title>
</head>
<body>
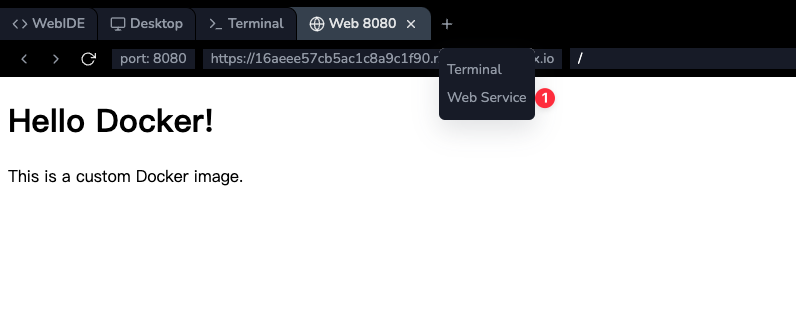
<h1>Hello Docker!</h1>
<p>This is a custom Docker image.</p>
</body>
</html>
This is a simple HTML page that will be served by our Nginx server.
- Open a terminal in WebIDE (Terminal -> New Terminal if you closed the previous one) and build the Docker image using the following command:
docker build -t my-nginx .
This command builds a new Docker image with the tag my-nginx.
Understanding the command:
docker build: This is the command to build a Docker image.-t my-nginx: The-tflag tags our image with the namemy-nginx..: This specifies the build context (the directory containing the Dockerfile) as the current directory.
- Once the build is complete, verify that the image was created successfully:
docker images
You should see the my-nginx image listed in the output.
Run and Test the Custom Image
Let's run a container based on our new image and test it.
- In the WebIDE terminal, start a container using the following command:
docker run -d -p 8080:80 --name my-nginx-container my-nginx
Understanding this command:
docker run: This command creates and starts a new container.-d: This flag runs the container in detached mode (in the background).-p 8080:80: This maps port 8080 on your host to port 80 in the container.--name my-nginx-container: This assigns a name to our container.my-nginx: This is the name of the image we're using to create the container.
- Verify that the container is running:
docker ps
You should see my-nginx-container listed in the output. This command shows all running containers.
- To view the contents of the web page, use the
curlcommand:
curl http://localhost:8080
You should see the HTML content of the index.html file displayed in the terminal.
If you're curious about what curl does, it's a tool to transfer data from or to a server. In this case, we're using it to fetch the content from our web server.
You can also navigate to the top of the LabEx VM, and click + to create a new web server, and then enter the port 8080 to view the content.
Add Custom Software to the Image
In this step, you'll modify your Docker image to include additional software. We'll add the nano text editor as an example because it is not included in the base nginx image.
- In WebIDE, open the
Dockerfile. You can do this by clicking onDockerfilein the File Explorer pane. - Modify the content of the
Dockerfileto:
FROM nginx
RUN apt-get update && apt-get install -y nano
COPY index.html /usr/share/nginx/html/
This Dockerfile adds a new RUN instruction that updates the package index and installs the nano package by using the apt-get package manager.
Understanding the new line:
RUN apt-get update && apt-get install -y nano: This line updates the package list (apt-get update) and then installsnano(apt-get install -y nano). The-yflag automatically answers "yes" to any prompts during installation.
- Save the file in WebIDE by pressing Ctrl+S (or Cmd+S on Mac).
- In the WebIDE terminal, rebuild the Docker image with a new tag:
docker build -t my-nginx-nano .
This command builds a new Docker image with the tag my-nginx-nano that includes the nano editor.
- Verify that the new image was created:
docker images
You should see the my-nginx-nano image listed in the output.
Test the Custom Image with Nano
In this step, you'll run a container based on your new image and confirm that the nano package is available inside it.
- In the WebIDE terminal, start a new container using the following command:
docker run -d --name nano-container my-nginx-nano
This command starts a new container based on the my-nginx-nano image and names it nano-container.
- Run the following command to check the installed
nanoversion inside the container:
docker exec nano-container nano --version
This command runs nano --version inside the running container so you can confirm that the package is installed.
Understanding this command:
docker exec: This runs a command in a running container.nano-container: This is the name of our container.nano --version: This prints the installednanoversion from inside the container.
- You should see output that starts with
GNU nano, which confirms that the custom image now includes the editor.
Use Environment Variables in the Image
In this step, we'll modify our Docker image to use environment variables for customization.
In WebIDE, open the
Dockerfileagain.Modify the content of the
Dockerfileto:
FROM nginx
ENV NGINX_PORT 9000
RUN sed -i "s/listen[[:space:]]*80;/listen $NGINX_PORT;/g" /etc/nginx/conf.d/default.conf
COPY index.html /usr/share/nginx/html/
This Dockerfile adds an ENV instruction that sets the NGINX_PORT variable to 9000. It also includes a RUN instruction that modifies the Nginx configuration to use this port.
Understanding the new lines:
ENV NGINX_PORT 9000: This sets an environment variableNGINX_PORTwith the value9000.RUN sed -i "s/listen[[:space:]]*80;/listen $NGINX_PORT;/g" /etc/nginx/conf.d/default.conf: This usessedto replace the default port (80) with our environment variable in the Nginx configuration file.
Save the file in WebIDE.
In the WebIDE terminal, rebuild the Docker image with a new tag:
docker build -t my-nginx-env .
- Run a container based on the new image:
docker run -d -p 9000:9000 --name env-container my-nginx-env
This command starts a new container based on the my-nginx-env image and maps port 9000 on the host to port 9000 in the container. Note that the environment variable is already set in the Dockerfile, so it's not necessary to set it again in the docker run command.
- Verify that the web server is running on the specified port:
curl http://localhost:9000
You should see the HTML content of the index.html file displayed in the terminal.
Use ENTRYPOINT in Dockerfile
In this step, we'll learn how to use the ENTRYPOINT instruction in a Dockerfile and use a different port (9100).
In WebIDE, open the
Dockerfileagain.Modify the content of the
Dockerfileto:
FROM nginx
COPY index.html /usr/share/nginx/html/
COPY start.sh /start.sh
RUN chmod +x /start.sh
ENTRYPOINT ["/start.sh"]
This Dockerfile removes the environment variable and sed command. Instead, we'll handle the configuration at runtime using an ENTRYPOINT script. This makes our image more flexible.
- Create a new file named
start.shin the same directory with the following content:
#!/bin/bash
## Set a default port if NGINX_PORT is not set
export NGINX_PORT=${NGINX_PORT:-9100}
## Replace the port in the nginx configuration
sed -i "s/listen[[:space:]]*80;/listen $NGINX_PORT;/g" /etc/nginx/conf.d/default.conf
echo "Starting Nginx on port $NGINX_PORT"
nginx -g 'daemon off;'
This script sets a default port, modifies the Nginx configuration at container startup, prints a message showing which port Nginx will run on, and then starts Nginx.
Save both files in WebIDE.
In the WebIDE terminal, rebuild the Docker image with a new tag:
docker build -t my-nginx-entrypoint .
- Run a container based on the new image. We'll set the port to 9100 using an environment variable.
docker run -d -p 9100:9100 -e NGINX_PORT=9100 --name entrypoint-container my-nginx-entrypoint
- Check the container logs to see the startup message:
docker logs entrypoint-container
You should see the message "Starting Nginx on port 9100" in the output.
- Verify that the web server is running correctly on the new port:
curl http://localhost:9100
You should see the HTML content of the index.html file displayed in the terminal.
Summary
In this lab, you have learned how to create custom Docker images that add value to your applications. You started by creating a simple image with a web server, then progressed to adding custom software and using environment variables for configuration. Throughout the lab, you've used WebIDE (VS Code) to edit files, making the process more intuitive and user-friendly.
Here's a recap of what you've accomplished:
- Set up a project environment and learned basic terminal commands.
- Created a simple Docker image with Nginx and a custom HTML page.
- Built and ran Docker containers, learning about port mapping and container naming.
- Modified a Docker image to include additional software (curl).
- Used Docker exec to run commands inside a container.
- Incorporated environment variables into your Docker image for easier configuration.


