
Introduction
In this project, you will learn how to create a seating arrangement for a movie theater using CSS. The goal is to design a layout that includes a screen and a seating area with specific spacing requirements.
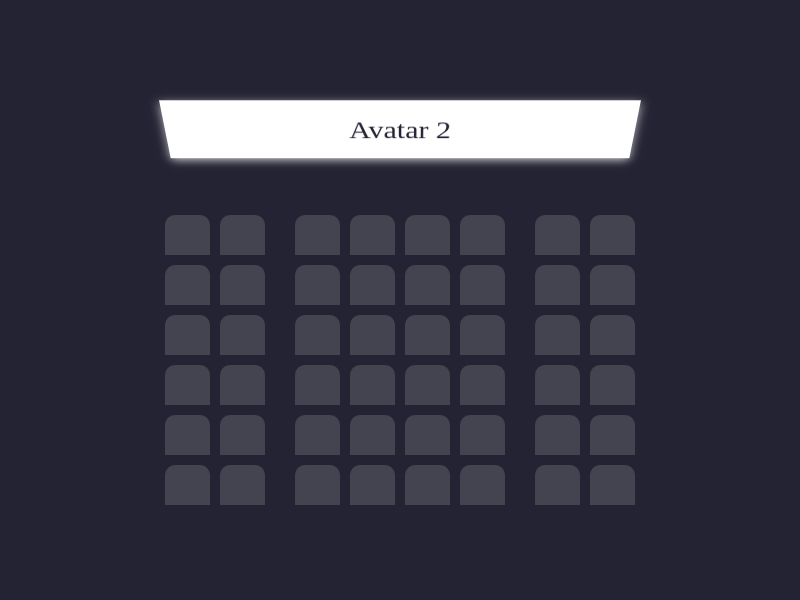
👀 Preview
🎯 Tasks
In this project, you will learn:
- How to set up the seating area with the required number of seats and spacing between them
- How to add the screen to the layout and separate it from the seating area
- How to apply CSS styles to achieve the desired visual appearance of the movie theater layout
🏆 Achievements
After completing this project, you will be able to:
- Use CSS to create a flexible layout for the seating area
- Position and style the screen element
- Apply specific spacing rules to achieve the desired layout
- Demonstrate your skills in designing and implementing complex layout structures, which is an essential skill for web development
Set Up the Project
In this step, you will set up the project files and structure. Follow the steps below to complete this step:
Open the project folder, which contains the following files and directories:
├── css
│   └── style.css
└── index.html
Here:
index.htmlis the main page.css/style.cssis the file where you need to add the required styles.
Click on Go Live button in the bottom right corner of WebIDE, to run the project.
Next, open "Web 8080" on the top of the VM and refresh it manually and you will see the page.
Add the Screen
In this step, you will learn how to add the screen to the movie theater layout. Follow the steps below to complete this step:
Open the
css/style.cssfile in your code editor.Inside the
.screenclass, add the following CSS properties:.screen { background-color: #fff; height: 70px; width: 100%; transform: rotateX(-45deg); box-shadow: 0 3px 10px rgba(255, 255, 255, 0.7); color: #242333; text-align: center; line-height: 70px; font-size: 30px; }This will style the screen, setting its size, color, and adding a 3D rotation effect and a drop shadow.
Set Up the Seating Area
In this step, you will learn how to set up the seating area for the movie theater. Follow the steps below to complete this step:
Open the
css/style.cssfile in your code editor.Inside the
.seat-areaclass, add the following CSS properties:.seat-area { display: flex; flex-wrap: wrap; margin-top: 40px; }This will create a flexible layout for the seating area, with the seats arranged in rows.
Next, target the
.seatclass and add the following CSS properties:.seat { background-color: #444451; height: 40px; width: 45px; border-top-left-radius: 10px; border-top-right-radius: 10px; margin-right: 10px; margin-top: 10px; }This will style the individual seats, setting their size, color, and adding rounded corners.
To create the desired spacing between the seats, add the following CSS rules:
.seat:nth-child(8n + 2) {
  margin-right: 30px;
}

.seat:nth-child(8n + 6) {
  margin-right: 30px;
}

.seat:nth-child(8n + 0) {
  margin-right: 0;
}
This will add a 30px gap on the right side of the 2nd and 6th columns (adjacent to the aisles), and a 10px gap between the other seats.
Your movie theater layout is now complete! Refresh the browser window that is displaying the web page. The finished result is as follows:
Summary
Congratulations! You have completed this project. You can practice more labs in LabEx to improve your skills.


