
Introduction
In this challenge, you will take on the role of a junior cybersecurity analyst at SecureNet tasked with monitoring encrypted web traffic on your organization's network. Your objective is to create a custom colorizing rule in Wireshark that highlights all HTTPS traffic (TCP port 443) with a green background and black text, making secure web connections easily identifiable during packet analysis.
This hands-on exercise will guide you through launching Wireshark, accessing the Coloring Rules dialog, creating and configuring a new rule named 'Secure Web Traffic', and finally exporting your customized colorizing rules to a file. By completing this challenge, you'll enhance your ability to quickly identify secure communications in network traffic—a crucial skill for effective cybersecurity monitoring.
Create HTTPS Traffic Detector
As a junior cybersecurity analyst at SecureNet, you've been tasked with monitoring encrypted web traffic on your organization's network. Your supervisor wants you to quickly identify HTTPS connections during packet analysis to ensure secure communications are properly established.
Tasks
- Create a new colorizing rule in Wireshark named "Secure Web Traffic" that highlights all HTTPS traffic using tcp.port == 443 as the filter with green background and black text
Requirements
- Launch Wireshark from the terminal using the
wiresharkcommand - Access the Coloring Rules from the View menu
- Create a new colorizing rule with the following specifications:
- Name:
Secure Web Traffic - Filter expression:
tcp.port == 443 - Background color: Green
- Foreground (text) color: Black
- Name:
- Enable the new colorizing rule by checking its checkbox
- Export the colorizing rules to a file named
secure_web_rule.txtin the/home/labex/projectdirectory
Examples
When properly configured, your new colorizing rule should appear in the Wireshark looks like this:
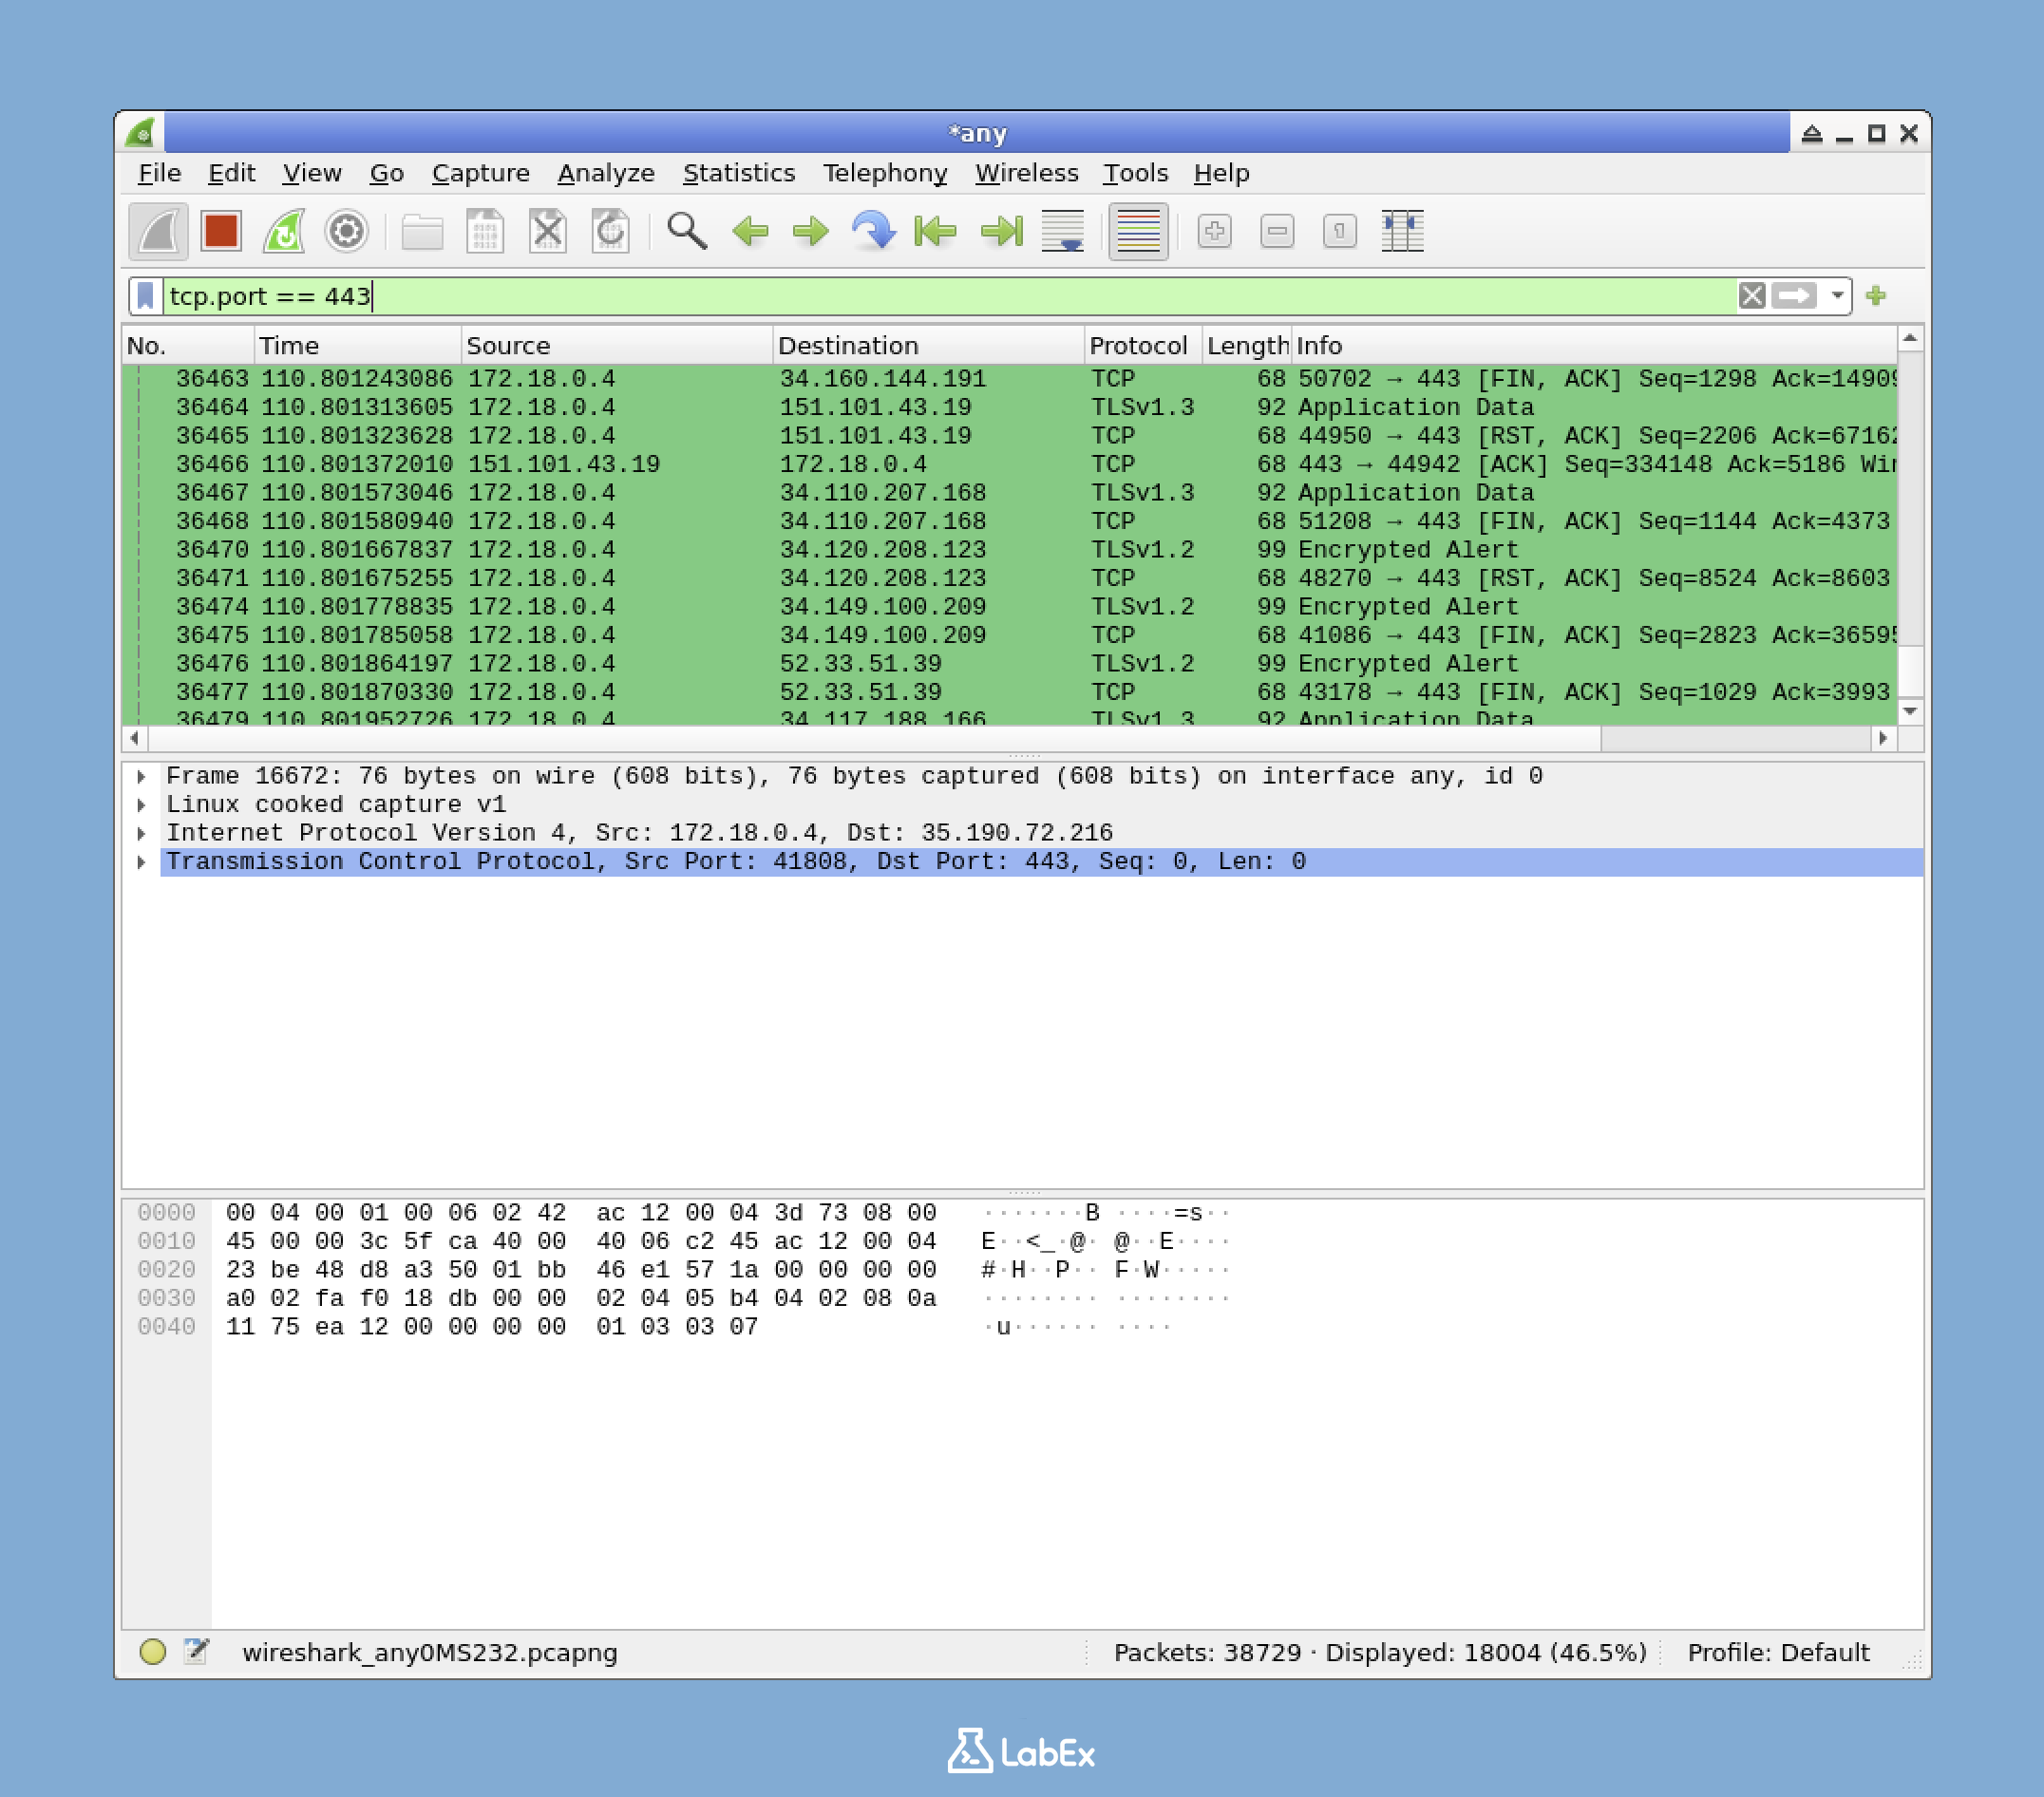
After applying this rule, all HTTPS traffic (TCP port 443) in your packet captures will be highlighted with green background and black text, making it easy to identify secure web connections.
Hints
- To open the Coloring Rules dialog, go to the View menu and select "Coloring Rules..."
- When creating a new rule, use the "+" button to add a new entry
- To set the colors, click on the buttons labeled "Foreground" and "Background"
- Remember to check the checkbox next to your new rule to enable it
- To export rules, click the "Export..." button in the Coloring Rules dialog
- Make sure to save the exported file with the exact name specified in the requirements
Summary
In this challenge, I created a custom colorizing rule in Wireshark to identify HTTPS traffic on a network. The task required launching Wireshark, accessing the Coloring Rules dialog from the View menu, and creating a new rule named "Secure Web Traffic" that uses the filter expression "tcp.port == 443" with green background and black text colors.
The practical exercise demonstrated how security analysts can visually highlight specific types of network traffic for easier identification during packet analysis. After configuring and enabling the rule, I exported the colorizing rules to a file named "secure_web_rule.txt" in the specified project directory, completing the implementation of a visual HTTPS traffic detector that makes secure web connections immediately recognizable during network monitoring.

