Database Management Fundamentals

MySQLMySQLBeginner
Practice Now

Introduction

In this lab, we will explore the fundamental concepts of database management using MySQL. We'll cover creating and dropping databases, selecting databases, and retrieving metadata. These skills are essential for anyone working with databases, from beginners to experienced developers. By the end of this lab, you'll have a solid foundation in basic MySQL database operations.

Learning Objectives

By completing this lab, you will be able to:

  • Create and drop databases using various methods
  • Select and switch between databases
  • Retrieve important metadata about your MySQL server and databases
  • Understand the case-sensitivity of database names in MySQL

Skills Graph

%%%%{init: {'theme':'neutral'}}%%%% flowchart RL linux(("`Linux`")) -.-> linux/FileandDirectoryManagementGroup(["`File and Directory Management`"]) linux(("`Linux`")) -.-> linux/BasicFileOperationsGroup(["`Basic File Operations`"]) mysql(("`MySQL`")) -.-> mysql/SystemManagementToolsGroup(["`System Management Tools`"]) mysql(("`MySQL`")) -.-> mysql/DatabaseFunctionsandDataTypesGroup(["`Database Functions and Data Types`"]) sql(("`SQL`")) -.-> sql/BasicSQLCommandsGroup(["`Basic SQL Commands`"]) mysql(("`MySQL`")) -.-> mysql/BasicKeywordsandStatementsGroup(["`Basic Keywords and Statements`"]) linux/FileandDirectoryManagementGroup -.-> linux/cd("`Directory Changing`") linux/BasicFileOperationsGroup -.-> linux/touch("`File Creating/Updating`") mysql/SystemManagementToolsGroup -.-> mysql/mysqladmin("`Admin Utility`") mysql/DatabaseFunctionsandDataTypesGroup -.-> mysql/database("`DB Function - Info Retrieval`") sql/BasicSQLCommandsGroup -.-> sql/select("`SELECT statements`") mysql/BasicKeywordsandStatementsGroup -.-> mysql/select("`Data Retrieval`") mysql/BasicKeywordsandStatementsGroup -.-> mysql/use_database("`Database Selection`") mysql/BasicKeywordsandStatementsGroup -.-> mysql/create_database("`Database Creation`") mysql/BasicKeywordsandStatementsGroup -.-> mysql/drop_database("`Database Deletion`") subgraph Lab Skills linux/cd -.-> lab-391537{{"`Database Management Fundamentals`"}} linux/touch -.-> lab-391537{{"`Database Management Fundamentals`"}} mysql/mysqladmin -.-> lab-391537{{"`Database Management Fundamentals`"}} mysql/database -.-> lab-391537{{"`Database Management Fundamentals`"}} sql/select -.-> lab-391537{{"`Database Management Fundamentals`"}} mysql/select -.-> lab-391537{{"`Database Management Fundamentals`"}} mysql/use_database -.-> lab-391537{{"`Database Management Fundamentals`"}} mysql/create_database -.-> lab-391537{{"`Database Management Fundamentals`"}} mysql/drop_database -.-> lab-391537{{"`Database Management Fundamentals`"}} end

Creating and Listing Databases

In this step, we'll learn how to create databases and list existing ones using the MySQL command-line client. This is a fundamental skill for any database administrator or developer.

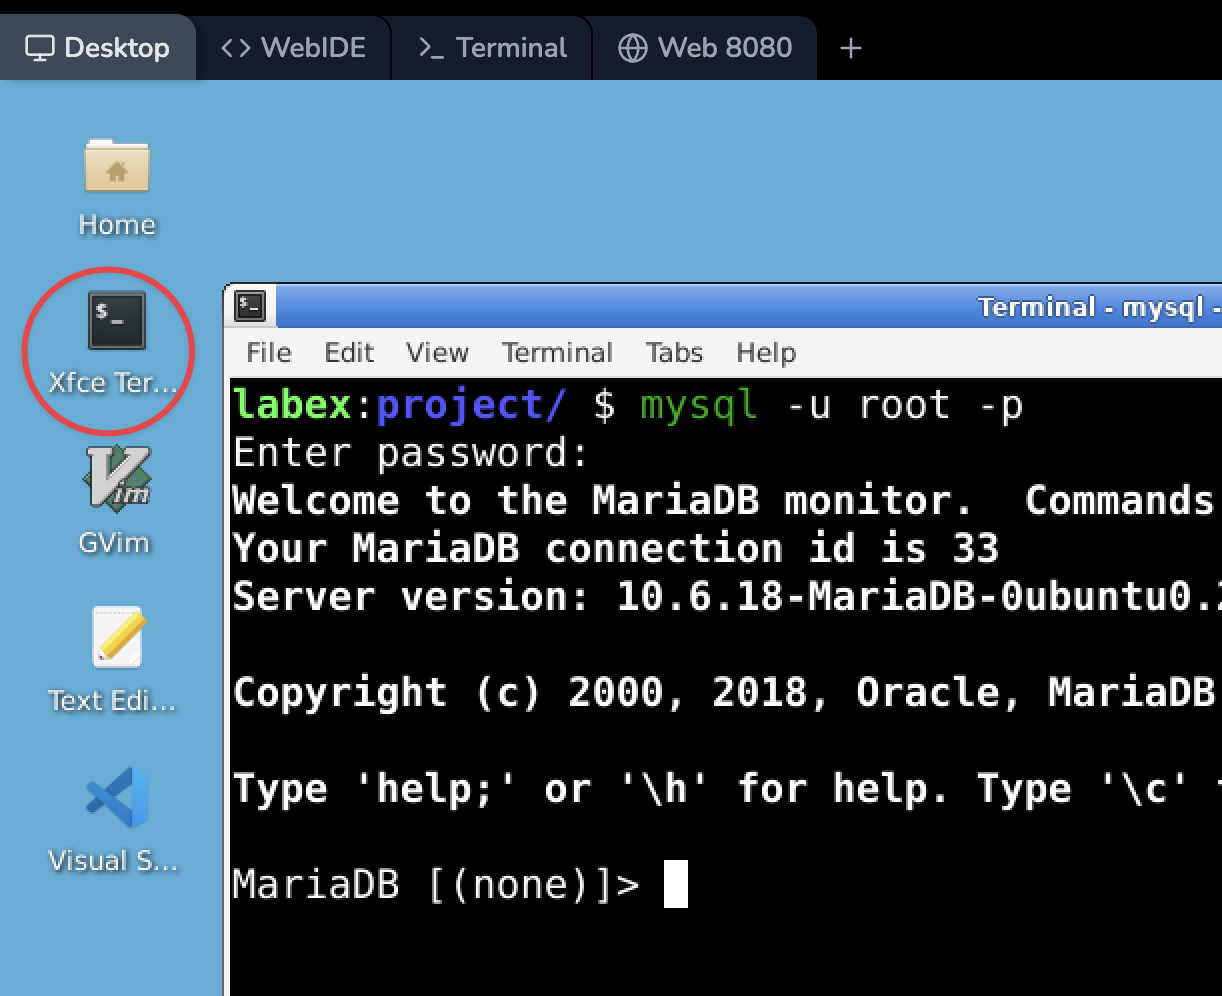
First, let's open a terminal window. In the LabEx environment, you'll be using a Ubuntu Linux system. The terminal should already be open, but if it's not, you can open it by clicking on the terminal icon.

Now, let's start the MySQL client:

mysql -u root -p

Press Enter. In the LabEx VM, you don't need to enter a password, so just press Enter again when prompted. This is a special setup for this lab environment - in a real-world scenario, you would typically need to enter a password for the root user.

alt text

Once you're in the MySQL client, you'll see a prompt that looks like this: MariaDB [(none)]>. This indicates that you're connected to the MariaDB server (which is a fork of MySQL) but haven't selected a specific database yet.

Listing Available Databases

Let's start by listing the available databases on your MySQL server:

SHOW DATABASES;

You should see output similar to this:

MariaDB [(none)]> SHOW DATABASES;
+--------------------+
| Database           |
+--------------------+
| information_schema |
| mysql              |
| performance_schema |
| sys                |
+--------------------+
4 rows in set (0.000 sec)

This command lists all the databases currently available on the server. Let's break down what these default databases are:

  • information_schema: A database that provides access to database metadata.
  • mysql: The system database that contains user account and privilege information.
  • performance_schema: A database for monitoring MySQL Server execution at a low level.
  • sys: A database that provides a set of objects to help interpret data collected by the Performance Schema.

Creating a Database

Now, let's create a new database called 'Hello_World'. In MySQL, we use the CREATE DATABASE command for this:

CREATE DATABASE Hello_World;

After executing this command, MySQL will respond with:

Query OK, 1 row affected (0.000 sec)

This means the database was successfully created. To confirm, let's list the databases again:

SHOW DATABASES;

You should now see 'Hello_World' in the list:

MariaDB [(none)]> SHOW DATABASES;
+--------------------+
| Database           |
+--------------------+
| Hello_World        |
| information_schema |
| mysql              |
| performance_schema |
| sys                |
+--------------------+
5 rows in set (0.000 sec)

Great! You've just created your first database.

Case-Sensitivity of Database Names

An important concept to understand in MySQL is that database names are case-sensitive. This means that 'Hello_World' and 'hello_world' are treated as two different databases. Let's demonstrate this:

CREATE DATABASE hello_world;
SHOW DATABASES;

You should now see both 'Hello_World' and 'hello_world' in the list:

MariaDB [(none)]> CREATE DATABASE hello_world;
Query OK, 1 row affected (0.000 sec)

MariaDB [(none)]> SHOW DATABASES;
+--------------------+
| Database           |
+--------------------+
| Hello_World        |
| hello_world        |
| information_schema |
| mysql              |
| performance_schema |
| sys                |
+--------------------+
6 rows in set (0.000 sec)

This demonstrates that 'Hello_World' and 'hello_world' are treated as two distinct databases. In your database designs, it's generally a good practice to use consistent naming conventions to avoid confusion. Many developers prefer to use all lowercase letters for database names to avoid potential case-sensitivity issues.

Creating Databases Using mysqladmin

In this step, we'll explore an alternative method to create databases using the mysqladmin tool. This tool is a command-line utility that allows you to perform some administrative operations without entering the MySQL prompt.

First, let's exit the MySQL client. You can do this by typing exit or quit and pressing Enter:

exit

Now that we're back at the regular command prompt, let's use mysqladmin to create a new database:

mysqladmin -u root -p create hello_world2

When prompted for a password, just press Enter (remember, in the LabEx VM, the root MySQL user doesn't have a password set).

The mysqladmin command we just used breaks down like this:

  • -u root: This specifies that we're connecting as the root user.
  • -p: This tells mysqladmin to prompt for a password.
  • create: This is the operation we're performing.
  • hello_world2: This is the name of the database we're creating.

Now, let's log back into the MySQL client to verify that our new database was created:

mysql -u root -p

Once you're in the MySQL client, list the databases:

SHOW DATABASES;

You should see 'hello_world2' in the list:

MariaDB [(none)]> SHOW DATABASES;
+--------------------+
| Database           |
+--------------------+
| Hello_World        |
| hello_world        |
| hello_world2       |
| information_schema |
| mysql              |
| performance_schema |
| sys                |
+--------------------+
7 rows in set (0.000 sec)

The mysqladmin tool provides a quick way to create databases directly from the command line, which can be useful for scripting and automation tasks. It's particularly handy when you need to create databases as part of a larger script or automated process.

Dropping Databases

Now that we've created several databases, let's learn how to remove them. In database management, it's just as important to know how to remove databases as it is to create them. We'll keep only the 'Hello_World' database and remove the others.

Dropping a Database Using the MySQL Client

Log into the MySQL client if you're not already there:

mysql -u root -p

Remember to just press Enter when prompted for a password.

Now, let's drop the 'hello_world' database:

DROP DATABASE hello_world;
SHOW DATABASES;

You should see that 'hello_world' is no longer in the list:

MariaDB [(none)]> DROP DATABASE hello_world;
Query OK, 0 rows affected (0.002 sec)

MariaDB [(none)]> SHOW DATABASES;
+--------------------+
| Database           |
+--------------------+
| Hello_World        |
| hello_world2       |
| information_schema |
| mysql              |
| performance_schema |
| sys                |
+--------------------+
6 rows in set (0.000 sec)

Note: Be extremely cautious when using the DROP DATABASE command. It permanently deletes the database and all its contents without asking for confirmation. In a production environment, you would typically have safeguards and backups in place before performing such operations.

Dropping a Database Using mysqladmin

Now, let's use mysqladmin to drop the 'hello_world2' database. This method is considered safer because it prompts for confirmation before dropping the database.

Exit the MySQL client by typing exit or quit, then run the following command in your terminal:

mysqladmin -u root -p drop hello_world2

You'll be prompted to confirm the action:

Enter password:
Dropping the database is potentially a very bad thing to do.
Any data stored in the database will be destroyed.

Do you really want to drop the 'hello_world2' database [y/N] y
Database "hello_world2" dropped

Type 'y' and press Enter to confirm. This extra confirmation step can help prevent accidental database deletions.

Now, log back into the MySQL client and verify that 'hello_world2' has been removed:

SHOW DATABASES;

You should see:

MariaDB [(none)]> SHOW DATABASES;
+--------------------+
| Database           |
+--------------------+
| Hello_World        |
| information_schema |
| mysql              |
| performance_schema |
| sys                |
+--------------------+
5 rows in set (0.000 sec)

We've successfully cleaned up our extra databases, leaving only the ones we need.

Selecting and Using Databases

Now that we've created and dropped databases, let's learn how to select and use a specific database. This is a crucial skill, as most of your work in MySQL will involve operating within a specific database.

Selecting a Database

To select a database to work with, use the USE command followed by the database name:

USE Hello_World;

You should see:

Database changed

This indicates that you're now working within the 'Hello_World' database. Any subsequent commands you run will be executed in the context of this database unless you specify otherwise.

Listing Tables in a Database

To see the tables in the current database, use the SHOW TABLES; command:

SHOW TABLES;

Since we haven't created any tables yet in our 'Hello_World' database, you'll see:

Empty set (0.00 sec)

This is normal for a new database. As you create tables, they will appear in this list.

Let's switch to a different database and list its tables to see how this works with a populated database:

USE mysql;
SHOW TABLES;

You'll see a list of tables in the 'mysql' system database:

MariaDB [mysql]> USE mysql;
Reading table information for completion of table and column names
You can turn off this feature to get a quicker startup with -A

Database changed
MariaDB [mysql]> SHOW TABLES;
+---------------------------+
| Tables_in_mysql           |
+---------------------------+
| column_stats              |
| columns_priv              |
| db                        |
| event                     |
| func                      |
| general_log               |
| global_priv               |
| gtid_slave_pos            |
| help_category             |
| help_keyword              |
| help_relation             |
| help_topic                |
| index_stats               |
| innodb_index_stats        |
| innodb_table_stats        |
| plugin                    |
| proc                      |
| procs_priv                |
| proxies_priv              |
| roles_mapping             |
| servers                   |
| slow_log                  |
| table_stats               |
| tables_priv               |
| time_zone                 |
| time_zone_leap_second     |
| time_zone_name            |
| time_zone_transition      |
| time_zone_transition_type |
| transaction_registry      |
| user                      |
+---------------------------+
31 rows in set (0.001 sec)

This demonstrates how to switch between databases and view their contents. The 'mysql' database contains system tables that MySQL uses to manage permissions, user accounts, and other internal data. In your own applications, you'll create and manage your own tables within your custom databases.

Retrieving MySQL Metadata

In this final step, we'll explore how to retrieve various types of metadata from MySQL. Metadata is "data about data" - it provides information about the database system itself, rather than the data stored within it. This information can be crucial for understanding and managing your MySQL environment.

Server Version

To get the MySQL server version, use:

SELECT VERSION();

You'll see output similar to:

MariaDB [mysql]> SELECT VERSION();
+----------------------------------+
| VERSION()                        |
+----------------------------------+
| 10.6.12-MariaDB-0ubuntu0.22.04.1 |
+----------------------------------+
1 row in set (0.000 sec)

This information is useful when you need to know which features are available in your current MySQL version, or when troubleshooting version-specific issues.

Current Database

To see which database you're currently using:

SELECT DATABASE();

The output will show the current database name or NULL if no database is selected:

MariaDB [mysql]> SELECT DATABASE();
+------------+
| DATABASE() |
+------------+
| mysql      |
+------------+
1 row in set (0.000 sec)

This can be helpful when you're working with multiple databases and need to confirm which one you're currently operating in.

Current User

To see the current user:

SELECT USER();

You'll see output like:

MariaDB [mysql]> SELECT USER();
+----------------+
| USER()         |
+----------------+
| root@localhost |
+----------------+
1 row in set (0.000 sec)

This shows the MySQL user you're logged in as and the host you're connecting from. It's useful for verifying your current permissions and connection details.

Server Status and Variables

To view all server status indicators:

SHOW STATUS;

This command provides a wealth of information about the current state of the MySQL server, including various counters and statistics.

To view all server configuration variables:

SHOW VARIABLES;

This command shows you how your MySQL server is configured, including settings for memory usage, connection limits, and many other parameters.

Both of these commands will produce extensive output. You can scroll through it in the terminal, or you can filter for specific information. For example, to see variables related to the buffer pool:

SHOW VARIABLES LIKE '%buffer%';

These commands provide extensive information about your MySQL server's configuration and current state. Understanding this metadata can be crucial for optimizing performance, troubleshooting issues, and ensuring your server is configured correctly for your needs.

For example, you might use SHOW STATUS to check the number of queries that have been executed:

SHOW STATUS LIKE 'Questions';

This could give you output like:

MariaDB [mysql]> SHOW STATUS LIKE 'Questions';
+---------------+-------+
| Variable_name | Value |
+---------------+-------+
| Questions     | 15    |
+---------------+-------+
1 row in set (0.001 sec)

This tells you how many statements have been executed by the server since it was started.

Similarly, you might use SHOW VARIABLES to check important configuration settings like the maximum allowed packet size:

SHOW VARIABLES LIKE 'max_allowed_packet';

Which might give output like:

MariaDB [mysql]> SHOW VARIABLES LIKE 'max_allowed_packet';
+--------------------+----------+
| Variable_name      | Value    |
+--------------------+----------+
| max_allowed_packet | 16777216 |
+--------------------+----------+
1 row in set (0.001 sec)

This shows the maximum size of one packet or any generated/intermediate string, which can be important when working with large amounts of data.

Understanding how to retrieve and interpret this metadata is a valuable skill for any database administrator or developer. It allows you to gain insights into your database system's behavior and performance, which can be crucial for optimization and troubleshooting.

Summary

In this lab, we've covered fundamental aspects of database management in MySQL:

  1. Creating databases using both the MySQL client and the mysqladmin tool
  2. Listing existing databases and understanding their purposes
  3. Understanding the case-sensitivity of database names in MySQL
  4. Dropping databases safely and the importance of caution when doing so
  5. Selecting and switching between databases
  6. Retrieving important metadata about the MySQL server and databases

These skills form the foundation of working with MySQL databases. As you progress in your database journey, you'll build upon these basics to perform more complex database operations and management tasks.

Other MySQL Tutorials you may like