Introduction
In this project, you will learn how to configure a Spring Boot application using a YAML file, implement a class to handle the configuration data, and create a controller to display the configured information on a web page.
👀 Preview
🎯 Tasks
In this project, you will learn:
- How to configure the application properties using a YAML file
- How to implement a
Studentclass to handle the configuration data - How to create a
StudentControllerto display the configured data on a web page - How to modify the startup class to scan all classes in the project package
🏆 Achievements
After completing this project, you will be able to:
- Use YAML files for application configuration
- Use the
@ConfigurationPropertiesannotation to automatically bind configuration data to a class - Use the
@Valueannotation to inject configuration values into a controller - Use the
@SpringBootApplicationannotation to configure component scanning - Develop a simple web application that displays the configured data
Configure the YAML File
In this step, you will learn how to configure the application properties using a YAML file. Follow the steps below to complete this step:
- Navigate to the
src/main/resourcesdirectory in your project. - Create a new file named
application.yml. - In the
application.ymlfile, add the following configuration:
## Self-defined properties
school: Stanford University

student:
  id: 2024000103
  name: Taylor Joy
  age: 18
  courseId: 100018, 321001, 458911
This YAML configuration defines the school property and the student properties, including the student ID, name, age, and course IDs.
Implement the Student Class
In this step, you will implement the Student class to handle the configuration data.
- Navigate to the
org.labex.entitypackage and create a new file namedStudent.java. - In the
Student.javafile, add the following code:
package org.labex.entity;

import org.springframework.boot.context.properties.ConfigurationProperties;
import org.springframework.stereotype.Component;

import java.util.Arrays;

@Component
@ConfigurationProperties(prefix = "student")
public class Student {
    private String id;
    private String name;
    private int age;
    private int[] courseId;

    @Override
    public String toString() {
        return "Student {id=" + id +
                ", name=" + name +
                ", age=" + age +
                ", course id=" + Arrays.toString(courseId) + "}";
    }

    // Getters and setters
    // ...
}
In this class, we use the @Component and @ConfigurationProperties annotations to automatically bind the properties from the application.yml file to the corresponding fields in the Student class.
Implement the StudentController
In this step, you will implement the StudentController to display the configured data.
- Navigate to the
org.labex.controllerpackage and create a new file namedStudentController.java. - In the
StudentController.javafile, add the following code:
package org.labex.controller;

import org.labex.entity.Student;
import org.springframework.beans.factory.annotation.Autowired;
import org.springframework.beans.factory.annotation.Value;
import org.springframework.web.bind.annotation.GetMapping;
import org.springframework.web.bind.annotation.RestController;

@RestController
public class StudentController {
    @Value("${school}")
    private String school;

    @Autowired
    private Student student;

    @GetMapping("/student")
    public String getStudent() {
        return "school=" + school + student.toString();
    }
}
In this controller, we use the @Value annotation to inject the school property, and the @Autowired annotation to inject the Student object. The getStudent() method will display the configured data on the browser when accessed via the /student endpoint.
Modify the Startup Class
In this step, you will modify the startup class to scan all classes in the org.labex package.
- Navigate to the
org.labex.springbootyamlpackage and open theDemoApplication.javafile. - Update the
DemoApplicationclass as follows:
package org.labex.springbootyaml;

import org.springframework.boot.SpringApplication;
import org.springframework.boot.autoconfigure.SpringBootApplication;

@SpringBootApplication(scanBasePackages="org.labex")
public class DemoApplication {
    public static void main(String[] args) {
        SpringApplication.run(DemoApplication.class, args);
    }
}
By adding scanBasePackages="org.labex" to the @SpringBootApplication annotation, we ensure that all classes in the org.labex package are scanned and managed by the Spring context.
Package and Run the Application
In this final step, you will package the application into a JAR file and run the Spring Boot service.
- Open a terminal and navigate to the root directory of your project using the following command:
cd ~/project/springbootyaml/
- Run the following commands to package and start the Spring Boot service:
mvn clean package
mvn spring-boot:run
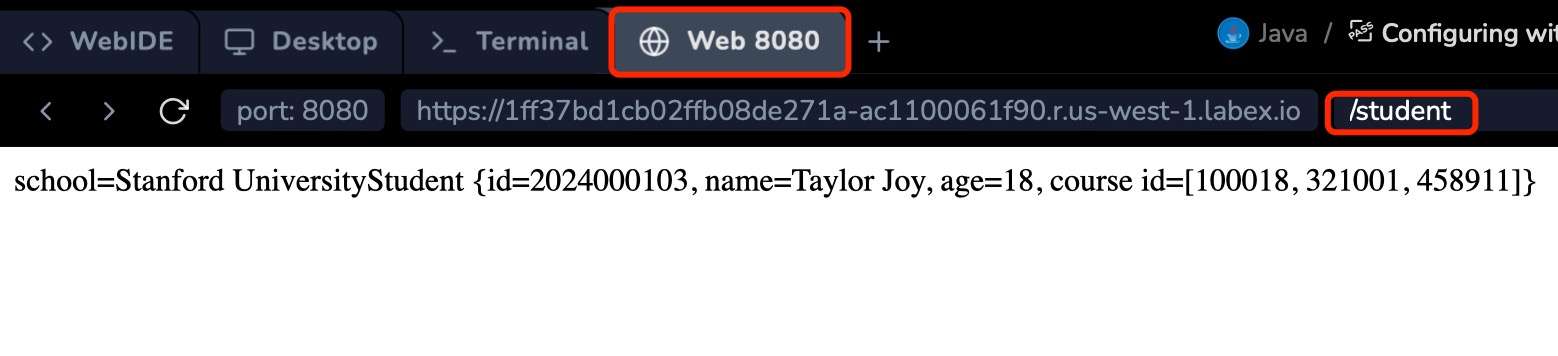
- Once the service is running, open a web browser and navigate to
http://localhost:8080/student. You should see the configured school and student information displayed on the page.
The output should look like this:
Congratulations! You have successfully completed the project by configuring the application using a YAML file, implementing the necessary classes, and running the Spring Boot service.
Summary
Congratulations! You have completed this project. You can practice more labs in LabEx to improve your skills.