Cyber Filter Mastery Quest

CybersecurityCybersecurityBeginner
Practice Now

Introduction

In this lab, you will learn how to use Wireshark capture filters to selectively capture network traffic based on specific criteria. Capture filters are powerful tools that allow you to focus on relevant data and discard irrelevant traffic, making your analysis more efficient and effective. You will explore various capture filter expressions and apply them to real-world scenarios, enhancing your skills in network troubleshooting and security analysis.


Skills Graph

%%%%{init: {'theme':'neutral'}}%%%% flowchart RL cybersecurity(("`Cybersecurity`")) -.-> cybersecurity/WiresharkGroup(["`Wireshark`"]) cybersecurity/WiresharkGroup -.-> cybersecurity/ws_capture_filters("`Wireshark Capture Filters`") subgraph Lab Skills cybersecurity/ws_capture_filters -.-> lab-415940{{"`Cyber Filter Mastery Quest`"}} end

Understand Capture Filter Syntax

In this step, you will learn the basic syntax for creating capture filters in Wireshark.

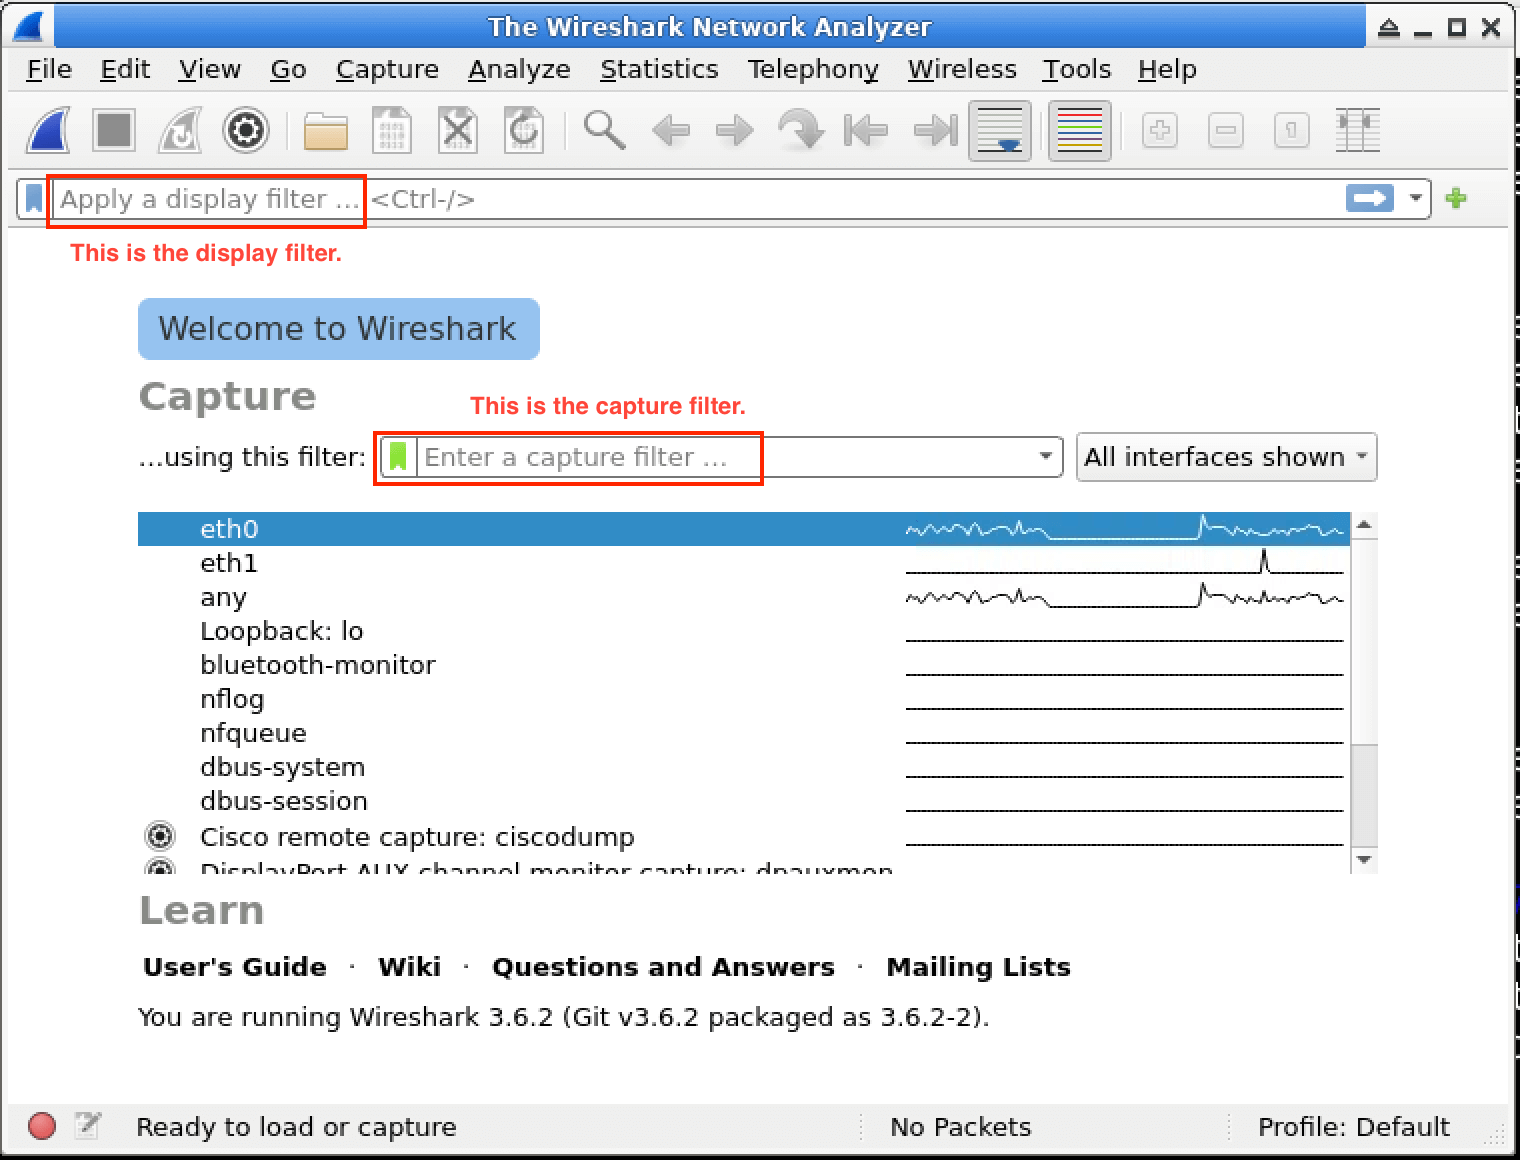
PS: Capture filter is NOT a display filter

alt text

Capture filters in Wireshark use a specific syntax based on the libpcap filter language. Here are some common elements:

  • host: Filters traffic based on the IP address or hostname. For example, host 192.168.0.2 captures traffic to or from the specified IP address.
  • net: Filters traffic based on a network address and subnet mask. For example, net 10.0.0.0/24 captures traffic from the 10.0.0.0/24 network.
  • port: Filters traffic based on the port number. For example, port 80 captures HTTP traffic.
  • protocol: Filters traffic based on the protocol. For example, tcp captures TCP traffic, and udp captures UDP traffic.

You can combine these elements using logical operators like and, or, and not.

Open Wireshark on your Linux machine by running the wireshark command in the terminal.

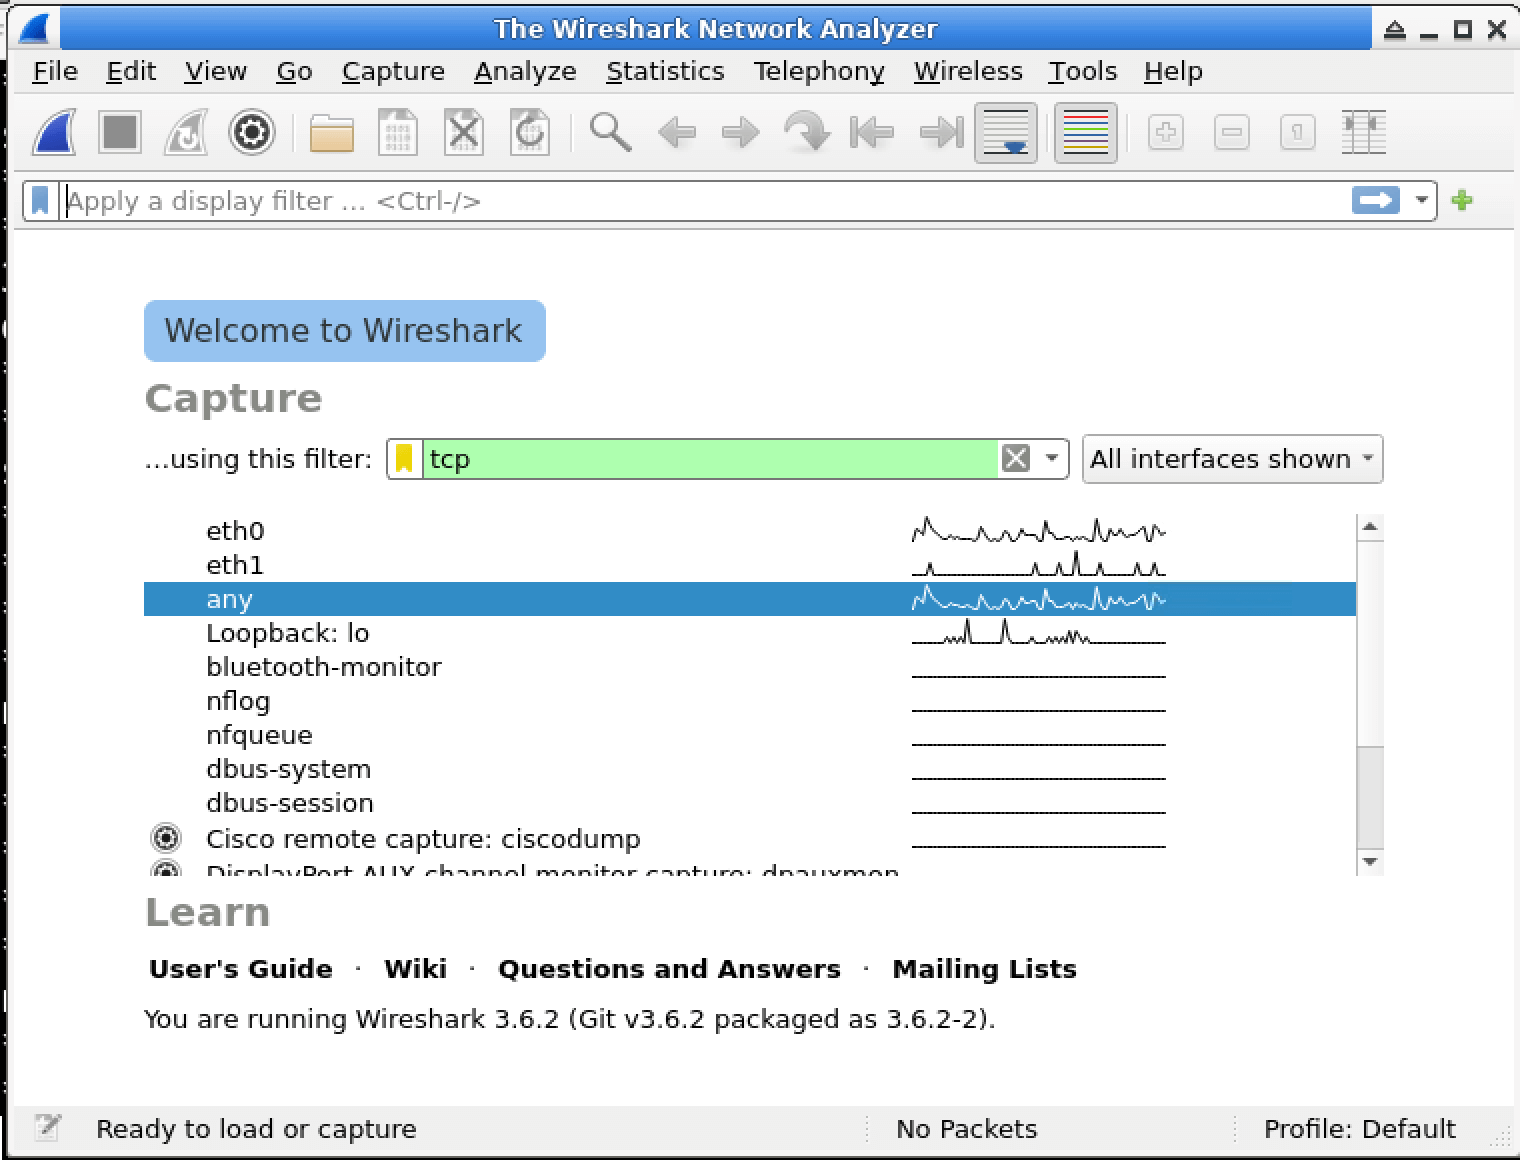
Fill in the filter box with tcp to capture only TCP packets. Choose the interface any and click Start to begin capturing packets with the specified filter applied.

Capture filter

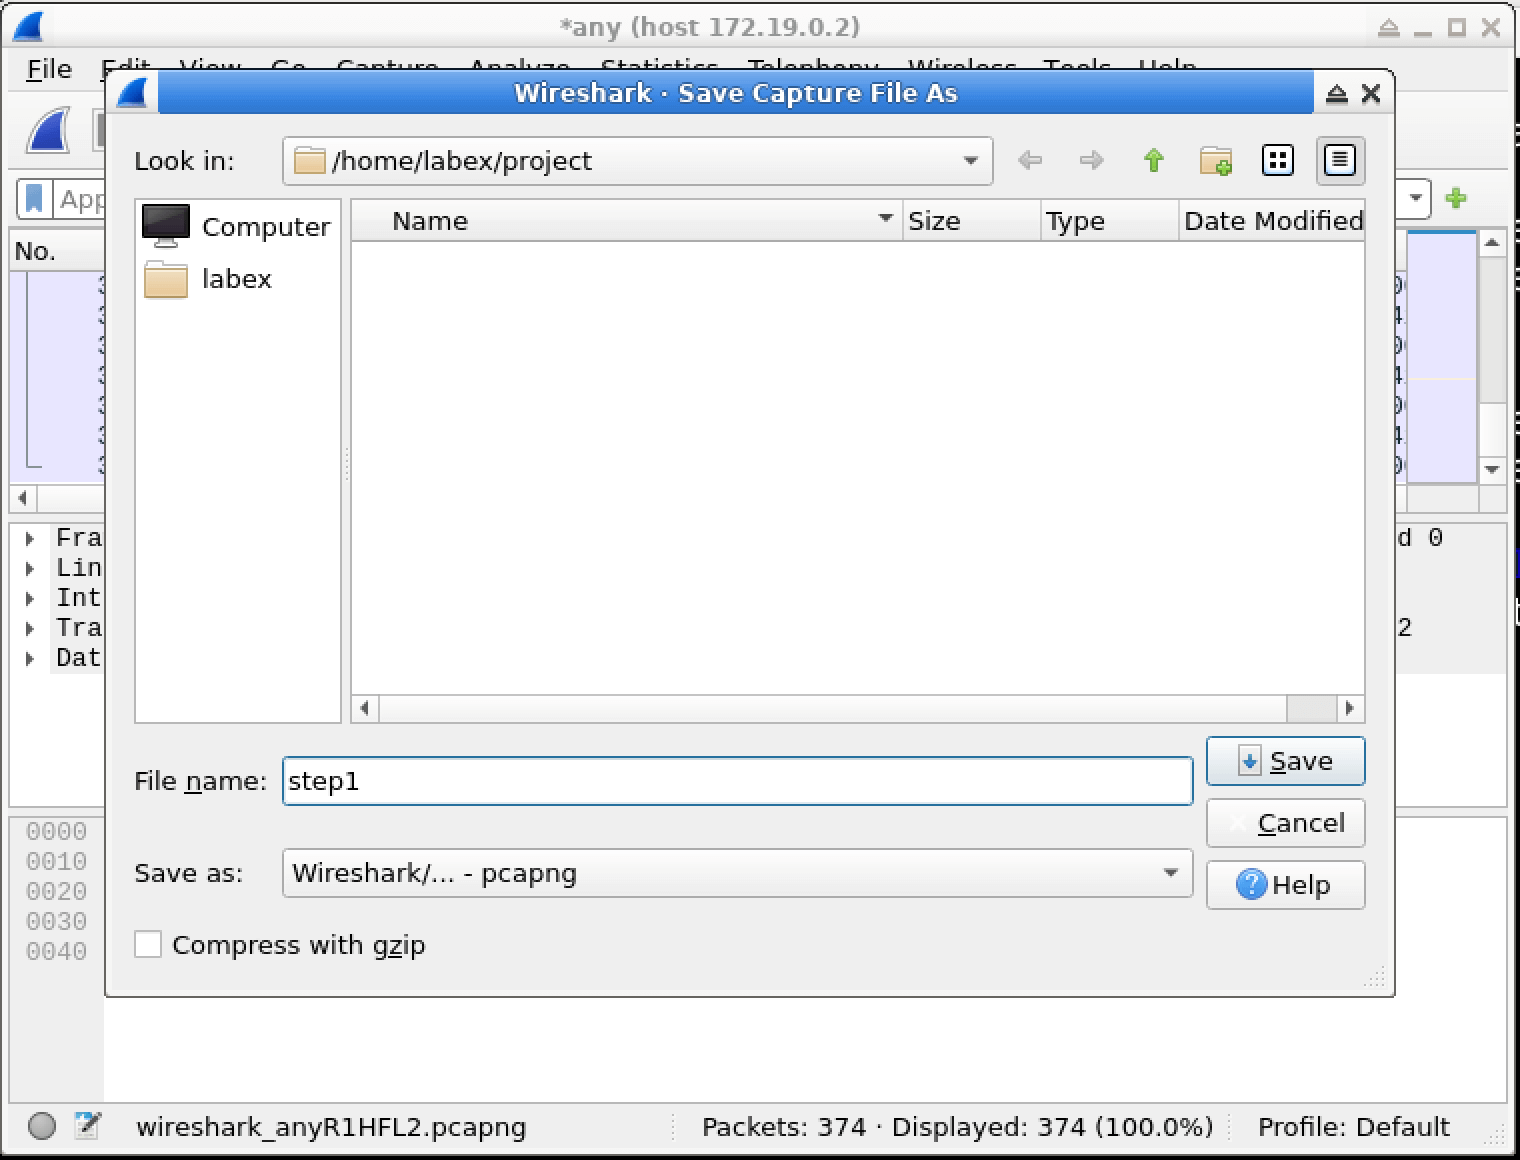
Stop capturing packets after a few seconds by clicking the red square Stop button and save the captured packets to a file named step1.pcapng in the /home/labex/project directory.

Save captured packets

Apply Capture Filters in Wireshark

In this step, you will learn how to apply capture filters in Wireshark and capture specific network traffic.

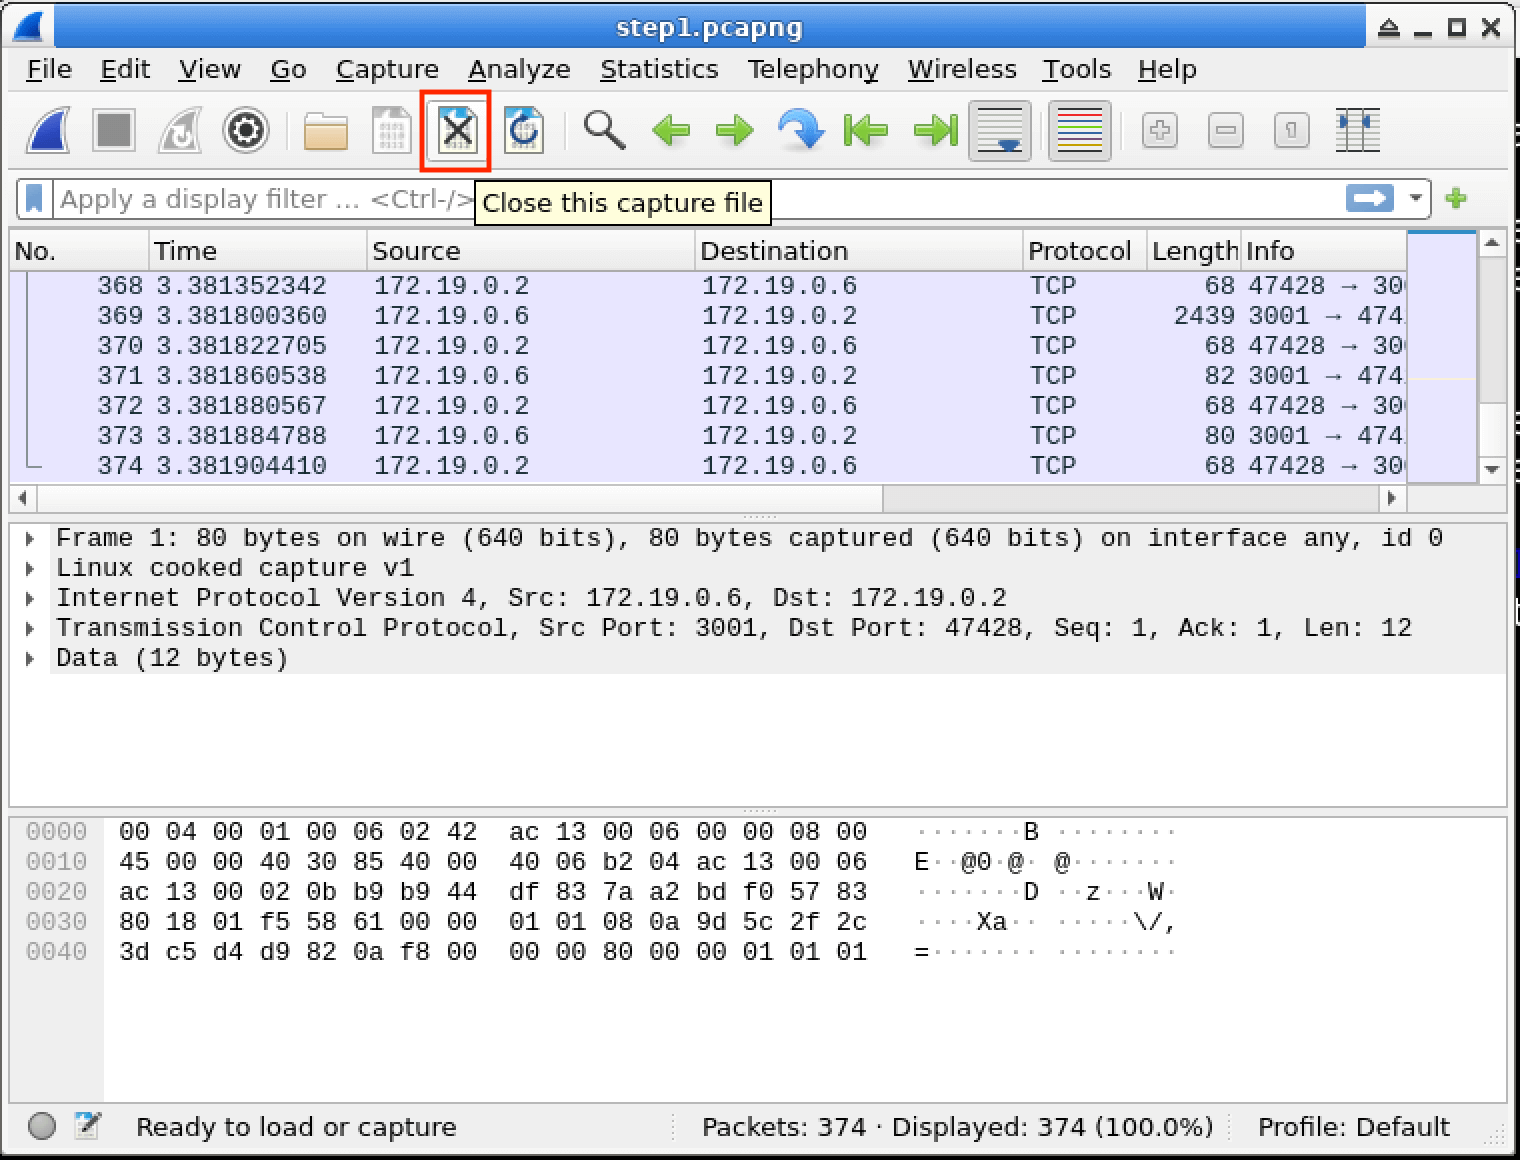
  1. You can back to start page by click Close this capture file button in Wireshark.

    Close this capture file
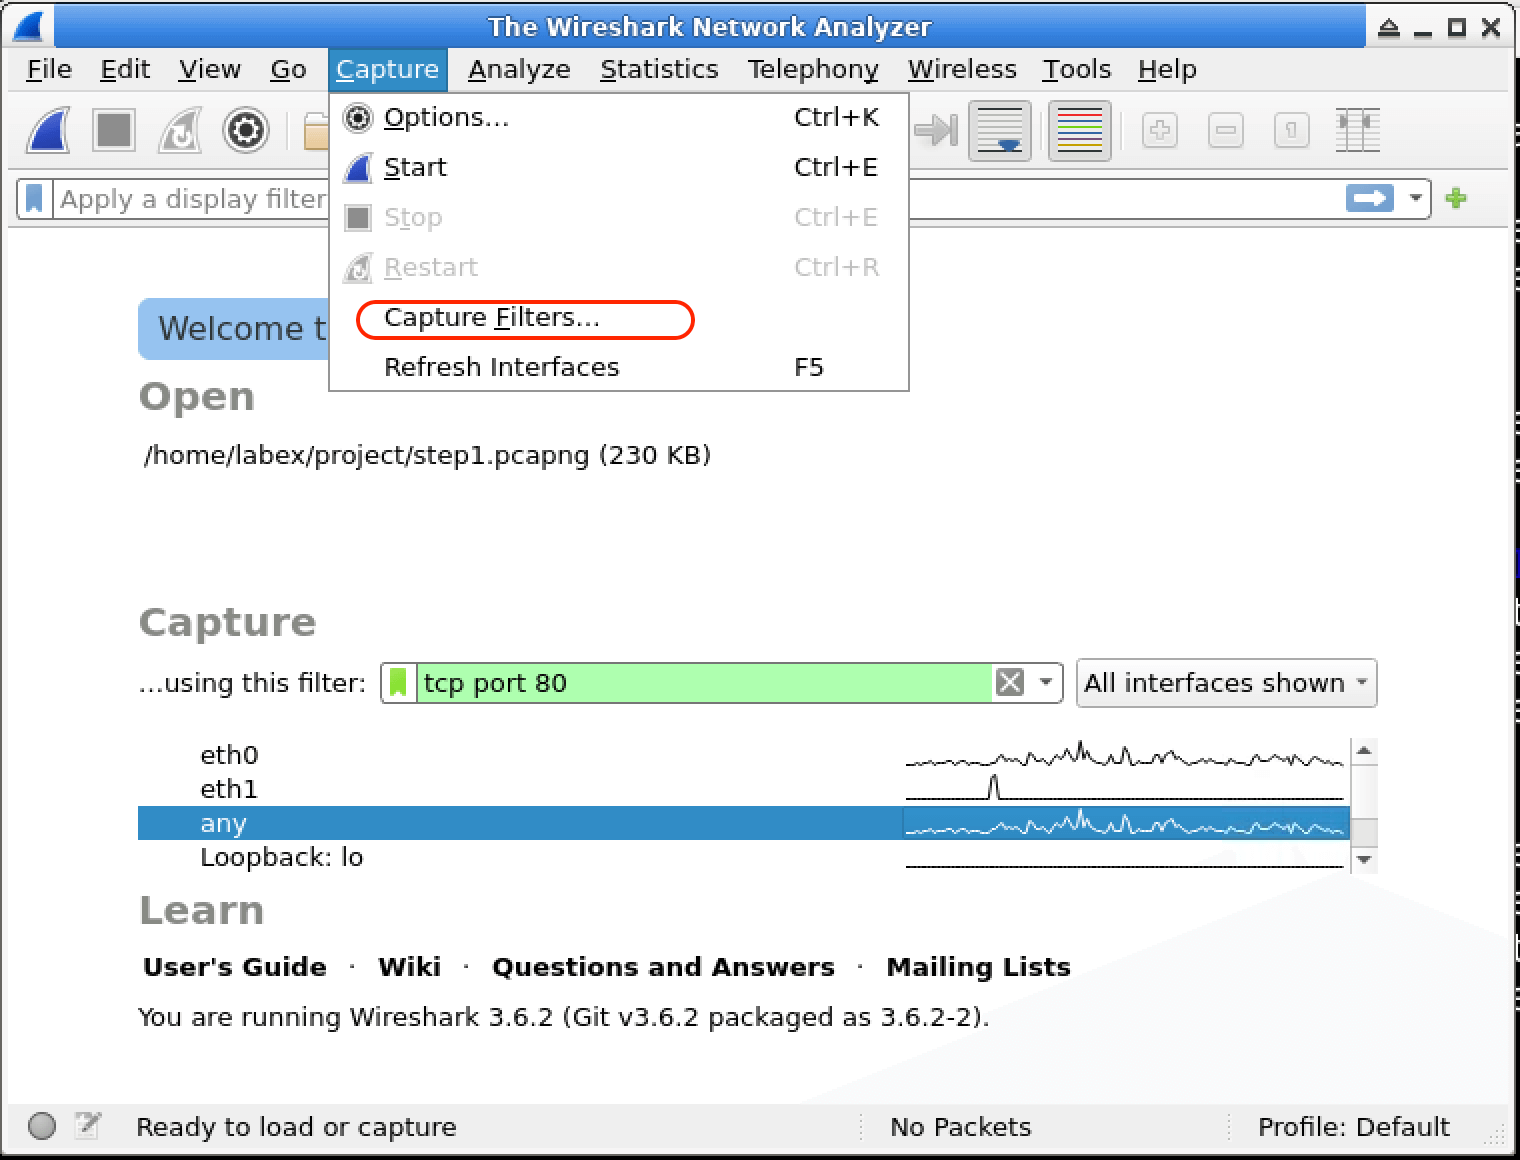
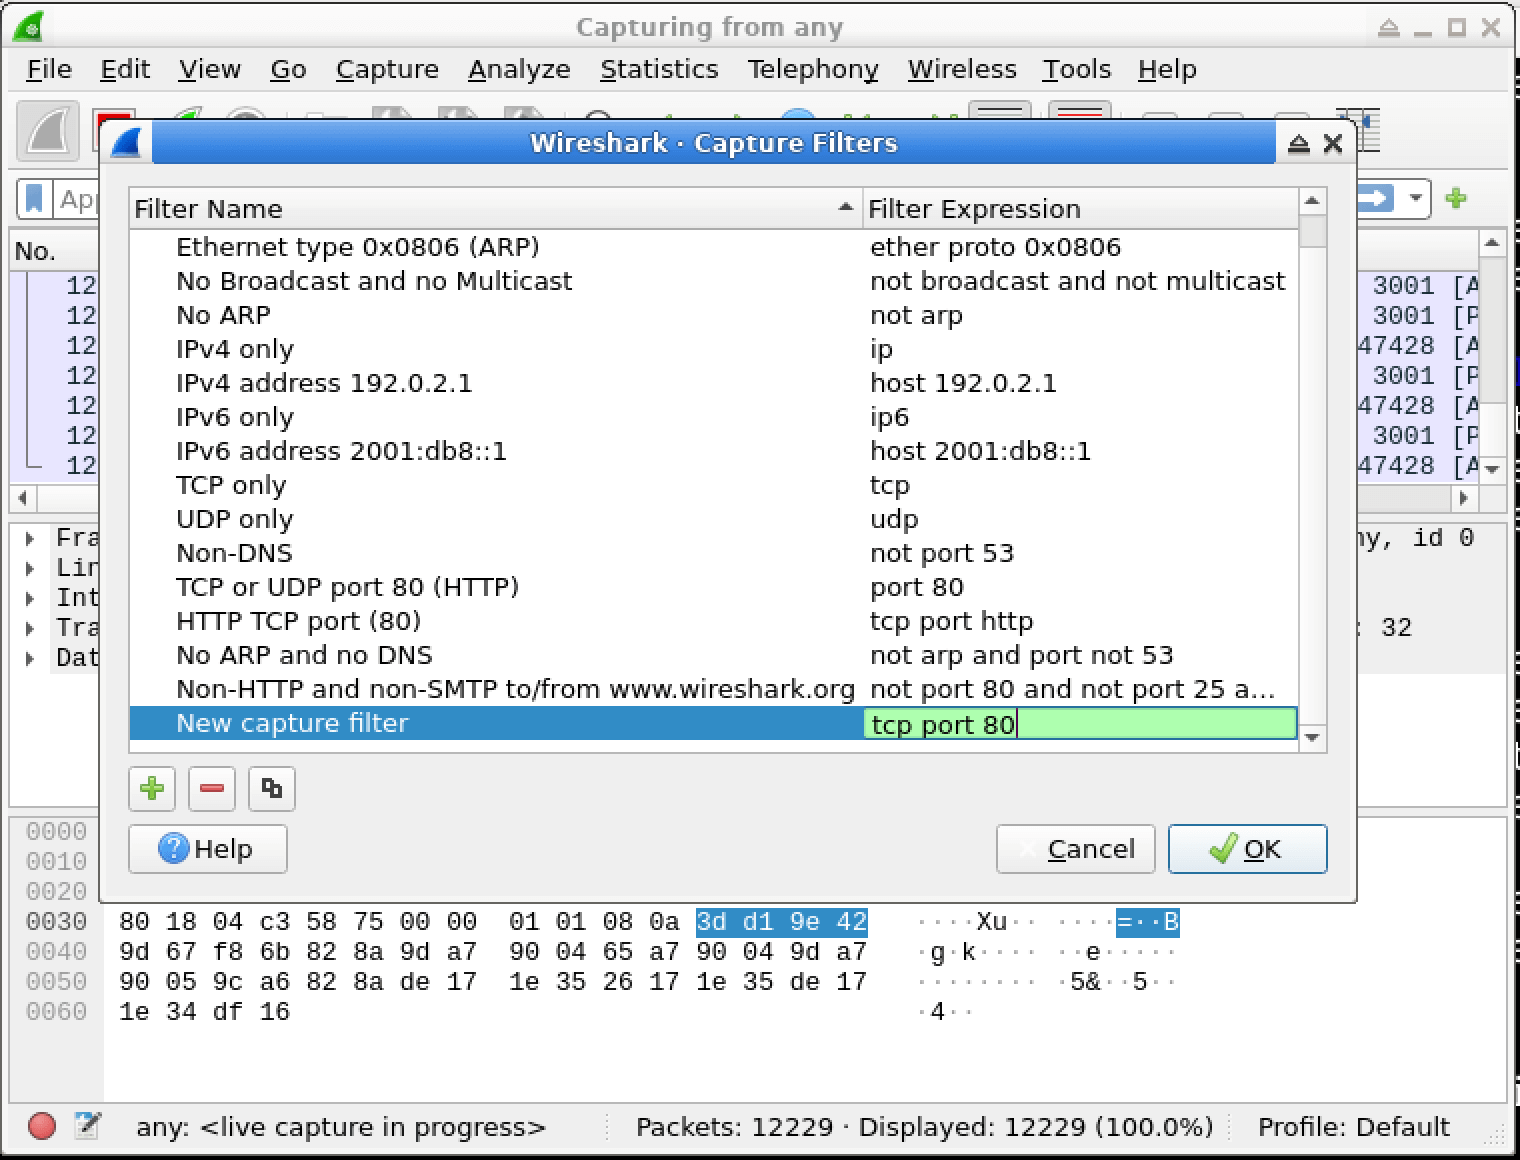
  2. Before starting a new capture, you can set a capture filter by going to the Capture Options dialog. Click on the Capture Filter box and enter your desired filter expression.

    Capture filter
    Capture filter

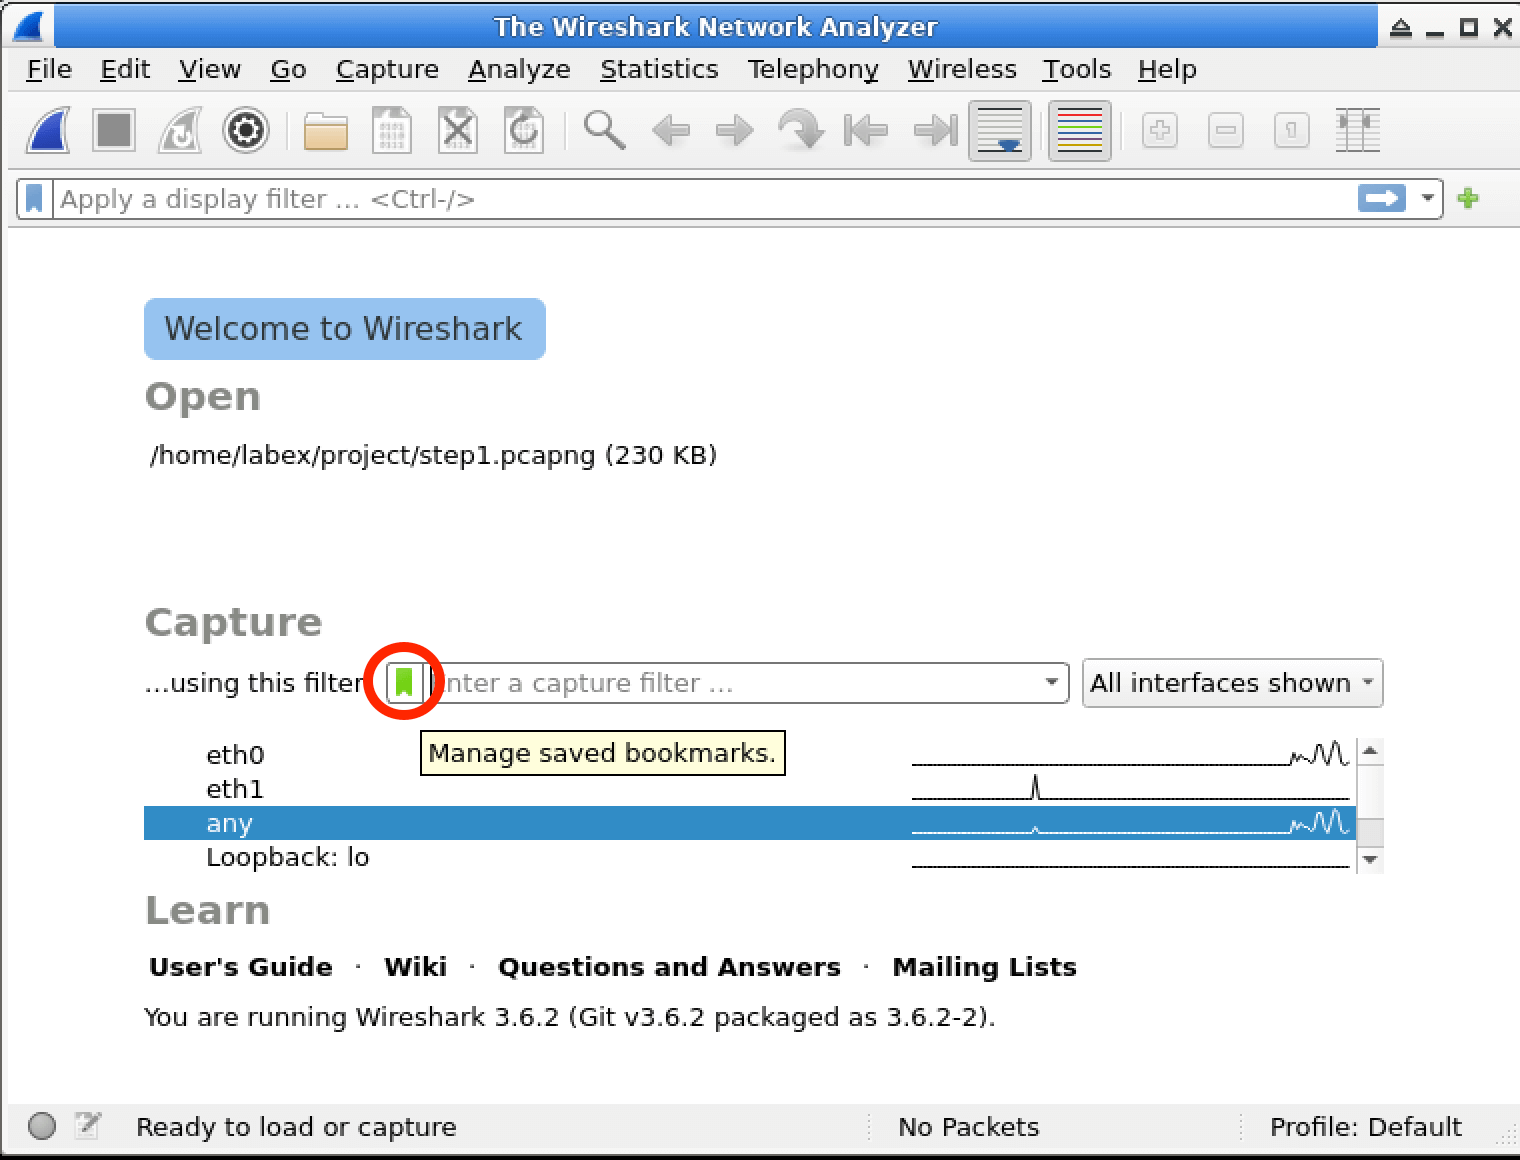
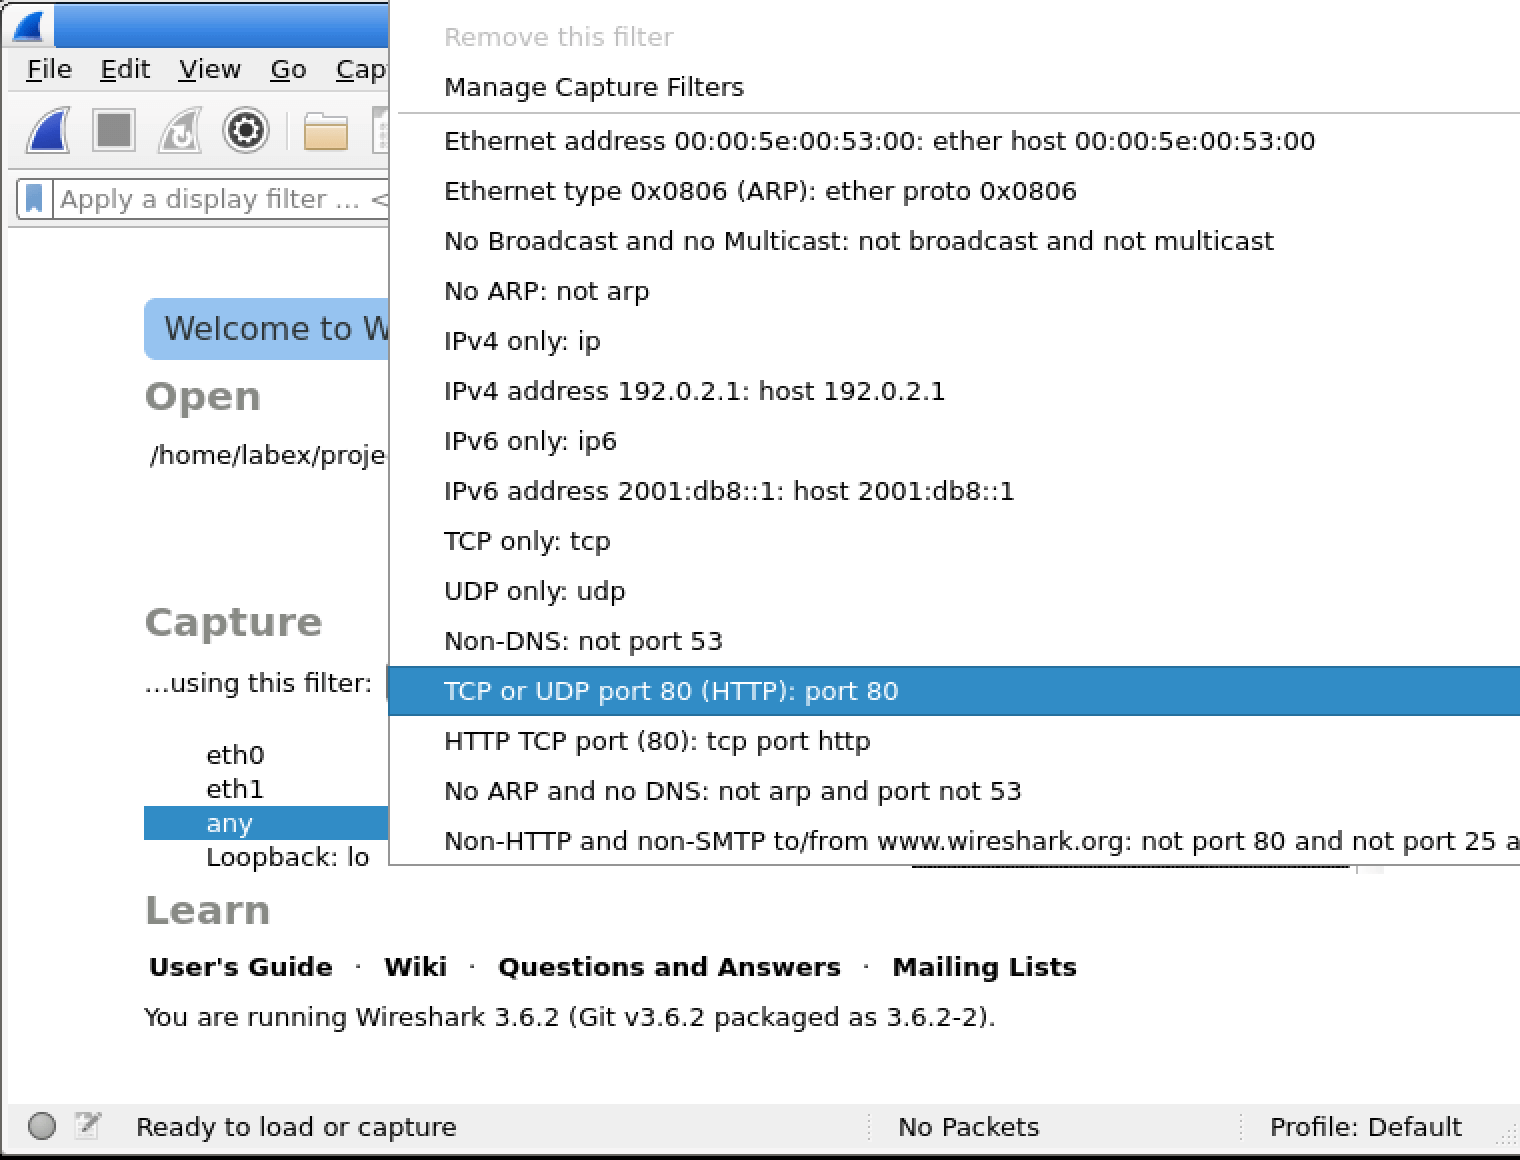
  3. Choose the interface any and slelect a filter from saved bookmarks.

    Capture filter

    You can use the filter port 80 to capture traffic on port 80, which is commonly used for HTTP.

    Capture filter
  4. Wireshark will now only capture packets that match your filter expression, making it easier to analyze the relevant traffic.

  5. After running the capture, now open a new terminal and run a bash script to generate simluated traffic.

    Navigate to the project directory by running the following command:

    cd /home/labex/project

    run the bash script by running the following command:

    ./simulate_traffic.sh

    Example output:

    labex:project/ $ ./simulate_traffic.sh
    Netcat server listening on port 80...
    Sending data to port 80...
    Hello, Wireshark!
    Please check the Wireshark output for the data sent to port 80.
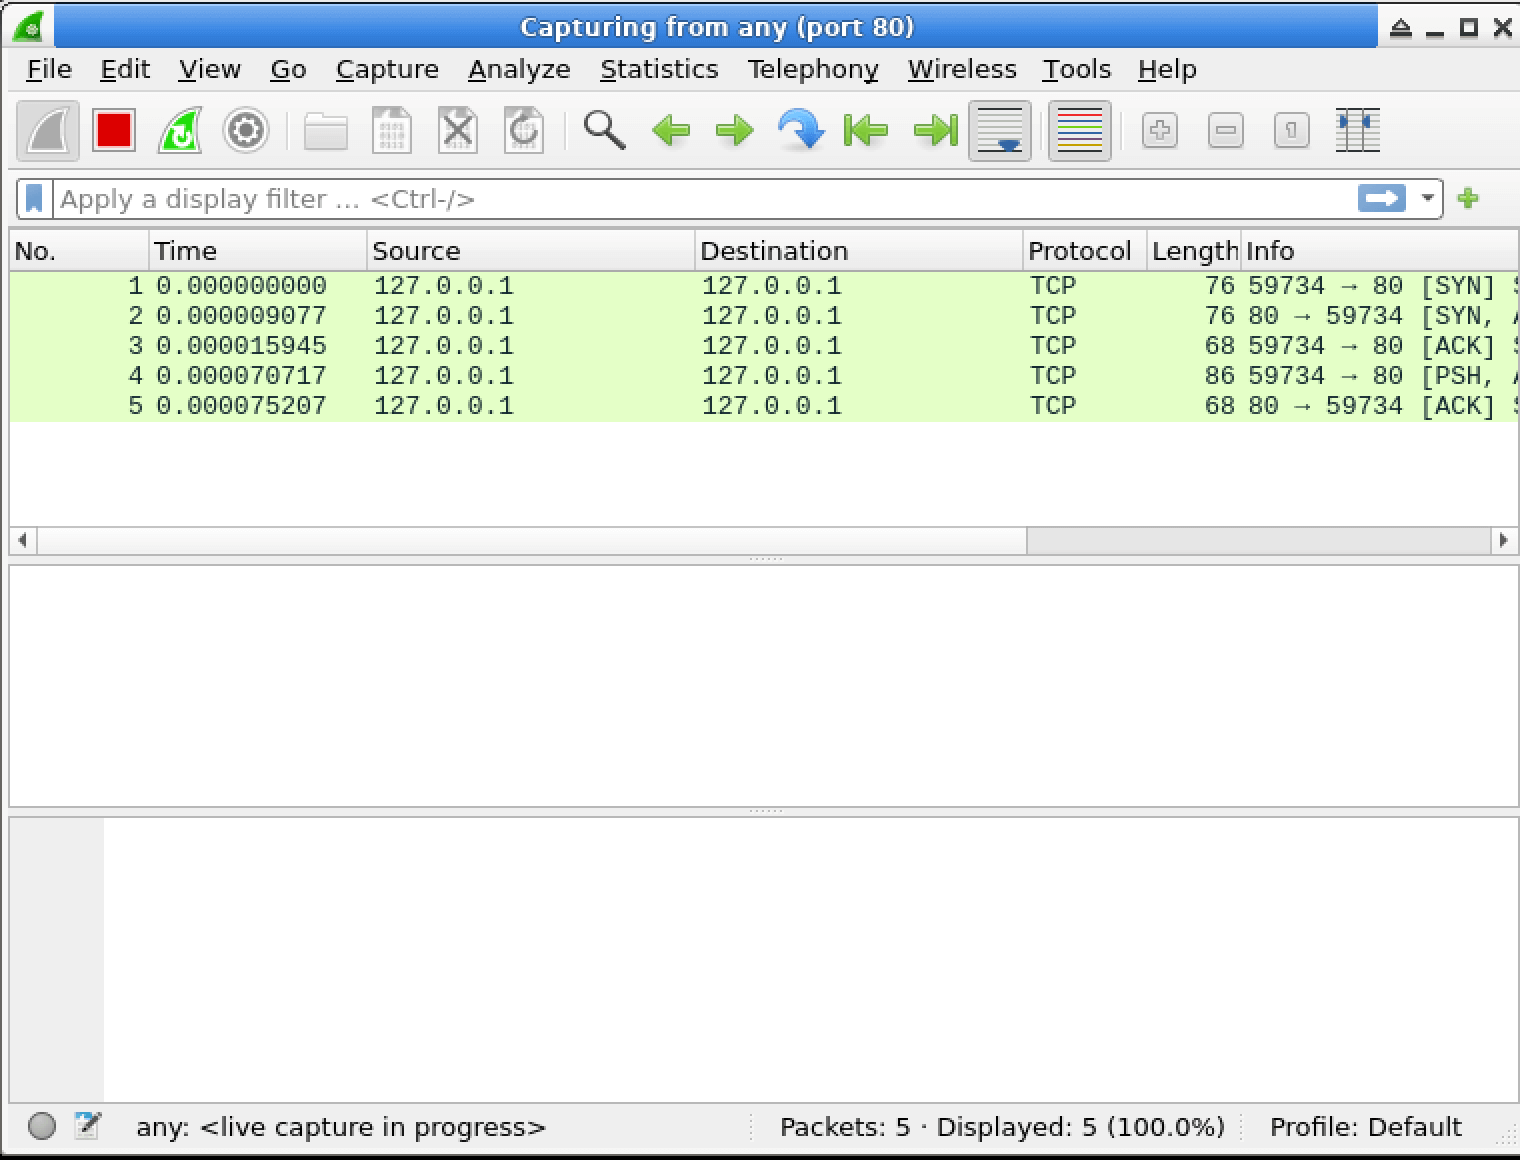
  6. Back in Wireshark, you should see the captured packets matching your filter expression. Analyze the traffic to identify the HTTP packets captured by the filter.

    Capture port 80
  7. Click the red square Stop button to stop capturing packets and save the captured packets to a file named step2.pcapng in the /home/labex/project directory.

Analyze Captured Traffic with Display Filters

In this step, you will learn how to use Display filters to analyze specific network traffic after capturing packets in Wireshark.

  1. Open step2.pcapng file in Wireshark.

  2. Go to the Display Filter toolbar and enter a capture filter expression. For example, enter http to display only HTTP traffic.

  3. Wireshark will apply the filter and display only the packets that match the specified criteria.

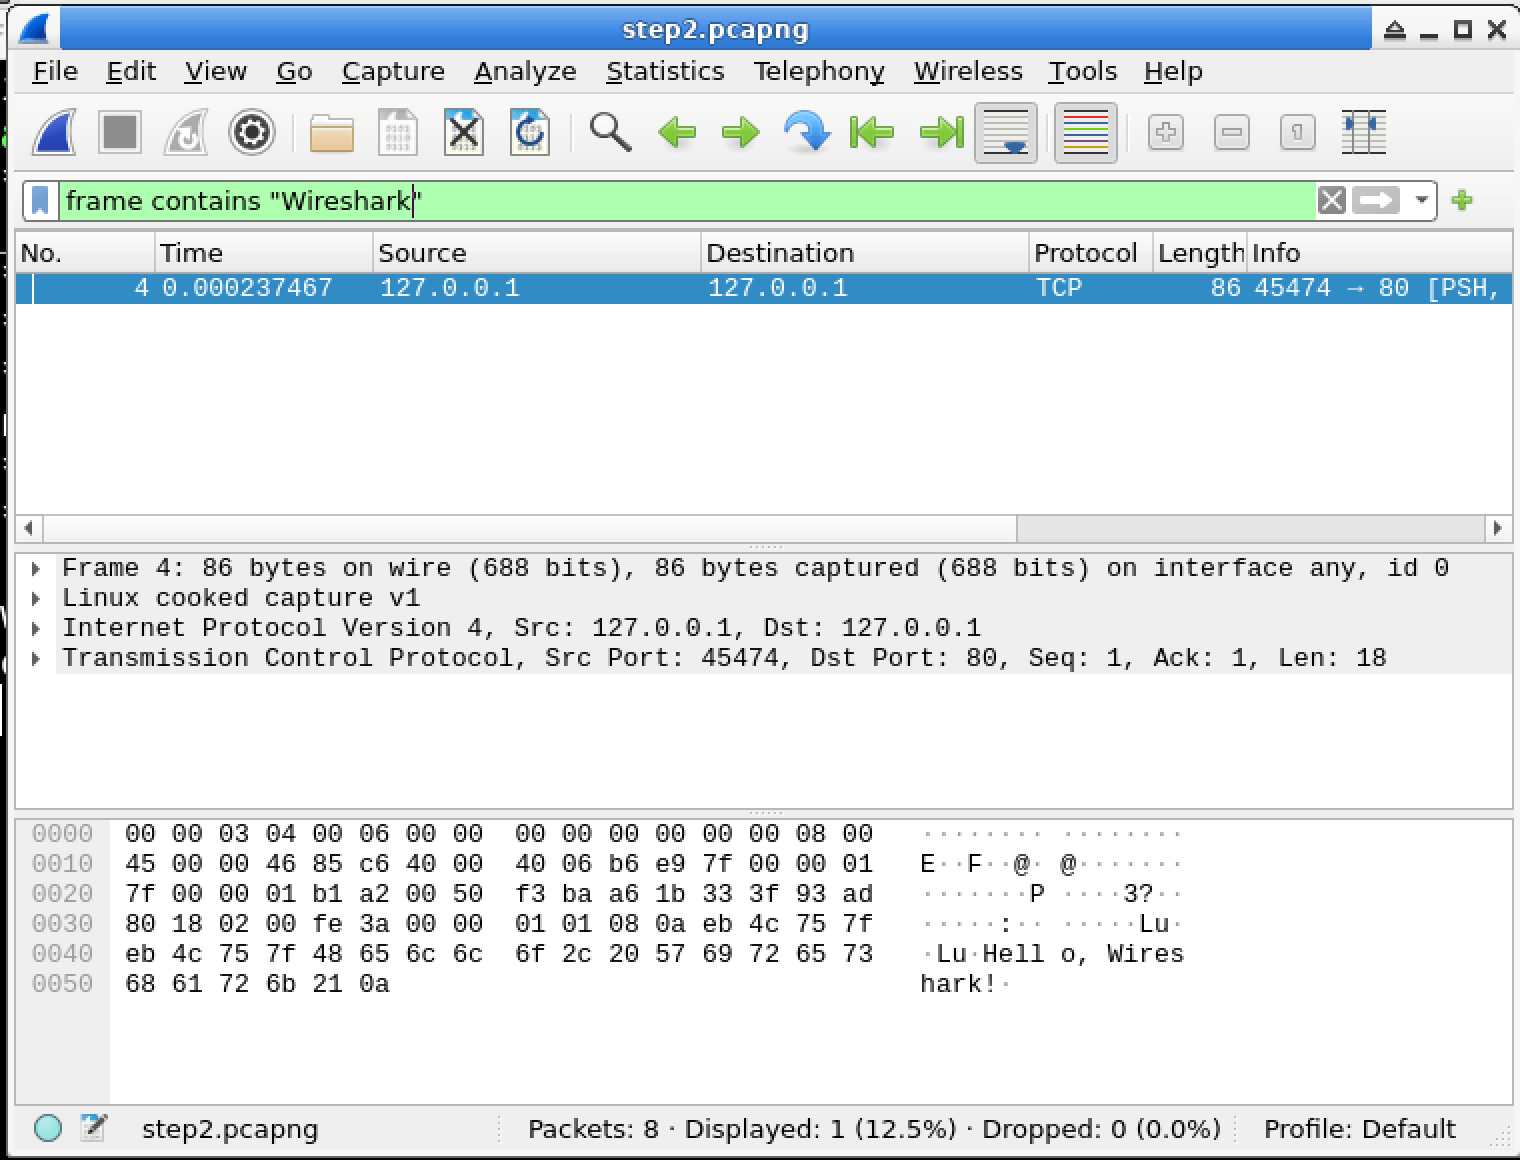
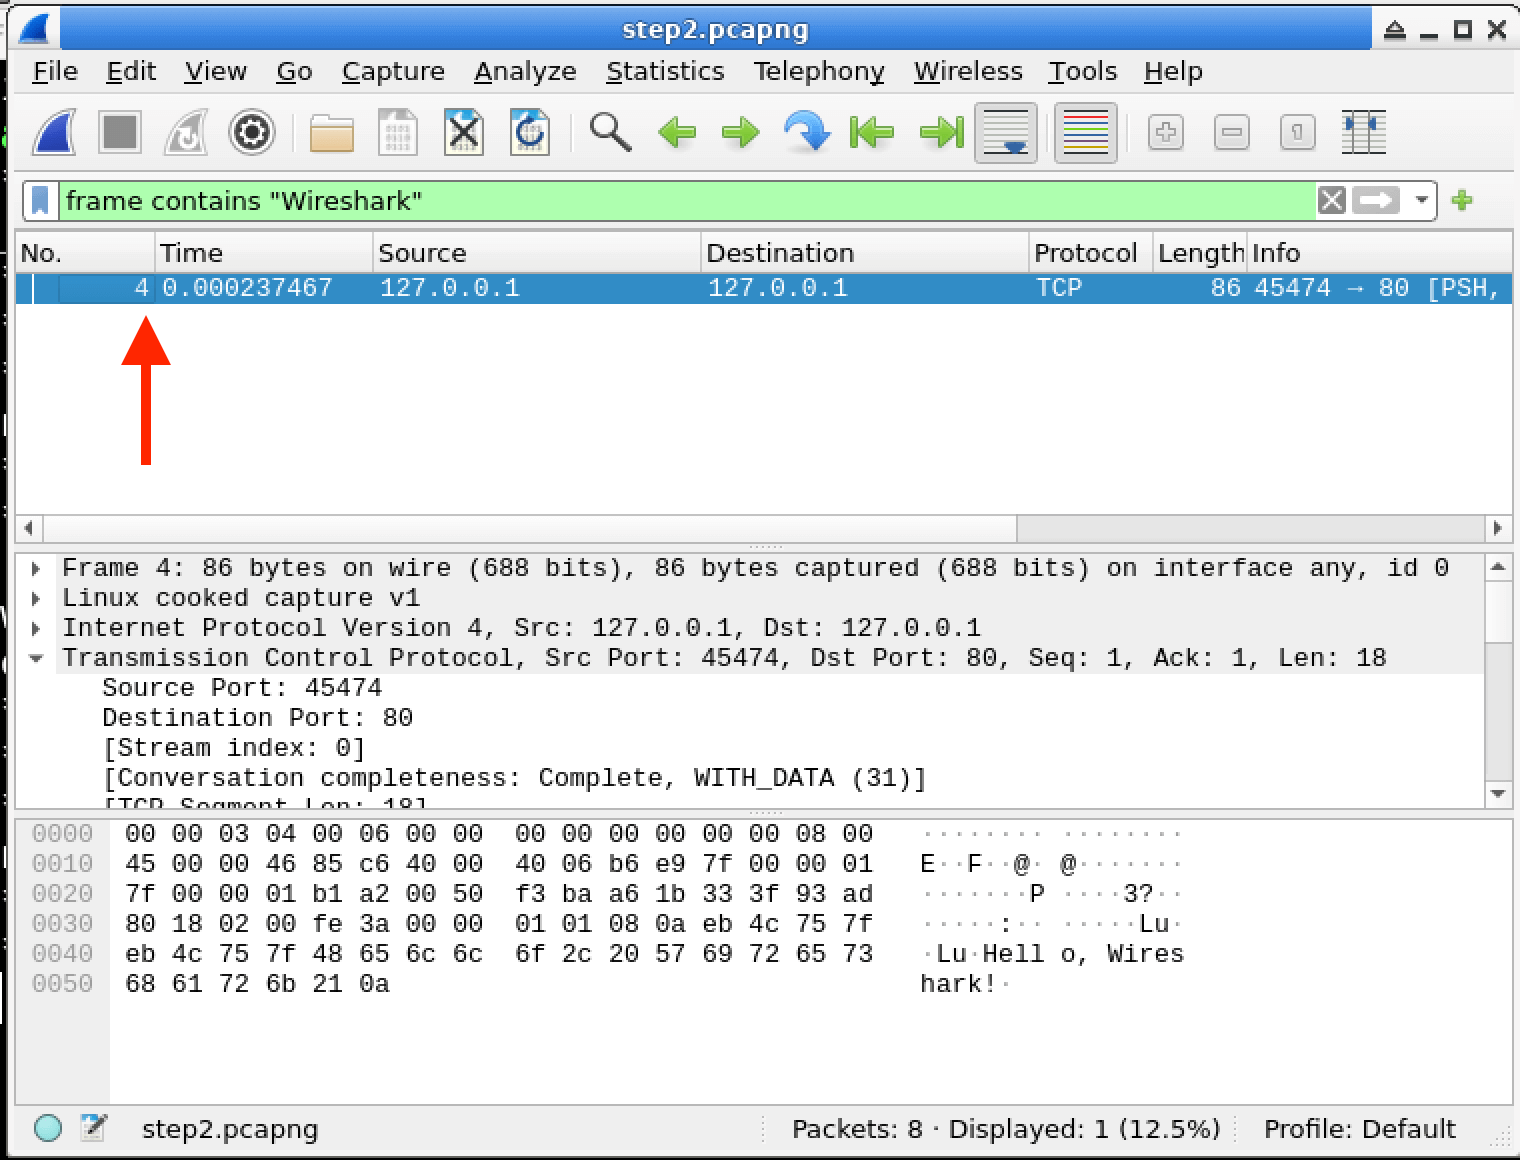
  4. You can further refine your analysis by adding more specific filters. For example, frame contains "Wireshark" will display only packets that contain the string "Wireshark".

    Display filter
  5. Open a terminal and write down the number of packets that match the filter expression in the report.txt file.

    Save report

    In this case, the number of packets matching the filter expression is 4.

    echo "Number of packets matching the filter expression: 4" > /home/labex/project/report.txt

Summary

In this lab, you learned how to use Wireshark capture filters to selectively capture and analyze network traffic based on specific criteria. You explored the syntax for creating capture filters, applied filters during live captures, and analyzed captured traffic using display filters. By mastering capture filters, you can streamline your network troubleshooting and security analysis workflows, focusing on the most relevant data and ignoring irrelevant traffic. This skill is essential for cybersecurity professionals, network administrators, and anyone working with network analysis tools like Wireshark.

Other Cybersecurity Tutorials you may like