
Introduction
In this lab, you will learn how to install and set up Ansible on an Ubuntu system. Ansible is a powerful open-source automation tool that simplifies configuration management, application deployment, and task automation. By the end of this lab, you will have Ansible installed and configured, ready to manage remote systems efficiently.
Update System Packages
Before installing any new software, it's crucial to ensure your system has the latest updates. This helps prevent potential conflicts and ensures you have the latest security patches.
First, update the package lists:
sudo apt update

This command connects to Ubuntu's software repositories and downloads information about the latest available packages. You might see output like this:
Hit:1 http://mirrors.cloud.aliyuncs.com/ubuntu jammy InRelease
Hit:2 http://mirrors.cloud.aliyuncs.com/ubuntu jammy-updates InRelease
Hit:3 http://mirrors.cloud.aliyuncs.com/ubuntu jammy-backports InRelease
Hit:4 http://mirrors.cloud.aliyuncs.com/ubuntu jammy-security InRelease
Reading package lists... Done
Building dependency tree... Done
Reading state information... Done
All packages are up to date.
Don't worry if you see some "Hit" or "Get" lines - this is normal and shows which repository information is being updated.
Install Ansible
Now that your system is up to date, you can proceed with installing Ansible. Ubuntu's default repositories include Ansible, which makes the installation process straightforward.
Install Ansible using the following command:
sudo apt install ansible -y
Let's break down this command:
sudo: This runs the command with administrative privileges, which is necessary for installing software.apt install: This tells the package manager to install a new package.ansible: This is the name of the package we want to install.-y: This flag automatically answers "yes" to any prompts during installation.
You'll see output showing the installation progress:
Reading package lists... Done
Building dependency tree... Done
Reading state information... Done
...
Processing triggers for man-db (2.10.2-1) ...
Don't be alarmed by the amount of text - this is just showing you all the dependencies being installed along with Ansible.
After the installation completes, it's a good practice to verify that Ansible was installed correctly. You can do this by checking its version:
ansible --version
This command should display information about the installed Ansible version:
ansible 2.10.8
  config file = None
  configured module search path = ['/home/labex/.ansible/plugins/modules', '/usr/share/ansible/plugins/modules']
  ansible python module location = /usr/lib/python3/dist-packages/ansible
  executable location = /usr/bin/ansible
  python version = 3.10.12 (main, Jul 29 2024, 16:56:48) [GCC 11.4.0]
If you see output similar to this, congratulations! Ansible is now installed on your system.
Configure SSH for Ansible
Ansible uses SSH to communicate with managed nodes. To streamline this process and enhance security, we'll set up SSH key-based authentication. This allows Ansible to connect to other machines without needing to enter a password each time.
First, generate an SSH key pair:
ssh-keygen -t rsa -b 4096 -C "labex@example.com"
Let's break down this command:
ssh-keygen: This is the program that generates the key pair.-t rsa: This specifies we want an RSA type key.-b 4096: This sets the key size to 4096 bits, which is very secure.-C "labex@example.com": This adds a comment to the key, usually an email address.
When you run this command, you'll see prompts:
Generating public/private rsa key pair.
Enter file in which to save the key (/home/labex/.ssh/id_rsa):
Press Enter to accept the default location.
Enter passphrase (empty for no passphrase):
Enter same passphrase again:
For this lab, you can leave the passphrase empty by pressing Enter twice. In a production environment, you'd want to use a strong passphrase.
You'll see output confirming the key creation:
Your identification has been saved in /home/labex/.ssh/id_rsa
Your public key has been saved in /home/labex/.ssh/id_rsa.pub
The key fingerprint is:
SHA256:abcdefghijklmnopqrstuvwxyz1234567890ABCDEFG labex@example.com
The key's randomart image is:
+---[RSA 4096]----+
|    .            |
|   . .           |
|    o            |
|   . o           |
|    + = S        |
|   + * +         |
|  . = o .        |
| . + =           |
|  +.+.           |
+----[SHA256]-----+
Next, we need to copy this key to the local machine. In a real-world scenario, you'd copy this to remote hosts, but for this lab, we'll use the local machine:
ssh-copy-id labex@localhost
Type yes to continue.
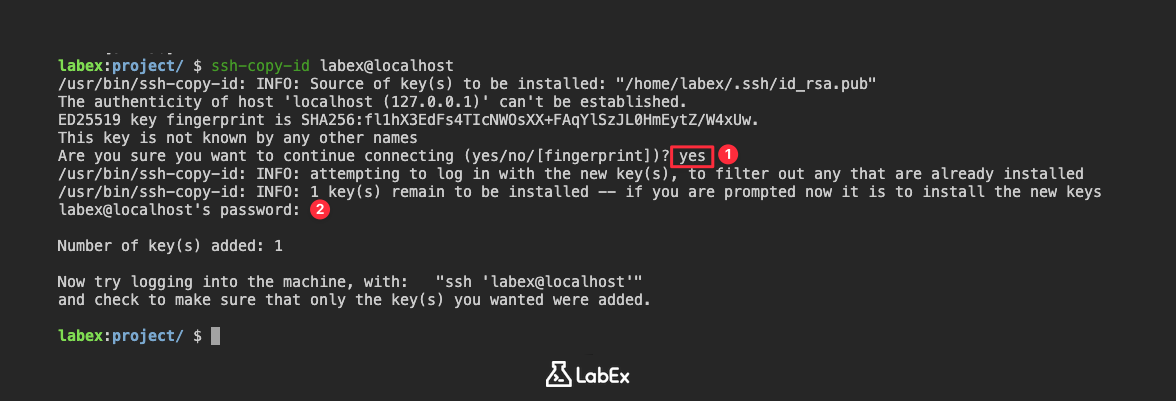
You'll be prompted for the labex user's password.
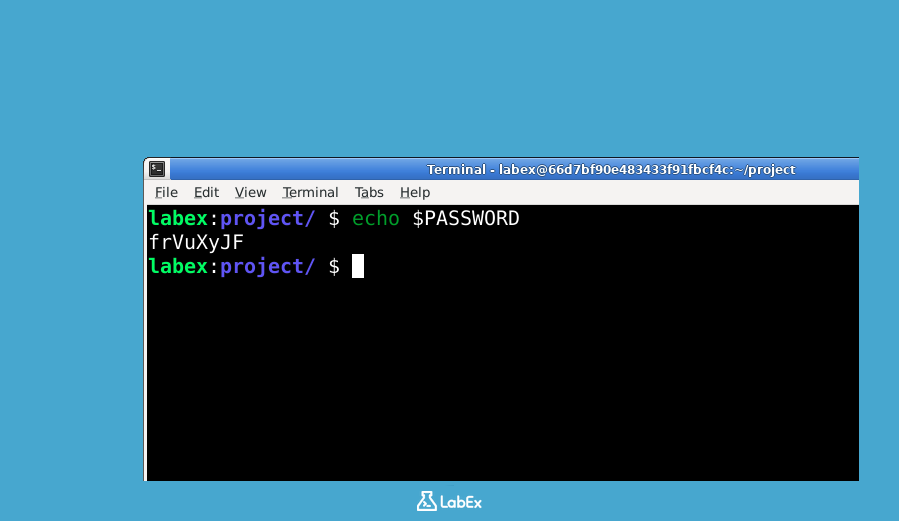
For this lab environment, you can find the password by opening the VNC terminal and running:
Do not close the current terminal session, and open a new Xfce terminal to run the following command:
echo $PASSWORD
Note: You must run this command in the VNC terminal. The password is only available in the VNC terminal and is not accessible via SSH or the web terminal.
Enter the password when prompted by ssh-copy-id. You should see output like:
/usr/bin/ssh-copy-id: INFO: attempting to log in with the new key(s), to filter out any that are already installed
/usr/bin/ssh-copy-id: INFO: 1 key(s) remain to be installed -- if you are prompted now it is to install the new keys
labex@localhost's password:

Number of key(s) added: 1

Now try logging into the machine, with:   "ssh 'labex@localhost'"
and check to make sure that only the key(s) you wanted were added.
To verify that the SSH key setup was successful, try to SSH into the local machine:
ssh labex@localhost
If the key was set up correctly, you should be able to log in without being prompted for a password. You'll see a new command prompt. Type exit to return to your original session.
Create and Configure the Ansible Inventory
The Ansible inventory is a file that defines the hosts and groups of hosts upon which commands, modules, and tasks in a playbook operate. It's like an address book for Ansible, telling it which machines it can connect to.
First, create the Ansible configuration directory:
sudo mkdir -p /etc/ansible
This command creates the /etc/ansible directory if it doesn't already exist. The -p flag ensures that it doesn't throw an error if the directory is already there.
Now, create and edit the inventory file:
sudo nano /etc/ansible/hosts
This opens the nano text editor. If you're new to nano, don't worry - it's a simple, user-friendly editor.
In this file, add the following content:
[local]
localhost ansible_connection=local

[webservers]
web1 ansible_host=localhost ansible_connection=ssh ansible_user=labex
Let's break down what this means:
[local]and[webservers]are group names. You can use these to organize your hosts.localhost ansible_connection=localtells Ansible to connect to the local machine directly, without using SSH.web1 ansible_host=localhost ansible_connection=ssh ansible_user=labexsets up a host calledweb1. For this lab, it's also connecting to localhost, but using SSH, and logging in as the userlabex.
To save the file in nano, press Ctrl+X, then Y, and finally Enter.
To verify the content of the inventory file, use the cat command:
cat /etc/ansible/hosts
You should see the content you just added to the file.
Test Ansible Connectivity
Now that we have Ansible installed and configured, let's test the connectivity to ensure everything is working correctly.
First, let's ping all the hosts in our inventory:
ansible all -m ping
Let's break down this command:
ansible: This is the base command to run Ansible.all: This tells Ansible to run on all hosts in the inventory.-m ping: This specifies the Ansible module to use. Thepingmodule checks if the hosts are responsive.
You should see output similar to:
localhost | SUCCESS => {
    "changed": false,
    "ping": "pong"
}
web1 | SUCCESS => {
    "changed": false,
    "ping": "pong"
}
If you see "SUCCESS" for both hosts, it means Ansible can successfully connect to and communicate with these hosts.
Next, let's try running a simple command on all hosts:
ansible all -a "uptime"
This command uses Ansible's command module (the default when no module is specified with -m) to run the uptime command on all hosts. The uptime command shows how long the system has been running.
You should see output similar to:
localhost | CHANGED | rc=0 >>
 14:30:15 up 1 day,  3:24,  1 user,  load average: 0.00, 0.00, 0.00

web1 | CHANGED | rc=0 >>
 14:30:15 up 1 day,  3:24,  1 user,  load average: 0.00, 0.00, 0.00
This output shows that Ansible successfully executed the uptime command on both hosts. The "CHANGED" status indicates that the command was run successfully and produced output.
Tip: You may see a deprecation warning "Distribution ubuntu 22.04 on host localhost should use /usr/bin/python3", which is due to the default Python interpreter being changed in newer versions of Ubuntu.
If you want to suppress this warning, you can add the following line to /etc/ansible/hosts file:
[all:vars]
ansible_python_interpreter=/usr/bin/python3
This line tells Ansible to use Python 3 explicitly for all hosts. After adding this line, you can run the ansible all -m ping command again to verify that the warning no longer appears.
Summary
Congratulations! In this lab, you have successfully installed and configured Ansible on an Ubuntu system. You've learned how to:
- Update system packages to ensure a stable environment for Ansible.
- Install Ansible using the package manager.
- Set up SSH key-based authentication for secure and passwordless connections.
- Create and configure an Ansible inventory file to define managed hosts.
- Test Ansible connectivity and execute basic commands on managed hosts.
These foundational steps provide a solid starting point for using Ansible to automate various IT tasks, from simple command executions to complex configuration management and application deployments.
Remember, this lab used localhost for demonstration purposes, but in real-world scenarios, you would typically manage multiple remote hosts. The principles and commands you've learned here can be easily applied to managing remote servers across your infrastructure.
As you continue your journey with Ansible, you'll discover its power in streamlining operations and enhancing productivity in system administration and DevOps practices. Consider exploring Ansible playbooks next, which allow you to automate more complex tasks and workflows.

