Monty Hall Problem Simulation Using Tkinter

PythonPythonBeginner
Practice Now

Introduction

The Monty Hall problem is a famous probability puzzle based on a game show scenario. In the game, a contestant is presented with three doors. Behind one of the doors is a prize (like a car), while the other two doors hide goats. The contestant selects one of the doors. The host, who knows where the prize is, then opens one of the other two doors to reveal a goat. The contestant is then given the option to either stay with their original choice or switch to the other unopened door. The question is: What's the best strategy, to switch or to stay? This project will guide you through building a GUI application to simulate the Monty Hall problem using the Tkinter library in Python.

👀 Preview
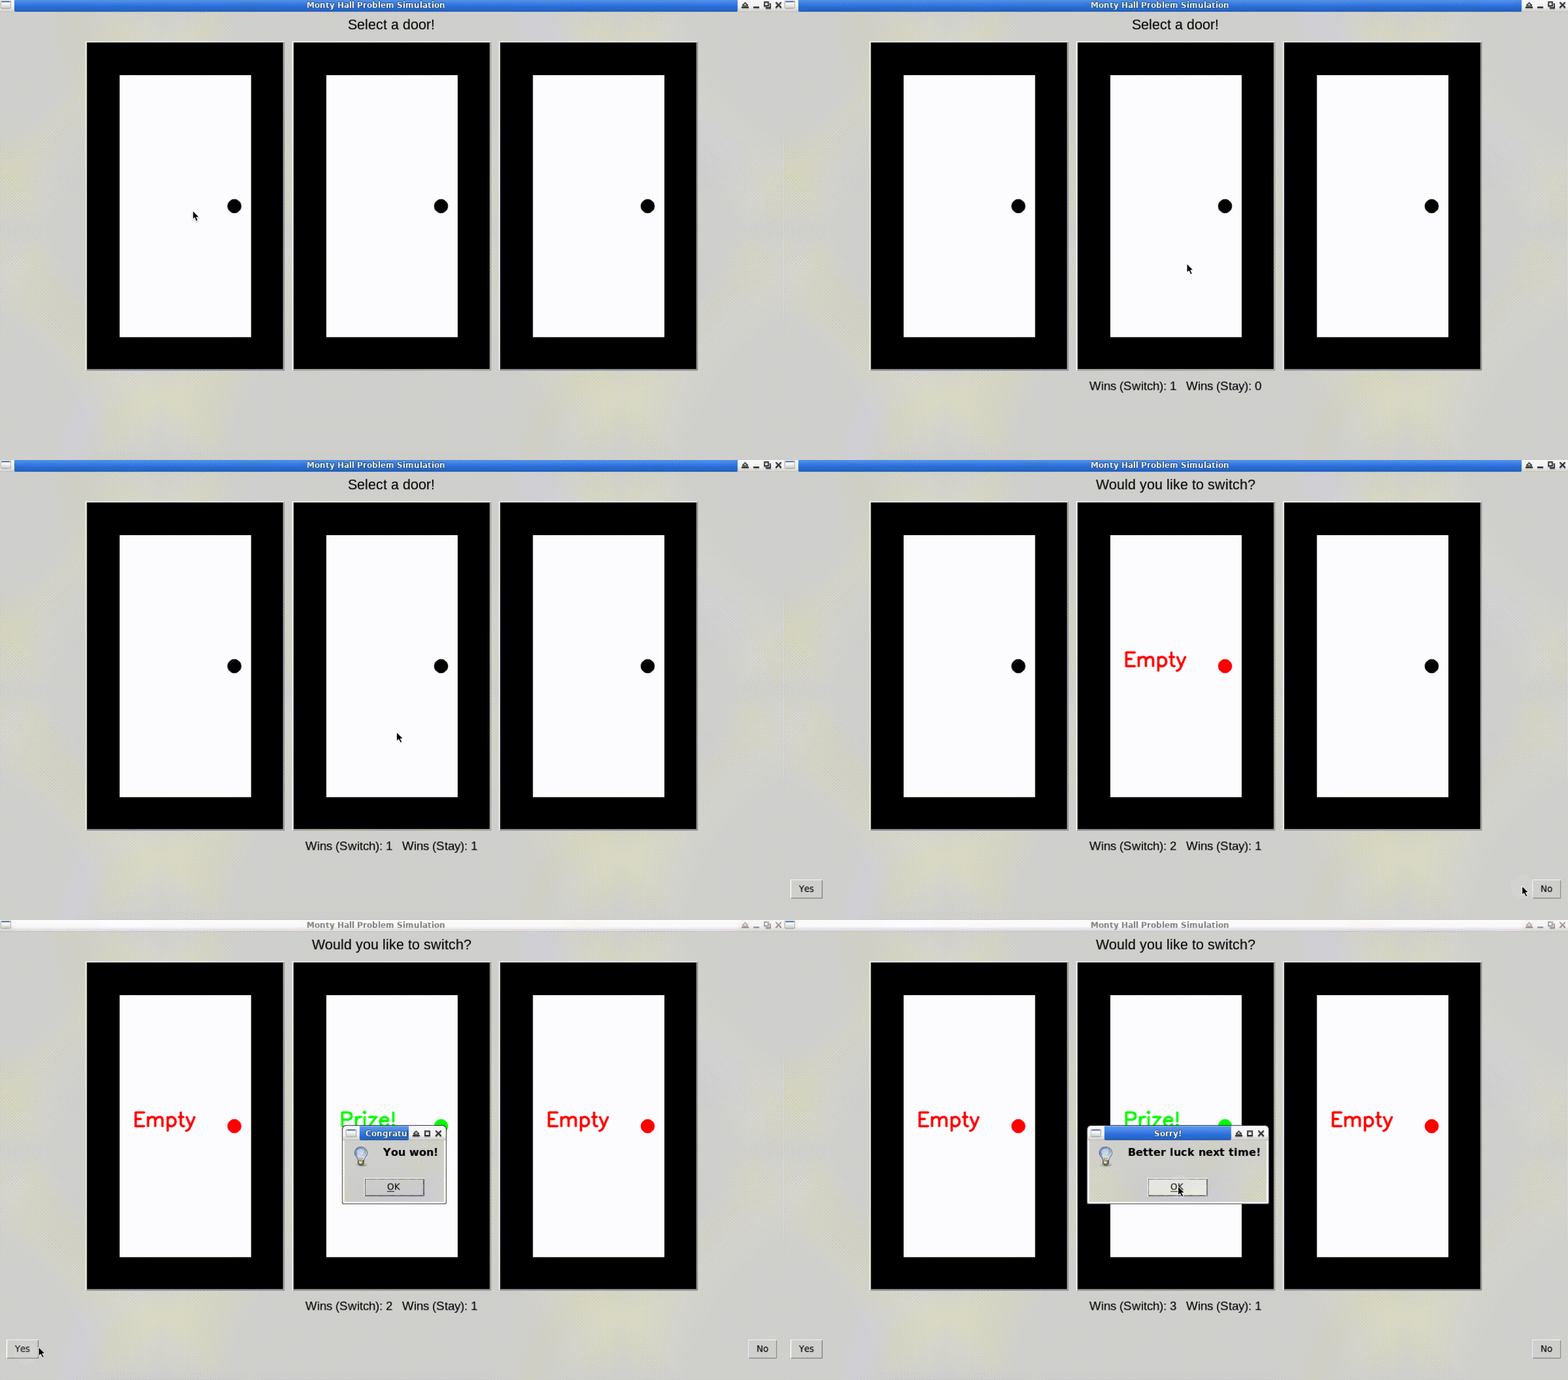
Monty Hall

ðŸŽŊ Tasks

In this project, you will learn:

  • How to design and develop a graphical user interface (GUI) using Tkinter.
  • How to simulate the Monty Hall problem to understand its probabilistic outcomes.
  • How to implement game logic in Python to handle user choices and reveal results.
  • How to use Python's random library to randomly allocate the prize behind one of the doors.
  • How to reset game states to allow multiple rounds of play without restarting the application.

🏆 Achievements

After completing this project, you will be able to:

  • Apply GUI design principles and implement them in Python with Tkinter.
  • Understand the practical application of probability and statistics in game simulations.
  • Implement event-driven programming and handle user interactions in a GUI application.
  • Utilize advanced Python programming techniques such as lambda functions and list comprehensions.
  • Recognize the importance of user experience (UX) in game design and provide feedback mechanisms using message boxes.

Create Project Files

First, create a Python file named monty_hall_gui.py in ~/project. Then open it in a text editor or an integrated development environment (IDE).

cd ~/project
touch monty_hall_gui.py
âœĻ Check Solution and Practice

Import Necessary Libraries

To begin, we'll import the required modules.

import tkinter as tk
from tkinter import messagebox
import random
from typing import List, Optional

In the above code, we're importing the required Python libraries. tkinter is for GUI creation, messagebox is for pop-up alerts, and random is for randomized game logic.

âœĻ Check Solution and Practice

Initialize the MontyHallSimulation Class

Now, we will create the main class to manage our simulation.

class MontyHallSimulation:
    def __init__(self, root: tk.Tk) -> None:
        """
        Initialize the Monty Hall Simulation.

        :param root: The main tkinter window
        """
        ## Window Configuration
        self.root = root
        self.root.title("Monty Hall Problem Simulation")
        self.root.geometry("1200x800")

In the above instructions, we begin to define our main class for the simulation.

âœĻ Check Solution and Practice

Set Up Variables and UI Components

Within the class, initialize the necessary variables and UI elements.

        ## Variables to keep track of the user's selected door, the door that's shown, and the winning door
        self.selected_door: Optional[int] = None
        self.show_door: Optional[int] = None
        self.winning_door: int = random.randint(1, 3)

        ## Variables to keep track of win counts based on decision to change or stay
        self.wins_change: int = 0
        self.wins_stay: int = 0

        ## Instructions displayed at the top
        self.label = tk.Label(root, text="Select a door!", font=("Arial", 16))
        self.label.pack(pady=5)

        ## Creating frame for door buttons
        self.doors_frame = tk.Frame(root)
        self.doors_frame.pack(pady=5)

The above instructions guide you through initializing various game variables and setting up the primary UI elements for our simulation.

âœĻ Check Solution and Practice

Set Up Door Images and Buttons

Load the door images and configure door buttons to allow user interaction.

        ## Load door images
        self.door_imgs: List[tk.PhotoImage] = [
            tk.PhotoImage(file="door_closed.png"),
            tk.PhotoImage(file="door_opened_empty.png"),
            tk.PhotoImage(file="door_opened_prize.png")
        ]

        ## Create door buttons with images and attach select door function
        self.door_buttons: List[tk.Button] = [
            tk.Button(self.doors_frame, image=self.door_imgs[0], command=lambda: self.select_door(1)),
            tk.Button(self.doors_frame, image=self.door_imgs[0], command=lambda: self.select_door(2)),
            tk.Button(self.doors_frame, image=self.door_imgs[0], command=lambda: self.select_door(3))
        ]

        for button in self.door_buttons:
            button.pack(side=tk.LEFT, padx=5)

        ## Buttons for choosing whether to switch doors
        self.yes_button = tk.Button(self.root, text="Yes", command=self.switch_door)
        self.yes_button.pack_forget()

        self.no_button = tk.Button(self.root, text="No", command=self.stay_door)
        self.no_button.pack_forget()

        ## Displaying results
        self.results_label = tk.Label(root, text="", font=("Arial", 14))
        self.results_label.pack(pady=5)

In the above code, we're loading the door images that represent different door states. We then create and configure three buttons representing the doors, which allow the user to make their choice.

âœĻ Check Solution and Practice

Implement Door Selection Logic

First, we'll tackle the logic for selecting a door.

    def select_door(self, door: int) -> None:
        """
        Handle the event when a door is selected.

        :param door: The number of the door selected
        """
        ## Ensure no re-selection of doors
        if self.selected_door:
            return

        self.selected_door = door

        ## Determine which doors were not selected
        non_selected_doors = [d for d in [1, 2, 3] if d != self.selected_door]

        ## Decide which door to reveal
        if self.selected_door == self.winning_door:
            show_door = random.choice(non_selected_doors)
        else:
            non_selected_doors.remove(self.winning_door)
            show_door = non_selected_doors[0]

        self.show_door = show_door
        self.door_buttons[show_door - 1].config(image=self.door_imgs[1])

        ## Prompt the user to decide whether to switch
        self.label.config(text="Would you like to switch?")

        ## Display the yes and no buttons
        self.yes_button.pack(side=tk.LEFT, padx=10, pady=20)
        self.no_button.pack(side=tk.RIGHT, padx=10, pady=20)

In the above code, we define the select_door method which will be used when a player chooses a door. The method will remember the player's selection and reveal one of the doors that doesn't contain the prize.

âœĻ Check Solution and Practice

Handle Door Switching Logic

Next, we delve into the logic of swapping door choices.

    def switch_door(self) -> None:
        """Handle the event when the user decides to switch doors."""
        ## Find the door that was not selected and not revealed
        remaining_doors = [d for d in [1, 2, 3] if d != self.selected_door and d != self.show_door]
        new_door = remaining_doors[0]

        ## Check for a win
        if new_door == self.winning_door:
            self.wins_change += 1
            self.show_win(True)
        else:
            self.show_win(False)

Here, the switch_door function manages what transpires when a player opts to switch doors after the host reveals a goat behind one of the non-selected doors.

âœĻ Check Solution and Practice

Address Door Retention Logic

Now, let's address the logic for retaining the initial door choice.

    def stay_door(self) -> None:
        """Handle the event when the user decides to stay with the initial door selection."""
        ## Check for a win
        if self.selected_door == self.winning_door:
            self.wins_stay += 1
            self.show_win(True)
        else:
            self.show_win(False)

In this snippet, the stay_door function supervises the outcome when the player decides to remain with their initial door choice.

âœĻ Check Solution and Practice

Illustrate Win or Loss

Subsequently, illustrate whether the player secured a win or not.

    def show_win(self, did_win: bool) -> None:
        """
        Display the results after revealing all doors.

        :param did_win: Boolean indicating whether the user won or not
        """
        ## Update door images based on the results
        for i, button in enumerate(self.door_buttons):
            if i + 1 == self.winning_door:
                button.config(image=self.door_imgs[2])
            else:
                button.config(image=self.door_imgs[1])

        ## Show win/lose message
        if did_win:
            messagebox.showinfo("Congratulations!", "You won!")
        else:
            messagebox.showinfo("Sorry!", "Better luck next time!")

        ## Update the win statistics
        self.results_label.config(text=f"Wins (Switch): {self.wins_change}   Wins (Stay): {self.wins_stay}")

        ## Prepare for the next round
        self.reset_game()

This show_win method reveals the outcomes. If the player's final door selection conceals the prize, they are announced as a winner; otherwise, better luck is wished for next time.

âœĻ Check Solution and Practice

Reset Game Mechanics

Finally, ensure you can reinitialize the game for another round.

    def reset_game(self) -> None:
        """Reset the game for a new round."""
        self.selected_door = None
        self.winning_door = random.randint(1, 3)
        for button in self.door_buttons:
            button.config(image=self.door_imgs[0])
        self.label.config(text="Select a door!")
        self.yes_button.pack_forget()
        self.no_button.pack_forget()

This function, reset_game, reboots the game state, allowing players to attempt another round.

âœĻ Check Solution and Practice

Run the Application

Finally, let's initialize and run our application.

if __name__ == "__main__":
    root = tk.Tk()
    sim = MontyHallSimulation(root)
    root.mainloop()

Now we've completed all the steps, we can run the code using the following command:

cd ~/project
python monty_hall_gui.py
Monty Hall
âœĻ Check Solution and Practice

Summary

Congratulations! You have just created a GUI-based simulation of the Monty Hall problem using Tkinter. To run the simulation, execute the monty_hall_gui.py script and interact with the graphical interface. Remember, the game showcases the counterintuitive nature of probability, and the best strategy is to always switch doors!

Other Python Tutorials you may like