
Introduction
In this lab, you will learn how to work with HTML5 Audio Tag to embed and play audio files directly in web pages. The lab covers essential skills for web developers, including understanding the basic structure of the audio tag, configuring audio controls, adding multiple audio source formats, exploring advanced attributes, and creating a simple audio player webpage. Through hands-on exercises, you will gain practical experience in implementing audio playback functionality using native HTML5 features without relying on external plugins.
By following the step-by-step instructions, you will discover how to seamlessly integrate audio content into web pages, customize audio player controls, and ensure cross-browser compatibility. The lab provides a comprehensive introduction to working with audio elements, enabling you to enhance web applications with rich multimedia experiences.
Understand HTML5 Audio Tag Basics
In this step, you'll learn the basics of the HTML5 Audio Tag, a powerful feature that allows you to embed and play audio files directly in web pages without using external plugins.
The HTML5 <audio> tag is a simple yet versatile element that enables web developers to include audio content seamlessly. Let's explore its fundamental structure and basic usage.
First, create a new HTML file in the ~/project directory to demonstrate the audio tag:
cd ~/project
touch audio-basics.html
Open the audio-basics.html file in the WebIDE and add the following basic HTML structure:
<!doctype html>
<html lang="en">
  <head>
    <meta charset="UTF-8" />
    <title>HTML5 Audio Tag Basics</title>
  </head>
  <body>
    <h1>HTML5 Audio Tag Example</h1>

    <audio src="sample-audio.mp3"></audio>
  </body>
</html>
The basic <audio> tag has a simple syntax:
srcattribute specifies the path to the audio file- By default, the audio will not have any controls visible to the user
Example output of the basic audio tag:
- The audio file is embedded in the page
- No play/pause controls are visible
- Audio will not autoplay by default
Key points about the HTML5 Audio Tag:
- Supports multiple audio formats (MP3, WAV, OGG)
- Works across modern web browsers
- Provides a native way to embed audio without plugins
When you preview the audio-basics.html file in the WebIDE, you will see nothing but a blank page since the audio player controls are not visible.
Notes: Learn more about How to preview HTML files in the WebIDE.
Configure Audio Tag with Controls and Source
In this step, you'll learn how to enhance the HTML5 audio tag by adding controls and configuring the audio source to provide a better user experience.
Open the audio-basics.html file in the WebIDE and modify the audio tag to include controls:
<!doctype html>
<html lang="en">
  <head>
    <meta charset="UTF-8" />
    <title>HTML5 Audio Tag with Controls</title>
  </head>
  <body>
    <h1>Audio Player with Controls</h1>

    <audio src="sample-audio.mp3" controls>
      Your browser does not support the audio element.
    </audio>
  </body>
</html>
Key modifications in this example:
- Added the
controlsattribute to display playback controls - Included a fallback text for browsers that don't support HTML5 audio
The controls attribute provides a default audio player interface with:
- Play/Pause button
- Volume slider
- Progress bar
- Current time and duration display
Let's explore additional source configuration options:
<audio controls>
  <source src="sample-audio.mp3" type="audio/mpeg" />
  <source src="sample-audio.ogg" type="audio/ogg" />
  Your browser does not support the audio element.
</audio>
Example of different audio source configurations:
- Multiple
<source>tags allow browser-compatible format selection typeattribute specifies the audio file MIME type- Browsers will use the first supported format
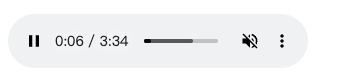
Example output of audio player:

Click the play button to start audio playback, make sure your browser tab has been unmuted.
Add Multiple Audio Source Formats
In this step, you'll learn how to provide multiple audio file formats to ensure cross-browser compatibility and improve audio playback reliability.
First, let's copy sample-audio.mp3 to different formats (music.ogg, music.wav) in the ~/project directory:
cd ~/project
cp sample-audio.mp3 music.mp3
ffmpeg -i sample-audio.mp3 music.ogg
ffmpeg -i sample-audio.mp3 music.wav
Wait for the conversion process to complete before proceeding.
Now, update the audio-basics.html file to include multiple audio sources:
<!doctype html>
<html lang="en">
  <head>
    <meta charset="UTF-8" />
    <title>Multiple Audio Source Formats</title>
  </head>
  <body>
    <h1>Cross-Browser Audio Playback</h1>

    <audio controls>
      <source src="music.mp3" type="audio/mpeg" />
      <source src="music.ogg" type="audio/ogg" />
      <source src="music.wav" type="audio/wav" />
      Your browser does not support the audio element.
    </audio>
  </body>
</html>
Key points about multiple audio sources:
- Browsers will use the first compatible format
- Common audio formats include:
- MP3 (audio/mpeg)
- OGG (audio/ogg)
- WAV (audio/wav)
- Order matters: list preferred formats first
Browser compatibility example:
- Chrome: Prefers MP3
- Firefox: Prefers OGG
- Safari: Prefers MP3
- The browser will automatically select the first supported format
Explore Audio Tag Advanced Attributes
In this step, you'll discover advanced attributes of the HTML5 audio tag that provide more control over audio playback and user experience.
Update the audio-basics.html file to demonstrate advanced attributes:
<!doctype html>
<html lang="en">
  <head>
    <meta charset="UTF-8" />
    <title>Advanced Audio Tag Attributes</title>
  </head>
  <body>
    <h1>Advanced Audio Playback Options</h1>

    <audio src="music.mp3" controls autoplay loop preload="metadata" muted>
      Your browser does not support the audio element.
    </audio>
  </body>
</html>
Key advanced attributes explained:
autoplay: Starts playing audio automatically when page loads- Useful for background music or sound effects
- Note: Many browsers block autoplay by default
loop: Repeats the audio track continuously- Great for background music or sound loops
preload: Specifies how the browser should load the audionone: No preloadingmetadata: Load only metadata (duration, etc.)auto: Preload entire audio file
muted: Starts the audio in a muted state- Helpful for initial user control
Example output of advanced audio controls:
Create a Simple Audio Player Webpage
In this step, you'll create a complete audio player webpage that demonstrates everything you've learned about HTML5 audio tags.
First, create a new file called music-player.html in the ~/project directory:
cd ~/project
touch music-player.html
Now, open music-player.html in the WebIDE and add the following code:
<!doctype html>
<html lang="en">
  <head>
    <meta charset="UTF-8" />
    <title>Simple Music Player</title>
    <style>
      body {
        font-family: Arial, sans-serif;
        text-align: center;
        background-color: #f4f4f4;
      }
      .player-container {
        max-width: 400px;
        margin: 50px auto;
        padding: 20px;
        background-color: white;
        border-radius: 10px;
        box-shadow: 0 4px 6px rgba(0, 0, 0, 0.1);
      }
    </style>
  </head>
  <body>
    <div class="player-container">
      <h1>My Music Player</h1>

      <audio id="musicPlayer" controls>
        <source src="music.mp3" type="audio/mpeg" />
        <source src="music.ogg" type="audio/ogg" />
        Your browser does not support the audio element.
      </audio>

      <div>
        <button
          Play
        </button>
        <button
          Pause
        </button>
        <button += 0.1">
          Volume Up
        </button>
        <button -= 0.1">
          Volume Down
        </button>
      </div>
    </div>

    <script>
      const player = document.getElementById("musicPlayer");
      player.addEventListener("ended", () => {
        console.log("Song finished playing");
      });
    </script>
  </body>
</html>
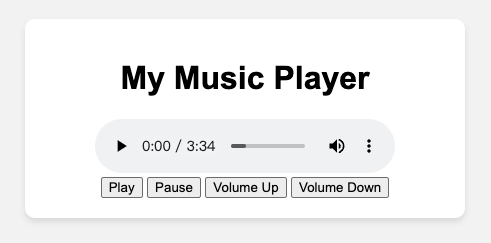
Don't worry if you're new to CSS and JavaScript. The code above is simple and easy to understand. It includes basic CSS styling for the player container and responsive design. The JavaScript code adds an event listener to the audio player to log a message when the song finishes playing.
Key features of the music player:
- Responsive design with basic CSS styling
- Multiple audio source formats
- Standard audio controls
- Custom play/pause buttons
- Volume control buttons
- Event listener for song completion
Example output in browser:
Summary
In this lab, participants learned the fundamentals of embedding and playing audio files directly in web pages using the HTML5 Audio Tag. The lab guided learners through understanding the basic structure of the <audio> tag, configuring audio controls, and exploring various attributes that enhance audio playback functionality.
Key learning outcomes included working with audio source attributes, adding playback controls, supporting multiple audio formats, and creating a simple audio player webpage. Participants gained practical experience in implementing native audio embedding techniques without relying on external plugins, demonstrating the versatility and ease of use of HTML5's audio capabilities across modern web browsers.


