
Introduction
HTML tables are used to display data in a structured, tabular format, consisting of rows and columns. This is essential for presenting information like product comparisons, financial reports, or schedules in a clear and organized way.
In this lab, you will learn the fundamental building blocks of an HTML table. You will start by creating the basic table structure and progressively add rows, headers, and data cells to build a complete, functional table.
Create table tag for table structure
In this step, you will create the main container for your table. The <table> tag is the root element of any HTML table and encloses all other table-related elements.
First, let's set up the basic HTML document structure. In the file explorer on the left, find and open the index.html file located in the ~/project directory.
Add the following boilerplate code to index.html. This code defines a standard HTML5 document and includes an empty <table> element within the <body>.
<!DOCTYPE html>
<html>
  <head>
    <title>My First Table</title>
  </head>
  <body>
    <table></table>
  </body>
</html>
After adding the code, you can click the Web 8080 tab at the top of the interface to preview your page. You won't see anything yet, as the table is empty, but this confirms the file is being served correctly.
Add tr tags for table rows
In this step, you will add rows to your table. Every horizontal row in a table is defined by the <tr> tag, which stands for "table row". All content within a row, such as headers or data cells, must be placed inside a <tr> element.
Let's add two rows to our table. The first row will eventually hold the column headers, and the second will hold the data.
Modify your index.html file to include two <tr> elements inside the <table> tag, like this:
<!DOCTYPE html>
<html>
  <head>
    <title>My First Table</title>
  </head>
  <body>
    <table>
      <tr></tr>
      <tr></tr>
    </table>
  </body>
</html>
Save the file. If you check the Web 8080 tab, you still won't see any visible changes because the rows don't contain any content or borders yet.
Insert th tags for header cells
In this step, you will define the header cells for your table. Header cells are created using the <th> tag, which stands for "table header". These tags are placed inside a <tr> element and typically render as bold, centered text, distinguishing them from regular data cells.
Let's add two headers to the first row of our table: "Name" and "Age".
Update your index.html file by adding two <th> elements inside the first <tr> tag:
<!DOCTYPE html>
<html>
  <head>
    <title>My First Table</title>
  </head>
  <body>
    <table>
      <tr>
        <th>Name</th>
        <th>Age</th>
      </tr>
      <tr></tr>
    </table>
  </body>
</html>
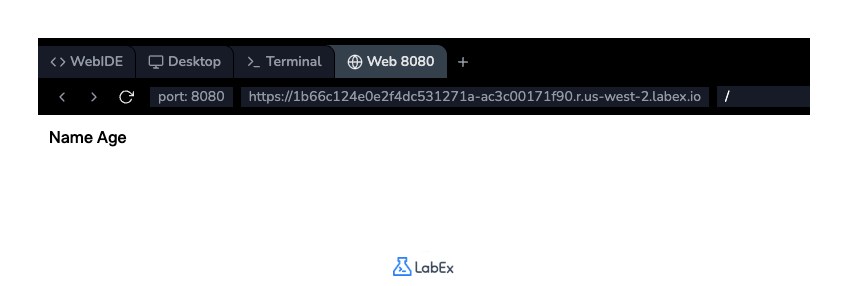
Now, if you switch to the Web 8080 tab, you will see the "Name" and "Age" headers displayed.
Use td tags for data cells
In this step, you will add the actual data to your table. Standard data cells are created with the <td> tag, which stands for "table data". These tags are placed inside a <tr> element and contain the information corresponding to the column headers.
Let's add a row of data for a person named "Alice" who is "30" years old. This data will go into the second row of our table.
Update your index.html file by adding two <td> elements inside the second <tr> tag:
<!DOCTYPE html>
<html>
  <head>
    <title>My First Table</title>
  </head>
  <body>
    <table>
      <tr>
        <th>Name</th>
        <th>Age</th>
      </tr>
      <tr>
        <td>Alice</td>
        <td>30</td>
      </tr>
    </table>
  </body>
</html>
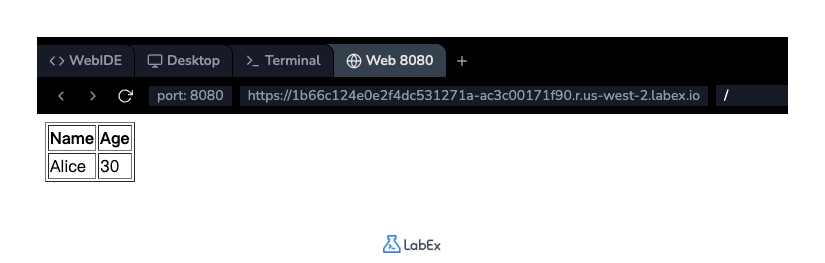
Save the file and check the Web 8080 tab. You will now see the data "Alice" and "30" displayed in the second row, aligned under their respective headers.
Add border attribute to table for visibility
In this step, you will make the table's structure visible. By default, HTML tables are rendered without any borders. To quickly add a border for visualization, you can use the border attribute on the <table> tag.
Let's add a 1-pixel border to our table. Modify the opening <table> tag in index.html to include border="1".
<!DOCTYPE html>
<html>
  <head>
    <title>My First Table</title>
  </head>
  <body>
    <table border="1">
      <tr>
        <th>Name</th>
        <th>Age</th>
      </tr>
      <tr>
        <td>Alice</td>
        <td>30</td>
      </tr>
    </table>
  </body>
</html>
After saving the file, refresh the Web 8080 tab. You will now see a complete table with visible borders around the table and each cell, clearly showing the row and column structure. While the border attribute is simple, modern web design uses CSS for styling, which offers much more control and flexibility.
Summary
Congratulations! You have successfully created a basic HTML table.
In this lab, you learned how to:
- Use the
<table>tag to create a table container. - Use the
<tr>tag to define table rows. - Use the
<th>tag to create header cells for columns. - Use the
<td>tag to add data cells. - Add a
borderattribute to make the table structure visible.
These are the essential elements for displaying any kind of tabular data on a web page. You can now build on this foundation to create more complex and styled tables.


