
Introduction
Welcome to the CSS Selectors Basics lab! Cascading Style Sheets (CSS) is a cornerstone technology of the World Wide Web, used for describing the presentation of a document written in a markup language like HTML.
CSS selectors are patterns used to select and style the HTML elements you want. Mastering selectors is a fundamental skill for any web developer. In this lab, you will learn how to use the most common types of CSS selectors to style a simple web page.
You will practice:
- Element Selector: Targets elements by their tag name.
- Class Selector: Targets elements with a specific
classattribute. - ID Selector: Targets a single element with a specific
idattribute. - Grouping Selector: Applies the same styles to multiple selectors.
- Descendant Selector: Targets elements that are descendants of another element.
The lab environment has been pre-configured with an index.html file. Your task is to write CSS code in the styles.css file to style the page. You can preview your changes in real-time by switching to the Web 8080 tab in the top-left corner of the interface.
Use element selector for p tag
In this step, you will use an element selector to apply a style to all <p> (paragraph) elements on the page. Element selectors are the most basic type of selector; they select HTML elements based on their tag name.
First, locate the styles.css file in the file explorer on the left side of your WebIDE. Click on it to open it in the editor.
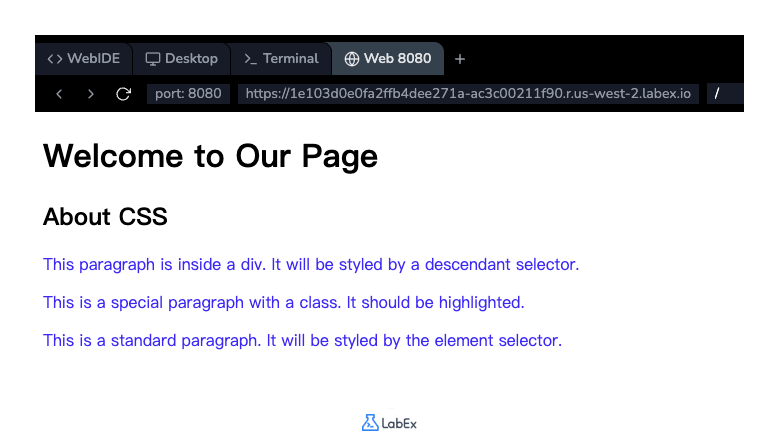
Now, add the following CSS code to the styles.css file. This rule will select all <p> elements and change their text color to blue.
p {
  color: blue;
}
After adding the code, save the file (you can use Ctrl+S or Cmd+S). To see the effect, click on the Web 8080 tab. You should see that the text of all three paragraphs on the page has turned blue.
Apply class selector with .classname
In this step, you will learn to use a class selector. Class selectors are more specific than element selectors. They select elements based on the value of their class attribute. A class selector is written with a period (.) followed by the class name.
In your index.html file, one of the paragraphs has a class="highlight" attribute. We will target this specific paragraph.
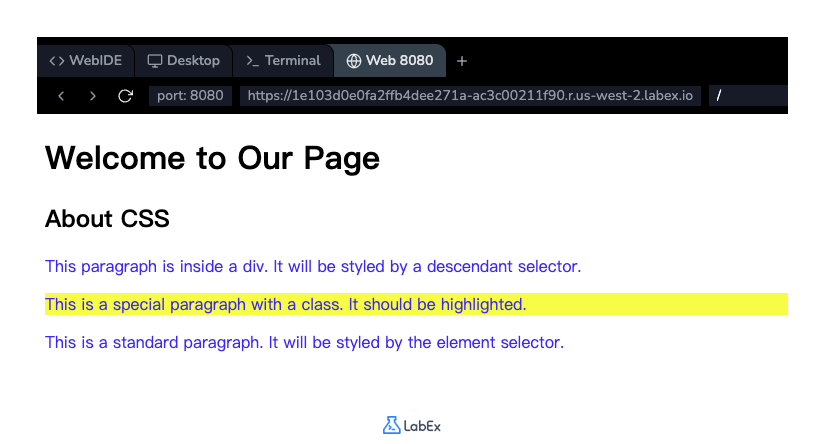
Add the following CSS rule to your styles.css file. This will select any element with the class highlight and give it a yellow background.
.highlight {
  background-color: yellow;
}
Save the styles.css file and switch to the Web 8080 tab to view your changes. You will notice that only the paragraph with the text "This is a special paragraph with a class" now has a yellow background, while the other paragraphs are unaffected.
Implement ID selector with #idname
In this step, we will use an ID selector. ID selectors are even more specific than class selectors. They are used to select one unique element with a specific id attribute. An ID selector is written with a hash character (#) followed by the element's ID. Remember, an ID must be unique within a single HTML page.
The <h1> element in index.html has an id="main-title". Let's style it.
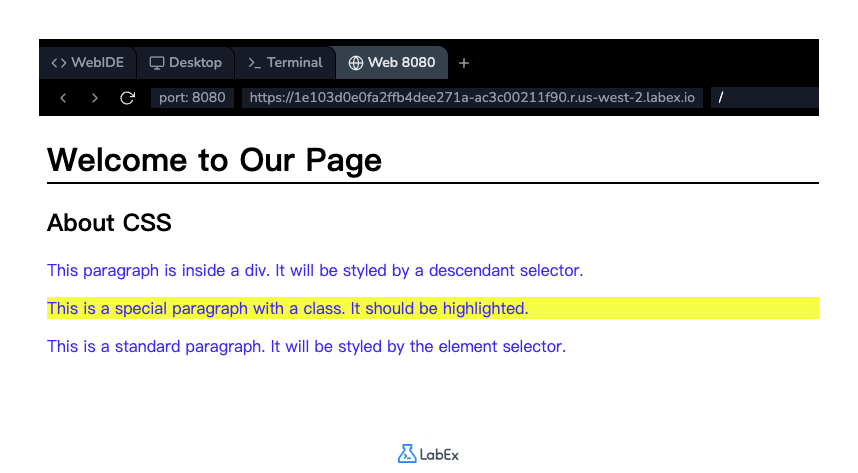
Add the following CSS rule to your styles.css file. This rule will increase the font size of the main title and add a solid black line underneath it.
#main-title {
  font-size: 32px;
  border-bottom: 2px solid black;
}
Save the file and check the Web 8080 tab. You should see the main title "Welcome to Our Page" is now larger and has a line under it. This style only applies to the element with the ID main-title.
Combine selectors using comma for grouping
In this step, you will learn how to apply the same styles to multiple selectors without repeating the code. The grouping selector allows you to do this by separating each selector with a comma.
Let's say we want to apply the same font to both the <h1> and <h2> elements on our page. Instead of writing two separate rules, we can group them.
Add the following CSS rule to your styles.css file.
h1,
h2 {
  font-family: Arial, sans-serif;
}
This rule tells the browser to apply the specified font-family to all <h1> elements AND all <h2> elements.
Save the file and refresh the Web 8080 tab. Observe how the font for both "Welcome to Our Page" and "About CSS" has changed.
Add descendant selector like div p
In this step, you will use a descendant selector. This selector matches all elements that are descendants of a specified element. A descendant selector is created by listing two or more selectors separated by a space.
Our index.html has a <p> element inside a <div>. We want to style only this specific paragraph, not the other paragraphs on the page.
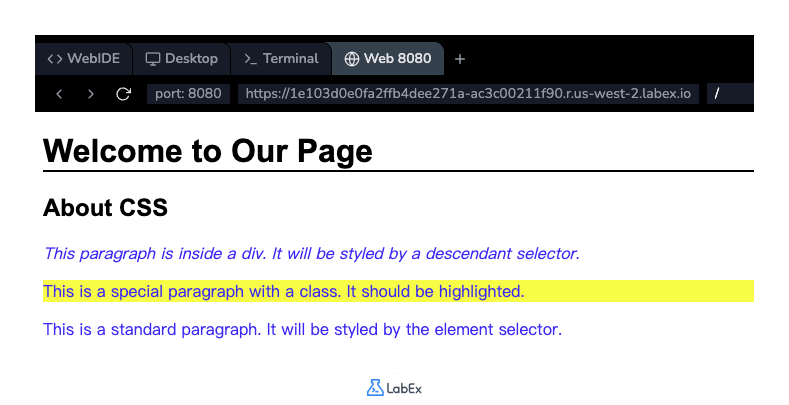
Add the following CSS rule to your styles.css file. The selector div p will select any <p> element that is located anywhere inside a <div> element.
div p {
  font-style: italic;
}
After saving the file, go to the Web 8080 tab. You will see that only the paragraph "This paragraph is inside a div..." is now in italics. The other two paragraphs remain unchanged because they are not descendants of a <div>.
Summary
Congratulations on completing the lab! You have successfully learned and applied the fundamental CSS selectors to style a web page.
In this lab, you practiced:
- Element Selector (
p): To style all elements of a certain type. - Class Selector (
.highlight): To style specific elements that share a class. - ID Selector (
#main-title): To style a single, unique element. - Grouping Selector (
h1, h2): To apply the same styles to multiple elements efficiently. - Descendant Selector (
div p): To style elements based on their position within another element.
These selectors are the building blocks for creating complex and beautiful web page layouts. You can now use them to precisely control the appearance of your HTML documents.


