Introduction
In React, "state" refers to data that can change over time within a component. When a component's state changes, React automatically re-renders the component to reflect the new state. Hooks are functions that let you "hook into" React state and lifecycle features from function components.
In this lab, you will learn how to use one of the most fundamental Hooks, useState, to manage state in a React functional component. We will build a simple counter application to demonstrate how to initialize, display, and update state in response to user interaction.
Import useState from react in component file
First, let's get our development environment ready. The setup script has already created a new React project for you at ~/project/my-app using Vite.
Your first task is to install the necessary dependencies and start the development server. Open a terminal in the WebIDE and run the following commands one by one.
Navigate into your project directory:
cd my-app
Install the project dependencies:
npm install
Start the development server:
npm run dev -- --host 0.0.0.0 --port 8080
After running the last command, you will see output indicating that the server is running. You can now view your live application by clicking on the "Web 8080" tab in the LabEx interface. Throughout this lab, we will be modifying the ~/project/my-app/src/App.jsx file.
In this step, we will begin by importing the useState Hook from the React library. Hooks are special functions, and to use them, you must first import them from the react package.
Using the file explorer in the WebIDE, navigate to and open the file ~/project/my-app/src/App.jsx.
First, let's clean up the default content to have a minimal starting point. Replace the entire content of App.jsx with the following code:
function App() {
  return (
    <>
      <h1>React Counter</h1>
    </>
  );
}

export default App;
Now, add the import statement at the very top of the file to make the useState Hook available within our component.
import { useState } from "react";

function App() {
  return (
    <>
      <h1>React Counter</h1>
    </>
  );
}

export default App;
This line tells JavaScript that we want to use the useState function, which is a named export from the 'react' library.
Initialize state with const [count, setCount] = useState(0)
In this step, we will call the useState Hook to create a new piece of state in our component.
The useState function takes one argument: the initial value of the state. It returns an array containing two elements:
- The current value of the state.
- A function that lets you update the state.
We use a syntax called "array destructuring" to get these two values into distinct variables. It's a convention to name these variables like [something, setSomething].
Inside the App component function, before the return statement, add the following line to initialize our state. We'll name our state variable count and set its initial value to 0.
Update your ~/project/my-app/src/App.jsx file with the following code:
import { useState } from "react";

function App() {
  const [count, setCount] = useState(0);

  return (
    <>
      <h1>React Counter</h1>
    </>
  );
}

export default App;
Now, our component has a piece of state named count which is initialized to 0, and a function setCount that we can use to change its value later.
Display state value in JSX with {count}
In this step, we will display the current value of our count state variable in the user interface.
In JSX, you can embed any valid JavaScript expression directly within your markup by wrapping it in curly braces {}. This allows us to render dynamic data, like our state variable.
Let's add a paragraph <p> tag to display a message that includes the current value of count.
Modify the JSX inside the return statement in ~/project/my-app/src/App.jsx:
import { useState } from "react";

function App() {
  const [count, setCount] = useState(0);

  return (
    <>
      <h1>React Counter</h1>
      <p>The current count is: {count}</p>
    </>
  );
}

export default App;
After saving the file, switch to the "Web 8080" tab. You should see the text "The current count is: 0" displayed on the page, confirming that our initial state value is being rendered correctly.
Update state with setCount(count + 1)
In this step, we will define the logic to update our state. It's important to remember that you should never modify state directly (e.g., count = count + 1). Instead, you must always use the state setter function provided by useState, which in our case is setCount.
Calling the setter function tells React that the state has changed. React will then schedule a re-render of the component with the new state value.
Let's create a simple function inside our App component that will handle the logic for incrementing the count. We'll call this function incrementCount.
Add the incrementCount function to your ~/project/my-app/src/App.jsx file:
import { useState } from "react";

function App() {
  const [count, setCount] = useState(0);

  const incrementCount = () => {
    setCount(count + 1);
  };

  return (
    <>
      <h1>React Counter</h1>
      <p>The current count is: {count}</p>
    </>
  );
}

export default App;
This function, when called, will take the current count value, add 1 to it, and then pass the new value to setCount. This will trigger a re-render of the App component.
Trigger update on button click event
In this final step, we will connect our state update logic to a user action. We'll add a button to our component, and when the user clicks it, we'll call the incrementCount function we created in the previous step.
In React, you can handle events like clicks by providing a function to special attributes like onClick.
Let's add a <button> element to our JSX and set its onClick handler to our incrementCount function.
Update your ~/project/my-app/src/App.jsx with the final code:
import { useState } from "react";

function App() {
  const [count, setCount] = useState(0);

  const incrementCount = () => {
    setCount(count + 1);
  };

  return (
    <>
      <h1>React Counter</h1>
      <p>The current count is: {count}</p>
      <button
    </>
  );
}

export default App;
Notice that we pass the function itself (incrementCount) to onClick, not the result of calling it (incrementCount()). React will invoke this function for us whenever the button is clicked.
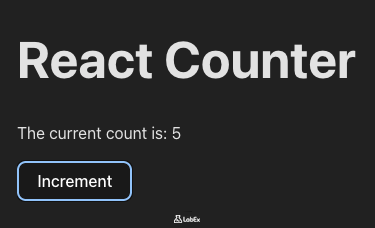
Now, go to the "Web 8080" tab. You should see the "Increment" button. Click it, and watch the count on the screen increase with each click!
Summary
Congratulations! You have successfully built a stateful React component using the useState Hook.
In this lab, you learned the fundamental principles of state management in modern React:
- What "state" is in a React component and why it's essential for creating interactive UIs.
- How to import the
useStateHook from thereactlibrary. - How to initialize a piece of state by calling
useStatewith an initial value. - How to use array destructuring to get the state variable and the state setter function.
- How to display the state variable in your JSX using curly braces
{}. - How to update the state in response to a user event (like a button click) by calling the setter function.
Understanding the useState Hook is a critical first step in mastering React. You can now use this pattern to add dynamic, interactive behavior to your own React components.