Introduction
Welcome to your first React lab! React is a powerful JavaScript library for building dynamic and interactive user interfaces. To get started with React development, you first need to set up a proper development environment.
In this lab, you will use the modern build tool Vite to bootstrap a new project. We will walk through the process of exploring the project structure, installing dependencies, starting a development server, modifying an existing component, and creating a new one. By the end of this lab, you will have a foundational understanding of the React project setup and be ready to build your own components.
Explore Project and Install Dependencies
The setup process has already created a new React project for you in a directory named my-app using Vite. First, let's verify that your development environment has the necessary tools, Node.js and npm.
Open the terminal and run the following commands to check their versions:
node -v
You should see an output indicating the Node.js version, for example:
v22.19.0
Next, check the npm version:
npm -v
You should see a similar output for the npm version:
10.9.3
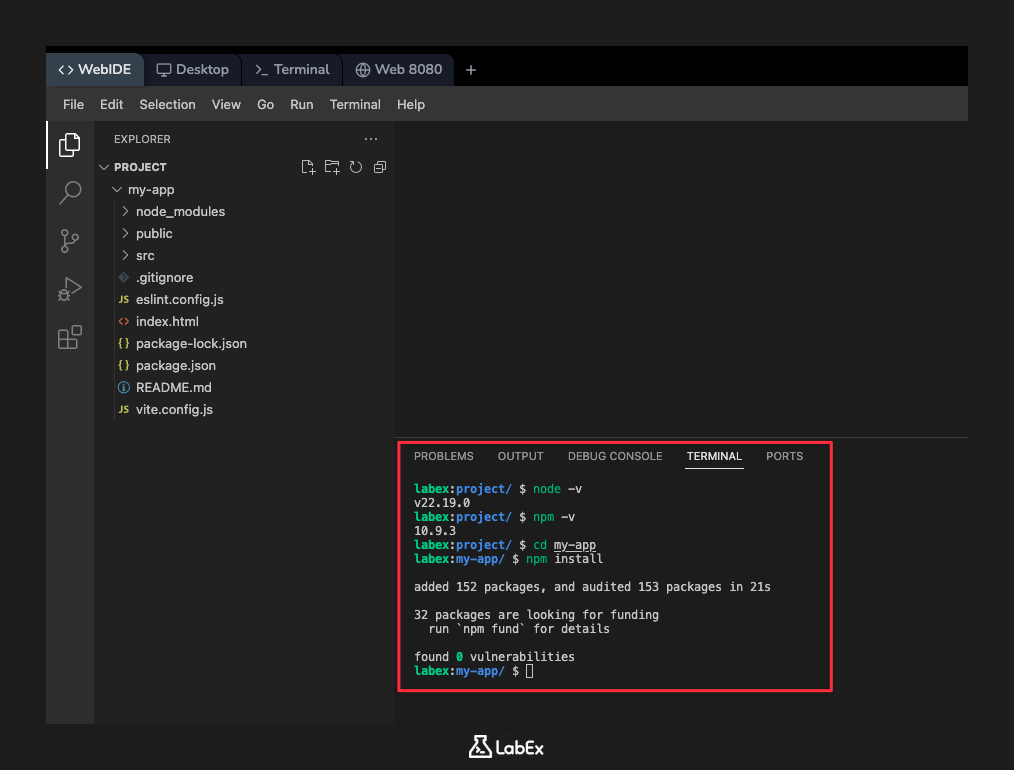
Now, navigate into the project directory. All subsequent commands should be run from inside this directory.
cd my-app
Your React application needs several packages to function, which are listed in the package.json file. You need to install these dependencies using npm.
Run the following command:
Important: For security reasons, free users cannot connect to the internet, so npm packages cannot be installed. You can continue to read the documentation, experience other Web Development Labs, or consider upgrading to a Pro user.
npm install
This command reads the package.json file and downloads all the required libraries into a node_modules folder within your project. You will see a progress bar and some messages as the packages are installed.
Start the Development Server
To see your React application in action, you need to start the development server. Since you are already inside the my-app directory, you can use the script provided by Vite.
Run the following command to start the server on port 8080:
npm run dev -- --host 0.0.0.0 --port 8080
This command starts the server and will occupy your terminal, displaying the local URL where the app is running. Leave this terminal running. After a moment, you will see a message indicating that the server is ready.
To view your application, click on the Web 8080 tab at the top of the interface. You should see the default Vite and React welcome page.
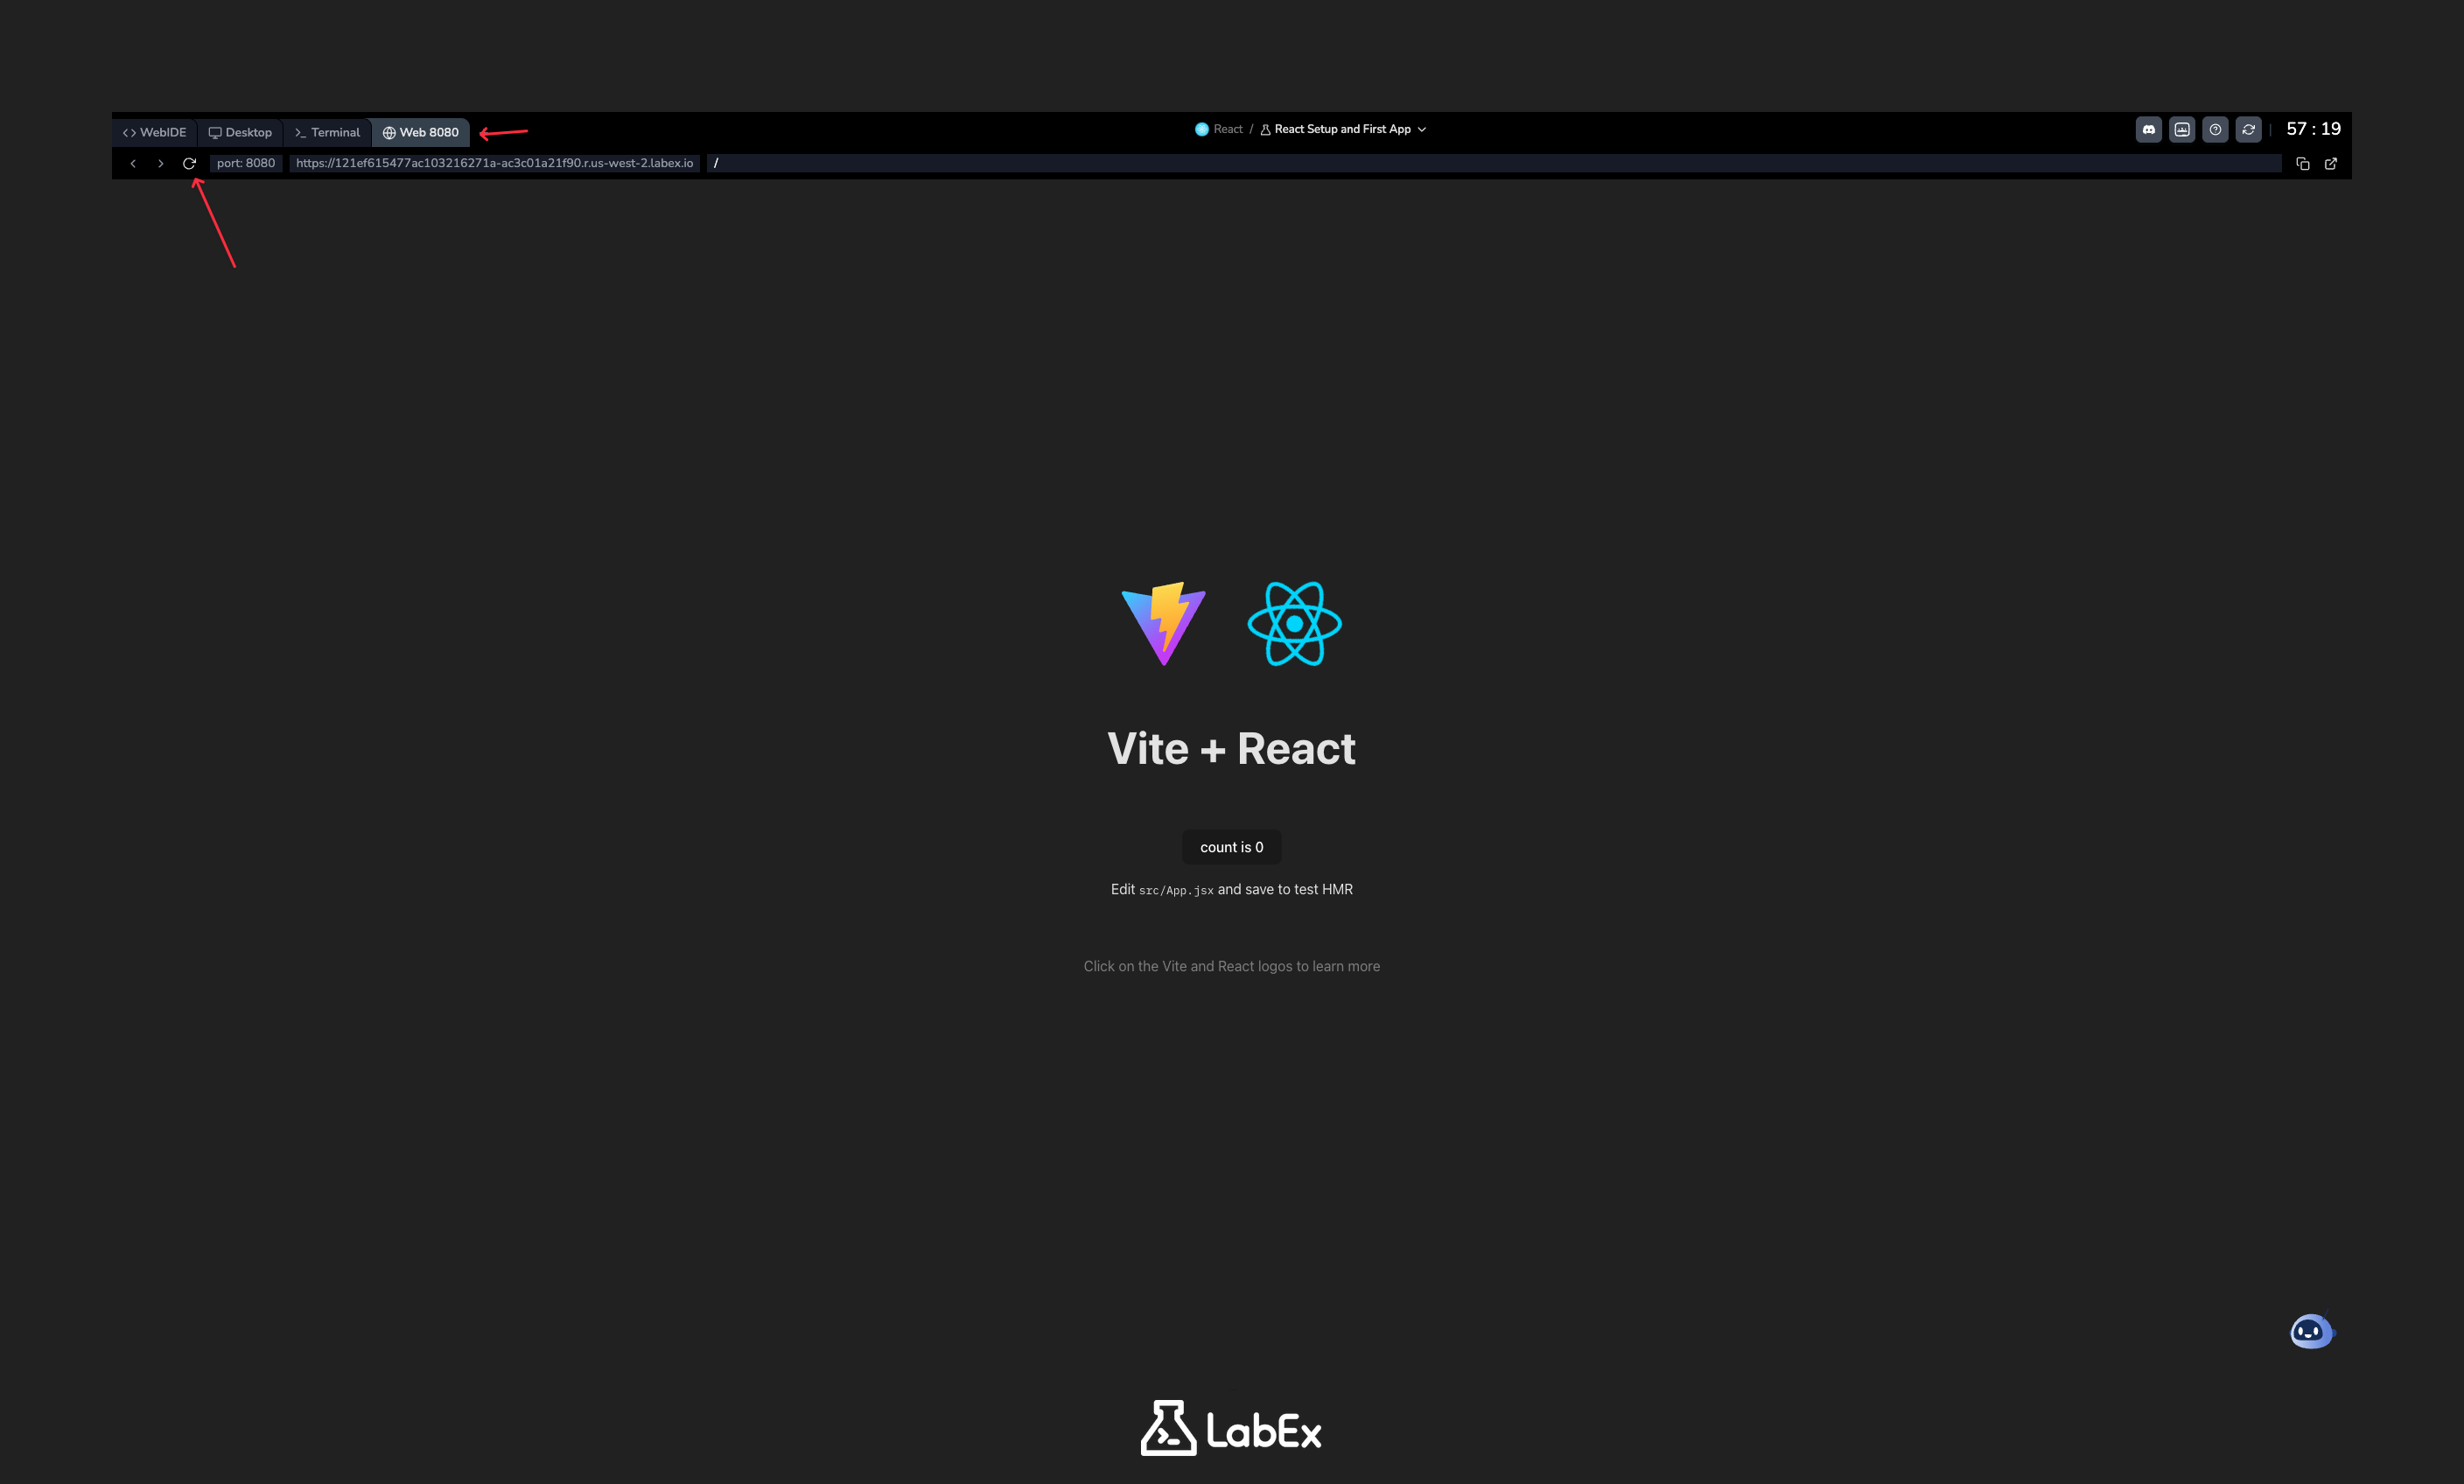
Note: If you do not see the application, try clicking the refresh button located to the left of the address bar in the Web 8080 tab.
Modify Your First Component
The Vite development server features Hot Module Replacement (HMR), which instantly updates the application in your browser when you save changes to a file. Let's see this in action.
In the file explorer on the left, navigate to my-app -> src and click on the App.jsx file to open it in the editor. This file defines the main App component.
Inside the return statement, you will see a block of code that looks like HTML. This is JSX, a syntax extension for JavaScript that allows you to write UI structures in a familiar way.
Replace the entire content inside the return (...) with a simple heading. Your App.jsx file should look like this:
import "./App.css";

function App() {
  return (
    <>
      <h1>Hello, LabEx!</h1>
    </>
  );
}

export default App;
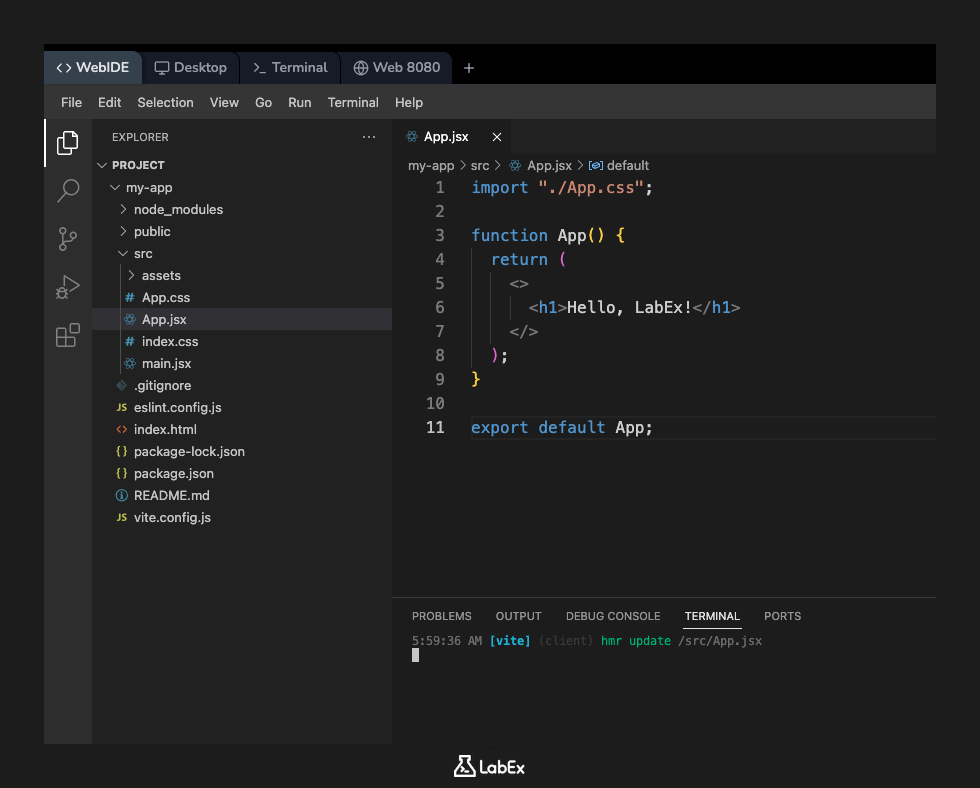
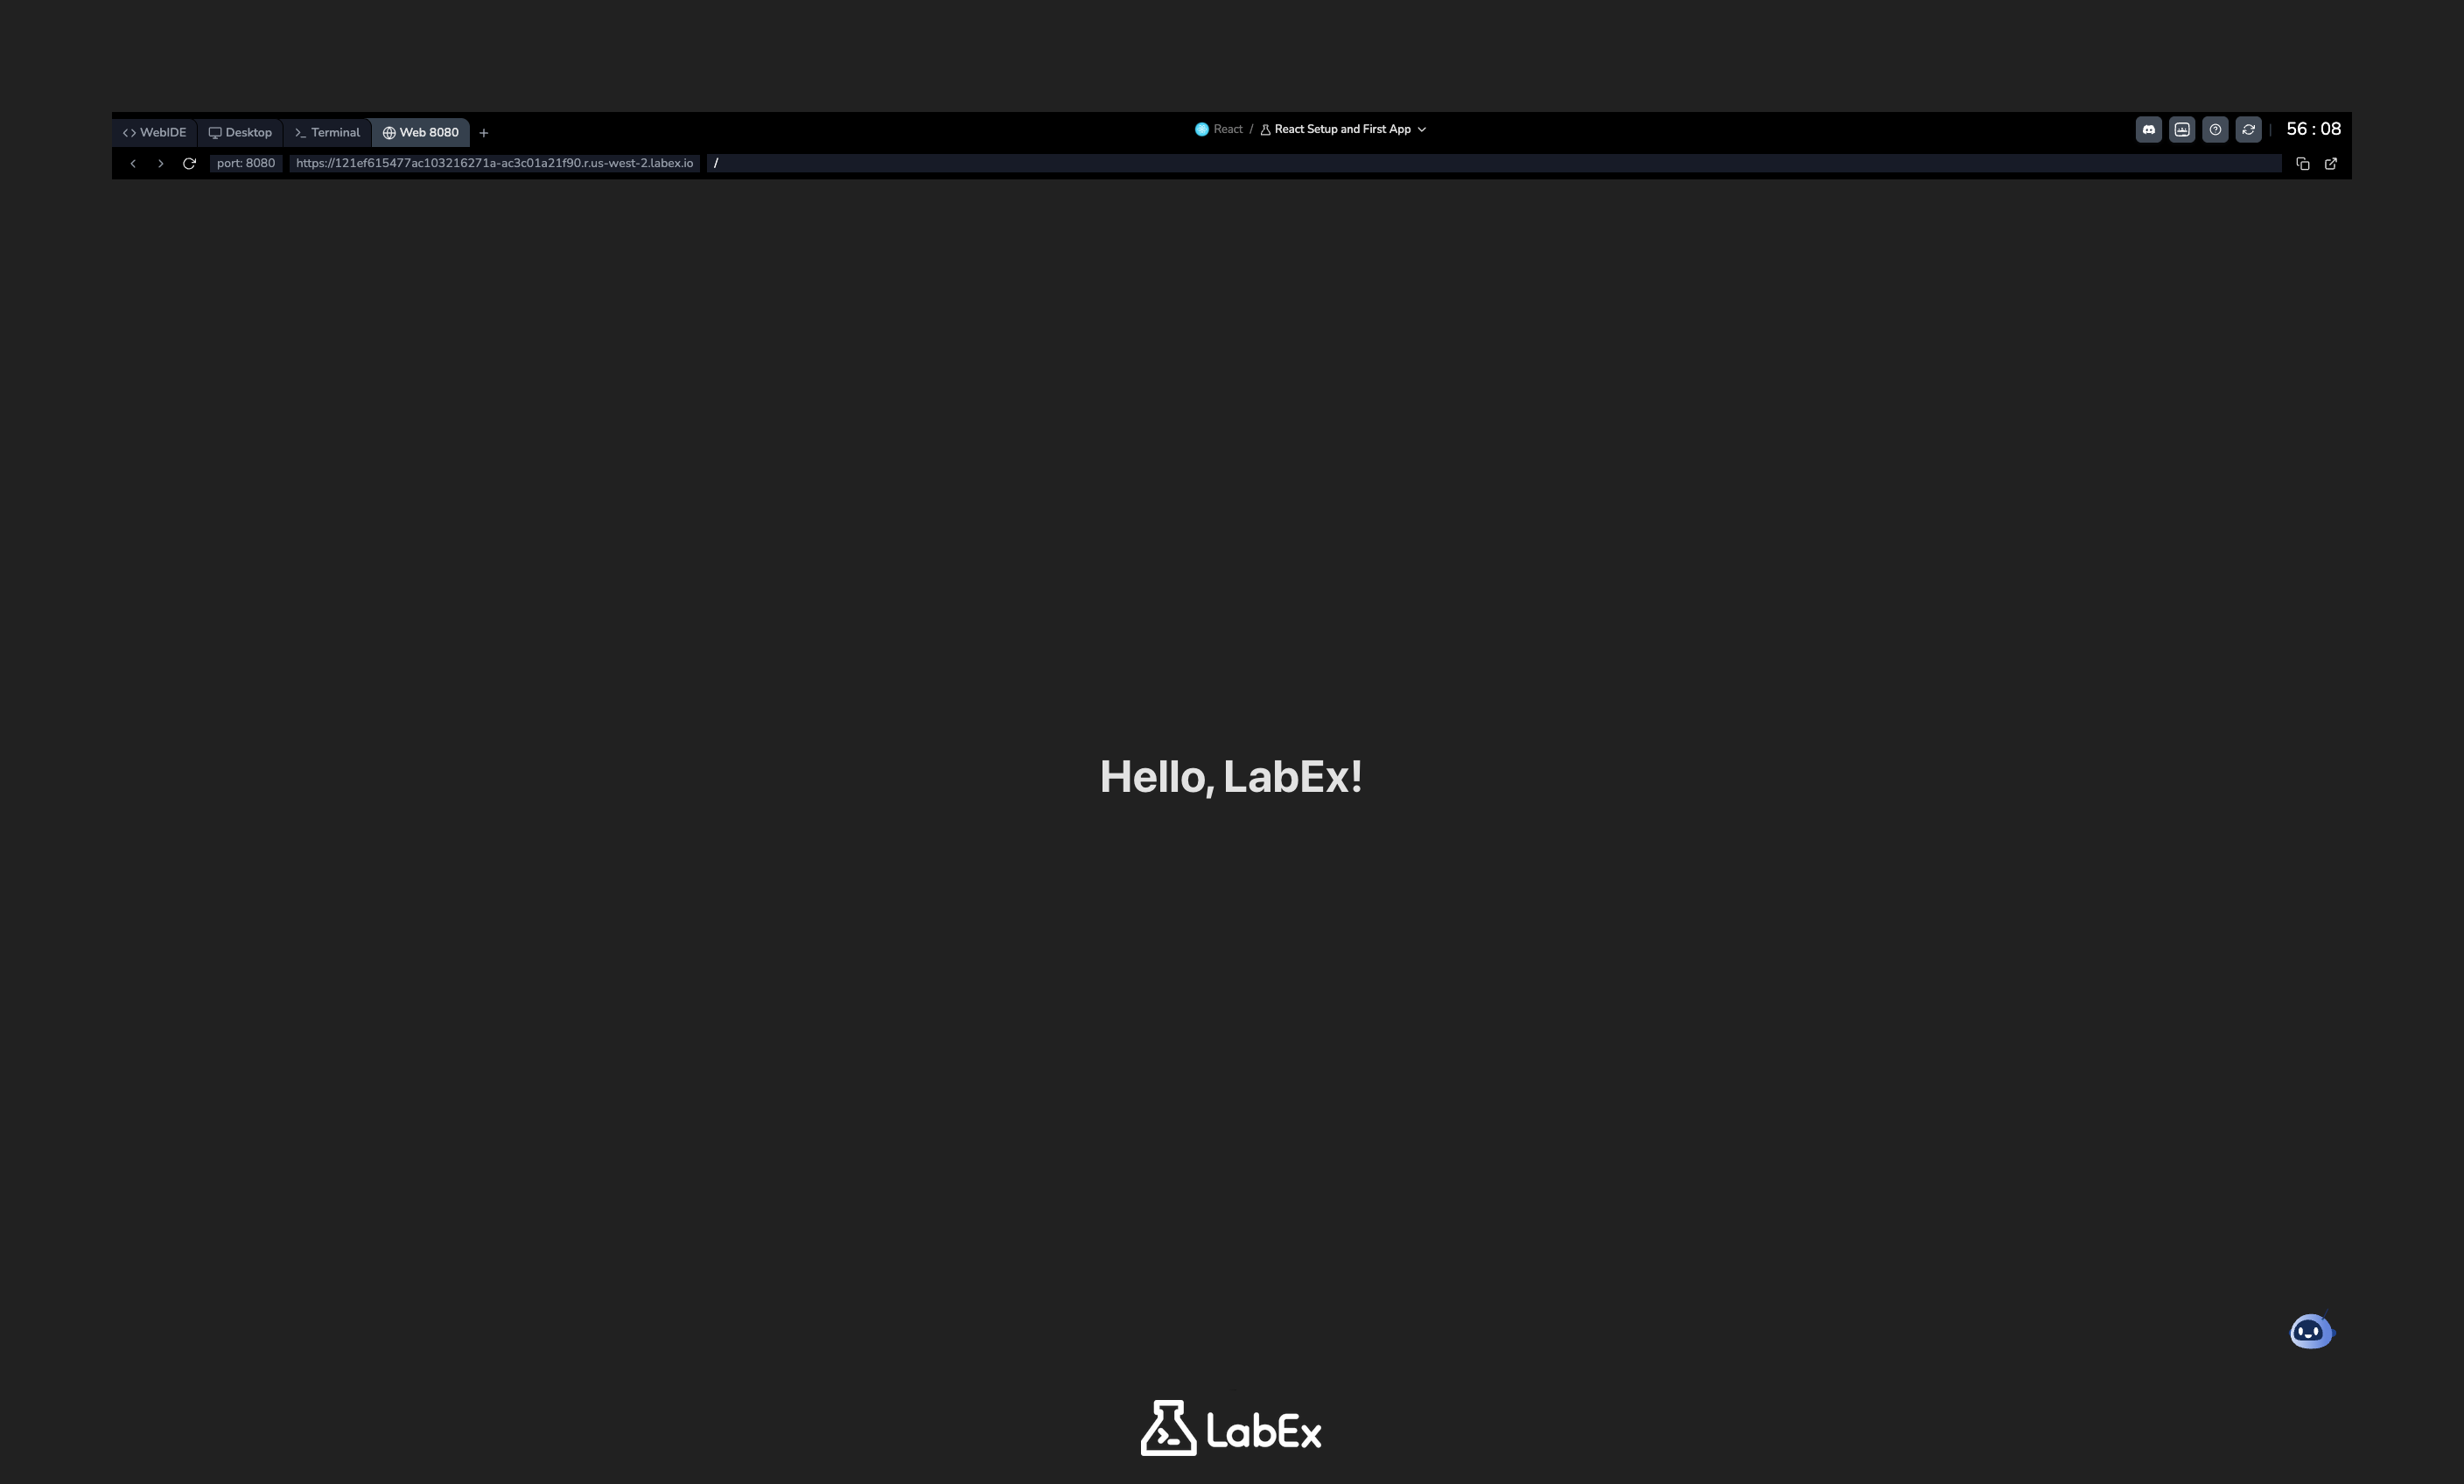
Save the file by pressing Ctrl+S (or Cmd+S on Mac). Now, switch back to the Web 8080 tab. You will see that the page has instantly updated to display your new "Hello, LabEx!" heading.
Create a New Component
A core principle of React is building UIs from small, reusable pieces called components. Let's create a new component.
- In the file explorer on the left, right-click the
srcdirectory insidemy-app. - Select "New File" and name it
Welcome.jsx. - Open the newly created
Welcome.jsxfile and add the following code:
import React from "react";

function Welcome() {
  return <h2>Welcome to my first React App!</h2>;
}

export default Welcome;
Let's break down this code:
import React from 'react';: This line is necessary for any file that uses JSX.function Welcome() { ... }: This defines a simple functional component namedWelcome.return <h2>...</h2>;: The component returns a JSX element that will be rendered to the screen.export default Welcome;: This makes theWelcomecomponent available for use in other files.
Save the file (Ctrl+S). Nothing will change in the browser yet, as we have not used this new component.
Use Your New Component
Now that you have created the Welcome component, let's use it inside our main App component. This is known as component composition.
- Open the
my-app/src/App.jsxfile again. - At the top of the file, add an
importstatement to bring in your new component:
import Welcome from "./Welcome.jsx";
- Next, place your new component inside the
Appcomponent'sreturnstatement. Add<Welcome />below the<h1>tag to render the component. The final code forApp.jsxshould look like this:
import "./App.css";
import Welcome from "./Welcome.jsx";

function App() {
  return (
    <>
      <h1>Hello, LabEx!</h1>
      <Welcome />
    </>
  );
}

export default App;
- Save the
App.jsxfile (Ctrl+S).
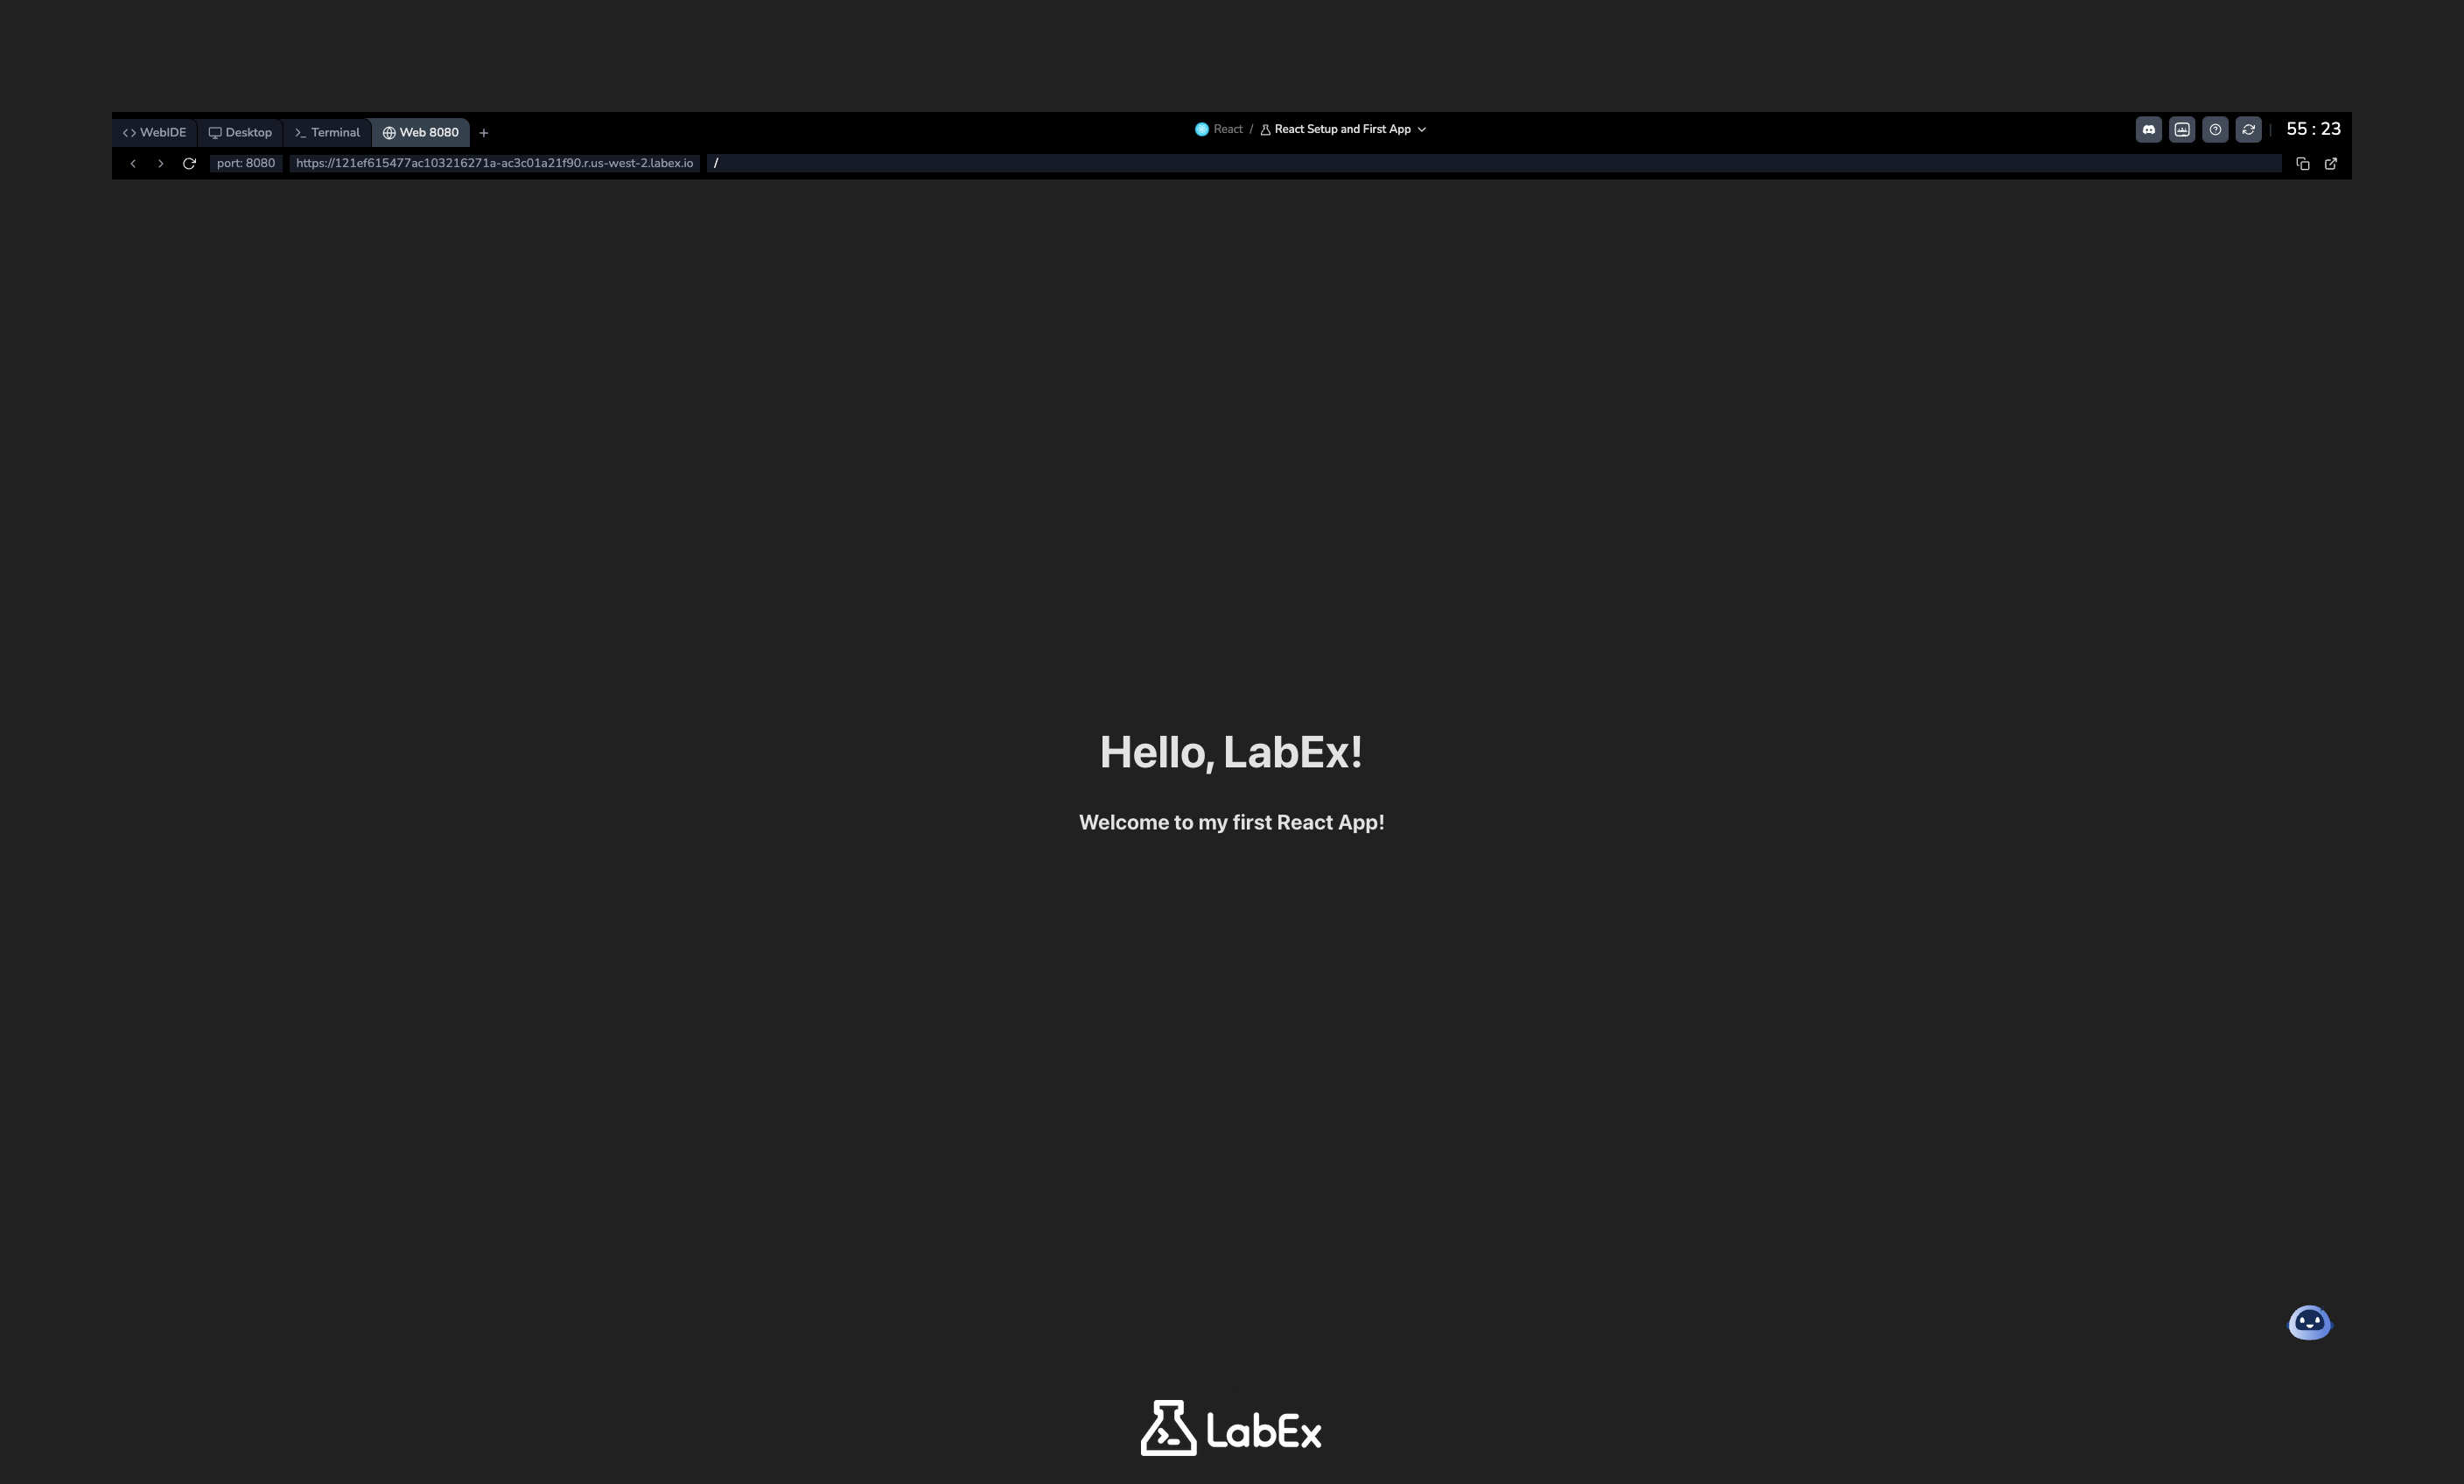
Switch to the Web 8080 tab one last time. You will now see the "Welcome to my first React App!" message rendered below your main heading. You have successfully created and composed React components!
Summary
In this lab, you have taken the first essential steps into the world of React development using the modern Vite toolchain.
You learned how to:
- Verify a Node.js and npm development environment.
- Create a new React project using Vite.
- Install project dependencies with
npm install. - Start the React development server using
npm run dev. - Modify an existing component and see live updates with Hot Module Replacement.
- Create a new functional component from scratch in a
.jsxfile. - Import and compose components to build a more complex UI.
You have successfully set up a React project, experienced the modern development workflow, and practiced the fundamentals of component-based architecture. You are now well-prepared to tackle more advanced React concepts.