
Introduction
In this lab, you will learn how to navigate and utilize the essential security tools in Kali Linux for penetration testing and cybersecurity tasks. This hands-on session guides you through viewing preinstalled tools with dpkg -l, starting the Metasploit framework using msfconsole, performing network scans with nmap, scanning web servers with nikto, accessing tool documentation via man pages, and saving command outputs to files. Designed for beginners, this lab provides a step-by-step introduction to Kali Linux within a controlled container environment on the LabEx VM. When you open the terminal, you will be automatically connected to the Kali Linux container's shell, ready to begin practicing.
Viewing Preinstalled Tools with dpkg -l
In this first step, you will learn how to view the preinstalled tools and packages on your Kali Linux system using the dpkg -l command. This is a basic yet essential skill to understand what software is available for use in penetration testing and system management.
When you open the terminal in the LabEx VM environment, you will be automatically connected to the Kali Linux container's shell. There is no need to manually start the container or enter the shell; the environment is already set up for you.
Let's start by running the command to list all installed packages. Type the following command in the terminal and press Enter:
dpkg -l
This command displays a detailed list of all installed packages, including their names, versions, architectures, and brief descriptions.
Expected Output (example, actual output may vary):
Desired=Unknown/Install/Remove/Purge/Hold
| Status=Not/Inst/Conf-files/Unpacked/halF-conf/Half-inst/trig-aWait/Trig-pend
|/ Err?=(none)/Reinst-required (Status,Err: uppercase=bad)
||/ Name                           Version              Architecture Description
+++-==============================-====================-============-========================================================
ii  adduser                        3.118                all          add and remove users and groups
ii  apt                            2.2.4                amd64        commandline package manager
ii  base-files                     11.1+deb11u7         amd64        Debian base system miscellaneous files
...
This output shows the status of each package (ii means installed), along with other details. Since the list is long, it will scroll through the terminal. You can use the up and down arrow keys or the mouse wheel to navigate through it.
To make the output more manageable, you can filter it to search for specific tools. For example, to find packages related to apt, type the following command and press Enter:
dpkg -l | grep apt
Expected Output (example, actual output may vary):
ii apt 2.2.4 amd64 commandline package manager
This filters the list to show only packages with apt in their name or description. This technique helps you quickly locate tools you’ll use in later steps. Understanding what tools are available on your system is a foundational step before diving into specific security tasks.
Installing and Starting Metasploit with msfconsole
Now that you’ve seen the tools available on Kali Linux, let’s move to starting one of the most powerful penetration testing frameworks, Metasploit, using the msfconsole command. This step builds on your understanding of the system’s tools and introduces you to a key platform for security testing.
Metasploit is a framework used for developing, testing, and executing exploits against target systems. The msfconsole is its command-line interface, allowing you to interact with the framework, configure settings, and launch various security tasks.
First, ensure that Metasploit is installed by updating the package list and installing the necessary package. Type the following commands in the Kali Linux container's terminal, pressing Enter after each:
apt update
apt install -y metasploit-framework
These commands refresh the package list and install Metasploit if it’s not already present. Wait for the installation to complete; it may take a few minutes depending on the system.
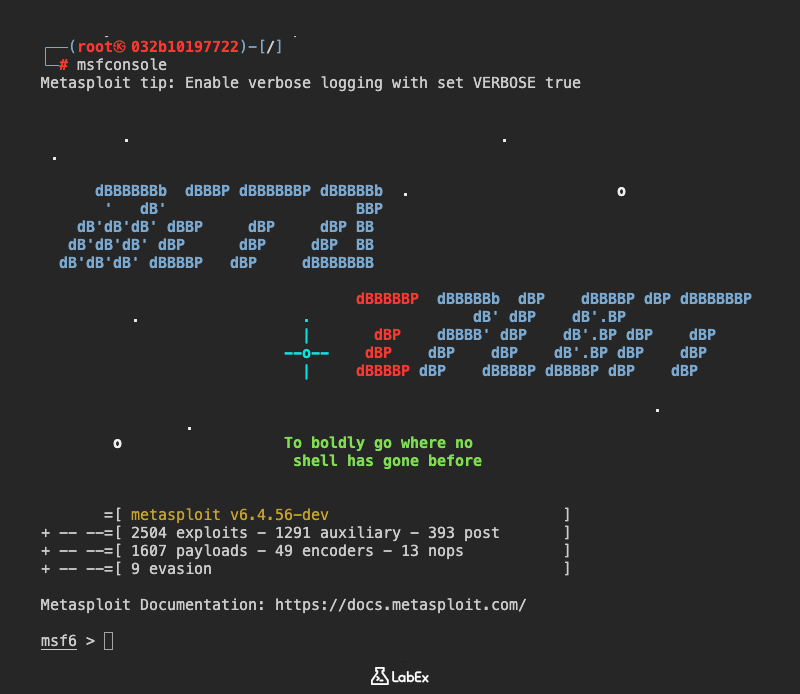
Once installed, start the Metasploit console by typing the following command and pressing Enter:
msfconsole
The first time you run this command, it may take a moment to initialize as it sets up the database and loads modules. Be patient during this process.
Expected Output (example, actual output may vary):
Metasploit Framework
...
msf6 >
The msf6 > prompt indicates you are now inside the Metasploit console, ready to interact with the framework. The number (e.g., 6) represents the version of Metasploit.
For now, you don’t need to perform any specific tasks in Metasploit. Exit the console by typing the following command at the msf6 > prompt and pressing Enter:
exit
This returns you to the standard terminal prompt. Starting and exiting msfconsole familiarizes you with accessing this tool, which is crucial for many penetration testing activities you’ll explore in future learning.
Installing and Running a Basic Nmap Scan
Having started Metasploit, let’s now focus on network scanning using nmap, a versatile tool for network discovery and security auditing. This step introduces you to identifying open ports and services on a system, a critical skill in penetration testing.
nmap, short for Network Mapper, is used to discover hosts and services on a network by sending packets and analyzing responses. It helps identify potential vulnerabilities by showing what’s accessible on a target system.
First, ensure nmap is installed on your Kali Linux container. Type the following command in the terminal and press Enter to update the package list and install nmap:
apt install -y nmap
Wait for the installation to complete; it should take only a few seconds. Once installed, you’re ready to perform a basic scan. Since scanning external systems without permission is unethical, we’ll scan localhost (your own container) as a safe target.
Let's run a basic web server on the container.
apt install -y apache2
service apache2 start
Type the following command and press Enter:
nmap localhost
This command performs a default scan to detect open ports and services on your local system.
Expected Output (example, actual output may vary):
Starting Nmap 7.91 ( https://nmap.org ) at ...
Nmap scan report for localhost (127.0.0.1)
Host is up (0.00010s latency).
Not shown: 997 closed ports
PORT     STATE SERVICE
80/tcp   open  http
...
Nmap done: 1 IP address (1 host up) scanned in 0.05 seconds
In this output, Host is up confirms the target is reachable. The table lists open ports (like 80/tcp for HTTP), their state (open means accessible), and the associated service. This information is vital for understanding what services are running on a system. By scanning localhost, you’ve practiced using nmap safely, preparing you for more advanced network reconnaissance tasks in future steps.
Installing and Scanning with Nikto for Web Vulnerabilities
Building on your network scanning skills with nmap, this step introduces you to nikto, a tool for scanning web servers to identify vulnerabilities and misconfigurations. This is an essential part of web security testing.
nikto is an open-source tool that checks web servers for known issues like outdated software, insecure files, and other potential security flaws. It’s widely used by security professionals to assess the security of web applications.
First, ensure nikto is installed on your Kali Linux container. Type the following command in the terminal and press Enter to install it:
apt install -y nikto
Wait for the installation to complete; it should take just a few seconds. Once installed, you’ll scan localhost as a safe target to demonstrate nikto’s functionality. If no web server is running on localhost, the tool will still show how it attempts to connect, which is valuable for learning. Type the following command and press Enter:
nikto -h localhost
The -h option specifies the host to scan, in this case, localhost, targeting the default web server port (usually 80).
Expected Output (example, actual output may vary):
- Nikto v2.1.6
---------------------------------------------------------------------------
+ Target IP:          127.0.0.1
+ Target Hostname:    localhost
+ Target Port:        80
---------------------------------------------------------------------------
+ End Time:           ...
---------------------------------------------------------------------------
This output shows nikto attempting to connect to a web server on localhost. If no server is running, it reports an inability to connect, as shown above. If a server were active, it would list potential vulnerabilities or misconfigurations. This step helps you understand how to use nikto for web vulnerability scanning, a key skill for identifying security weaknesses in web applications.
Accessing Tool Documentation with man Pages
Now that you’ve used tools like nmap and nikto, it’s important to know how to access their documentation for further learning. In this step, you will learn to use man pages to explore detailed information about commands and tools in Kali Linux.
man pages, short for manual pages, are comprehensive guides for most Linux tools and commands. They provide detailed descriptions, options, examples, and usage instructions, making them invaluable for understanding how to use a tool effectively.
Install man if it's not already installed.
apt install -y man
Let’s access the man page for nmap as an example. Type the following command in the terminal and press Enter:
man nmap
This opens the manual page for nmap in a pager interface, like less, where you can read detailed documentation.
Expected Output (example, actual output may vary):
NMAP(1)                          Nmap Reference Guide                         NMAP(1)

NAME
       nmap - Network exploration tool and security / port scanner

SYNOPSIS
       nmap [Scan Type...] [Options] {target specification}

DESCRIPTION
       Nmap ("Network Mapper") is an open source tool for network exploration and
       security auditing. It was designed to rapidly scan large networks, although
       it works fine against single hosts. Nmap uses raw IP packets in novel ways
       to determine what hosts are available on the network, what services (application name and version) those hosts are offering, what operating systems (and
       OS versions) they are running, what type of packet filters/firewalls are in
       use, and dozens of other characteristics.
...
Use the up and down arrow keys to navigate through the documentation. You’ll see sections on usage, options, and examples. To exit the man page, press q to return to the terminal prompt.
Learning to use man pages equips you with the ability to explore any tool’s features independently. This is especially useful in Kali Linux, where tools have numerous options that you might need to reference during security tasks.
Redirecting Nmap Output to a File
In this final step, you will learn how to save the output of a command to a file for future reference. This builds on your earlier use of nmap and introduces output redirection, a fundamental Linux skill for documenting results.
Output redirection in Linux allows you to save the results of a command to a file instead of displaying them in the terminal. This is done using the > symbol, which writes the output to a specified file, overwriting it if it already exists.
Let’s perform another nmap scan on localhost and save the results to a file named nmap_scan.txt. Type the following command in the terminal and press Enter:
nmap localhost > /root/nmap_scan.txt
The > symbol redirects the output of the nmap localhost command to the file /root/nmap_scan.txt. You won’t see the scan results in the terminal because they are being saved to the file.
To confirm the output was saved, view the contents of the file by typing the following command and pressing Enter:
cat /root/nmap_scan.txt
Expected Output (example, actual output may vary):
Starting Nmap 7.91 ( https://nmap.org ) at ...
Nmap scan report for localhost (127.0.0.1)
Host is up (0.00010s latency).
Not shown: 997 closed ports
PORT     STATE SERVICE
80/tcp   open  http
...
Nmap done: 1 IP address (1 host up) scanned in 0.05 seconds
This confirms the scan results were successfully saved to /root/nmap_scan.txt. Saving outputs to files is a practical way to document findings during penetration testing, allowing you to review or share results later without needing to rerun commands.
Summary
In this lab, you have learned how to explore and use essential security tools in Kali Linux for penetration testing. You started by viewing preinstalled tools with dpkg -l, installed and started Metasploit using msfconsole, performed network scans with nmap, scanned for web vulnerabilities with nikto, accessed tool documentation via man pages, and saved command outputs to files. These foundational skills provide a solid base for further learning in cybersecurity and network analysis within a controlled environment.


