Introduction
Welcome to this lab on integrating Jenkins with Git. Source Control Management (SCM) is a cornerstone of modern software development. Integrating your Continuous Integration (CI) server, like Jenkins, with an SCM system, like Git, is a fundamental step in automating your build and test processes.
In this lab, you will learn how to:
- Verify that the Jenkins Git plugin is available.
- Create a Freestyle project linked to a local Git repository.
- Add a build step to execute a script from the repository.
- Run a build manually to test the configuration.
- Configure SCM polling to trigger builds automatically on new commits.
A Jenkins instance and a small local Git repository are already prepared for this lab. You can access the Jenkins web interface by opening the Firefox browser on the desktop. The browser will automatically open to http://localhost:8080, so you don't need to manually enter the URL. No login is required.
Verify the Git Plugin
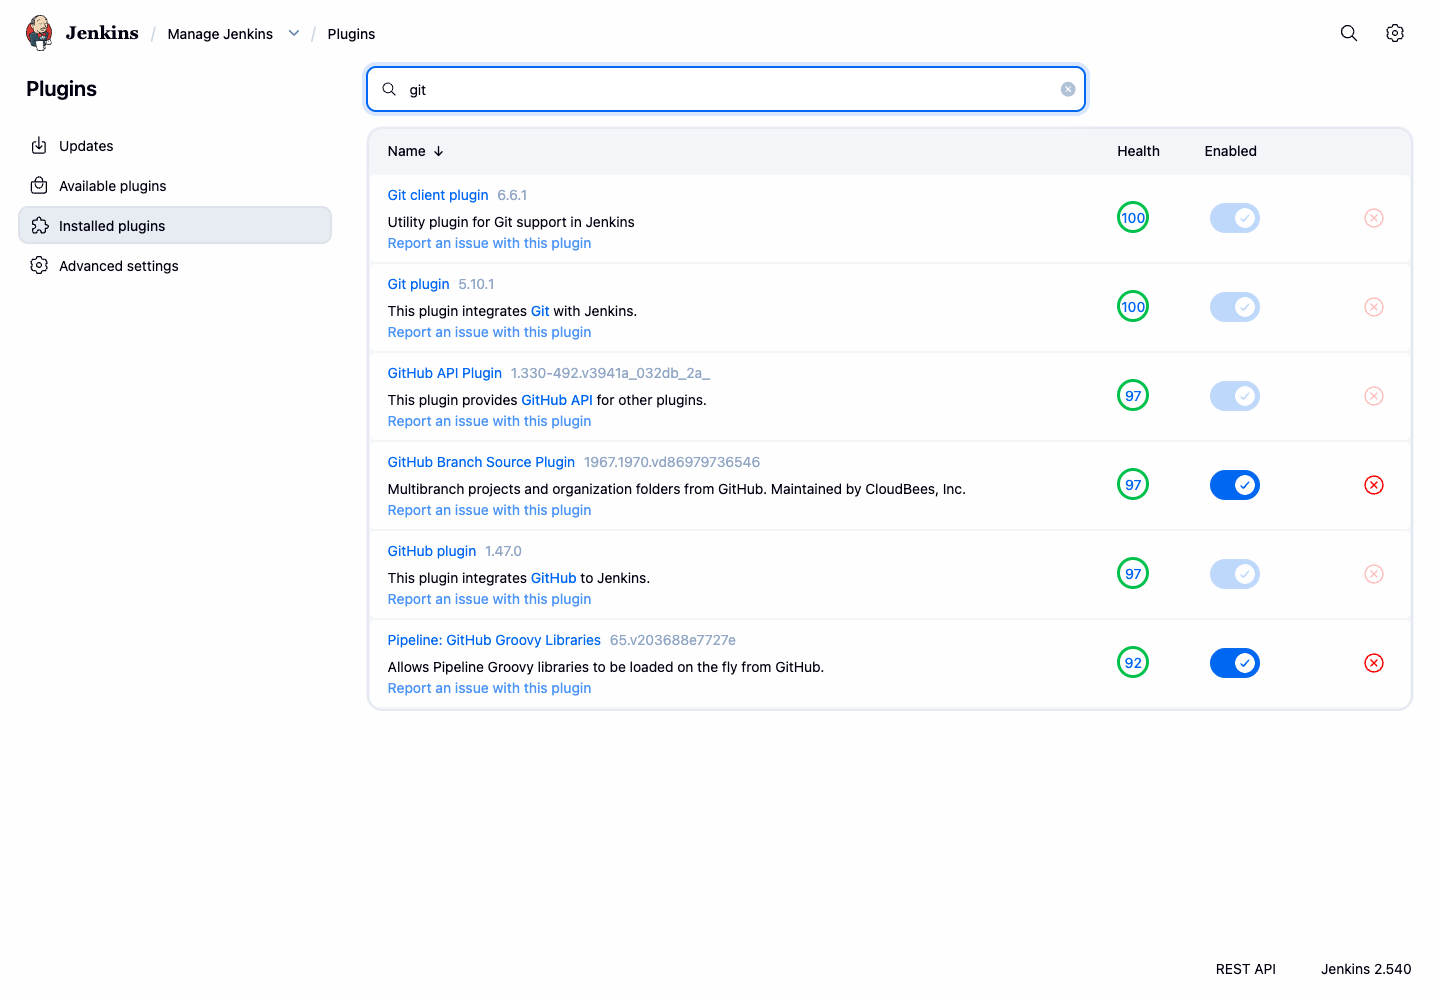
Jenkins uses plugins to add integrations. The Git plugin provides the Git option that you will use in the job configuration.
- Open the Firefox browser from the desktop interface. The browser will automatically open to
http://localhost:8080, so you don't need to manually enter the URL. No login is required. - On the Jenkins dashboard, click the gear icon in the top-right corner to open Manage Jenkins.
- Click Plugins.
- Select the Installed plugins tab.
- In the filter box, type
git. - Confirm that Git appears in the installed plugin list.
With the Git plugin confirmed, you can create a project that pulls source code from a repository.
Create a Project and Configure Git SCM
With the Git plugin installed, you can now create a Jenkins project and configure it to pull source code from the local repository prepared in the Jenkins container.
- Return to the main Jenkins dashboard by clicking the Dashboard link in the breadcrumb navigation at the top left.
- Click on New Item in the left-hand sidebar.
- Enter
git-integration-projectas the item name. - Select Freestyle project.
- Click OK.
This will take you to the project's configuration page.
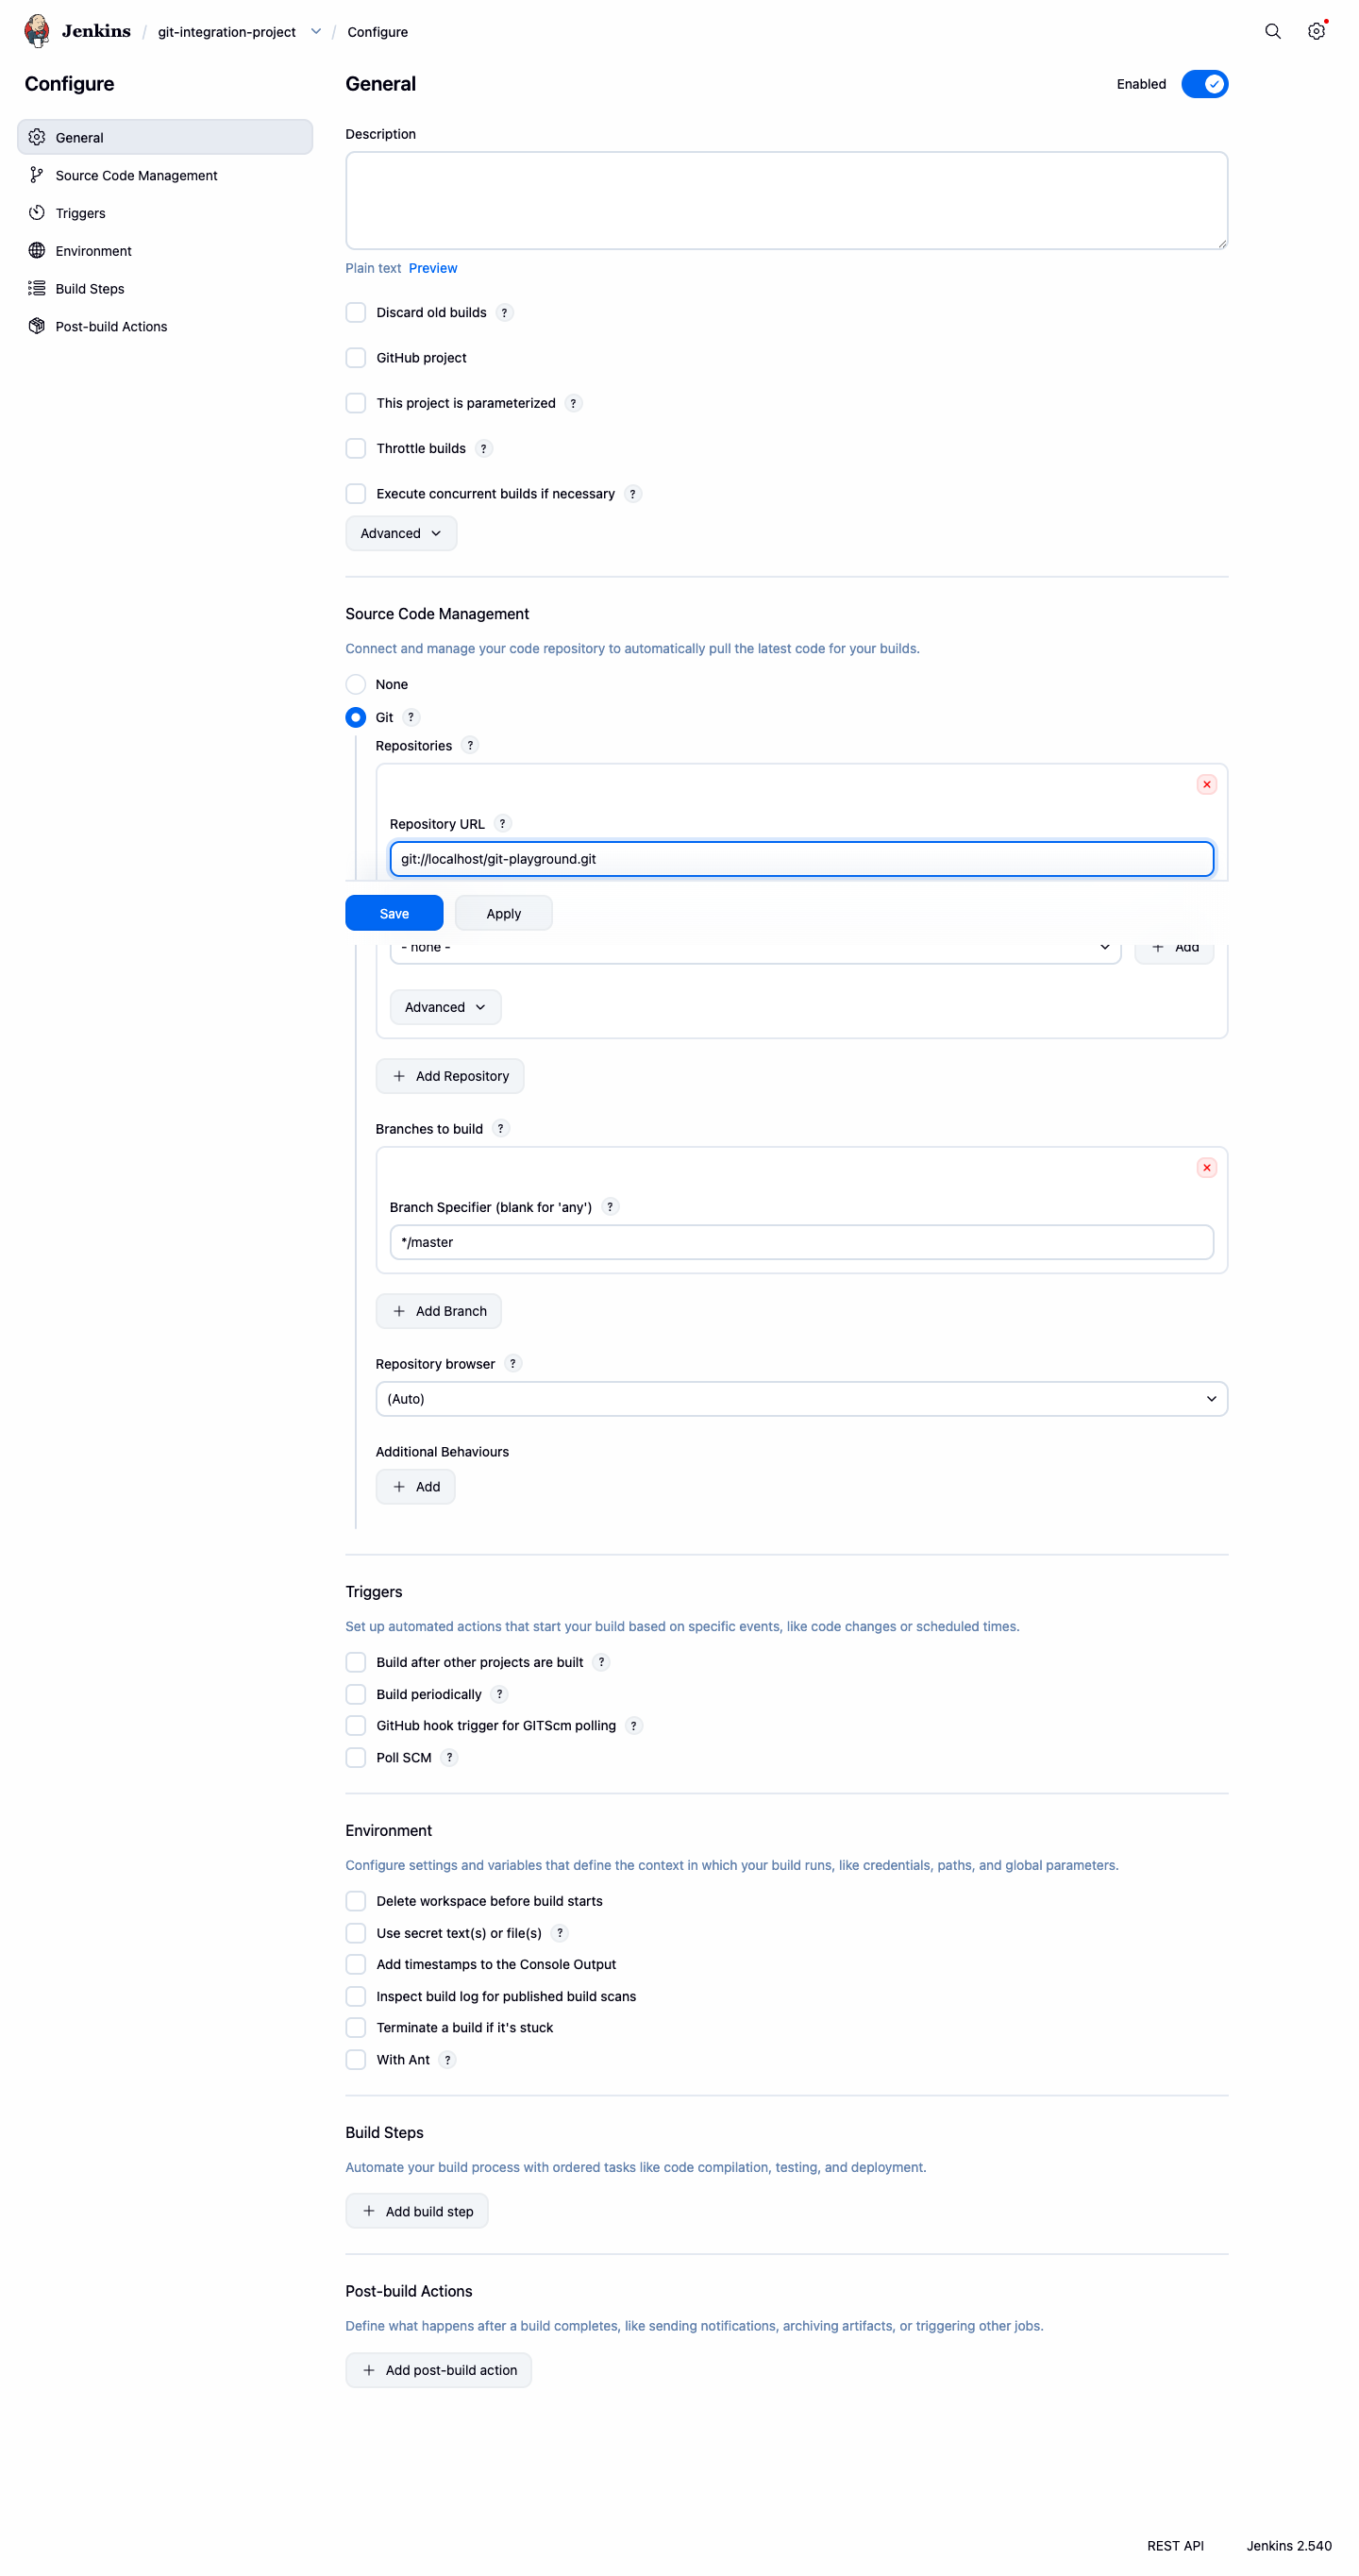
- Scroll down to the Source Code Management section.
- Select the Git option. If you do not see this option, please verify that the Git plugin was installed correctly in the previous step.
- In the Repository URL field, enter the local repository URL prepared for this lab:
git://localhost/git-playground.git
- Leave the Branch Specifier as the default,
*/master. This tells Jenkins to use themasterbranch. - Click the Save button at the bottom of the page.
You have successfully created a Jenkins job linked to a local Git repository. In the next step, you will define what the job should do with the checked-out code.
Add a Build Step and Run a Manual Build
Now that Jenkins knows where to get the code, you need to tell it what to do with that code. You will add a build step with shell commands and then run a build manually to test it.
- On the project page for
git-integration-project, click Configure in the left-hand sidebar. - Scroll down to the Build Steps section.
- Click the Add build step dropdown and select Execute shell.
- In the Command text area, enter the following build commands:
echo "Building from the Git repository"
./build.sh
When the job runs, Jenkins will first clone the Git repository into its workspace and then execute these commands from within that workspace. The build.sh script comes from the repository, so a successful run proves that Jenkins checked out the code before running the shell step.
- Click Save.
- You are now back on the project page. Click Build Now in the left-hand sidebar to start a build.
A new build will appear in the Build History panel. Wait for it to complete (the status icon will turn blue for success).
- Click on the build number (e.g.,
#1). - Click on Console Output from the build's menu.
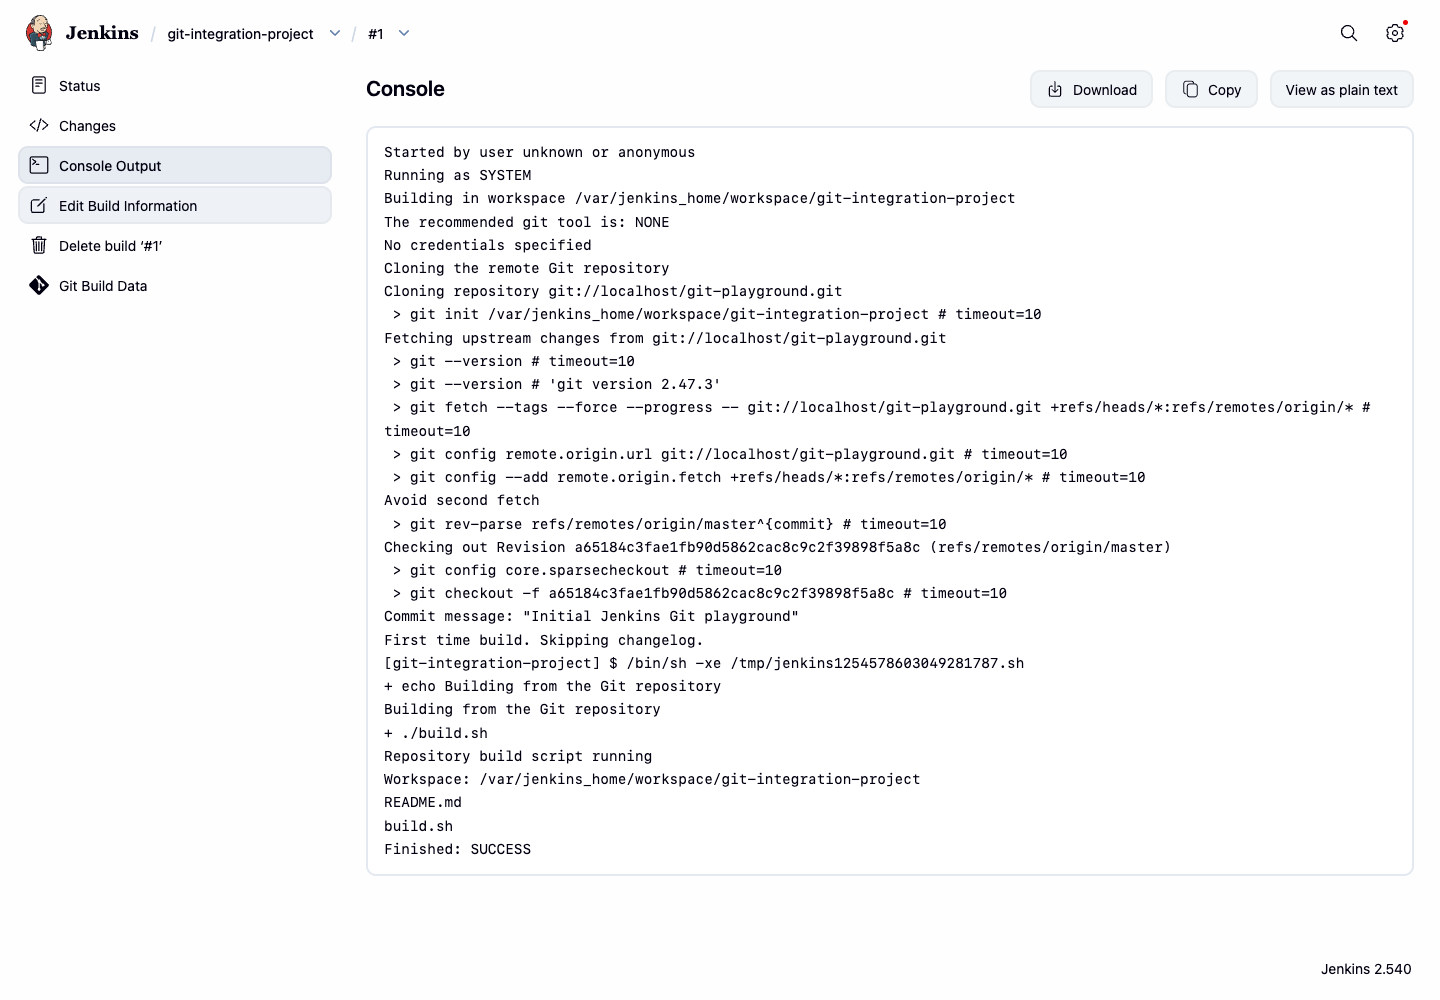
You should see output confirming that Jenkins cloned the repository and executed your commands successfully.
Started by user admin
Running as SYSTEM
Building in workspace /var/jenkins_home/workspace/git-integration-project
...
[git-integration-project] $ /bin/sh -xe /tmp/jenkins123.sh
+ echo Building from the Git repository
Building from the Git repository
+ ./build.sh
Repository build script running
Workspace: /var/jenkins_home/workspace/git-integration-project
README.md
build.sh
Finished: SUCCESS
Enable Automatic Builds with SCM Polling
Running builds manually is useful for testing, but the real power of CI is automation. In this step, you will configure Jenkins to poll the Git repository for changes.
- Navigate back to the configuration page for
git-integration-project(Project Page > Configure). - Scroll down to the Build Triggers section.
- Check the box next to Poll SCM.
- A Schedule text box will appear. This uses cron syntax to define how often Jenkins should check the repository for changes. To poll every minute, enter the following:
* * * * *
- Click Save.
The schedule is stored with the job configuration. Jenkins will now check the configured repository once per minute and start a new build when it detects a new commit.
- Return to the Jenkins UI and go to the
git-integration-projectpage. - In the left sidebar, you'll see a new option called Git Polling Log. Click on it.
- This page shows the polling activity after Jenkins has run at least one polling cycle. It may take up to one minute for the first entry to appear. You should see entries like:
Started on ...
Using strategy: Default
[poll] Last Built Revision: Revision ...
The recommended git tool is: NONE
No credentials specified
 > git --version ## timeout=10
 > git ls-remote -h -- git://localhost/git-playground.git ## timeout=10
...
No changes

This demonstrates that Jenkins is configured to poll the repository automatically. In a real-world project, the repository would usually be hosted on a Git server and Jenkins would build when new commits appear.
Summary
In this lab, you gained hands-on experience with one of the most critical integrations in a CI pipeline: connecting Jenkins to a Git source control repository.
You have successfully:
- Verified that the essential Git plugin is available to enable Jenkins' Git integration capabilities.
- Created a Freestyle project and configured it to check out code from a Git repository.
- Defined a build step to execute a shell script from the checked-out code.
- Verified the setup by running a manual build.
- Set up an automated build trigger using Poll SCM, which allows Jenkins to detect and build new commits automatically.
These skills are fundamental for automating your development workflow and are the first step towards building a robust and efficient CI/CD pipeline with Jenkins.