
Introduction
A tiny print studio needs a postcard made from a grid of colors. You will first run a complete four-by-four sample, give it a warmer ink, then finish a C program that turns a rectangular character pattern into a real image file.
You need C variables, conditions, loops, arrays, functions and basic terminal navigation. Two-dimensional indexing and image output are explained here. The prepared browser environment includes a Workspace terminal and Postcard Preview. The picture is a P3 PPM file: readable numbers, not a PNG. Estimated reading and practice time is an author estimate, not a measured beginner completion time.
Print and Recolor a Small Sample
In this step, you will see a complete C sample become a picture, then change one ink color.
Open the Workspace Tab. Its terminal is in /home/labex/project/postcards; the explicit cd below also lets you recover after changing directories. pwd prints your current directory and ls lists its files.
cd /home/labex/project/postcards
pwd
ls
The ready files are sample.c, unfinished card.c, and supplied art.h. Change only sample.c and card.c; keep art.h unchanged. cat prints a file without editing it:
cat sample.c
The sample uses a grid with four rows and four columns. In grid[row][col], the first index chooses a row from top to bottom; the second chooses a column from left to right. Both start at zero. Each entry is either 0 or 1, selecting one RGB triple in color. RGB means red, green and blue; each component is an integer from 0 through 255. The second index in color[c][0] selects red, [1] green and [2] blue.
printf writes text to standard output, normally this terminal. \n starts a new line. P3 files begin with P3, width and height, then the largest component value, 255. After that come RGB triples, read left to right across each row, from the top row to the bottom. Whitespace separates numbers, so one RGB triple per line is valid. P3 also allows # comments.
Compile the sample. gcc is the C compiler; -std=c11 selects C11, -Wall -Wextra enable useful warnings, and -o sample names the executable sample.
gcc -std=c11 -Wall -Wextra sample.c -o sample
./sample runs the executable in this directory. > redirects standard output into a file instead of the terminal. The shell opens or replaces that file before the program runs. Use the new file name shown here:
./sample > sample.ppm
Switch to the Postcard Preview Tab. Click Refresh files, select sample.ppm under Postcard file, then click Open postcard. The status reads 4 × 4 pixels · sample.ppm. You should see a dark, asymmetric mark on a cream background. The preview displays the file you just created; it does not fill in missing pixels.
Return to Workspace. Change the dark ink from {30, 76, 64} to the warm color {170, 70, 45}. The sed text-editing command below uses s/old/new/ to substitute that exact text, and -i saves the change in sample.c. Single quotes pass the substitution to sed as one unchanged argument.
sed -i 's/{30, 76, 64}/{170, 70, 45}/' sample.c
Recompile after a source edit; the old executable does not change by itself.
gcc -std=c11 -Wall -Wextra sample.c -o sample
./sample > sample.ppm
Switch to Postcard Preview, keep sample.ppm selected, and click Open postcard again. Only the foreground color should change; the dimensions and cream pixels stay the same.
If the terminal reports a missing file, use the taught cd and ls to return to the workspace. If the preview says no file exists, return to Workspace and check that compilation succeeded before running ./sample > sample.ppm. A compiler error means no new executable was built: correct the reported source line, then compile again.
Map a Rectangular Pattern to RGB Pixels
In this step, you will complete the postcard generator and open its actual output.
Start in Workspace, in /home/labex/project/postcards. Read the supplied artwork and unfinished generator:
cd /home/labex/project/postcards
cat art.h
cat card.c
#include "art.h" makes these prepared definitions available when C compiles card.c. #define WIDTH 5 and #define HEIGHT 3 give names to the dimensions. pattern has three rows of five digit characters. Each string row reserves WIDTH + 1 characters because C stores a zero-valued terminator after the visible characters; the loops use only the five visible positions.
The first row, "10000", begins with palette color 1, then four pixels of color 0. Character '2' is not the integer 2. Subtracting the character '0' converts one of the supplied digit characters to its palette index: '2' - '0' is 2. This artwork contains only digits 0 through 3, matching the four palette rows. Keep its pattern, dimensions and colors unchanged. Write the loops using WIDTH and HEIGHT so recompilation also works for supplied rectangular patterns from 1 through 16 columns and rows, using the same palette indexes 0 through 3.
The incomplete generator writes a header but no pixels. A file header alone is not a picture. Complete it with an outer loop over y (rows) and an inner loop over x (columns). pattern[y][x] chooses the character; palette[c][0..2] chooses its RGB values. The %d placeholders in printf print integer arguments in their listed order.
Use the following complete source. cat > card.c replaces that file. <<'EOF' starts a here-document: the shell copies subsequent lines literally until a line containing only EOF. The quoted delimiter prevents shell expansion inside C source. Copy the whole block, including the last EOF.
cat > card.c <<'EOF'
#include <stdio.h>
#include "art.h"

int main(void) {
    printf("P3\n%d %d\n255\n", WIDTH, HEIGHT);
    for (int y = 0; y < HEIGHT; y++) {
        for (int x = 0; x < WIDTH; x++) {
            int c = pattern[y][x] - '0';
            printf("%d %d %d\n", palette[c][0], palette[c][1], palette[c][2]);
        }
    }
    return 0;
}
EOF
Compile and generate a new output file:
gcc -std=c11 -Wall -Wextra card.c -o card
./card > original.ppm
The provided inspection tool only decodes a file; it cannot generate or repair your postcard. Run it with the file name as its argument:
python3 /home/labex/.local/share/pixel-postcards/inspect.py original.ppm
Expected output:
5 x 3 pixels; 15 RGB triples; max value 255
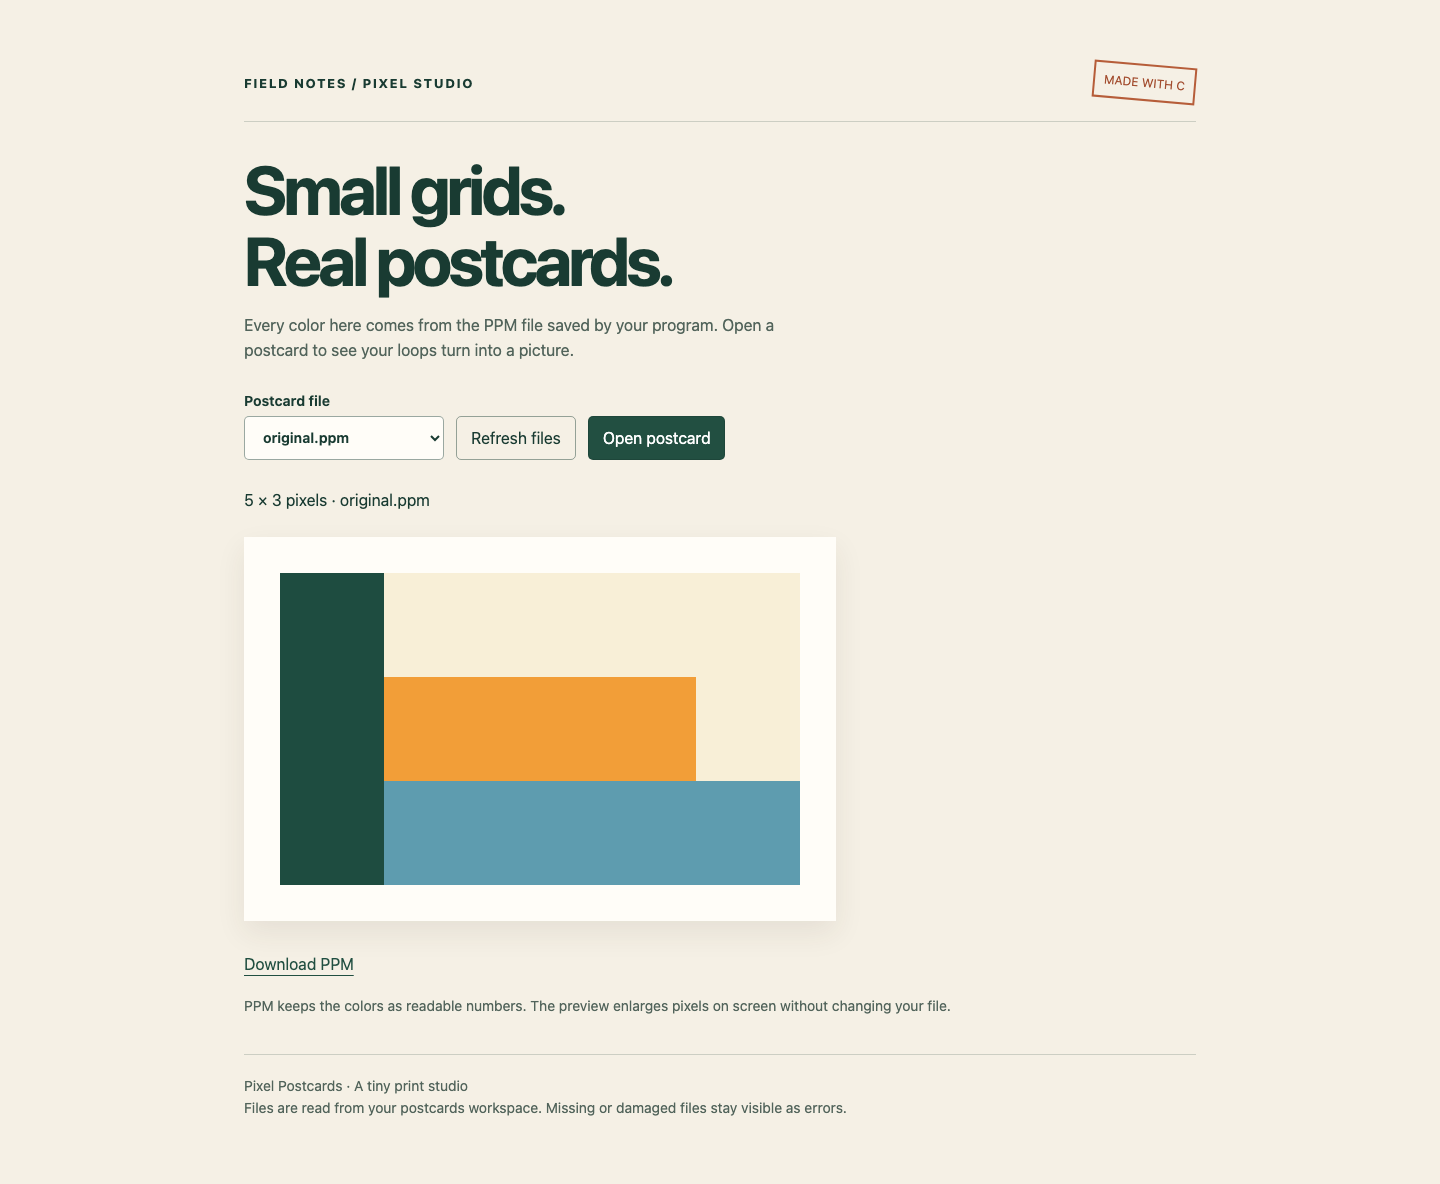
Why are these numbers useful? A square could hide swapped dimensions. This five-column, three-row pattern must be wider than it is tall, with its dark strip on the left. WIDTH controls the inner loop, HEIGHT the outer loop; exchanging them can access outside a row or leave out pixels.
Switch to Postcard Preview. Click Refresh files, select original.ppm, then Open postcard. Check the 5 × 3 status and compare the rows to art.h. Click Download PPM to save the real image file. A browser may download PPM rather than display it directly; use this preview to view it. Return to Workspace for the lab check.
The screenshot shows original.ppm selected, its saved 5 × 3 dimensions, and Download PPM below the image. Compare the left dark strip and all three rows.
Keep card.c, the executable card, art.h, and original.ppm in this workspace.
If the preview reports a pixel-count error, a file exists but its content is incomplete: check both loop limits, save card.c, recompile and generate original.ppm again. The preview's screen enlargement does not alter the saved dimensions. In the next lab you will make enlarged image files yourself.
Summary
You compiled and recolored a small sample, then mapped a rectangular character array to RGB triples. Your C program created a real P3 file that you decoded, viewed and downloaded. You practiced row-first indexing and standard-output redirection.