Introduction
Your team needs a server for a small report application. In this lab, you will launch an Amazon EC2 instance, connect with SSH, change the application's greeting and test its response through AWS View. You will then terminate the instance and confirm its final state.
You should be familiar with basic terminal commands and the purpose of a VPC, subnet and security group. The environment supplies a network, an Ubuntu image, an SSH key pair and the application software. You will create and configure the application instance yourself.
Certification Relevance
This lab practices programmatic AWS operations and selecting EC2 as a compute service, supporting Tasks 3.1 and 3.3 of the AWS Certified Cloud Practitioner CLF-C02 Domain 3 objectives. You will also distinguish an image, an instance type and a running instance.
Launch the Application Instance
In this step, you will inspect a prepared image and launch one EC2 instance in the supplied network.
An EC2 instance is a virtual server. An Amazon Machine Image (AMI) supplies its operating system and initial software. An instance type specifies a combination of compute and memory capacity. You will select t3.micro, a small general purpose instance type, for this introductory application.
Start in the project directory:
cd /home/labex/project
The file launch.env contains the identifiers of the prepared image, subnet and security group. Inspect it to see the resources you will use:
cat launch.env
The values are resource IDs and will differ between environments. Load them into your current shell with source, which reads the variable assignments from the file:
source launch.env
Inspect the AMI. The --image-ids option selects the image, while --query limits the displayed fields:
aws ec2 \
  describe-images \
  --image-ids "$AMI_ID" \
  --query 'Images[].{Image:ImageId,Name:Name,Architecture:Architecture}'
Look for the image name report-server-ubuntu-2204 and architecture x86_64. This image contains Ubuntu and the report application, so you can focus on launching and operating the server.
The subnet determines the instance's network location. The supplied security group permits SSH on port 22 and application requests on port 8081 from the lab's access network. The key pair report-key provides the public key installed on the instance; its private key is supplied in the project directory for your SSH connection.
Launch one instance with the prepared resources. --count 1 creates one server, and the tag gives it the recognizable name report-server:
aws ec2 \
  run-instances \
  --image-id "$AMI_ID" \
  --instance-type t3.micro \
  --subnet-id "$SUBNET_ID" \
  --security-group-ids "$SECURITY_GROUP_ID" \
  --key-name report-key \
  --count 1 \
  --tag-specifications 'ResourceType=instance,Tags=[{Key=Name,Value=report-server}]'
The response contains the new instance ID and its initial state. Save the instance ID in a shell variable for the following commands. The $(...) syntax runs the command inside the parentheses and stores its output; --output text returns the ID as plain text:
INSTANCE_ID=$(aws ec2 \
  describe-instances \
  --filters Name=tag:Name,Values=report-server \
  --query 'Reservations[0].Instances[0].InstanceId' \
  --output text)
Inspect the instance's state and addresses:
aws ec2 \
  describe-instances \
  --instance-ids "$INSTANCE_ID" \
  --query 'Reservations[].Instances[].{Instance:InstanceId,State:State.Name,PrivateIPv4:PrivateIpAddress,PublicIPv4:PublicIpAddress}'
Confirm that the state is running and that private and public IPv4 addresses are present. If the state is still pending, wait briefly and repeat the inspection command. The private address identifies the server within its VPC; the public address is the destination you will use to connect through the lab's access network.
Connect and Configure the Application
In this step, you will connect to the instance with SSH, change the report application's greeting and test the response in AWS View.
Retrieve the instance's public IPv4 address into another shell variable:
PUBLIC_IP=$(aws ec2 \
  describe-instances \
  --instance-ids "$INSTANCE_ID" \
  --query 'Reservations[0].Instances[0].PublicIpAddress' \
  --output text)
SSH creates an encrypted terminal connection to the server. Ubuntu images use the login name ubuntu. The supplied ssh_config selects your private key and the lab's connection route; -F tells SSH to read that configuration file:
ssh -F ssh_config ubuntu@"$PUBLIC_IP"
Your terminal is now inside the application instance. Confirm the login user:
whoami
The output should be ubuntu. This distinguishes the application instance from your LabEx terminal, where the user is labex.
The supplied application reads its greeting from /etc/report-app/config.json. This system file requires administrator privileges to update. sudo tee writes the following text to the file, and the here-document between the two JSON markers supplies that text:
sudo tee /etc/report-app/config.json <<'JSON'
{
  "message": "Hello from EC2"
}
JSON
The application rereads this configuration on each request. Use curl to request its health endpoint through the instance's loopback address:
curl -sS http://127.0.0.1:8081/health
The JSON response should identify the Report server service and include "message": "Hello from EC2". This proves that the application is responding inside the instance with your configuration.
Exit the SSH session to return to the LabEx terminal:
exit
Open AWS View and click Refresh resources. Find report-server in the instances table. Confirm its running state and compare its public IPv4 address with the address returned by the CLI.
Under Application requests, select the running instance and click Check application. Confirm an HTTP 200 response containing Hello from EC2. This request goes to the instance's current public address, testing the application through the network as well as inside the server.
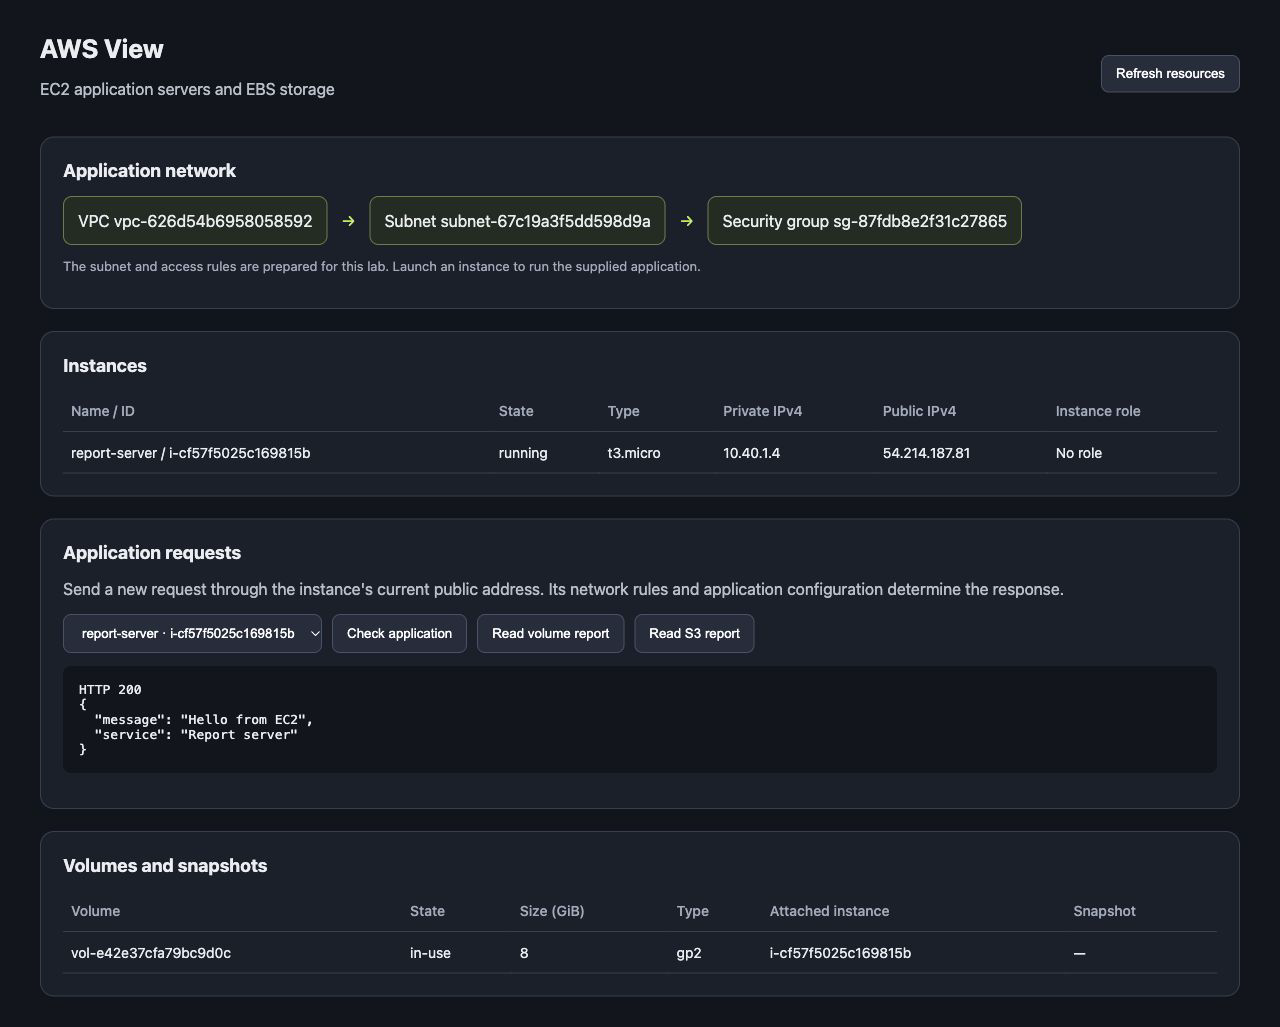
Example checkpoint: the application returns HTTP 200 with Hello from EC2. Your resource IDs and addresses will differ.
Terminate Your Server
In this step, you will terminate the application instance and confirm that it is no longer running.
Termination permanently removes the instance. Use the ID you saved earlier to select only your application server:
aws ec2 \
  terminate-instances \
  --instance-ids "$INSTANCE_ID"
The response shows the previous and current states. The AWS CLI also provides a waiter, which polls a resource until it reaches the specified state. Wait for termination to finish:
aws ec2 \
  wait instance-terminated \
  --instance-ids "$INSTANCE_ID"
The waiter returns without output when the condition is satisfied. Inspect the final state:
aws ec2 \
  describe-instances \
  --instance-ids "$INSTANCE_ID" \
  --query 'Reservations[].Instances[].{Instance:InstanceId,State:State.Name}'
Confirm terminated. An instance record can remain visible after termination; this does not mean that the server is still running.
Click Refresh resources in AWS View. The instance should show terminated and no longer be available as a running application target. Leave the prepared network and key pair in place.
Summary
You launched an EC2 instance using an AMI, an instance type, network resources and an SSH key pair. You connected to the server, configured its report application and verified its response through AWS View. Finally, you terminated the instance and confirmed its final state.