Introduction
Your first task is to change a welcome message and watch the result. You will learn where to type commands, how to read their answers, and how to see the same resource in AWS View.
No AWS or Linux experience is required. Enter one command at a time and follow the observations after it. The tools and connection are already prepared; you do not need a personal AWS account or access keys.
You will practice a few Linux terminal basics, identify the account and identity used by the AWS CLI, create and update one configuration value, and remove that practice resource. Each lab starts in a fresh environment, so later labs do not depend on keeping this one open.
Certification Relevance
This lab provides hands-on practice for the following exam topics.
- Cloud Practitioner (CLF-C02) · Task 3.1: Console and CLI workflows for operating AWS resources.
Meet Your AWS Workspace
In this step, you will choose where to work and practice entering commands in the prepared Terminal.
Amazon Web Services (AWS) provides services for tasks such as storing files and running applications. A resource is an item managed by a service, such as a file or a named setting. You can manage resources through a website or through commands:
| Interface | Useful for | Tradeoff |
|---|---|---|
| AWS Management Console (web dashboard) | Exploring a service, viewing resources or charts, and making occasional changes through forms. | Repeating many changes by clicking takes time and is harder to save as a reusable procedure. |
| AWS CLI (command-line tool) | Precise operations, repeated tasks, and scripts that automate work. | You need to learn command options and read text responses. |
Engineers often use both. The official Console example below shows service search and dashboard cards, with example account details and costs. Its layout may change over time.
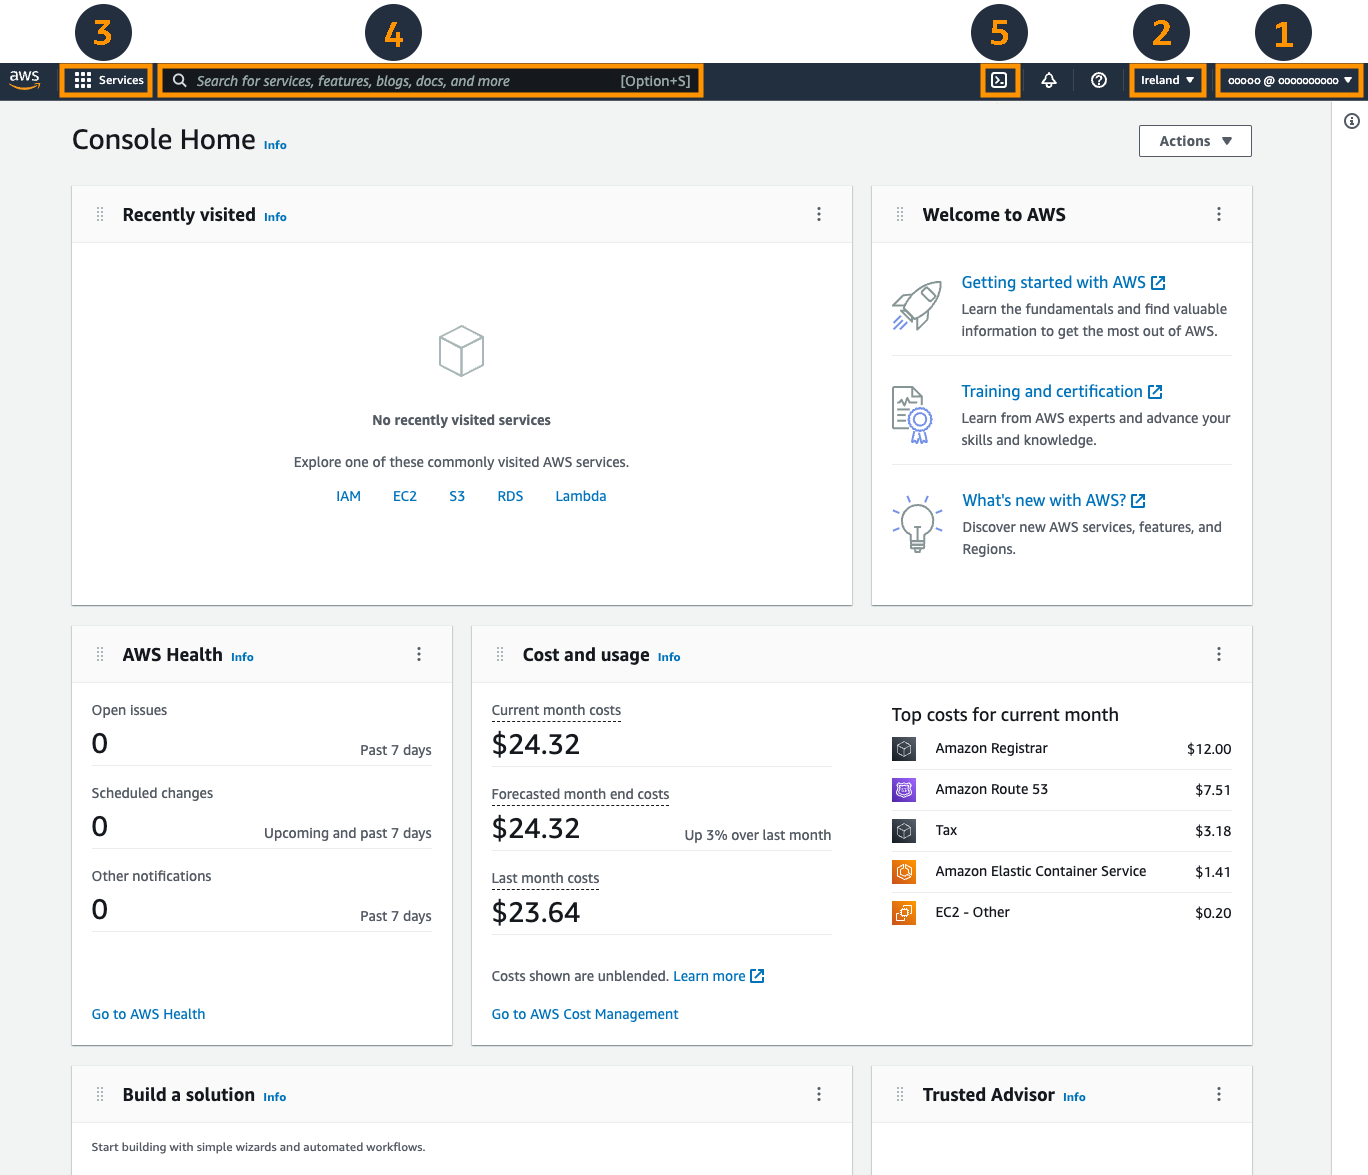
Source: AWS Console guide.
LabEx provides a virtual machine (VM), a prepared computer with the CLI already installed. Commands give you a clear record of an action that you can repeat, later automate, or review when working with an AI agent that suggests or runs commands. These labs focus on CLI practice and introduce Console workflows when needed.
In this lab, use Terminal to make changes and AWS View, the tab beside it, to observe the same service state. AWS View is a focused lab resource view, separate from the official Console. You do not need to sign in to a personal AWS account.
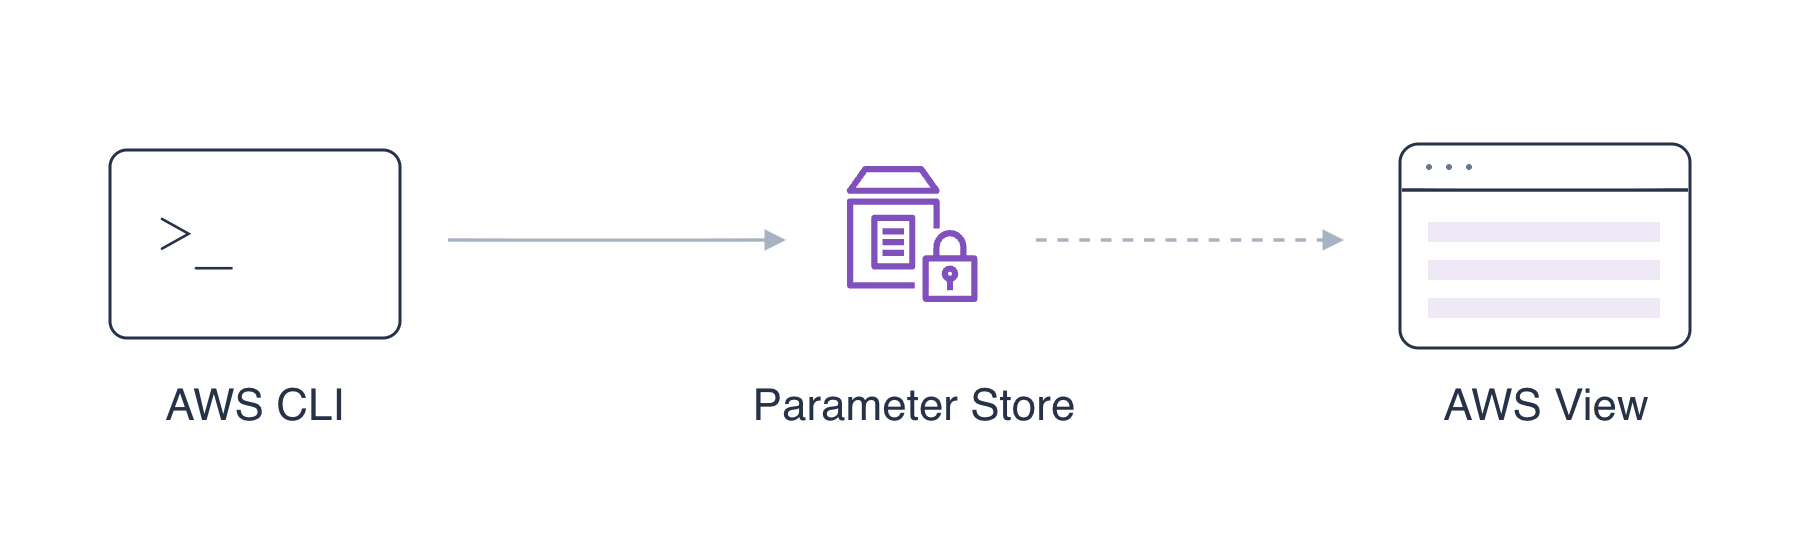
Concept diagram: both interfaces refer to the same lab resources. Completion checks read their resulting state. Changes in your personal AWS account are outside this lab's checks; Console actions can be checked when a system has authorized access to the same resources.
Click Terminal. Its prompt, such as labex:project/ $, means it is ready for a command. Type or paste the command, press Enter, and wait for the prompt to return. Do not type the prompt itself.
Find your current directory (folder):
pwd
pwd means print working directory. Move to the lab workspace with cd, meaning change directory:
cd /home/labex/project
A successful cd normally prints nothing. Confirm the location:
pwd
It should be /home/labex/project. List the files with ls:
ls
Read welcome.txt with cat:
cat welcome.txt
You should see Welcome to your AWS workspace. This file is on the lab computer. Next you will work with a setting held by a service.
Make your own local copy. cp takes a source and a destination:
cp welcome.txt my-welcome.txt
Read the copy:
cat my-welcome.txt
The same text appears. This step's check confirms your copy and that the original remains unchanged.
Create Your First AWS Setting
In this step, you will check who sends your AWS requests, create a welcome setting, and see it appear in AWS View.
A resource is an item managed by a service. An AWS account groups resources; a user or role, called an identity, makes requests to them. Your Linux username in the Terminal prompt identifies the user on the lab computer, which is separate from this AWS identity.
The CLI and its connection are prepared. Check the installed tool:
aws --version
The answer starts with aws-cli/. Ask Security Token Service (STS) for the identity used by this connection:
aws sts get-caller-identity
aws runs the CLI, sts selects a service, and get-caller-identity is the action. The answer uses JSON, a text format with named fields and values. Find Account and Arn: the account is a number, and the caller ARN ends with user/getting-started-learner. An ARN is a resource identifier; the next lab will show how to read one.
You are checking an existing connection, not logging in. Credentials, the information that authenticates requests, are already prepared and should remain private.
Now create a named application setting with Systems Manager Parameter Store. An application might read a welcome message from a central setting instead of keeping it in a local file. In this exercise, you will change and inspect the setting itself; no application needs to be deployed.
A parameter is a name and a stored value. Use the supplied name below and the welcome text as its value:
aws ssm put-parameter --name /labex/getting-started/greeting --type String --value 'Welcome to AWS' --region us-east-1
Read the command in parts:
ssm put-parameter: use Systems Manager to write a parameter.--name: the setting's name. Slashes organize this service name; they do not create local folders.--type String: store ordinary text.--value: the text to store. Quotes keep the words together.--region us-east-1: use this location for the request. Keep it as shown; the next lab explores Regions.
The response includes "Version": 1, the first stored version. Click AWS View beside Terminal. Find the greeting under us-east-1, with value Welcome to AWS. The /labex/reference/team setting is a prepared reference; leave it unchanged.
For comparison, a parameter's Overview page in the official Console shows the same Name, Type, and Value fields, using a different example parameter:
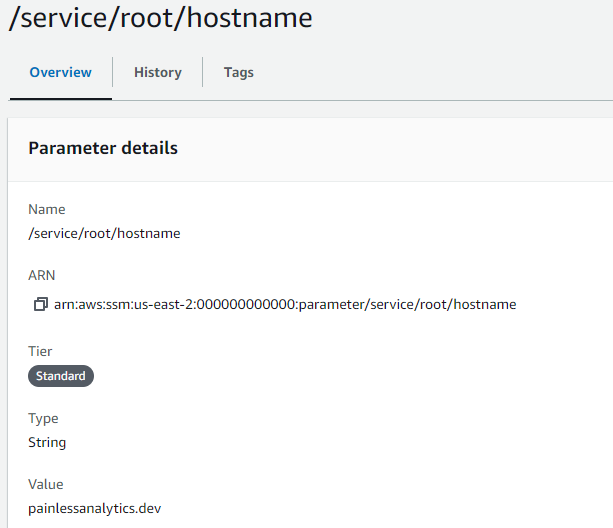
Source: AWS Summit DEV206.
If you repeat the create command and see ParameterAlreadyExists, the name is already in use. Read it with the command in the next step; do not delete unrelated resources or restart the whole lab. The completion check confirms the greeting's initial value and the unchanged reference.
Change the Welcome Message
In this step, you will read your setting, change its value, and compare the result in Terminal and AWS View.
Return to Terminal. Unlike cat welcome.txt, this command reads a service resource:
aws ssm get-parameter --name /labex/getting-started/greeting --region us-east-1
Inside Parameter, find Name, Value, and Version. The value is Welcome to AWS and the version is 1.
Change only the value. The new option, --overwrite, permits updating this existing setting:
aws ssm put-parameter --name /labex/getting-started/greeting --type String --value 'Hello from the CLI' --overwrite --region us-east-1
The response includes Version 2 on your first update. Read it again:
aws ssm get-parameter --name /labex/getting-started/greeting --region us-east-1
The value is now Hello from the CLI. Switch to AWS View and wait for the greeting to update. Its name stays the same while its value and version change. The reference setting still has value platform.
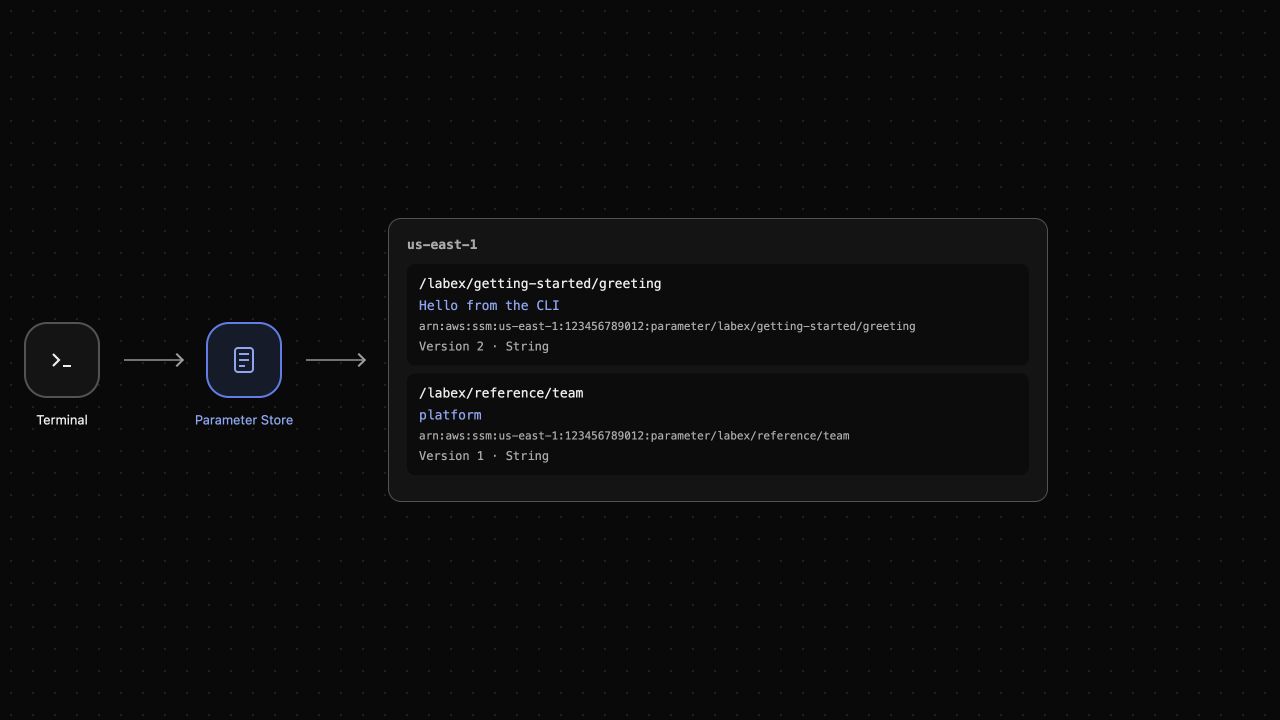
Example result: your first update is Version 2; repeating an update can produce a higher version. Changing tabs only observes the state, it does not update the setting.
Remove Your Practice Resource
In this step, you will delete the greeting and confirm that the reference setting remains.
Return to Terminal. delete-parameter removes the named service resource:
aws ssm delete-parameter --name /labex/getting-started/greeting --region us-east-1
A successful deletion may print nothing. Query the remaining parameter names to confirm the result:
aws ssm describe-parameters --region us-east-1
describe-parameters lists metadata such as names and versions. The greeting should be absent, and /labex/reference/team should remain. Read that reference to confirm its value:
aws ssm get-parameter --name /labex/reference/team --region us-east-1
Its value is still platform. Switch to AWS View: only the reference setting remains. A connection error or an Unavailable message does not prove deletion; the successful queries establish the result.
Remove only the local copy you made. rm removes the named local file:
rm my-welcome.txt
You removed a service resource and your own local copy. The local welcome.txt file is separate and remains on the lab computer. Leave the reference unchanged. The next lab starts with fresh resources and credentials; carry forward what you learned, not this environment.
Summary
You practiced Terminal commands, identified the AWS caller, and created, read, updated, and deleted a named setting. AWS View showed the same resource changes. You also distinguished a local file from a service resource.
Next, Explore AWS Regions and Resource Identity shows why the location of a request matters, even when two resources have the same name.