Introduction
Your team wants every new report server to start with the correct application greeting. You will write a Bash User Data script, pass it when launching an EC2 instance and inspect the resulting application and startup log.
You should already know how to launch an EC2 instance and connect with SSH. This fresh environment supplies its own image, network and key pair; you will create the server and its startup configuration.
Certification Relevance
This lab practices programmatic resource configuration and startup automation, supporting Task 3.1 of the AWS Certified Cloud Practitioner CLF-C02 Domain 3 objectives.
Configure the Application at Launch
In this step, you will write a startup script, launch an instance with that script and verify its application response.
User Data is information passed to an instance at launch. A Linux startup script can use it to configure software automatically. By default, these scripts run as root during the first boot, so commands inside them do not require sudo. The official EC2 User Data guide describes this startup behavior and log location.
Start in your workspace:
cd /home/labex/project
The prepared image contains the report application. Load the image and network IDs into your current shell:
source launch.env
Create user-data.sh with a here-document. The outer SCRIPT markers delimit the whole script; the inner JSON markers delimit the application's configuration. Quoted markers preserve the text literally. The first line, #!/bin/bash, selects Bash, while set -euo pipefail stops the script on command failures or unset variables. The final echo prints a useful startup-log entry.
cat > user-data.sh <<'SCRIPT'
#!/bin/bash
set -euo pipefail
cat > /etc/report-app/config.json <<'JSON'
{
  "message": "Started with User Data"
}
JSON
echo 'Report application configuration applied.'
SCRIPT
This creates a local file; it does not yet change any instance. Pass that file to run-instances using --user-data file://user-data.sh. The AWS CLI reads and encodes the file for the API, so you do not need to encode it yourself. Give this server the name bootstrap-server:
aws ec2 \
  run-instances \
  --image-id "$AMI_ID" \
  --instance-type t3.micro \
  --subnet-id "$SUBNET_ID" \
  --security-group-ids "$SECURITY_GROUP_ID" \
  --key-name report-key \
  --count 1 \
  --user-data file://user-data.sh \
  --tag-specifications 'ResourceType=instance,Tags=[{Key=Name,Value=bootstrap-server}]'
Save the new instance ID. The filter selects its name tag, and $(...) captures the plain-text result:
INSTANCE_ID=$(aws ec2 \
  describe-instances \
  --filters Name=tag:Name,Values=bootstrap-server \
  --query 'Reservations[0].Instances[0].InstanceId' \
  --output text)
Inspect the state and public address:
aws ec2 \
  describe-instances \
  --instance-ids "$INSTANCE_ID" \
  --query 'Reservations[].Instances[].{Instance:InstanceId,State:State.Name,PublicIPv4:PublicIpAddress}'
Confirm running. If it is still pending, wait briefly and repeat the query. A running state alone does not prove that startup configuration succeeded; you will inspect the application next.
Open AWS View, click Refresh resources and select bootstrap-server under Application requests. Click Check application. Confirm HTTP 200 and the message Started with User Data. You configured the server through its startup script without editing it after launch.
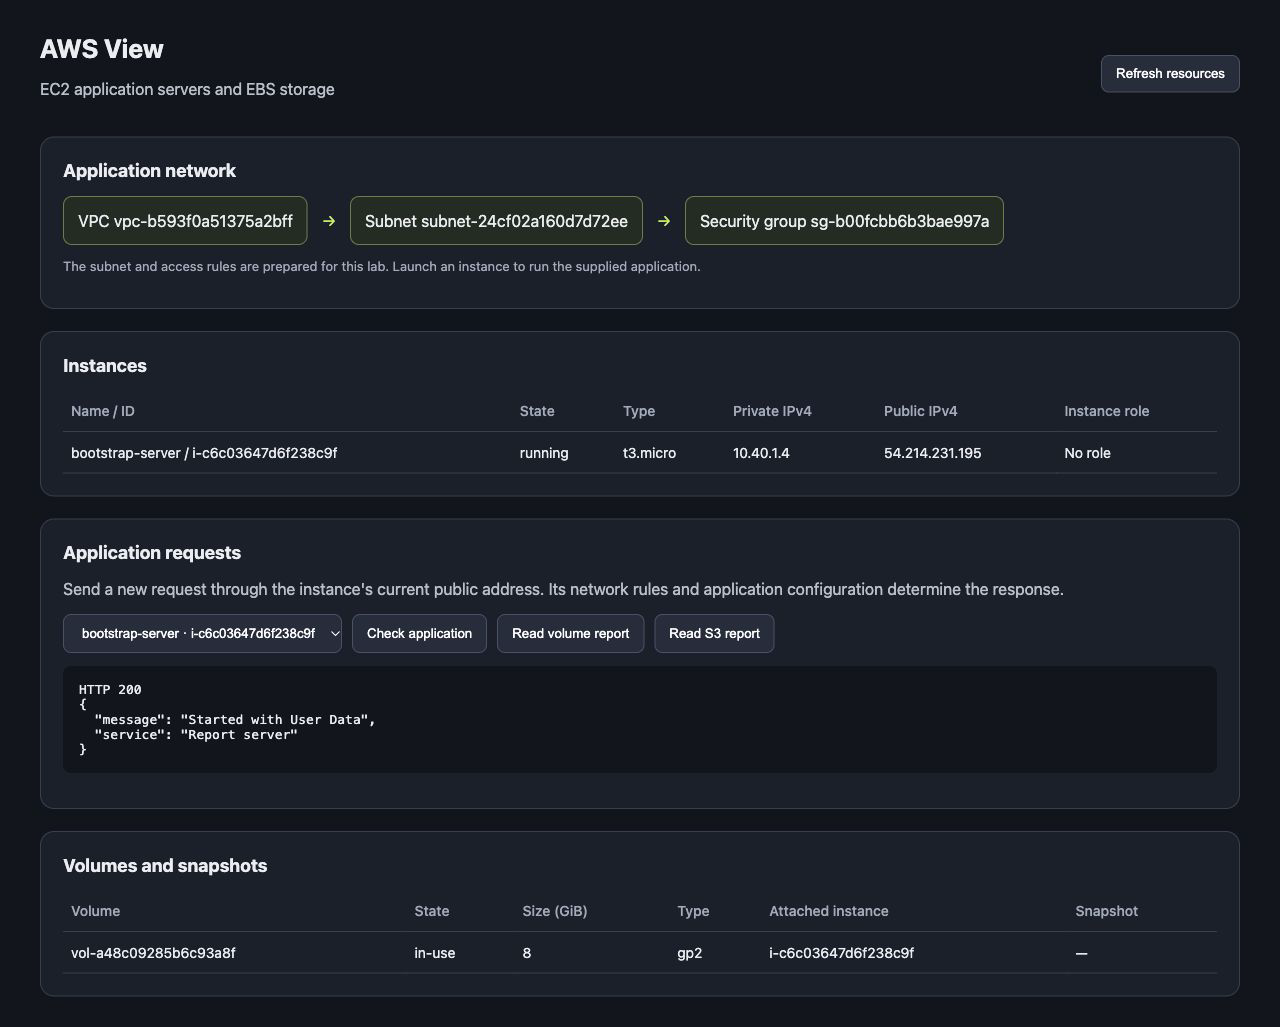
This example shows the expected response. Your instance and network IDs will differ.
Retrieve the public address to connect with SSH:
PUBLIC_IP=$(aws ec2 \
  describe-instances \
  --instance-ids "$INSTANCE_ID" \
  --query 'Reservations[0].Instances[0].PublicIpAddress' \
  --output text)
The supplied SSH configuration selects the private key and the lab's access route:
ssh -F ssh_config ubuntu@"$PUBLIC_IP"
You are now inside the application instance. Read the startup output log with administrator privileges:
sudo cat /var/log/cloud-init-output.log
Look for Report application configuration applied. This is the output of the script you supplied. When diagnosing a startup failure, inspect this log for command errors, then test the application itself rather than relying on the instance state alone.
Return to the LabEx terminal:
exit
You can also retrieve the User Data stored on the instance. This query selects its Base64 value, and the pipe sends it to base64 --decode to display the original script:
aws ec2 \
  describe-instance-attribute \
  --instance-id "$INSTANCE_ID" \
  --attribute userData \
  --query 'UserData.Value' \
  --output text | base64 --decode
Confirm the Bash script and greeting match your file. User Data normally runs only on the first boot; stopping and starting an instance does not automatically repeat this configuration. Use startup automation for repeatable initial configuration, and keep credentials out of the script.
Terminate the Bootstrap Server
In this step, you will remove the instance you created and verify its final state.
Terminate only the instance identified by your saved variable:
aws ec2 \
  terminate-instances \
  --instance-ids "$INSTANCE_ID"
Wait for the instance to reach terminated. The waiter polls the state and returns without output when it succeeds:
aws ec2 \
  wait instance-terminated \
  --instance-ids "$INSTANCE_ID"
Confirm the final state:
aws ec2 \
  describe-instances \
  --instance-ids "$INSTANCE_ID" \
  --query 'Reservations[].Instances[].{Instance:InstanceId,State:State.Name}'
The result should show terminated. Refresh AWS View and confirm that bootstrap-server is no longer a running application target. Leave the prepared network and key pair in place.
Summary
You wrote a Bash User Data script and passed it to EC2 at launch. You verified automatic application configuration through AWS View, inspected the startup output log and retrieved the stored script. Finally, you terminated the server and confirmed its final state.