

Introduction
Cloudflare Workers lets you run application code on Cloudflare's network without managing a server yourself. You can use it to receive a website form, return data to an app, or run a small scheduled check. Before writing that code, you need an account to hold your applications. In this lab, you will prepare your own recognizable learning account and confirm its Workers Free plan.
You only need a web browser and access to your email inbox. Complete all actions on Cloudflare's website; this lab does not use a LabEx VM, a terminal, a credit card, or a purchased domain. Allow about 20 minutes, plus any time needed to receive the verification email.
The main path assumes you have never used Cloudflare. If you already have a login, follow the Existing user notes to prepare a separate learning account under that login. You do not need another email address.
Each step ends with a Check your result instruction. These are manual checks: the lab's completion buttons do not inspect your Cloudflare account. Keep your password and email verification links private.
The English Dashboard screenshots show a demonstration account named LabEx Learning. Layouts can change; use the labels described in the text to find the equivalent controls.
Create Your Cloudflare Login
In this step, you will create the login you will use to access your learning account.
Two terms will help you navigate Cloudflare. Your user profile is your sign-in identity, associated with your email address. An account holds resources, members, and billing settings. One login can access several accounts. Throughout this course, a learning account simply means a dedicated account you own and use for practice; it is not a special Cloudflare product or an Enterprise Organization.
Open the Cloudflare sign-up page. Enter an email address whose inbox you can access and create a strong, unique password that meets the requirements shown on the form. Save it securely in your password manager. Review the displayed terms and privacy information, complete any human verification yourself, and select Create Account when you are ready.
Cloudflare sends a verification email after registration. Leave the Dashboard open and continue to the next step to verify your address. If onboarding asks you to connect a domain, you do not need to purchase or add one for this lab. Return to the Dashboard and continue with account preparation.
Existing user: Open the login page and sign in using your existing identity. Complete any authentication prompts. Do not register a second login. You will create or select a dedicated account in step 3. If the sign-up page redirects to your Dashboard, you are already signed in; use this existing-user path.
Check your result: You can reach the Cloudflare Dashboard while signed in. New users should also have a verification message waiting in their inbox. Signing in alone does not prove that the email address is verified.
Reference: Cloudflare's account creation guide.
Verify Your Email Address
In this step, you will confirm that you control the email address used for your Cloudflare login.
Open your email inbox in another tab and find the recent verification message from Cloudflare. Check your spam folder if necessary. Follow the verification link and sign in to Cloudflare if prompted. The link belongs to your login; do not copy it into a lab answer or share it with another person.
Return to the Dashboard. Open the user menu at the top right and choose My Profile. Under Email Address, look for the verified status beside your address. This profile setting is separate from the account selector at the top left.
If the message is missing or the link has expired, use Send verification email in the profile's Email Address section and open the latest message. If the address is already verified, this resend option may not appear. If a link fails, check the profile status first: verification might already be complete. For a still-unverified address, try the latest link in another browser or private window and sign in with the same identity.
Existing user: If your profile already shows a verified address, no new message is needed. Verification belongs to your login, so creating another learning account does not require a second email address.
Check your result: Your profile shows that your email address is verified. Do not use the absence of a warning banner as the only evidence.
Reference: Cloudflare's email verification and troubleshooting guide.
Prepare a Dedicated Learning Account
In this step, you will select the account for this course and give it a recognizable name.
New user: Use the initial account created during registration. Its default name may contain your email address. You do not need to create a second account. Continue below to rename this initial account.
Existing user: Open the account selector at the top left of the Dashboard, where the current account name appears. Choose Create Account there, or use that button on the Accounts page, to create a standalone Free account. Follow the form and use LabEx Learning as the account name when asked. Select the newly created account before continuing. If you already own a dedicated Free learning account, select it instead of creating another one.
Cloudflare currently requires your user identity to be at least 7 days old to create an additional Free account and allows up to 5 Free accounts. If creation is unavailable, check these restrictions. You can reuse a suitable dedicated account you already own or return after you become eligible. Do not rename a work account or delete existing accounts to get through this lab. These restrictions concern additional accounts; a first-time user uses the initial account from registration. See the official Free account creation announcement.
With your learning account selected, expand Manage account in the left sidebar and open Configurations. On the Preferences tab, find Account name and select Change name. Enter LabEx Learning, then select Save. If the account already has this name, leave it as it is.
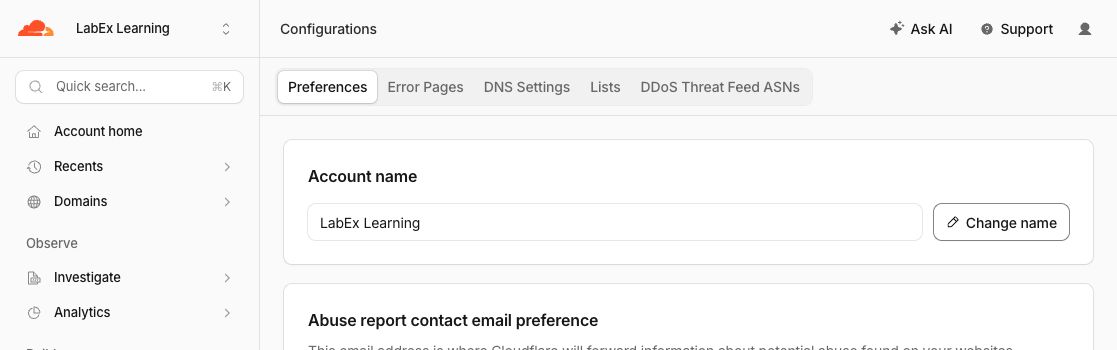
The screenshot shows the saved name. This is a display label that makes the account easy to recognize in later authorization screens. Other learners can use the same label: their accounts remain separate. Cloudflare identifies each account using its own account ID, not this name. A different clear name is also acceptable. Naming an account does not activate a plan or change your login email.
Check your result: The account selector and the Account name field identify your dedicated learning account. Reload Configurations once to confirm the saved name persists. If you cannot change it, check that you selected an account you own rather than one you joined as a member.
Confirm Workers Free and Find Your Workspace
In this step, you will check the Workers plan for your selected account and locate the page you will use in later labs.
Keep your learning account selected. In the left sidebar, expand Compute and select Workers plans. Find the Free section and check that it is marked Current plan, as shown below. The disabled Current plan button is a status indicator; you do not need to click it or upgrade.
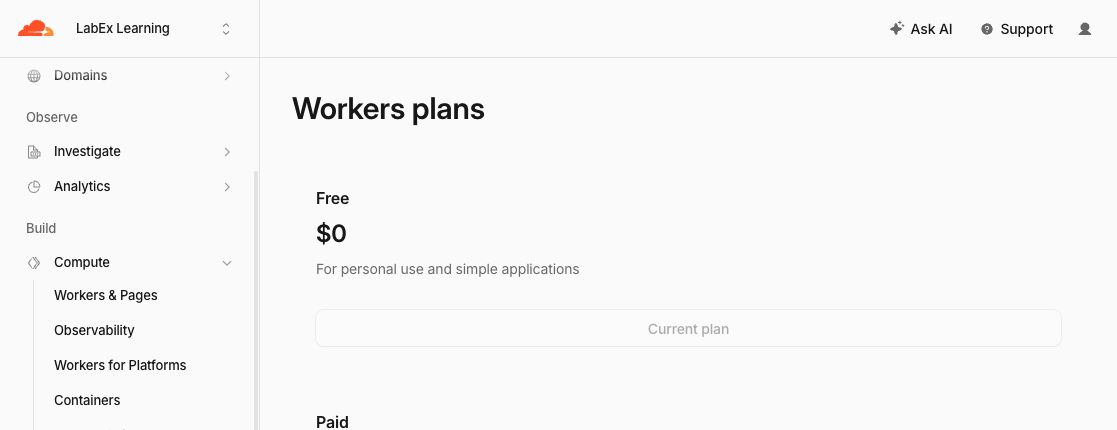
If a paid plan is current, first check the account selector. You may have opened a different account. Return to your dedicated Free account; do not change a business subscription for this exercise. If the page offers an upgrade or asks for payment information, you do not need to complete that purchase for this lab.
A Free account and a product plan are related but different. This checkpoint confirms the Workers plan. Other Cloudflare products can have their own activation requirements and charges. Later labs explain any additional prerequisites before you start them.
Now select Compute → Workers & Pages. This is where applications for the selected account appear. In a new account, an empty state such as No projects found is expected. You will deploy your first Worker in a later lab; leave Create application for that lesson.
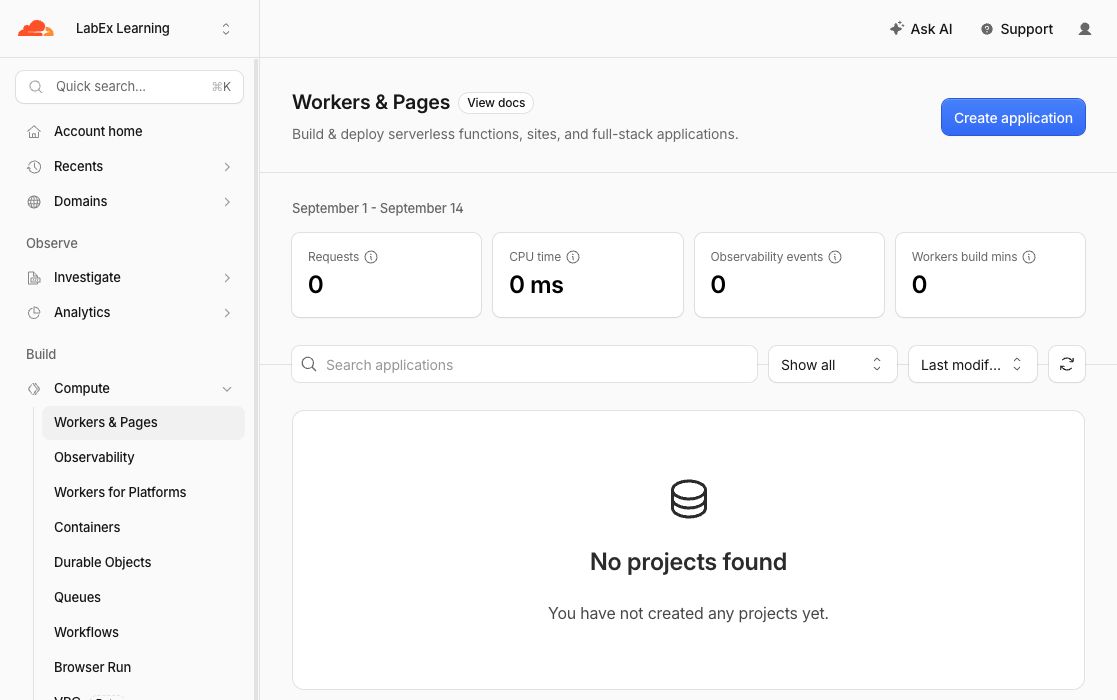
Your page may also display an account ID or a workers.dev subdomain further down. Do not copy the demonstration account's identifiers or try to claim a matching subdomain. Subdomain setup and application deployment are not required to complete this lab.
Existing user: A reused learning account may already contain projects. An empty list is only an illustration for a new account, not a completion requirement. Keep existing resources intact.
Check your result: Confirm all of the following before continuing:
- Your login email is verified in My Profile.
- You can select your own dedicated learning account and recognize its name.
- Workers plans marks Free as the current plan for that account.
- You can open Workers & Pages under the same account.
Keep this account for the rest of the course; do not delete it as cleanup. Bookmark Workers & Pages for your own use. If you are using a shared computer, sign out when finished. In the next lab, Connect LabEx to Your Cloudflare Account, you will authorize a LabEx environment to access this account. Being signed in to the Dashboard does not automatically authorize a VM or command-line tool.
Summary
You prepared a personal Cloudflare learning account, checked your email verification, saved a recognizable account name, and confirmed the Workers Free plan in the Dashboard. You also located Workers & Pages without deploying an application or adding a domain.
You now know the difference between a login identity, an account, and a product plan. Keep your learning account for the next lab, where you will connect a LabEx environment through your own authorization. This lab used manual page checks; its compatibility checks did not validate your Cloudflare state.