Introduction
Required before starting
Before starting this lab or launching its VM, read Prepare Your Cloudflare Learning Account and complete the account preparation in your browser. This required preparation does not need a LabEx VM. Continue only when your login email is verified, you can select your own dedicated learning account, Workers Free is its current plan, and you can open Workers & Pages in that account. Keep the account name handy;
LabEx Learningis a suggested display name. If your account is already prepared, read the guide and confirm these checkpoints before continuing.
Cloudflare Workers runs your application code on Cloudflare's network, for example to receive a form or provide data to a website. Before you can publish that code, your development tools need permission to use your account. This lab connects your LabEx Linux environment using Wrangler, Cloudflare's command-line tool. Your browser confirms your identity, while Wrangler saves authorization inside this VM. Signing in to the Dashboard alone does not connect the terminal.
Use an account you own with a verified email address and the Workers Free plan, as prepared in Prepare Your Cloudflare Learning Account. Keep its name handy; we recommend LabEx Learning. This lab requests read access to your user and account information. It does not deploy applications, require a domain, or add paid services.
The lab installs Node.js 22.22.0 and Wrangler 4.131.1 automatically. You will use standard Wrangler commands and its project configuration, which also work on your own computer. You will authorize the connection yourself, inspect its result, and log out at the end. Each fresh VM needs a fresh authorization.
Authorize Wrangler Through Your Browser
In this step, you will authorize Wrangler in your LabEx VM using your own Cloudflare login.
Required before starting
Before starting this lab or launching its VM, read Prepare Your Cloudflare Learning Account and complete the account preparation in your browser. This required preparation does not need a LabEx VM. Continue only when your login email is verified, you can select your own dedicated learning account, Workers Free is its current plan, and you can open Workers & Pages in that account. Keep the account name handy;
LabEx Learningis a suggested display name. If your account is already prepared, read the guide and confirm these checkpoints before continuing.
The LabEx VM is your temporary Linux practice computer. Its Terminal accepts text commands; those commands run in the VM, not on your own laptop. Node.js runs the JavaScript-based development tools, while Wrangler communicates with Cloudflare. This first exercise only connects those tools to your account.
Open the LabEx Terminal and change into the prepared project directory. The cd command changes your working directory; subsequent commands run here.
cd /home/labex/project/cloudflare-connect
Wrangler is installed locally in this project as a development dependency. npx wrangler runs that installed version. The setup has already installed Node.js and the project dependencies, so you do not need to install them again. Check the version:
npx wrangler --version
Expect version 4.131.1. The project's package.json pins this exact version, while package-lock.json records the resolved dependency versions. On your own computer, after installing Node.js, you can add Wrangler to a project using npm install --save-dev --save-exact wrangler@4.131.1. This is an explanation, not an extra command to run in the prepared lab. Use npm ci when reproducing an existing project with its committed lockfile.
Project-local installation keeps each project's tool version independent. See Cloudflare's installation guidance.
Authorization means granting a tool specific permissions to act on your behalf. A scope names one of those permissions, such as reading account information. You will grant only the access this exercise needs, rather than sharing your password with the terminal.
Now start device authorization. --device connects your browser approval to this remote terminal without a localhost callback. --browser=false keeps Wrangler from trying to launch a browser inside the VM. The two scopes request account and user read access for this connection exercise. Cloudflare also includes required Background Access so Wrangler can maintain its authorization. No Worker write permission is requested.
npx wrangler login --device --browser=false --scopes account:read user:read
Wrangler displays a verification URL and a short code. Keep this command running. Open the displayed Cloudflare URL in your own browser, enter the code from your current terminal, and continue. If the URL already includes the code, check it against your terminal. Do not use a code from a screenshot or another person's session.
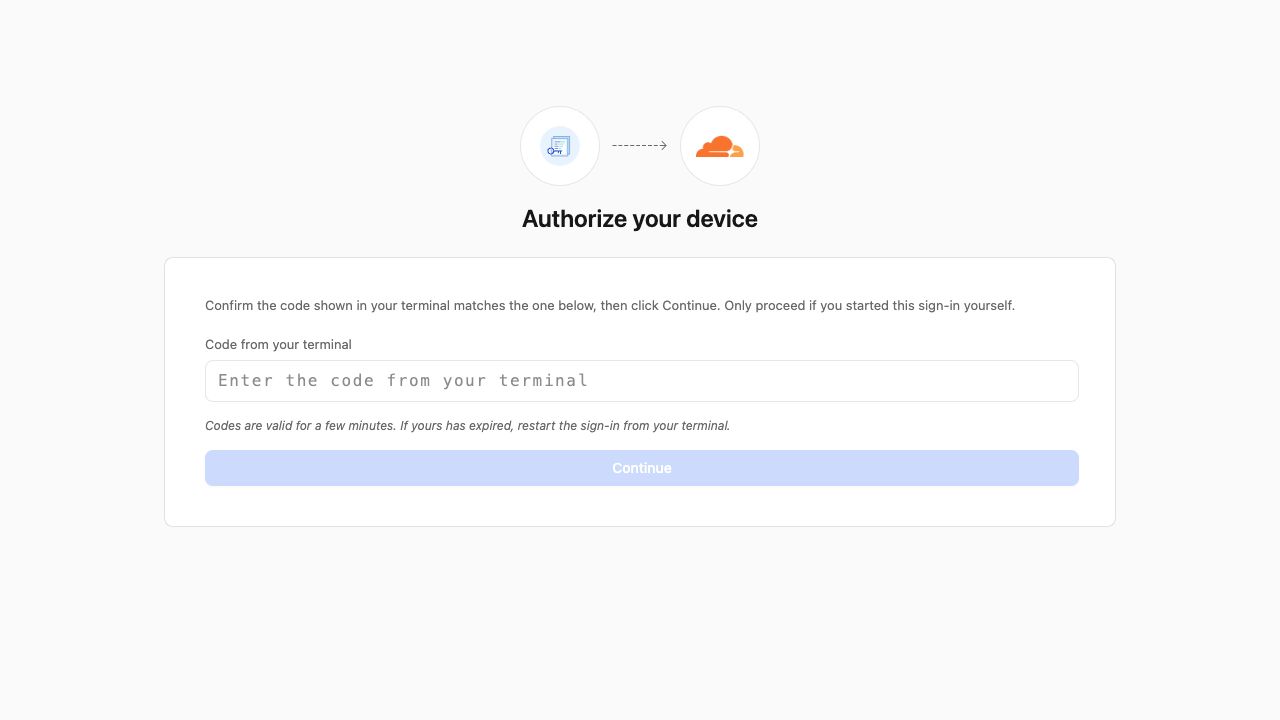
Copy the code directly from the terminal to avoid confusing similar characters. Select Continue. If Cloudflare cannot verify the code, check the exact characters and whether the current login command is still waiting.
Sign in if asked. On the consent page, check that the application is Wrangler, review its requested permissions, and select only your learning account if account selection is offered. The consent page groups Account Read under Account & Billing; expand that group to inspect it. User Read and Background Access appear under Required.
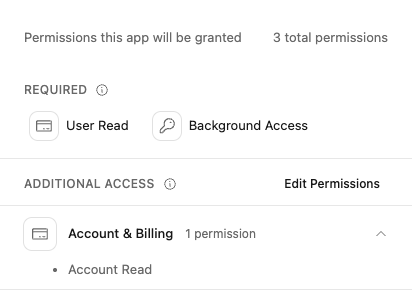
Check the account name beside Edit. If it is not your learning account, select Edit and choose the intended account before returning to consent. The cropped screenshot below shows the selected account and the Authorize button; your login identity appears above this area in the full page.
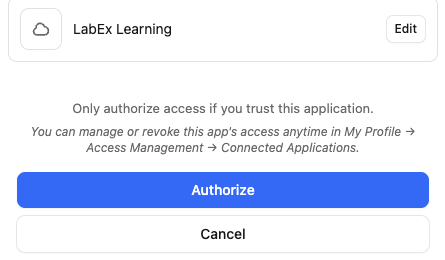
Review the displayed privacy information, then select Authorize after checking these details. Return to the Terminal and wait for Successfully logged in. before continuing. Browser approval and terminal completion are separate checkpoints.
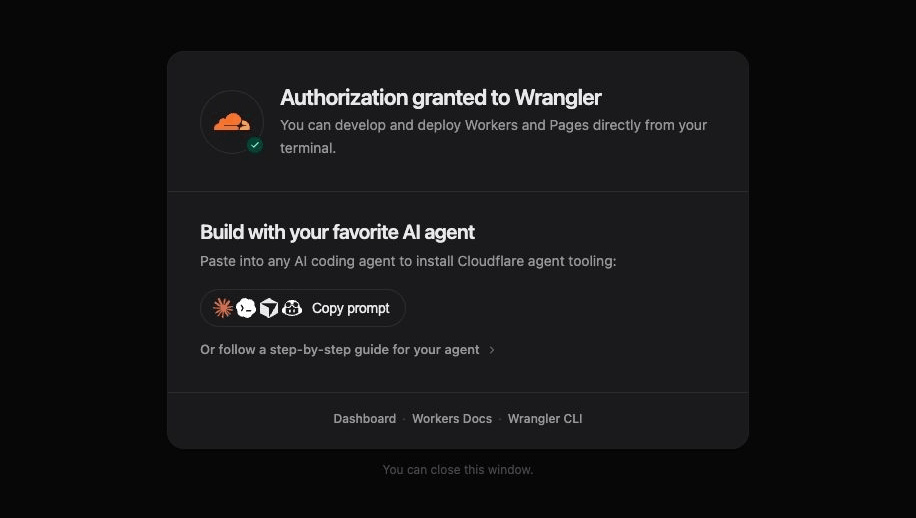
The success page includes general development suggestions. You do not need to install agent tooling or copy its suggested prompt. Its generic deployment message does not expand this lab's read permissions.
The code expires after a short period. If it expires or you deny the request, let the command finish or press Ctrl+C, then run the same command for a new code. If you accidentally started ordinary login and see an unreachable localhost page, stop that command and use the device command above.
Confirm the stored login with Wrangler itself:
npx wrangler whoami --json
Look for "loggedIn": true, "authType": "OAuth Token", and an accounts array containing your learning account. Each account object has a name and an id. The --json flag returns structured data instead of the human-readable report; you do not need to understand the other account settings. A browser success page alone is insufficient if the VM did not receive the authorization. If Wrangler reports that you are not authenticated, repeat device authorization.
Use the step's verification button. LabEx independently checks that this VM's stored OAuth login can read accessible accounts.
Wrangler stores credentials in the VM's user configuration. Do not print or copy credential files or run token-display commands. The official Wrangler login documentation describes the device flow.
Select and Verify Your Learning Account
In this step, you will identify your learning account and save its ID in Wrangler's standard project configuration. Authorization answers ‘what may this VM do?’; configuration answers ‘which account should this project use?’ Keeping the target in a file helps avoid deploying to the wrong account later.
One login may access multiple accounts. Run the same identity command to see their names and IDs in the accounts array:
npx wrangler whoami --json
Find the object whose name identifies your learning account. If only one account appears, still check its name. If several appear, use the Dashboard account selector to confirm which is your learning account. Do not select an account solely because it appears first. If the intended account is missing, repeat authorization and select it in the browser.
Copy the 32-character id from that same account object. An account name is a display label; an ID identifies the actual account. Wrangler's account_id setting makes a project's target explicit, including when your login can access several accounts.
Create wrangler.jsonc. Replace YOUR_ACCOUNT_ID below with the ID you just copied before running the block. Keep the quotation marks. The here-document writes everything between CONFIG delimiters into the file; > replaces its contents.
cat > wrangler.jsonc <<'CONFIG'
{
  "account_id": "YOUR_ACCOUNT_ID"
}
CONFIG
Inspect the saved configuration:
cat wrangler.jsonc
Confirm that account_id matches the learning account object in whoami --json, and that the placeholder is gone. This file contains an identifier, not a password or OAuth token. JSON without comments is valid JSONC; use the shown format in this lab. Later labs add Worker settings to the same standard configuration file. See Wrangler configuration.
Use this step's verification button before logging out. The backend reads your configuration and makes an authenticated, read-only account request. It checks that Cloudflare confirms access to that exact account; a saved file alone is insufficient. If it fails, check the copied ID, authorization, and connectivity. No custom command is needed in your terminal.
This verifies account read access. Later labs request additional permissions for deployment.
Disconnect This VM
In this step, you will remove this VM's Wrangler login and verify that it is no longer authenticated.
Finish the previous step's verification first. Logging out removes the authorization needed by its live API check. No cloud resources were created in this lab, so there are no applications or accounts to delete.
Run Wrangler's logout command:
npx wrangler logout
Then confirm the explicit unauthenticated state:
npx wrangler whoami --json
Find "loggedIn": false in the structured output. With this Wrangler version, the command also exits nonzero when logged out; that is expected here. A network error without this explicit state does not prove logout. Use the step's verification button to confirm the result independently.
You can also review the application grant in the Dashboard under My Profile → Access Management → Connected Applications, as linked from the consent page. This is where Cloudflare lets you manage or revoke an application's access. Only revoke the grant you intend to remove; another environment may use the same application.
Logging out of Wrangler does not delete your Cloudflare learning account or sign your browser out of the Dashboard. Keep the account for later lessons. The wrangler.jsonc file contains an identifier rather than credentials, but it does not authorize a new VM. The next lab will start with a fresh environment and its own connection steps.
If you rerun earlier verification after this point, its authentication failure is expected. Reauthorize only if you intend to repeat the exercise, and log out again when finished.
Summary
You authorized a remote LabEx VM through Cloudflare's device flow, selected your own learning account, and verified live account access from an independent process. You then logged Wrangler out and checked its explicit unauthenticated state.
Your learning account remains available for the course. Browser login, VM authorization, and the selected account are separate parts of the connection; check all three whenever you start a fresh environment.