
Introduction
Welcome to your first Linux lab! This introduction is designed for complete beginners who have never used Linux before. Linux is a free, open-source operating system that powers everything from smartphones to supercomputers. Unlike Windows or macOS, Linux allows users to interact directly with the system through a command-line interface, giving you more control and flexibility.
In this lab, you'll learn the basics of using Linux through its command-line interface, called the terminal. Don't worry if this sounds intimidating – we'll guide you through each step, explaining what you're doing and why it's important.
If you are new to Linux or LabEx, it is recommended to begin with the Quick Start with Linux course to learn the basics systematically. After completing the course, you can return here to practice your skills.
Understanding and Opening the Terminal
The terminal, also known as the command line or shell, is a text-based interface to interact with your computer. Instead of clicking on icons or menus, you type commands to perform actions like creating files, navigating directories, or running programs.
Now, let's open the terminal:
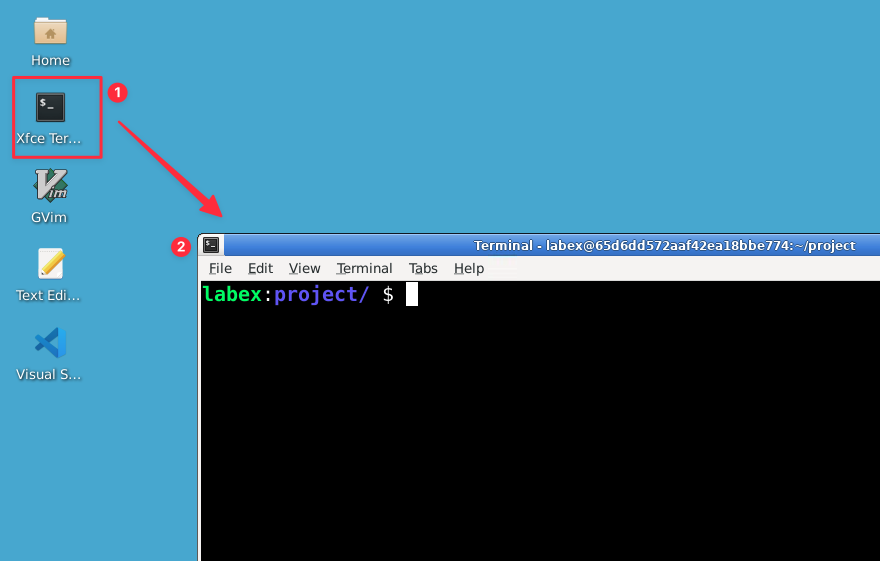
- Look for an icon on your desktop labeled "Terminal" or "XFCE Terminal". It might look like a small black screen.
- Double-click this icon to open the terminal.
The last line in this window is called the "prompt". It typically ends with a $ symbol. This is where you'll type your commands.
Another method to open the terminal in LabEx is by selecting the Terminal tab from the top menu bar.
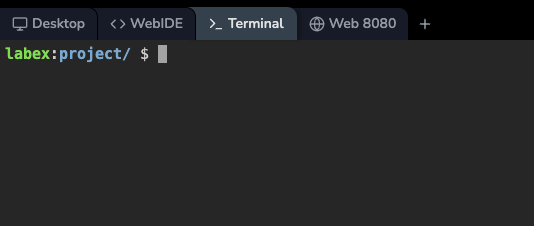
Both the Desktop's Terminal icon and the Terminal tab access the same lab environment. You can choose the method that works best for you.
Navigating the File System
Just like your computer has folders and files, Linux organizes information in a similar way. In Linux, we call folders "directories". Let's learn how to move around these directories using the terminal.
- First, let's find out where we are. Type the following command and press Enter:
pwd
pwd stands for "print working directory". It tells you which directory you're currently in.
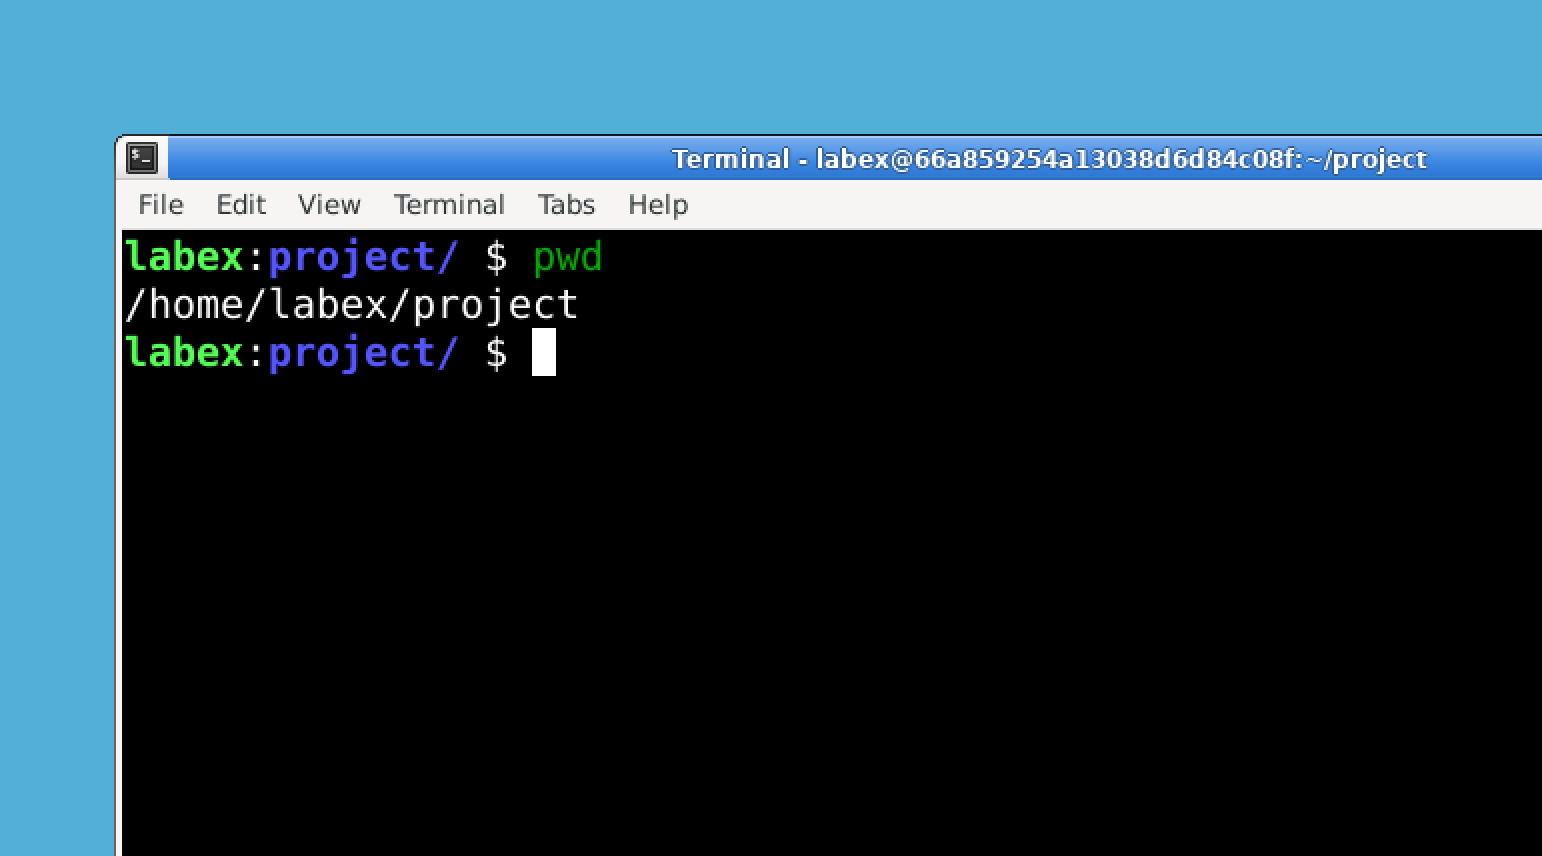
You should see something like /home/labex/project. This is your current location in the file system.
Tips: No more operation screenshots will be added later to avoid duplication. Just follow the instructions to complete the lab.
- Now, let's move to your home directory. Type:
cd ~
cd means "change directory", and ~ is a shortcut that always represents your home directory.
Note: If you cannot type the
~symbol in the Desktop terminal due to keyboard layout differences in certain countries, you can try switching to the standalone Terminal tab in the upper left corner of the VM interface.
- Let's check our location again:
pwd
You should now see /home/labex. This is your home directory!
- To go back to the project directory, type:
cd project
- Now, let's see what's in this directory. Type:
ls
ls stands for "list". It shows you all the files and directories in your current location.
Remember, in Linux:
/is the root of the file system (like C: in Windows)- Directories are separated by
/(not\like in Windows) - File and directory names are case-sensitive (unlike Windows)
Creating Files and Directories
Now that we can move around, let's learn how to create new files and directories.
Before proceeding, ensure you are in the /home/labex/project directory. If not, utilize the cd command to navigate to the correct directory.
- First, let's create a new directory called
linux_practice:
mkdir linux_practice
mkdir stands for "make directory". This command creates a new folder.
- Move into the new directory:
cd linux_practice
- Now, let's create an empty file called
hello.txt:
touch hello.txt
touch is a command that creates an empty file if it doesn't exist, or updates the timestamp if it does.
- Let's confirm our file was created:
ls
You should see hello.txt listed.
- Now, let's add some text to our file:
echo "Hello, Linux" > hello.txt
👆 LabEx Tips: Click "Explain Code" at the bottom right of the code block to chat with Labby AI for code clarification.
echo is like "print" in other languages. The > symbol tells Linux to put the output into a file instead of displaying it on the screen.
- To view the contents of our file:
cat hello.txt
cat is short for "concatenate", but it's often used to display file contents.
These commands demonstrate how Linux uses small, specialized tools that can be combined to perform complex tasks.
Using Wildcards
Wildcards are special characters that help you work with multiple files at once. They're like search patterns for file names. Let's practice using them.
Before proceeding, ensure you are in the /home/labex/project/linux_practice directory. If not, utilize the cd command to navigate to the correct directory.
- First, let's create a few more files:
touch file1.txt file2.txt file3.txt
This creates three new empty files in one command!
- Now, let's list all files ending with
.txt:
ls *.txt
The * is a wildcard that matches any number of characters. So *.txt means "any file name ending with .txt".
- We can also create numbered files using a range:
touch note_{1..5}.txt
This creates note_1.txt, note_2.txt, note_3.txt, note_4.txt, and note_5.txt all at once!
- Let's list files starting with "note":
ls note*
This should show all five note files we just created.
Wildcards are powerful tools for working with groups of files. The most common wildcards are:
*: Matches any number of characters?: Matches any single character[abc]: Matches any one character listed in the brackets
Basic File Operations
Now that we have some files to work with, let's learn how to copy, move, and delete them.
Before proceeding, ensure you are in the /home/labex/project/linux_practice directory. If not, utilize the cd command to navigate to the correct directory.
- Let's copy
hello.txtto a new file calledhello_copy.txt:
cp hello.txt hello_copy.txt
cp stands for "copy". The first argument is the source file, the second is the destination.
- Now, let's move
hello_copy.txtto the parent directory:
mv hello_copy.txt ..
mv stands for "move". The .. represents the parent directory (one level up).
- Let's remove
file1.txt:
rm file1.txt
rm stands for "remove". Be careful with this command – in Linux, deleted files don't go to a Recycle Bin!
- List the contents of the current directory to see the changes:
ls
- Now, list the contents of the parent directory to see the moved file:
ls ..
These commands – cp, mv, and rm – are some of the most frequently used in day-to-day Linux operations.
Using Command Line Shortcuts
Linux provides several helpful shortcuts to make your command line experience more efficient. Let's try some of them:
Use the up arrow key (↑) to recall the last command you typed. Try pressing it now – you should see your last command appear!
Use Tab completion: Type
cat hand then press the Tab key. It should auto-complete tocat hello.txt. This feature saves a lot of typing and helps prevent spelling mistakes.Use Ctrl+C to interrupt a running command: Type the following command and press Enter:
tail -f /dev/nullThis command will wait for input indefinitely. Now press Ctrl+C to stop it. This is useful when a command is taking too long or you want to stop a continuous output.
Use Ctrl+L to clear the screen: Your terminal might be getting cluttered. Press Ctrl+L to clear it and give yourself a fresh view.
These shortcuts will make your Linux experience much smoother as you become more proficient.
Getting Help
One of the best things about Linux is its extensive built-in help system. Let's learn how to use it:
- To get a quick summary of a command and its options, use the
--helpoption. Try it withls:
ls --help
This shows a brief description of ls and its most common options.
- For more detailed information, use the
mancommand (short for "manual"):
man ls
This opens the full manual page for ls. Use the arrow keys to scroll, and press 'q' to quit.
- Let's try getting help for another command, like
cp:
man cp
The man pages are comprehensive guides for almost every command in Linux. Whenever you're unsure about how to use a command or what options are available, the man pages are your best resource.
Summary
Congratulations! You've completed your first introduction to Linux. Let's recap what you've learned:
- You've used the terminal, the powerful text-based interface to interact with Linux.
- You've navigated the file system using commands like
cd,pwd, andls. - You've created files and directories with
touchandmkdir. - You've used wildcards to work with multiple files at once.
- You've performed basic file operations like copying, moving, and deleting.
- You've learned some helpful command-line shortcuts to improve your efficiency.
- You've accessed Linux's built-in help system using
--helpandman.
These skills form the foundation for working with Linux systems. As you continue your journey, you'll build upon these basics to become proficient in Linux administration and usage.
Remember, becoming comfortable with Linux takes practice. Don't be afraid to experiment and explore further in your Linux environment. If you make a mistake, it's a learning opportunity! Keep exploring, and you'll soon find yourself navigating Linux with confidence.


