
はじめに
このプロジェクトでは、Python の Pygame ライブラリを使って迷路ゲームを作成します。このゲームでは、プレイヤーが迷路を進みながら壁を避けながら食べ物を集めます。開発プロセスを複数のステップに分割して、理解しやすく追いやすくします。
👀 プレビュー
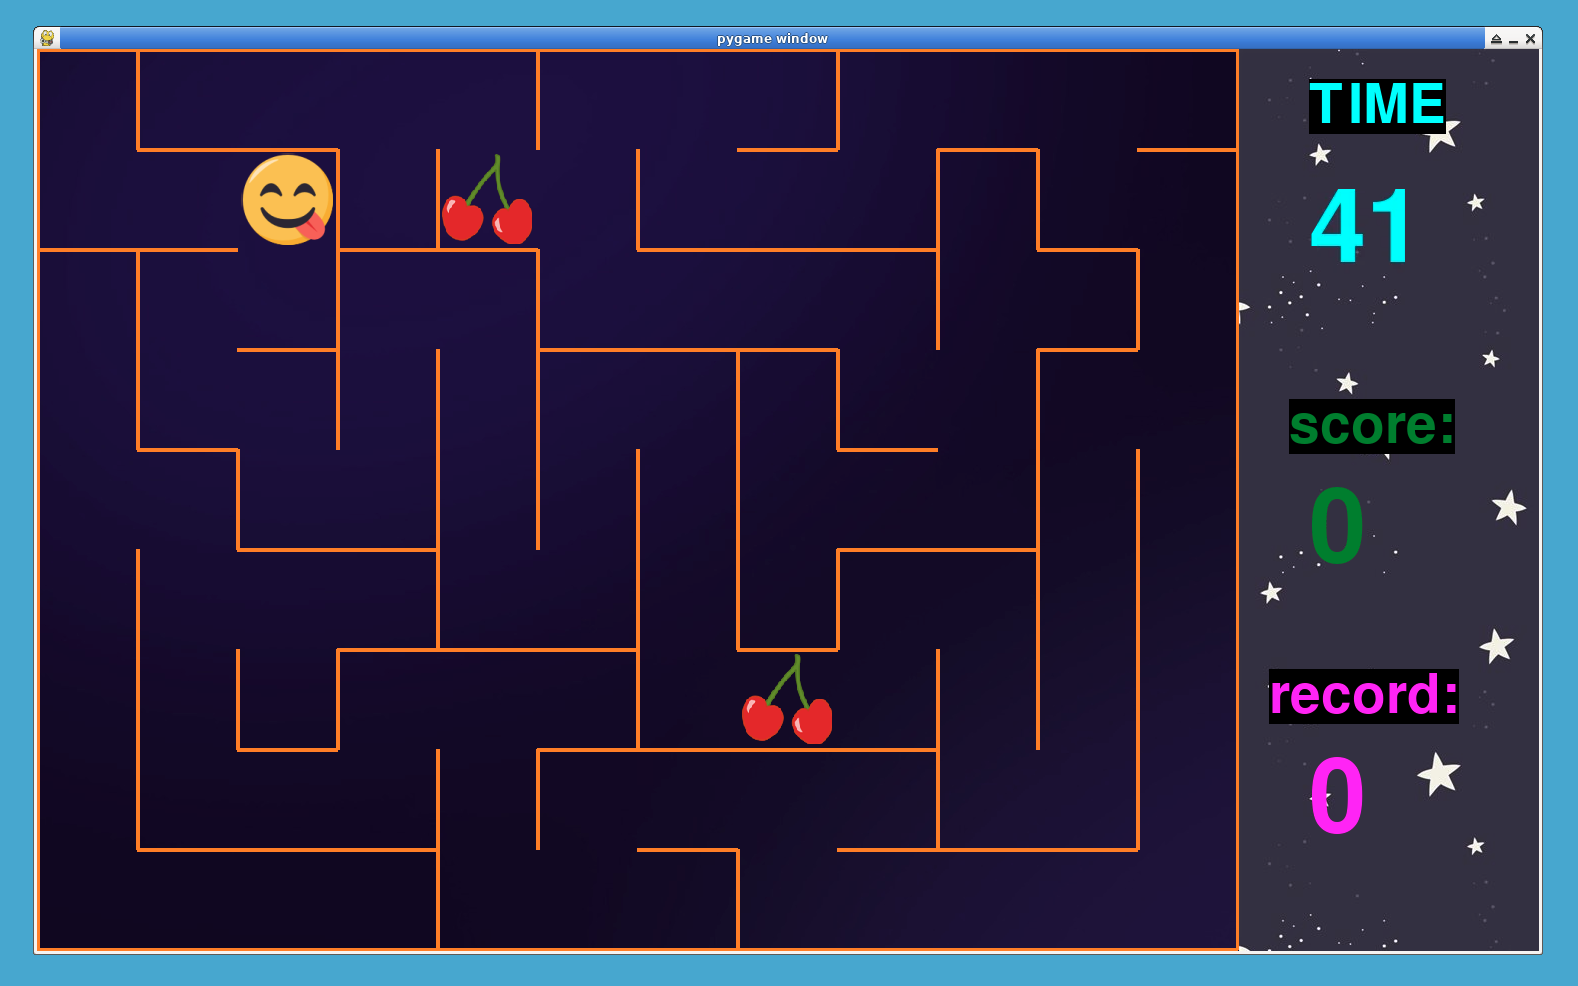
🎯 タスク
このプロジェクトでは、以下を学びます。
- Pygame を使ってゲーム環境を設定する方法
- セルと壁を使って迷路を作成する方法
- プレイヤーが集める食べ物を追加する方法
- プレイヤーの移動と衝突検出を実装する方法
- スコア付けやゲームオーバー条件を含むゲームロジックを処理する方法
- プレイヤーの記録を追跡する方法
- 時間、スコア、記録などのゲーム統計を画面に表示する方法
🏆 成果
このプロジェクトを完了すると、以下ができるようになります。
- ゲーム開発に Pygame ライブラリを使用する
- オブジェクト指向プログラミングの概念を適用してゲーム要素を作成する
- 迷路生成に対するアルゴリズム思考と問題解決能力を示す
- イベント処理とプレイヤー入力を処理する
- ゲーム環境における衝突検出と移動メカニズムを実装する
- ゲーム記録の保存と取得のためのファイル処理を管理する
- 画面にゲーム統計と情報を表示する
環境の設定
まず、迷路ゲーム用のプロジェクトファイルを作成します。
cd ~/project
touch maze.py
sudo pip install pygame
このステップでは、Pygame 環境をセットアップし、定数を定義します。
import pygame
from random import choice, randrange

## 画面サイズとタイルサイズの定数
RES = WIDTH, HEIGHT = 1202, 902
TILE = 100
cols, rows = WIDTH // TILE, HEIGHT // TILE

## 残りのコードはここに書きます...
このステップでは:
- 必要なライブラリ(Pygame と random)をインポートします。
- 画面サイズとタイルサイズの定数を定義します。
- Pygame を初期化し、ゲームウィンドウをセットアップします。
- ゲーム用の背景画像を読み込みます。
セルクラスの作成
このステップでは、迷路のセルを表すCellクラスを定義します。
## 迷路のセルを表すクラスを定義
class Cell:
    def __init__(self, x, y):
        self.x, self.y = x, y
        ## 壁はセルの境界を表します
        self.walls = {"top": True, "right": True, "bottom": True, "left": True}
        self.visited = False
        self.thickness = 4

    ## セルの壁を描画する
    def draw(self, sc):
        x, y = self.x * TILE, self.y * TILE
        if self.walls["top"]:
            pygame.draw.line(
                sc, pygame.Color("darkorange"), (x, y), (x + TILE, y), self.thickness
            )
        if self.walls["right"]:
            pygame.draw.line(
                sc,
                pygame.Color("darkorange"),
                (x + TILE, y),
                (x + TILE, y + TILE),
                self.thickness,
            )
        if self.walls["bottom"]:
            pygame.draw.line(
                sc,
                pygame.Color("darkorange"),
                (x + TILE, y + TILE),
                (x, y + TILE),
                self.thickness,
            )
        if self.walls["left"]:
            pygame.draw.line(
                sc, pygame.Color("darkorange"), (x, y + TILE), (x, y), self.thickness
            )

    ## セルの各壁を表す四角形を取得する
    def get_rects(self):
        rects = []
        x, y = self.x * TILE, self.y * TILE
        if self.walls["top"]:
            rects.append(pygame.Rect((x, y), (TILE, self.thickness)))
        if self.walls["right"]:
            rects.append(pygame.Rect((x + TILE, y), (self.thickness, TILE)))
        if self.walls["bottom"]:
            rects.append(pygame.Rect((x, y + TILE), (TILE, self.thickness)))
        if self.walls["left"]:
            rects.append(pygame.Rect((x, y), (self.thickness, TILE)))
        return rects

    ## 隣接するセルが存在するかどうかを確認する
    def check_cell(self, x, y):
        find_index = lambda x, y: x + y * cols
        if x < 0 or x > cols - 1 or y < 0 or y > rows - 1:
            return False
        return self.grid_cells[find_index(x, y)]

    ## 訪問されていない隣接セルを取得する
    def check_neighbors(self, grid_cells):
        self.grid_cells = grid_cells
        neighbors = []
        top = self.check_cell(self.x, self.y - 1)
        right = self.check_cell(self.x + 1, self.y)
        bottom = self.check_cell(self.x, self.y + 1)
        left = self.check_cell(self.x - 1, self.y)
        if top and not top.visited:
            neighbors.append(top)
        if right and not right.visited:
            neighbors.append(right)
        if bottom and not bottom.visited:
            neighbors.append(bottom)
        if left and not left.visited:
            neighbors.append(left)
        return choice(neighbors) if neighbors else False

## 残りのコードはここに書きます...
このステップでは:
- 壁を描画し、隣接セルをチェックするためのプロパティとメソッドを持つ
Cellクラスを定義します。
壁を取り除いて迷路を生成する
このステップでは、壁を取り除き、迷路を生成する関数を作成します。
## 2 つの隣接するセル間の壁を取り除く関数
def remove_walls(current, next):
    dx = current.x - next.x
    if dx == 1:
        current.walls["left"] = False
        next.walls["right"] = False
    elif dx == -1:
        current.walls["right"] = False
        next.walls["left"] = False
    dy = current.y - next.y
    if dy == 1:
        current.walls["top"] = False
        next.walls["bottom"] = False
    elif dy == -1:
        current.walls["bottom"] = False
        next.walls["top"] = False


## 迷路を生成する関数
def generate_maze():
    grid_cells = [Cell(col, row) for row in range(rows) for col in range(cols)]
    current_cell = grid_cells[0]
    array = []
    break_count = 1

    while break_count!= len(grid_cells):
        current_cell.visited = True
        next_cell = current_cell.check_neighbors(grid_cells)
        if next_cell:
            next_cell.visited = True
            break_count += 1
            array.append(current_cell)
            remove_walls(current_cell, next_cell)
            current_cell = next_cell
        elif array:
            current_cell = array.pop()
    return grid_cells

## 残りのコードはここに書きます...
このステップでは:
- 隣接するセル間の壁を取り除く
remove_walls関数を定義します。 - 深さ優先探索アルゴリズムを使って迷路を生成する
generate_maze関数を作成します。
ゲームに食べ物を追加する
このステップでは、ゲームに食べ物を追加するためのFoodクラスを作成します。
## ゲーム内の食べ物を表すクラス
class Food:
    def __init__(self):
        ## 食べ物の画像を読み込む
        self.img = pygame.image.load("img/food.png").convert_alpha()
        self.img = pygame.transform.scale(self.img, (TILE - 10, TILE - 10))
        self.rect = self.img.get_rect()
        self.set_pos()

    ## 食べ物の位置をランダムに設定する
    def set_pos(self):
        self.rect.topleft = randrange(cols) * TILE + 5, randrange(rows) * TILE + 5

    ## 食べ物を画面に描画する
    def draw(self):
        game_surface.blit(self.img, self.rect)

## 残りのコードはここに書きます...
このステップでは:
- 食べ物の位置を設定し、描画するメソッドを持つ
Foodクラスを定義します。
プレイヤーの移動と衝突検出
このステップでは、プレイヤーの制御、移動、および衝突検出を設定します。
## プレイヤーが壁と衝突しているかどうかを確認する
def is_collide(x, y):
    tmp_rect = player_rect.move(x, y)
    if tmp_rect.collidelist(walls_collide_list) == -1:
        return False
    return True

## 残りのコードはここに書きます...
このステップでは:
- プレイヤーが壁と衝突しているかどうかを確認する
is_collide関数を定義します。
ゲームプレイと得点計算
このステップでは、食べ物を食べることや得点計算などのゲームプレイロジックを実装します。
## プレイヤーが食べ物を食べたかどうかを確認する
def eat_food():
    for food in food_list:
        if player_rect.collidepoint(food.rect.center):
            food.set_pos()
            return True
    return False


## ゲームが終了したかどうかを確認する(時間切れ)
def is_game_over():
    global time, score, record, FPS
    if time < 0:
        pygame.time.wait(700)
        player_rect.center = TILE // 2, TILE // 2
        [food.set_pos() for food in food_list]
        set_record(record, score)
        record = get_record()
        time, score, FPS = 60, 0, 60

## 残りのコードはここに書きます...
このステップでは:
- プレイヤーが食べ物を食べたかどうかを確認する
eat_food関数を定義します。 - 時間切れのときにゲームが終了したかどうかを確認する
is_game_over関数を作成します。
記録の処理
このステップでは、ゲームの記録管理を実装します。
## ファイルから現在の記録を取得する関数
def get_record():
    try:
        with open("record") as f:
            return f.readline()
    except FileNotFoundError:
        with open("record", "w") as f:
            f.write("0")
            return "0"

## ファイルに記録を設定して更新する関数
def set_record(record, score):
    rec = max(int(record), score)
    with open("record", "w") as f:
        f.write(str(rec))

## 残りのコードはここに書きます...
このステップでは:
- ファイルから現在の記録を取得し、更新する関数を定義します。
ゲームの初期化
このステップでは、ゲームの初期化タスクを実行します。
## Pygame を初期化し、ゲームウィンドウを設定する
FPS = 60
pygame.init()
game_surface = pygame.Surface(RES)
surface = pygame.display.set_mode((WIDTH + 300, HEIGHT))
clock = pygame.time.Clock()

## 背景画像を読み込む
bg_game = pygame.image.load("img/bg_1.jpg").convert()
bg = pygame.image.load("img/bg_main.jpg").convert()

## 迷路を生成する
maze = generate_maze()

## プレイヤー設定
player_speed = 5
player_img = pygame.image.load("img/0.png").convert_alpha()
player_img = pygame.transform.scale(
    player_img, (TILE - 2 * maze[0].thickness, TILE - 2 * maze[0].thickness)
)
player_rect = player_img.get_rect()
player_rect.center = TILE // 2, TILE // 2
directions = {
    "a": (-player_speed, 0),
    "d": (player_speed, 0),
    "w": (0, -player_speed),
    "s": (0, player_speed),
}
keys = {"a": pygame.K_LEFT, "d": pygame.K_RIGHT, "w": pygame.K_UP, "s": pygame.K_DOWN}
direction = (0, 0)

## 食べ物設定
food_list = [Food() for i in range(3)]

## 衝突検出用の壁の矩形のリストを作成する
walls_collide_list = sum([cell.get_rects() for cell in maze], [])

## タイマー、得点、記録
pygame.time.set_timer(pygame.USEREVENT, 1000)
time = 60
score = 0
record = get_record()

## フォント
font = pygame.font.SysFont("Impact", 150)
text_font = pygame.font.SysFont("Impact", 80)

## 残りのコードはここに書きます...
このステップでは:
- Pygame の設定、画像の読み込み、迷路の生成、プレイヤーと食べ物に関連する変数の初期化など、様々な初期化タスクを実行します。
メインゲームループ
このステップでは、メインゲームループを設定し、ゲーム要素を表示します。
## メインゲームループ
while True:
    ## 背景画像を描画する
    surface.blit(bg, (WIDTH, 0))
    surface.blit(game_surface, (0, 0))
    game_surface.blit(bg_game, (0, 0))

    for event in pygame.event.get():
        if event.type == pygame.QUIT:
            exit()
        if event.type == pygame.USEREVENT:
            time -= 1

    ## プレイヤーの制御と移動を処理する
    pressed_key = pygame.key.get_pressed()
    for key, key_value in keys.items():
        if pressed_key[key_value] and not is_collide(*directions[key]):
            direction = directions[key]
            break
    if not is_collide(*direction):
        player_rect.move_ip(direction)

    ## 迷路を描画する
    [cell.draw(game_surface) for cell in maze]

    ## ゲームプレイ:プレイヤーが食べ物を食べたかどうかとゲームが終了したかどうかを確認する
    if eat_food():
        FPS += 10
        score += 1
    is_game_over()

    ## プレイヤーを描画する
    game_surface.blit(player_img, player_rect)

    ## 食べ物を描画する
    [food.draw() for food in food_list]

    ## 残りのコードはここに書きます...
このステップでは:
- イベント、プレイヤーの移動、ゲームの描画を処理するメインゲームループを設定します。
ゲーム統計情報の表示
このステップでは、画面上にゲームの統計情報を表示します。
    ## ゲーム統計情報を描画する
    surface.blit(
        text_font.render("TIME", True, pygame.Color("cyan"), True), (WIDTH + 70, 30)
    )
    surface.blit(font.render(f"{time}", True, pygame.Color("cyan")), (WIDTH + 70, 130))
    surface.blit(
        text_font.render("score:", True, pygame.Color("forestgreen"), True),
        (WIDTH + 50, 350),
    )
    surface.blit(
        font.render(f"{score}", True, pygame.Color("forestgreen")), (WIDTH + 70, 430)
    )
    surface.blit(
        text_font.render("record:", True, pygame.Color("magenta"), True),
        (WIDTH + 30, 620),
    )
    surface.blit(
        font.render(f"{record}", True, pygame.Color("magenta")), (WIDTH + 70, 700)
    )

    pygame.display.flip()
    clock.tick(FPS)
このステップでは:
- 時間、得点、記録などのゲーム関連情報を表示するためにフォントを使用します。
blit()メソッドを使って画面上にテキストを描画します。flip()メソッドを使って表示を更新します。
ゲームを実行する
これですべてのステップを完了したので、以下のコマンドを使ってメイズゲームを実行できます。
cd ~/project
python maze.py
まとめ
このプロジェクトでは、Pygame を使ってメイズゲームを作成するプロセスを、10 の明確で管理しやすいステップに分割しました。ゲーム環境の設定方法、メイズセルの作成方法、メイズの生成方法、プレイヤーの移動と衝突検出の処理方法、ゲームプレイと得点計算の実装方法、記録の管理方法などを学びます。これらのステップに従うことで、Python で完全に機能するメイズゲームを作成することができます。


