介绍
在这个项目中,我们将使用 React 创建一个简单的笔记应用程序。该应用程序将允许用户添加、编辑和删除笔记。我们将把开发过程分解为几个步骤,确保每个步骤都满足特定要求并添加基本功能。
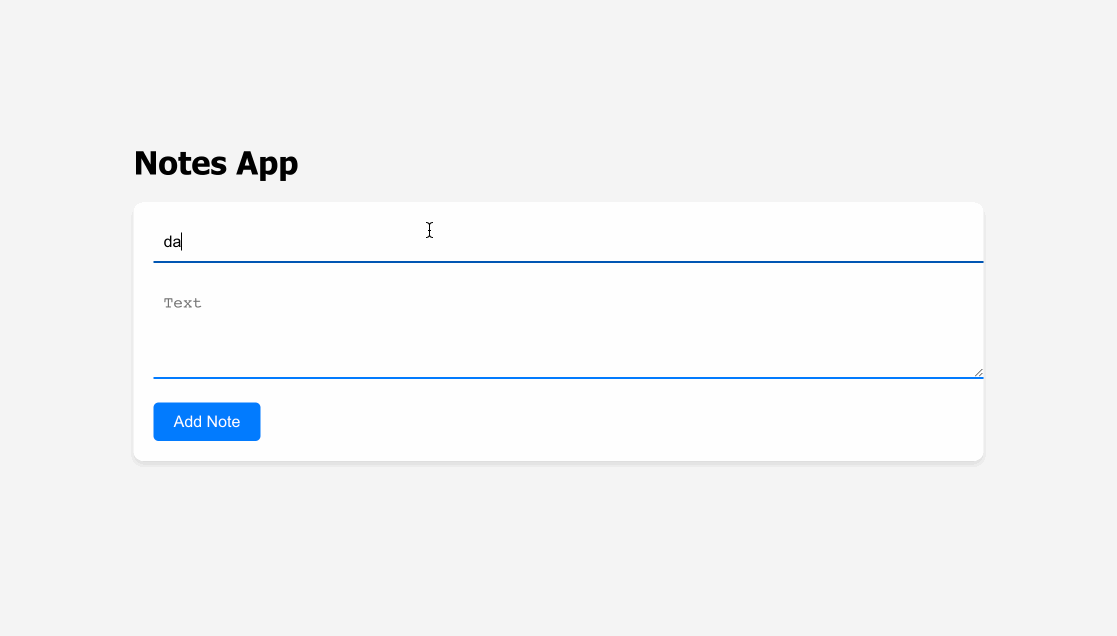
👀 预览
🎯 任务
在这个项目中,你将学习:
- 如何使用 Create React App 命令创建一个新的 React 项目
- 如何构建功能性 React 组件以创建用户界面
- 如何使用 React 的
useState钩子管理状态 - 如何在应用程序中添加和管理笔记
- 如何实现添加、编辑和删除笔记等功能
- 如何在 React 组件中处理用户交互和事件
- 如何使用 CSS 为 React 应用程序设置样式
- 如何开发一个基本的 CRUD(创建、读取、更新、删除)应用程序
- 如何构建和组织 React 项目
- 如何为笔记应用程序构建一个简单的响应式用户界面
🏆 成果
完成这个项目后,你将能够:
- 设置一个新的 React 项目
- 创建和管理 React 组件
- 使用
useState等 React 钩子管理组件状态 - 在 React 应用程序中处理用户输入和表单提交
- 使用 props 在父组件和子组件之间传递数据和函数
- 在 React 中创建响应式和交互式用户界面
- 在 React 应用程序中实现基本的数据存储和操作
- 在 React 项目中构建和组织代码文件
- 使用 CSS 为 React 组件设置样式
- 调试和排除 React 应用程序故障
- 遵循构建 React 应用程序的最佳实践
项目设置
要求:
- 在新的 React 项目中安装依赖项。
功能:
- 使用必要的依赖项和基本项目结构初始化项目。
步骤:
打开终端并导航到项目文件夹:
cd notes-app你需要在
project目录下运行此命令。在项目中安装依赖项:
npm install安装完成后,会创建一个
node_modules文件夹;如果该文件夹不存在,则表示安装未成功。
创建笔记组件
要求:
- 创建一个表示单个笔记的“笔记”组件。
- “笔记”组件应显示笔记内容,并提供编辑按钮和删除按钮。
功能:
- 显示笔记的标题和文本。
- 提供用于编辑和删除笔记的按钮。
步骤:
- 在
src文件夹内,创建一个名为Note.js的新文件。 - 按如下方式实现“笔记”组件:
import React from "react";

const Note = ({ note }) => {
  return (
    <div className="note">
      <h3>{note.title}</h3>
      <p>{note.text}</p>
      <button>编辑</button>
      <button>删除</button>
    </div>
  );
};

export default Note;
创建应用组件和状态
要求:
- 创建一个将管理笔记及其状态的“应用”组件。
- 初始化状态以保存笔记数组。
- 实现添加、删除和编辑笔记的函数。
功能:
- 维护笔记数组。
- 添加新笔记。
- 删除笔记。
- 编辑笔记。
步骤:
在
src文件夹中,打开App.js文件。在文件顶部导入
useState钩子:// App.js import React, { useState } from "react"; import "./App.css"; import Note from "./Note";在“应用”组件中设置初始状态以及添加、删除和编辑笔记的函数:
// App.js
function App() {
  const [notes, setNotes] = useState([]);
  const [newNote, setNewNote] = useState({ title: "", text: "" });

  const addNote = () => {
    // 待办事项:实现添加笔记函数
  };

  const deleteNote = (id) => {
    // 待办事项:实现删除笔记函数
  };

  const editNote = (id, newText) => {
    // 待办事项:实现编辑笔记函数
  };

  return <div className="App">{/* 应用内容在此处 */}</div>;
}
实现添加笔记功能
要求:
- 实现
addNote函数,以便将新笔记添加到状态中。 - 确保笔记有标题和文本。
功能:
- 将新笔记添加到状态中。
- 添加笔记后清除输入字段。
步骤:
- 实现
addNote函数:
// App.js
const addNote = () => {
  if (newNote.title && newNote.text) {
    const newId = Date.now().toString();
    setNotes([...notes, { ...newNote, id: newId }]);
    setNewNote({ title: "", text: "" });
  }
};
- 在你的 JSX 中,使用
onChange处理程序捕获输入值并更新状态:
// App.js
return (
  <div className="App">
    <h1>笔记应用</h1>
    <div className="笔记表单">
      <input
        type="text"
        placeholder="标题"
        value={newNote.title} => setNewNote({ ...newNote, title: e.target.value })}
      />
      <textarea
        rows="4"
        cols="50"
        placeholder="文本"
        value={newNote.text} => setNewNote({ ...newNote, text: e.target.value })}
      />
      <button
    </div>
  </div>
);
需注意,这里“笔记表单”是根据英文“note-form”直接翻译。
实现删除笔记功能
要求:
- 实现
deleteNote函数,以便在点击“删除”按钮时从状态中移除笔记。
功能:
- 当点击“删除”按钮时,从状态中删除笔记。
步骤:
- 实现
deleteNote函数:
// App.js
const deleteNote = (id) => {
  const updatedNotes = notes.filter((note) => note.id !== id);
  setNotes(updatedNotes);
};
- 将
deleteNote函数作为属性传递给Note组件,以启用笔记删除功能。
// App.js
<div className="App">
  <div className="笔记列表">
    {notes.map((note) => (
      <Note key={note.id} note={note} />
    ))}
  </div>
</div>
需注意,这里“笔记列表”是根据英文“note-list”直接翻译。
实现编辑笔记功能
要求:
- 实现
editNote函数,以便在点击“编辑”按钮时更新笔记的文本。
功能:
- 在可编辑的文本区域中显示笔记文本。
- 当点击“保存”按钮时更新笔记的文本。
步骤:
- 实现
editNote函数:
// App.js
const editNote = (id, newText) => {
  const updatedNotes = notes.map((note) =>
    note.id === id ? { ...note, text: newText } : note
  );
  setNotes(updatedNotes);
};
- 更新
Note组件以处理编辑:
// Note.js
import React, { useState } from "react";
const Note = ({ note, onDelete, onEdit }) => {
  const [isEditing, setIsEditing] = useState(false);
  const [editedText, setEditedText] = useState(note.text);

  const handleEdit = () => {
    setIsEditing(true);
  };

  const handleSave = () => {
    onEdit(note.id, editedText);
    setIsEditing(false);
  };

  return (
    <div className="note">
      <div className="note-header">
        <h3>{note.title}</h3>
        <button => onDelete(note.id)}>删除</button>
      </div>
      {isEditing ? (
        <>
          <textarea
            rows="4"
            cols="50"
            value={editedText} => setEditedText(e.target.value)}
          />
          <button
        </>
      ) : (
        <p>{note.text}</p>
      )}
      {!isEditing && <button
    </div>
  );
};
样式设计(App.css)
要求:
- 为应用程序应用基本样式,以获得视觉上令人愉悦的界面。
功能:
- 为应用组件设置样式,以提升用户体验。
步骤:
- 创建一个
App.css文件,并为应用组件应用基本样式。使用提供的 CSS 代码对应用进行样式设计。
body {
  font-family: "Segoe UI", Tahoma, Geneva, Verdana, sans-serif;
  background-color: #f5f5f5;
  margin: 0;
  padding: 0;
  display: flex;
  justify-content: center;
  align-items: center;
  min-height: 100vh;
}

.container {
  max-width: 800px;
  width: 100%;
  padding: 20px;
  box-sizing: border-box;
}

.header {
  background-color: #343a40;
  color: #fff;
  padding: 20px 0;
  text-align: center;
  font-size: 32px;
  margin-bottom: 20px;
  border-radius: 10px;
}

.note-form {
  background-color: #fff;
  padding: 20px;
  border-radius: 10px;
  box-shadow: 0 4px 6px rgba(0, 0, 0, 0.1);
  margin-bottom: 20px;
}

.note-form input[type="text"],
.note-form textarea {
  width: 100%;
  padding: 10px;
  margin-bottom: 20px;
  border: none;
  border-bottom: 2px solid #007bff;
  background-color: transparent;
  font-size: 16px;
  transition: border-bottom 0.3s;
}

.note-form input[type="text"]:focus,
.note-form textarea:focus {
  border-bottom: 2px solid #0056b3;
  outline: none;
}

.note-form button {
  background-color: #007bff;
  color: #fff;
  border: none;
  border-radius: 5px;
  padding: 10px 20px;
  font-size: 16px;
  cursor: pointer;
  transition: background-color 0.3s;
}

.note-form button:hover {
  background-color: #0056b3;
}

.note-list {
  display: flex;
  flex-wrap: wrap;
  gap: 20px;
  justify-content: center;
}

.note {
  background-color: #fff;
  padding: 20px;
  border-radius: 10px;
  box-shadow: 0 4px 6px rgba(0, 0, 0, 0.1);
  width: 300px;
  transition:
    transform 0.3s,
    box-shadow 0.3s;
}

.note:hover {
  transform: scale(1.03);
  box-shadow: 0 6px 8px rgba(0, 0, 0, 0.2);
}

.note-header {
  display: flex;
  justify-content: space-between;
  align-items: center;
  margin-bottom: 10px;
}

.note-header h3 {
  margin: 0;
  font-size: 24px;
  color: #007bff;
}

.note-actions {
  display: flex;
  gap: 10px;
}

.note-actions button {
  background-color: #007bff;
  color: #fff;
  border: none;
  border-radius: 5px;
  padding: 5px 10px;
  font-size: 14px;
  cursor: pointer;
  transition: background-color 0.3s;
}

.note-actions button:hover {
  background-color: #0056b3;
}
运行应用程序
要运行你的 React 笔记应用程序:
打开你的终端或命令提示符。
确保你位于项目的根目录(即
package.json文件所在的目录)。启动开发服务器:
npm start现在你应该会在浏览器的 8080 端口看到一个基本的 React 应用程序正在运行。我们将在此基础上构建我们的笔记应用程序。
页面效果如下:
总结
在这个项目中,我们通过将开发过程分解为多个步骤,使用 React 创建了一个简单的笔记应用程序。我们设置了项目,创建了笔记组件,实现了添加、删除和编辑笔记的功能,并应用了基本样式。通过遵循这些步骤,你可以构建一个功能齐全的笔记应用程序,并根据你的需求扩展其功能。