



介绍
Moonroom 的真实照片卡片已有清晰说明和响应式布局,但详细查看器尚未连接。你的任务是让每张卡片打开自己的大图,允许访客浏览整个照片集,再准确回到他们最初使用的卡片。你还会制造并恢复一次真正的图片缺失错误,而不以其他图片代替。
本实验自带完整图库和本地照片,不依赖上一环境的文件。你需要了解第一个实验的卡片与数据关系,以及 JavaScript 函数、DOM 选择和事件。新的数组查找、对话框、焦点及图片事件行为都会在使用前介绍。作者估计阅读和练习需要 60 分钟。
打开或刷新网站页面后,请等页面加载完成,再操作照片控件。用 WebIDE 编辑 /home/labex/project/moonroom,用 Web 8080 浏览网站。编辑 viewer.js;photos.js 中临时修改 large 路径,只用于明确教授的失败练习,检查前必须恢复。保留其他提供的文件、元数据和原始图片。两条 Earthrise 记录必须分开,每张卡片、缩略图和说明都要保持可用。你可以使用等效的 JavaScript 行为,但要保留提供的按钮 ID、稳定照片关联属性、可见的 Close、Previous 和 Next 控件,以及原生对话框的标题与说明关联。这些键盘练习并不构成完整的无障碍认证。
打开正确照片并返回原卡片
本步骤将已有卡片连接到原生模态对话框,并为键盘焦点保留可靠的返回位置。
切换到 Web 8080,选择网站链接 Study collection,用 Tab、Enter 和 Esc 打开并关闭一张照片。然后选择 Current exhibition。这里已有三张卡片及其说明。尝试在卡片上按 Enter:目前不会发生任何事,因为你的 viewer.js 只有一条注释。这是预期的未完成行为,不是环境故障。
切换到 WebIDE,在 Explorer 中打开 moonroom 文件夹,阅读 index.html。dialog 元素是浏览器内置的面板。它的 aria-labelledby="photo-title" 指向可见标题,aria-describedby="photo-caption" 指向当前说明。showModal() 将它作为模态打开,此时页面其他内容不能操作。浏览器处理基本的模态 Tab 行为和 Esc 关闭动作,你不需要自己编写焦点圈定逻辑。不要给对话框本身添加 tabindex。已准备的 Close 按钮带有 autofocus,因此打开面板时,焦点会落在一个明确的退出方式上。
打开 viewer.js。const 保存 DOM 元素引用。需要改变的值使用 let:currentIndex 是当前选择的数组位置,从零开始;openingButton 记住真正打开面板的按钮。photos[currentIndex] 取出该照片的完整记录。showPhoto() 一起更新标题、说明、替代文本和真实大图。
图库只有一个点击监听器。在原生按钮上按键盘 Enter 也会激活它。event.target 是实际被点击的元素,可能是按钮里的图片或标题。closest('button[data-photo-id]') 向外查找匹配的打开按钮。if (!button) return 忽略并非来自该类按钮的点击。这就是事件委托:一个监听器处理所有已有卡片按钮。
findIndex() 在数组中搜索,返回 ID 与按钮的 dataset.photoId 匹配的位置。其回调在 photo.id === button.dataset.photoId 时返回 true;=== 在不转换值类型的情况下比较。如果没有匹配记录,findIndex() 返回 -1,所以保护判断会停止操作,而不是打开错误照片。我们有意比较 ID,而不是重复的标题 Earthrise。
无论通过 Esc 还是 Close 按钮关闭,对话框的 close 事件都会触发。openingButton.focus() 将焦点恢复到记住的卡片。这里的 focus() 用来实现返回行为;手动测试仍须用真实键盘到达并激活卡片。
用下面完整代码替换 viewer.js 的全部内容,再用 Ctrl+S 或 Cmd+S 保存:
const viewer = document.querySelector('#viewer');
const largePhoto = document.querySelector('#large-photo');
const photoTitle = document.querySelector('#photo-title');
const photoCaption = document.querySelector('#photo-caption');
let currentIndex = 0;
let openingButton;

function showPhoto() {
  const photo = photos[currentIndex];
  photoTitle.textContent = photo.title;
  photoCaption.textContent = photo.caption;
  largePhoto.alt = photo.alt;
  largePhoto.src = photo.large;
}

document.querySelector('#gallery').addEventListener('click', function (event) {
  const button = event.target.closest('button[data-photo-id]');
  if (!button) return;
  currentIndex = photos.findIndex(function (photo) {
    return photo.id === button.dataset.photoId;
  });
  if (currentIndex === -1) return;
  openingButton = button;
  showPhoto();
  viewer.showModal();
});

document.querySelector('#close').addEventListener('click', function () {
  viewer.close();
});
viewer.addEventListener('close', function () {
  openingButton.focus();
});
切换到 Web 8080,必要时选择 Current exhibition,然后刷新页面。用 Tab 到达每张卡片,再按 Enter 打开。第一张 Earthrise 必须显示 Apollo 8 的照片和说明,最后一张必须显示 Apollo 11。每次按 Esc 关闭后,观察焦点是否落在同一张卡片上。重新打开一张照片,用 Tab 找到 Close 后按 Enter,测试第二条关闭路径。Previous 和 Next 要到下一步才会连接。
如果面板未打开,返回 WebIDE,将文件与完整代码块对照。检查是否保存为 viewer.js、index.html 中的脚本行是否保留,以及 data-photo-id 的值是否仍与 photos.js 匹配。修正拼写后保存并刷新网站。如果显示了错误场景,同时比较当前记录的 large、标题和说明;不要修改源数据来掩盖 ID 查找错误。三个独立的 Enter/Esc 路径都正常后再运行检查。
浏览完整照片集及其边界
本步骤更新同一个详细视图,同时保留最初打开它的卡片。
返回 WebIDE,对照 photos.js 中从零开始的数组位置:第一条为 0,第二条为 1,最后一条为 photos.length - 1。length 统计记录数量。可见位置应从一开始计数,因此 currentIndex + 1 会给出 1 / 3 这类便于人阅读的数字。
disabled 属性接受布尔值。previous.disabled = currentIndex === 0 只在第一张照片禁用 Previous;对应的 Next 规则只在最后一张禁用它。这些边界避免查找越界。点击处理器也会在改变索引前检查边界。currentIndex -= 1 减一并保存新索引;+= 1 则加一。每次改变都会调用 showPhoto(),让图片、说明和位置保持同步。
只有打开卡片时才改变 openingButton。在对话框内浏览其他照片不能改变它:即使当前显示的是另一张照片,关闭时仍回到此次访问开始的卡片。
用下面完整版本替换 viewer.js 并保存。它保留打开和关闭功能,同时加入有边界的导航:
const viewer = document.querySelector('#viewer');
const largePhoto = document.querySelector('#large-photo');
const photoTitle = document.querySelector('#photo-title');
const photoCaption = document.querySelector('#photo-caption');
const previous = document.querySelector('#previous');
const next = document.querySelector('#next');
let currentIndex = 0;
let openingButton;

function showPhoto() {
  const photo = photos[currentIndex];
  photoTitle.textContent = photo.title;
  photoCaption.textContent = photo.caption;
  largePhoto.alt = photo.alt;
  largePhoto.src = photo.large;
  previous.disabled = currentIndex === 0;
  next.disabled = currentIndex === photos.length - 1;
  document.querySelector('#photo-position').textContent = (currentIndex + 1) + ' / ' + photos.length;
}

document.querySelector('#gallery').addEventListener('click', function (event) {
  const button = event.target.closest('button[data-photo-id]');
  if (!button) return;
  currentIndex = photos.findIndex(function (photo) {
    return photo.id === button.dataset.photoId;
  });
  if (currentIndex === -1) return;
  openingButton = button;
  showPhoto();
  viewer.showModal();
});

previous.addEventListener('click', function () {
  if (currentIndex > 0) {
    currentIndex -= 1;
    showPhoto();
  }
});
next.addEventListener('click', function () {
  if (currentIndex < photos.length - 1) {
    currentIndex += 1;
    showPhoto();
  }
});
document.querySelector('#close').addEventListener('click', function () {
  viewer.close();
});
viewer.addEventListener('close', function () {
  openingButton.focus();
});
切换到 Web 8080,刷新 Current exhibition。用键盘打开第一张 Earthrise。Previous 已禁用,Tab 会跳过它。用 Tab 到达 Next 并按 Enter。应该看到竖幅足印、它的标题与说明,以及 2 / 3。继续到最后一张 Earthrise,确认 Apollo 11 的图片和说明出现,同时 Next 被禁用。
用 Tab 到达 Previous,经过两张图片返回。需要向后移动到可用控件时,按住 Shift 再按 Tab;这会移动键盘焦点,而激活 Previous 才会改变照片。这是不同的动作。按 Esc,确认焦点返回最初的第一张卡片。现在直接打开中间卡片,浏览其他照片后关闭:焦点必须回到中间卡片。
首尾按钮被禁用是预期状态。看似可用却不起作用的控件则不是。如果标题改变而照片未改变,返回 WebIDE,确认每次移动都调用同一个 showPhoto() 函数。如果 Esc 总回到第一张卡片,确认 openingButton 在打开卡片的监听器中赋值,且不会被导航处理器覆盖。需要时恢复完整代码,保存并刷新后再检查。
如实处理缺图并允许恢复
本步骤处理真实的图片加载失败,同时保留访客的位置及照片集其他部分的可用性。
图片的 load 事件表示文件成功加载;error 表示无法加载图片,例如路径不存在。这些是浏览器图片事件,不能证明任意 HTTP 响应都包含有效图片。服务器连接失败可能导致整页不可用;这里页面仍然可用,只是一张图片的请求失败。
在 WebIDE 中打开 viewer.js。这个版本会先设置事件处理器,再赋值 src,避免快速缓存图片在处理器存在之前就加载完成。加载时隐藏旧图片,并在已有的 role="status" 段落中显示 **Loading photo...**。成功时显示真实图片并清空消息;失败时继续隐藏图片,并提供可读的恢复指引。CSS 规则 dialog img[hidden] { display: none; } 不可缺少,因为普通对话框图片规则使用 display: block;否则,单独的 hidden 属性会被该 CSS 规则覆盖。
错误处理器不会将 src 改为缩略图或另一张照片。那样会掩盖失败,并显示与当前记录不符的内容。访客仍可以关闭面板或浏览完好的照片。
用下面完整最终版本替换 viewer.js 的全部内容并保存:
const viewer = document.querySelector('#viewer');
const largePhoto = document.querySelector('#large-photo');
const photoTitle = document.querySelector('#photo-title');
const photoCaption = document.querySelector('#photo-caption');
const photoError = document.querySelector('#photo-error');
const previous = document.querySelector('#previous');
const next = document.querySelector('#next');
let currentIndex = 0;
let openingButton;

function showPhoto() {
  const photo = photos[currentIndex];
  photoTitle.textContent = photo.title;
  photoCaption.textContent = photo.caption;
  largePhoto.alt = photo.alt;
  photoError.textContent = 'Loading photo...';
  largePhoto.hidden = true;
  largePhoto.onload = function () {
    largePhoto.hidden = false;
    photoError.textContent = '';
  };
  largePhoto.onerror = function () {
    largePhoto.hidden = true;
    photoError.textContent = 'This photo could not be loaded. Close the viewer and check its large image path.';
  };
  largePhoto.src = photo.large;
  previous.disabled = currentIndex === 0;
  next.disabled = currentIndex === photos.length - 1;
  document.querySelector('#photo-position').textContent = (currentIndex + 1) + ' / ' + photos.length;
}

document.querySelector('#gallery').addEventListener('click', function (event) {
  const button = event.target.closest('button[data-photo-id]');
  if (!button) return;
  currentIndex = photos.findIndex(function (photo) {
    return photo.id === button.dataset.photoId;
  });
  if (currentIndex === -1) return;
  openingButton = button;
  showPhoto();
  viewer.showModal();
});

previous.addEventListener('click', function () {
  if (currentIndex > 0) {
    currentIndex -= 1;
    showPhoto();
  }
});
next.addEventListener('click', function () {
  if (currentIndex < photos.length - 1) {
    currentIndex += 1;
    showPhoto();
  }
});
document.querySelector('#close').addEventListener('click', function () {
  viewer.close();
});
viewer.addEventListener('close', function () {
  openingButton.focus();
});
现在在自己的文件中制造一个受控的路径错误,再进行恢复。在 WebIDE 中打开 photos.js。找到 id 为 footprint 的记录,只将它的 large 值从 images/footprint.jpg 改为 images/missing-photo.jpg。不要改变缩略图、ID、说明或替代文本。保存文件。
切换到 Web 8080,刷新 Current exhibition,然后用 Tab 和 Enter 打开 A trace of a visitor。缩略图仍能显示,但大图请求现在会失败。预期出现可见文字 This photo could not be loaded. Close the viewer and check its large image path.。面板不能用 Earthrise 或拉伸的缩略图代替。足印的标题和说明仍然保留,Close、Previous 和 Next 控件仍然可用。
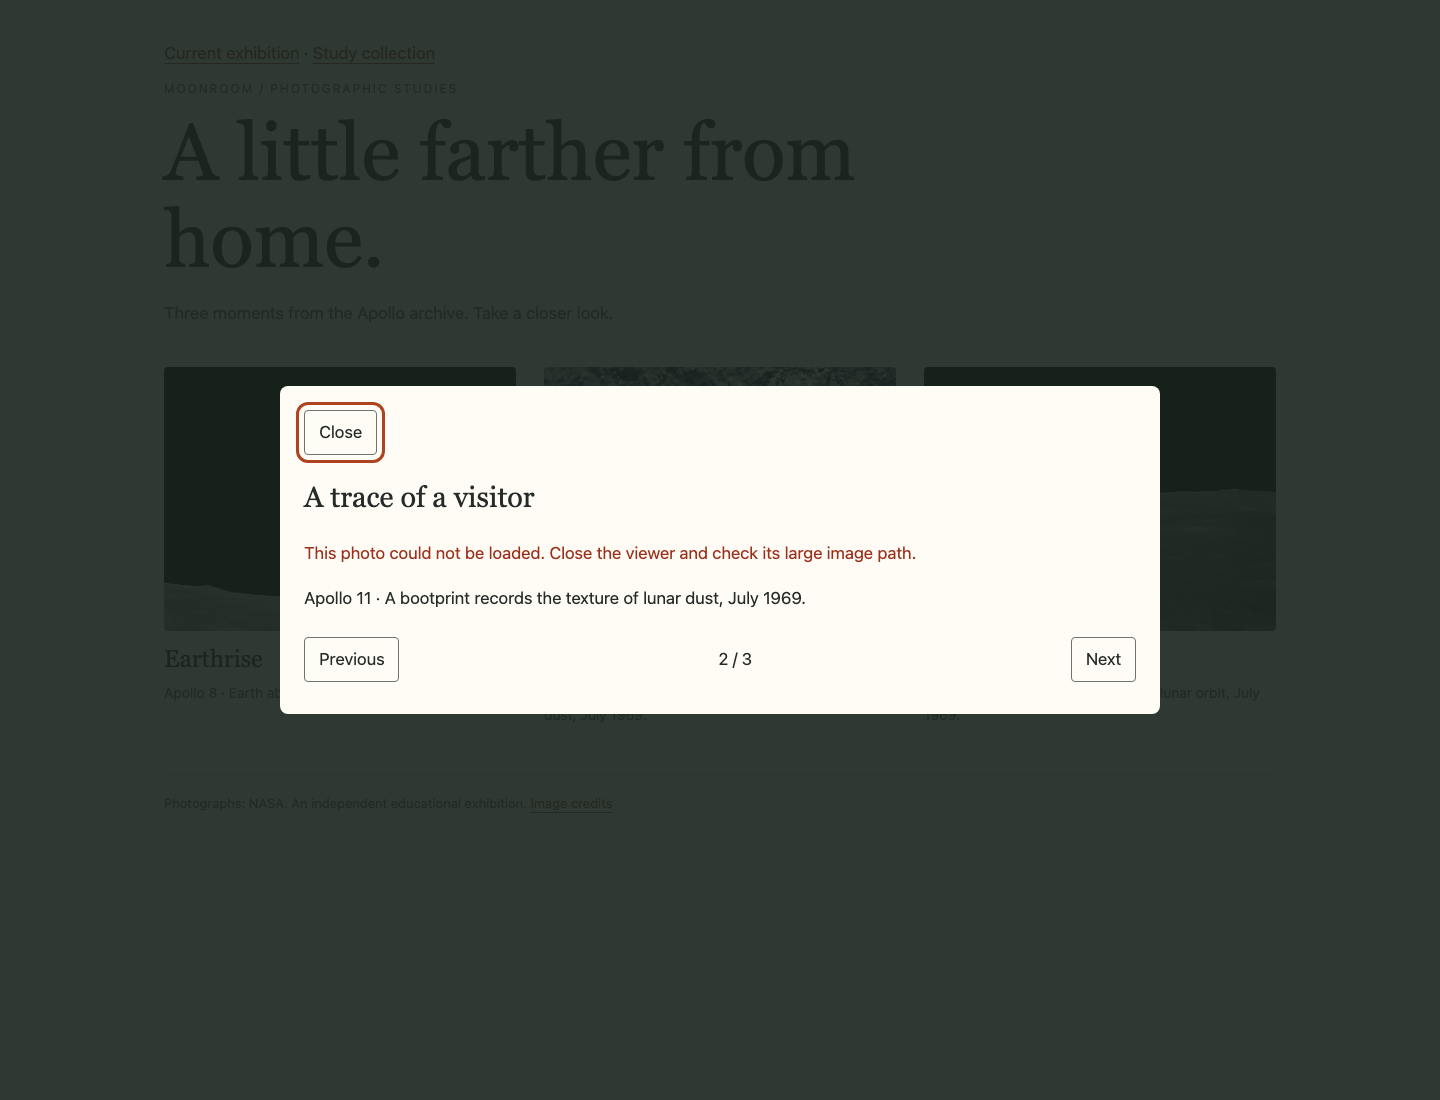
失败面板保留足印标题和说明,没有替代图片。Next 仍然可用,让访客能够继续浏览。
用 Tab 和 Enter 激活 Next。完好的 Apollo 11 图片应该加载,错误消息应该清空。按 Esc,检查焦点是否返回最初打开面板的足印卡片。这是在照片集内部恢复浏览,并没有修复错误文件路径。
返回 WebIDE,将 footprint 记录的 large 值准确恢复为 images/footprint.jpg,然后保存。切换到 Web 8080,刷新 Current exhibition,让浏览器读取恢复后的数据。再次打开足印。真实竖幅图片现在应该成功解码并显示,不再出现错误消息。浏览器刷新会重新加载页面数据,不会重置已保存的工作,也不会重建环境。
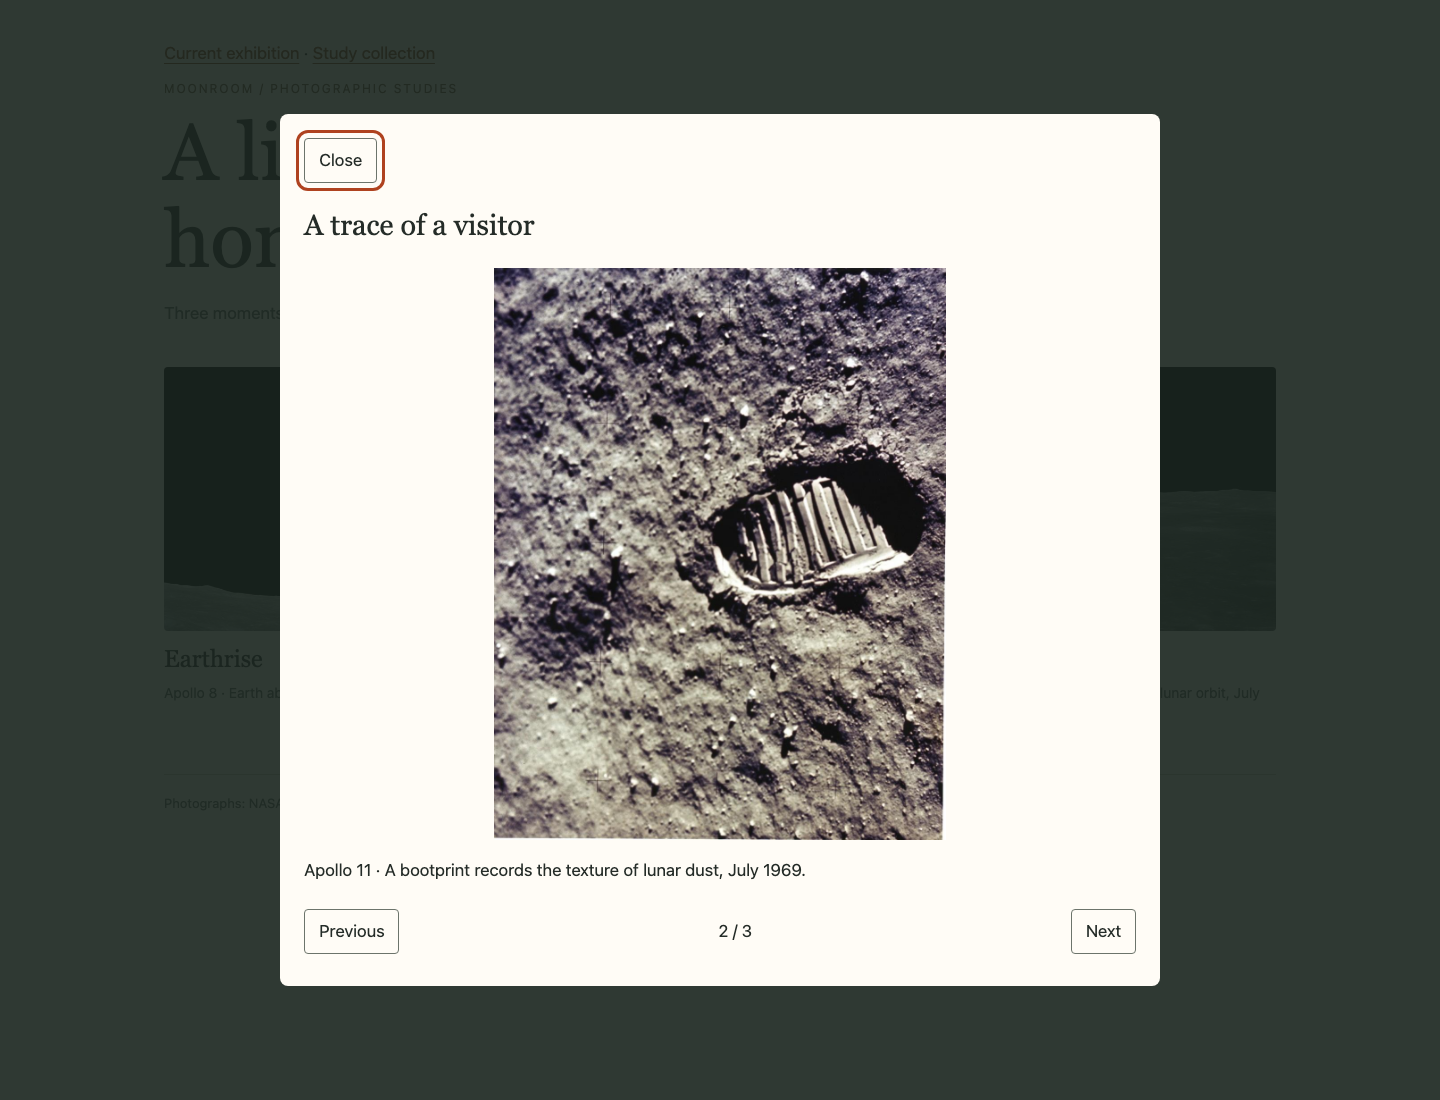
恢复路径并刷新后,竖幅足印显示在查看器内,没有拉伸,错误消息也已消失。
最后,再次检查三张卡片、正反向边界和两条关闭路径。缩窄网站面板,确认整张照片和换行后的标题都能容纳在对话框内,没有水平页面滚动。所有原始缩略图、元数据、图片及署名必须保留。最终检查要求提供的数据已恢复,只会在文件的一次性副本中测试失败处理;它不会删除你真实展览中的图片。
总结
你用稳定 ID 在原生对话框中显示每张照片的真实内容,添加了有边界的前后导航,保留了 Esc 和 Close 的原始返回位置,并在不替换图片的前提下处理真实的图片缺失请求。图库在如实报告局部失败的同时,保留了网格、说明和其他照片的可用性。