介绍
发布内容已经正确存入 S3,但分配仍可能返回先前缓存的副本。控制缓存有效期,观察复用与过期,再通过仅使目标用户端路径失效来发布更新。保持第二个对象的缓存和源站的私有性。
请先完成私有 S3 内容分发实验。本独立 VM 提供新的私有桶、OAC、分配及匹配的桶策略,不复用先前 VM。初始缓存关闭,尚无用户端请求或失效请求。预置页面文件让你专注于缓存行为。在上方 AWS View 观察实际状态,在下方 Terminal 执行命令。无需个人 AWS 账户或公开域名。
认证考点
| 认证 | 考试任务 | 实践内容 |
|---|---|---|
| Solutions Architect – Associate (SAA-C03) | 任务 3.4 | 练习 CloudFront 边缘内容分发,以及缓存有效期对源站读取的影响。 |
实验概览
观察缓存复用与过期
本步骤配置较短缓存有效期,区分缓存命中与再次读取源站的请求。
缓存(cache)保留副本供后续请求使用。TTL 是以秒计的有效期。对象的 Cache-Control: max-age 提供有效期;分配的最小和最大 TTL 限定其范围,当源站未指定有效期时使用默认 TTL。本实验采用这些普通分配设置,不另外创建缓存策略。
找到预置分配。--query 选择带有本实验备注的分配,$(...) 将 ID 或域名保存到 Shell 变量。保持 Terminal 打开。查看无关参照桶,不要改变它:
cd /home/labex/project
DIST_ID=$(aws cloudfront list-distributions \
  --query "DistributionList.Items[?Comment=='labex-n03:private-content'].Id | [0]" \
  --output text)
DIST_DOMAIN=$(aws cloudfront get-distribution \
  --id "$DIST_ID" \
  --query Distribution.DomainName \
  --output text)
aws s3api list-buckets \
  --query 'Buckets[].Name'
读取当前配置及其 ETag,这是安全更新所需的版本标识。> 将命令输出写入文件。sed 只修改当前预置配置中两个为零的 TTL 属性,最小 TTL 保持零。新的最大值允许后续使用较长有效期:
aws cloudfront get-distribution-config \
  --id "$DIST_ID" \
  --query DistributionConfig > current-config.json
ETAG=$(aws cloudfront get-distribution-config \
  --id "$DIST_ID" \
  --query ETag \
  --output text)
sed -e 's/"DefaultTTL": 0/"DefaultTTL": 6/'   -e 's/"MaxTTL": 0/"MaxTTL": 3600/'   current-config.json > cached-config.json
aws cloudfront update-distribution \
  --id "$DIST_ID" \
  --if-match "$ETAG" \
  --distribution-config file://cached-config.json
aws cloudfront wait distribution-deployed \
  --id "$DIST_ID"
上传预置第一版内容,并设置六秒对象有效期。保留 text/html 内容类型:
aws s3api put-object \
  --bucket labex-n03-content \
  --key index.html \
  --body index.html \
  --content-type text/html \
  --cache-control 'max-age=6'
curl --include 显示响应头和正文。--resolve 为实际分配名选择本 VM 的用户端端点,不改变系统 DNS。连续执行两个请求,使第二个请求发生在六秒有效期结束前:
curl --fail --include --noproxy '*'   --resolve "${DIST_DOMAIN}:8082:127.0.0.1"   "http://${DIST_DOMAIN}:8082/index.html"
curl --fail --include --noproxy '*'   --resolve "${DIST_DOMAIN}:8082:127.0.0.1"   "http://${DIST_DOMAIN}:8082/index.html"
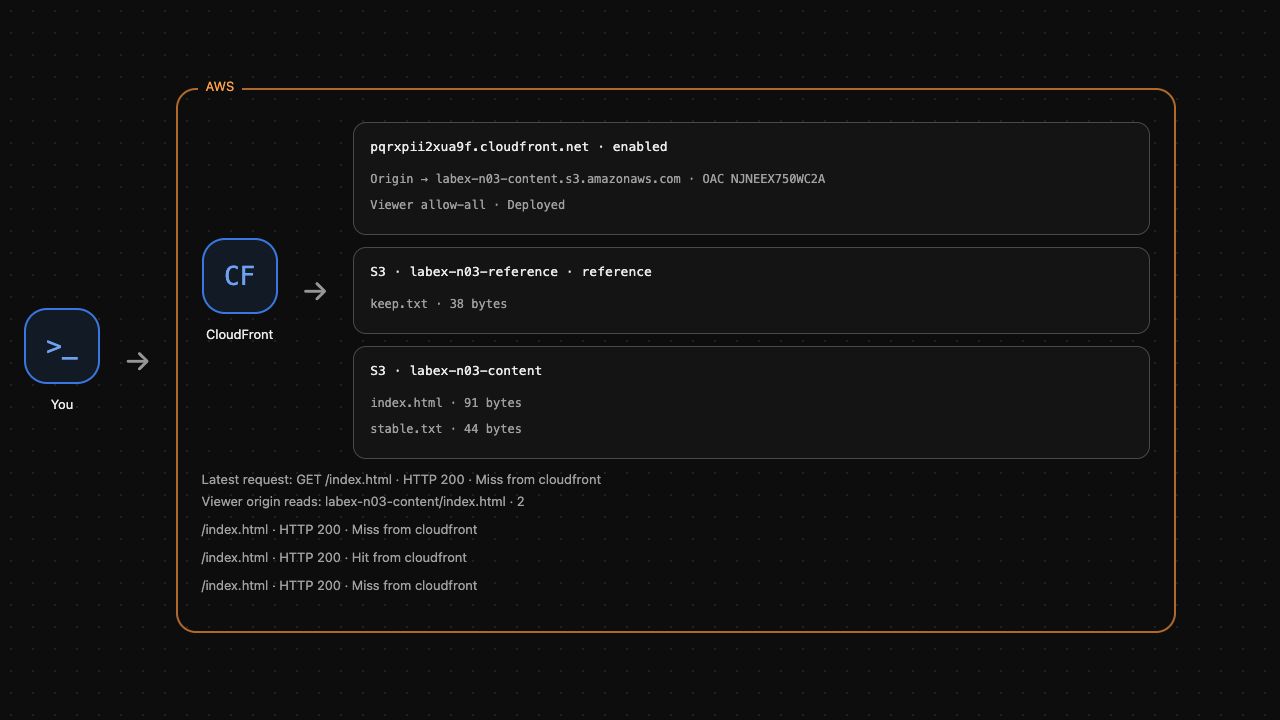
第一次显示 X-Cache: Miss from cloudfront,第二次显示 Hit from cloudfront,两次都返回 Release one。命中复用已保存字节,不再次读取源站。Age 显示缓存副本已存在的时间,立即发出的请求可能都显示零秒。
sleep 7 让六秒副本过期,然后再次请求:
sleep 7
curl --fail --include --noproxy '*'   --resolve "${DIST_DOMAIN}:8082:127.0.0.1"   "http://${DIST_DOMAIN}:8082/index.html"
预期再次未命中,并返回相同页面。过期使下次请求重新访问源站,不会删除 S3 对象。AWS View 显示实际请求结果和源站读取次数。继续前执行缓存有效期检查。
观察缓存副本背后的更新
本步骤上传新版本,观察为何已有缓存仍会返回旧内容。
使用更长有效期,让旧内容现象易于观察。以 max-age=900 重新上传第一版页面,以 max-age=3600 上传独立的 stable.txt 对象。分配的最大值 3600 允许这两个值:
aws s3api put-object \
  --bucket labex-n03-content \
  --key index.html \
  --body index.html \
  --content-type text/html \
  --cache-control 'max-age=900'
aws s3api put-object \
  --bucket labex-n03-content \
  --key stable.txt \
  --body stable.txt \
  --content-type text/plain \
  --cache-control 'max-age=3600'
更改源站元数据不会追溯修改已缓存响应。等待先前的六秒副本过期,然后预热两个对象路径:
sleep 7
curl --fail --include --noproxy '*'   --resolve "${DIST_DOMAIN}:8082:127.0.0.1"   "http://${DIST_DOMAIN}:8082/index.html"
curl --fail --include --noproxy '*'   --resolve "${DIST_DOMAIN}:8082:127.0.0.1"   "http://${DIST_DOMAIN}:8082/stable.txt"
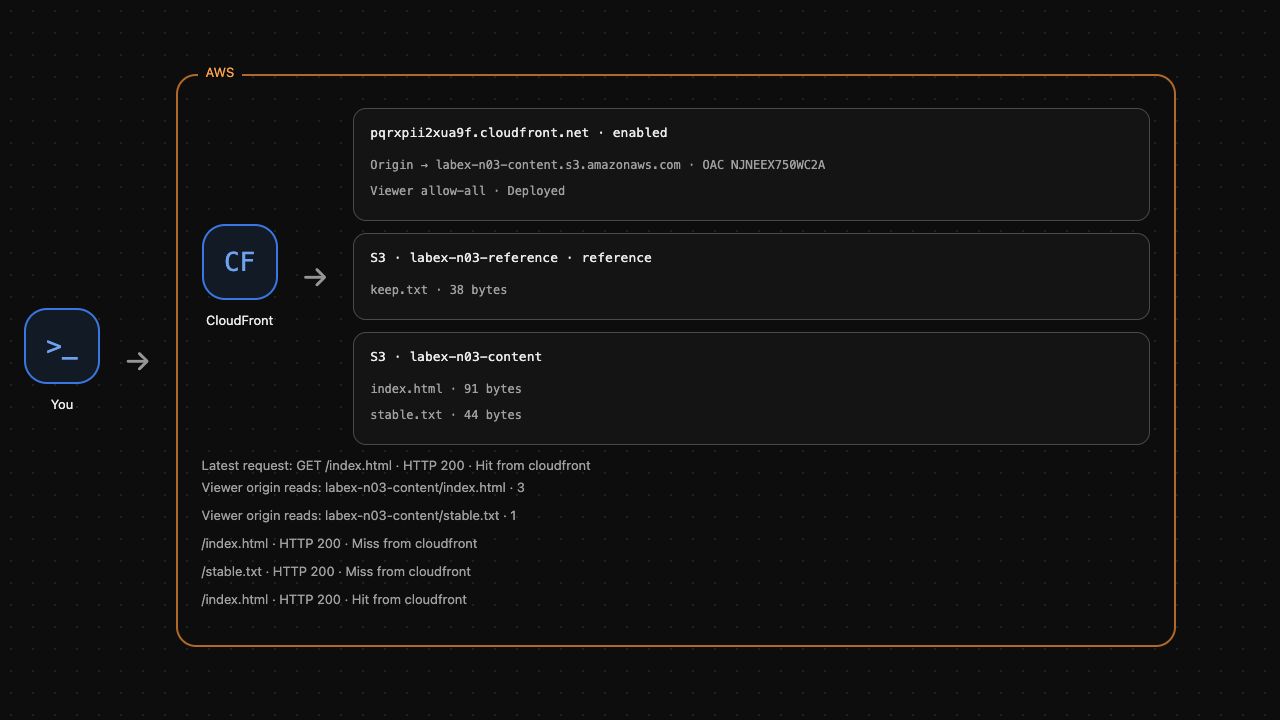
两个请求都未命中并读取当前源站对象。页面现在带有 Cache-Control: max-age=900。请在十五分钟有效期内完成接下来两个步骤。
预置的 release-two.html 包含修改后的页面。以相同对象键上传,保留内容类型和有效期。通过已认证 S3 CLI 将对象读入 origin-release.html,查看实际字节:
cat release-two.html
aws s3api put-object \
  --bucket labex-n03-content \
  --key index.html \
  --body release-two.html \
  --content-type text/html \
  --cache-control 'max-age=900'
aws s3api get-object \
  --bucket labex-n03-content \
  --key index.html origin-release.html
cat origin-release.html
源站包含 Release two。请求用户端的同一路径:
curl --fail --include --noproxy '*' --resolve "${DIST_DOMAIN}:8082:127.0.0.1" "http://${DIST_DOMAIN}:8082/index.html"
预期命中并返回 Release one。上传成功,但保留的用户端副本按自身 TTL 仍有效。这与源站权限失败不同。执行旧副本检查。
仅使更新页面的缓存失效
本步骤在副本过期前让新版本可见,不清除独立对象。
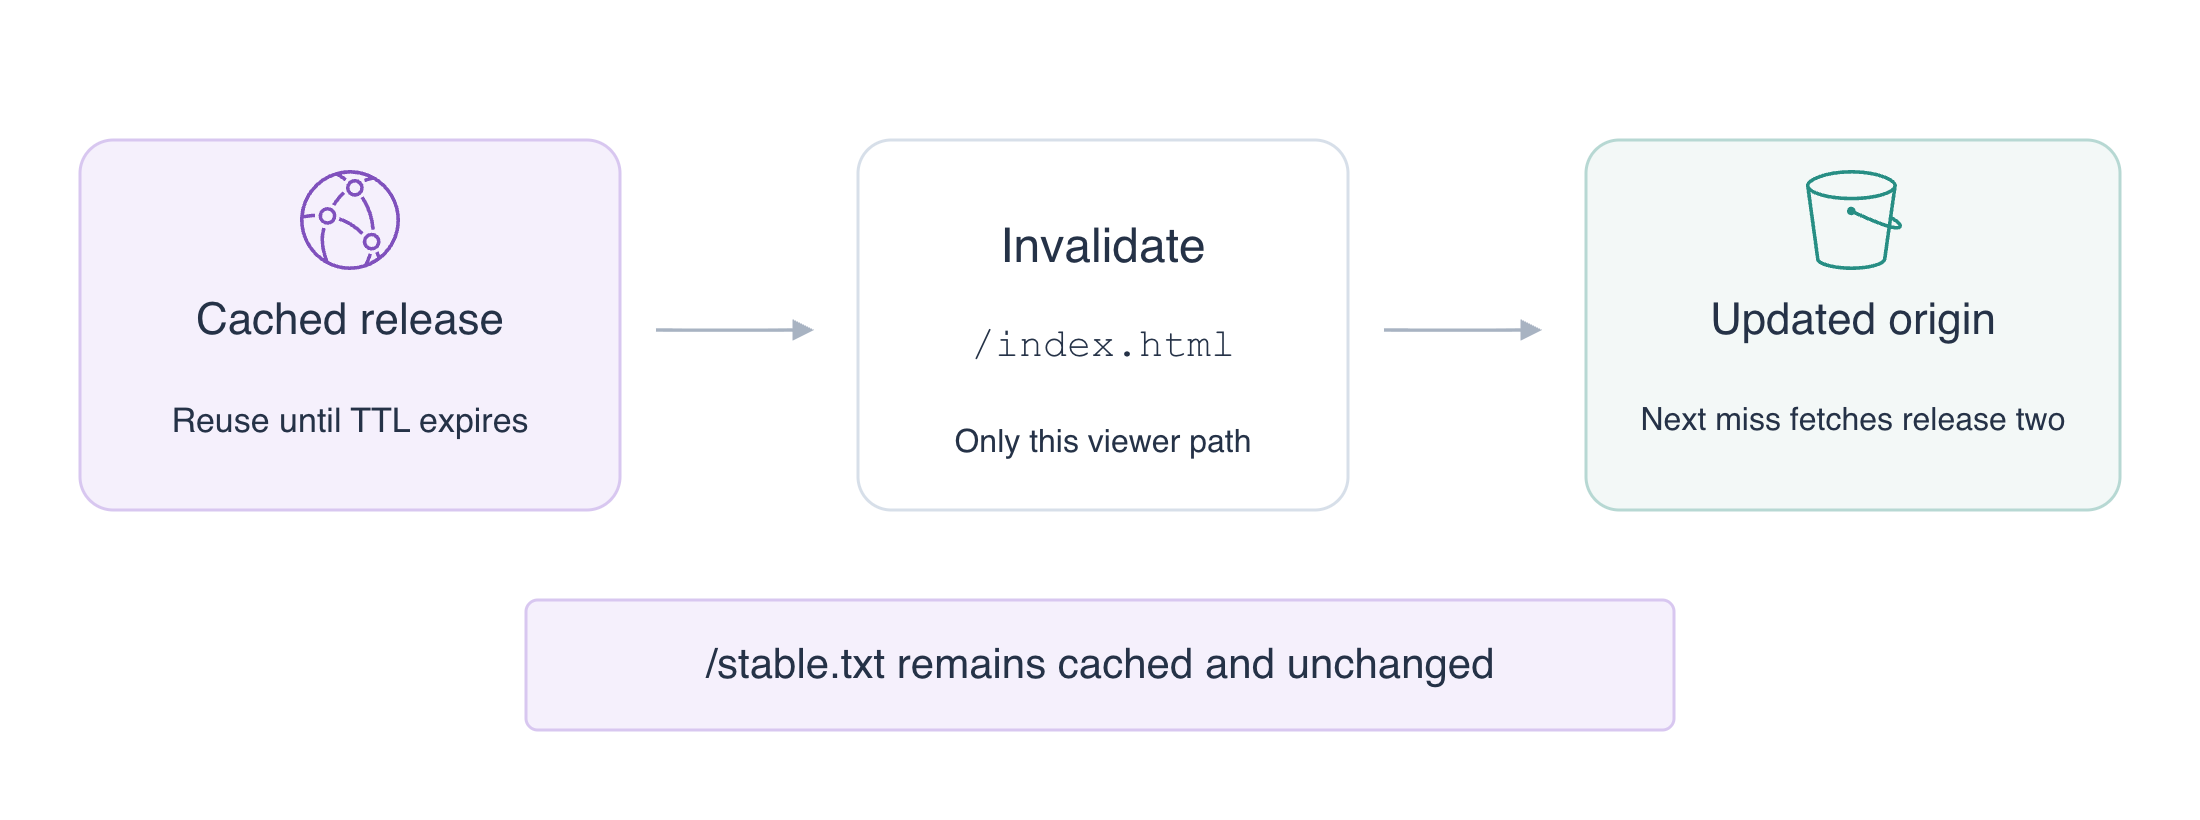
失效请求(invalidation)移除分配缓存中匹配的对象。路径是以 / 开头的用户端路径,不是桶名称或本地文件路径。精确使用 /index.html,因为 /* 会不必要地同时使独立对象失效。
创建请求。CLI 的 --paths 简写提供失效批次,查询把生成的 ID 保存到变量:
INVALIDATION_ID=$(aws cloudfront create-invalidation \
  --distribution-id "$DIST_ID" \
  --paths '/index.html' \
  --query Invalidation.Id \
  --output text)
aws cloudfront wait invalidation-completed \
  --distribution-id "$DIST_ID" \
  --id "$INVALIDATION_ID"
aws cloudfront get-invalidation \
  --distribution-id "$DIST_ID" \
  --id "$INVALIDATION_ID" \
  --query 'Invalidation.{Status:Status,Paths:InvalidationBatch.Paths.Items}'
确认 Completed 和 /index.html。仅有完成的请求不能证明用户收到预期字节。请求页面两次,证明新内容及后续复用:
curl --fail --include --noproxy '*'   --resolve "${DIST_DOMAIN}:8082:127.0.0.1"   "http://${DIST_DOMAIN}:8082/index.html"
curl --fail --include --noproxy '*'   --resolve "${DIST_DOMAIN}:8082:127.0.0.1"   "http://${DIST_DOMAIN}:8082/index.html"
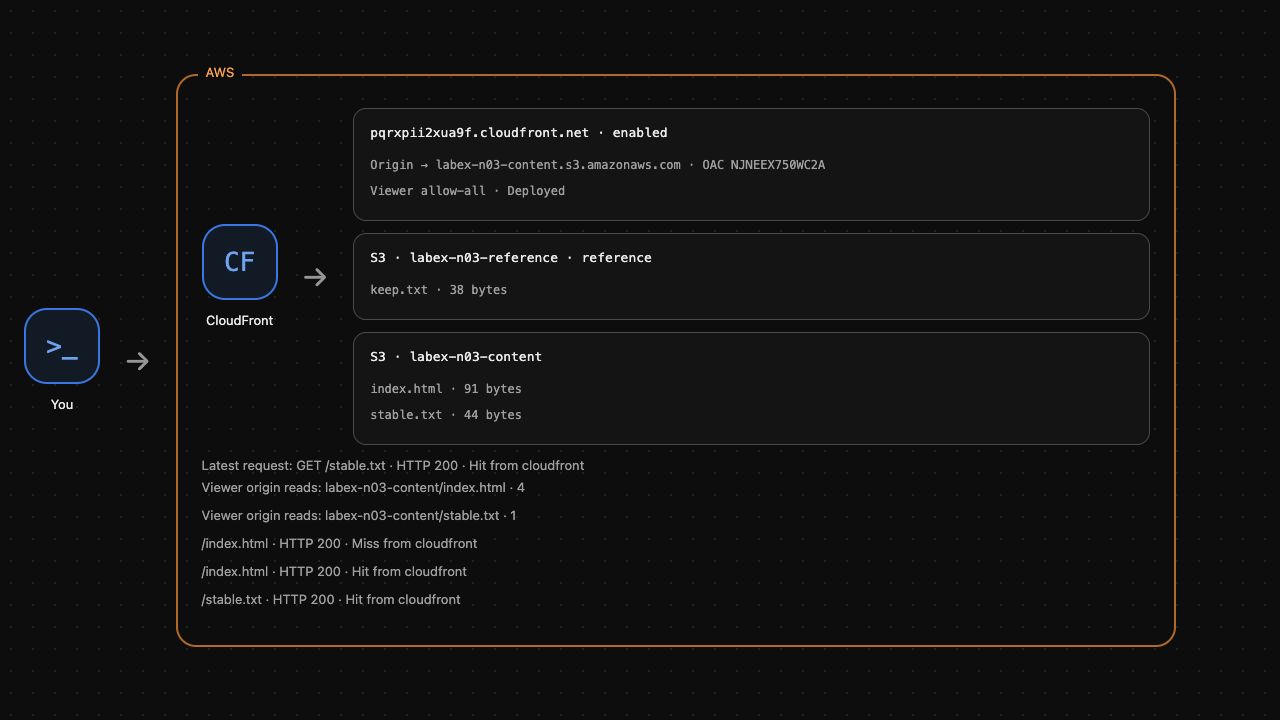
预期先未命中并返回 Release two,再命中并返回同一新页面。第一次获取当前源站字节,第二次复用新副本。
请求独立对象,并重复匿名直接源站测试:
curl --fail --include --noproxy '*'   --resolve "${DIST_DOMAIN}:8082:127.0.0.1"   "http://${DIST_DOMAIN}:8082/stable.txt"
curl --noproxy '*' --output /dev/null   --write-out 'Anonymous origin: HTTP %{http_code}\n'   http://127.0.0.1:5000/labex-n03-content/index.html
stable.txt 必须仍命中、内容保持原样,且不增加源站读取次数。匿名 S3 访问必须仍为 HTTP 403。失效改变缓存状态,不改变源站权限。执行定向更新检查。
只删除自己的分发资源
本步骤先禁用并删除分配,再删除 OAC 和 S3 内容。保持参照桶不变。
CloudFront 用 ETag 作为配置变更的版本令牌。获取当前配置及 ETag,不要猜测令牌。
删除分配前先读取其 OAC ID。这个 Shell 变量保留清理所针对的精确控制:
OAC_ID=$(aws cloudfront get-distribution-config \
  --id "$DIST_ID" \
  --query 'DistributionConfig.Origins.Items[0].OriginAccessControlId' \
  --output text)
现在保存当前配置,并取得 ETag:
aws cloudfront get-distribution-config \
  --id "$DIST_ID" \
  --query DistributionConfig \
  --output json > distribution-current.json
DIST_ETAG=$(aws cloudfront get-distribution-config \
  --id "$DIST_ID" \
  --query ETag \
  --output text)
在本实验当前配置中,分配的 Enabled 是唯一值为 true 的同名属性。以下标准 sed 替换生成禁用副本,同时保留源站设置:
sed 's/"Enabled": true/"Enabled": false/' distribution-current.json > distribution-disabled.json
aws cloudfront update-distribution \
  --id "$DIST_ID" \
  --if-match "$DIST_ETAG" \
  --distribution-config file://distribution-disabled.json
等待禁用配置部署完成。AWS 配置传播可能需要时间,本实验不测量全球部署延迟:
aws cloudfront wait distribution-deployed \
  --id "$DIST_ID"
更新会改变 ETag。删除已禁用分配前读取最新令牌:
DIST_ETAG=$(aws cloudfront get-distribution-config \
  --id "$DIST_ID" \
  --query ETag \
  --output text)
aws cloudfront delete-distribution \
  --id "$DIST_ID" \
  --if-match "$DIST_ETAG"
使用 OAC 自己的 ETag 删除它。分配 ID 和 OAC ID 指向不同资源:
OAC_ETAG=$(aws cloudfront get-origin-access-control \
  --id "$OAC_ID" \
  --query ETag \
  --output text)
aws cloudfront delete-origin-access-control \
  --id "$OAC_ID" \
  --if-match "$OAC_ETAG"
只删除本实验的两个对象和桶:
aws s3api delete-object \
  --bucket labex-n03-content \
  --key index.html
aws s3api delete-object \
  --bucket labex-n03-content \
  --key stable.txt
aws s3api delete-bucket \
  --bucket labex-n03-content
aws s3api list-buckets \
  --query 'Buckets[].Name'
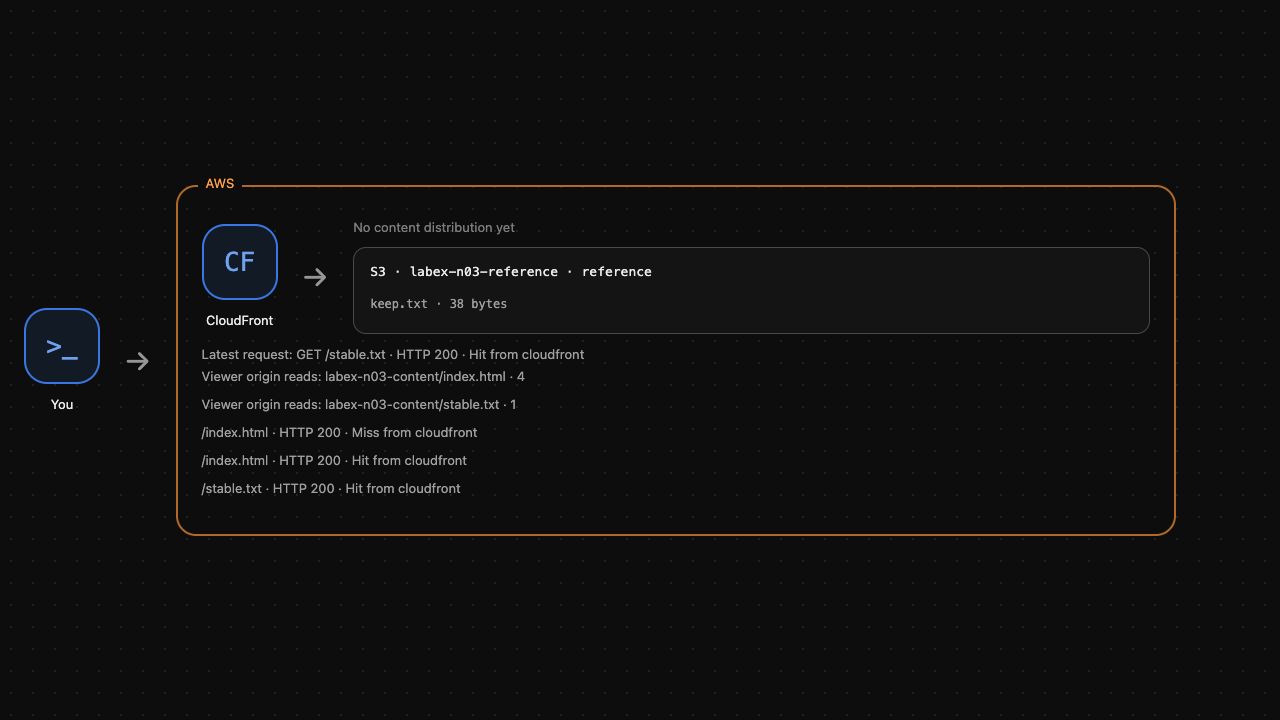
预期参照桶保留,内容桶已不存在。AWS View 应显示无内容分配,且只有参照对象。执行清理检查。失败的 API 请求不能证明资源已删除。
总结
你设置了分配 TTL 范围和对象 Cache-Control,观察缓存命中不增加源站读取,并让短期副本过期。你证明上传新源站版本不会替换仍有效的用户端副本。精确路径失效获取了新页面,同时保持独立对象的缓存和源站私有性。随后只删除自己的内容资源。频繁发布时,带版本的对象名称也是选择新内容的一种方式;本实验练习更新已有路径。