Introducción
Este proyecto te guiará a través del proceso de creación de una herramienta simple de recorte de imágenes. Al final, tendrás una aplicación interactiva que permite a los usuarios subir, mostrar y recortar imágenes.
👀 Vista previa
🎯 Tareas
En este proyecto, aprenderás:
- Cómo crear la estructura HTML para la herramienta de recorte de imágenes
- Cómo dar estilo a la página web utilizando CSS para que sea visualmente atractiva
- Cómo inicializar variables y oyentes de eventos utilizando JavaScript para manejar las interacciones del usuario
- Cómo manejar la carga y visualización de imágenes utilizando la API FileReader en JavaScript
- Cómo implementar el mecanismo de recorte utilizando la API Canvas en JavaScript
- Cómo guardar la imagen recortada y mostrar el resultado
🏆 Logros
Después de completar este proyecto, podrás:
- Comprender las etiquetas y la estructura de HTML
- Aplicar eficazmente propiedades y selectores de CSS
- Utilizar la sintaxis, variables y oyentes de eventos de JavaScript
- Aprovechar la API FileReader en JavaScript para manejar la carga de archivos
- Implementar la manipulación de imágenes utilizando la API Canvas en JavaScript
Diseña la estructura HTML
Requisitos:
- Conocimiento de las etiquetas y la estructura de HTML.
Funcionalidad:
- Diseña una interfaz para permitir a los usuarios subir una imagen y desencadenar el proceso de recorte.
Incorpore el código HTML en su index.html.
<!doctype html>
<html lang="en">
  <head>
    <meta charset="UTF-8" />
    <meta name="viewport" content="width=device-width, initial-scale=1.0" />
    <title>HTML5 Crop Image</title>
    <link rel="stylesheet" href="style.css" />
  </head>
  <body>
    <input type="file" name="file" id="post_file" />

    <button id="save_button">GUARDAR</button>
    <div id="label">
      <canvas id="get_image"></canvas>
      <p>
        <canvas id="cover_box"></canvas>
        <canvas id="edit_pic"></canvas>
      </p>
    </div>
    <p>
      <span id="show_edit"></span>
      <span id="show_pic"><img src="" /></span>
    </p>
    <script type="text/javascript" src="main.js"></script>
  </body>
</html>
Las tres etiquetas <canvas> mencionadas anteriormente se utilizan para procesar el contenido relacionado con las imágenes. El manejo detallado se proporcionará en el código js (JavaScript) subsiguiente. Los elementos con id show_edit e id show_pic se utilizan para previsualizar la imagen y ver el resultado final de la generación de la imagen.
Dale estilo a la página web
Requisitos:
- Conocimiento de las propiedades y selectores de CSS.
Funcionalidad:
- Estiliza los elementos HTML para que la interfaz sea amigable para el usuario y visualmente atractiva.
Incorpore el CSS en su style.css.
body {
  background-color: #f6f6f6;
  margin: 0;
  padding: 20px;
  text-align: center;
}

#label {
  border: 1px solid #ccc;
  background-color: #fff;
  text-align: center;
  height: 300px;
  width: 300px;
  margin: 20px auto;
  position: relative;
}

#get_image {
  position: absolute;
}

#edit_pic {
  position: absolute;
  display: none;
  background: #000;
}

#cover_box {
  position: absolute;
  z-index: 9999;
  display: none;
  top: 0px;
  left: 0px;
}

#show_edit {
  margin: 0 auto;
  display: inline-block;
}

#show_pic {
  height: 100px;
  width: 100px;
  border: 2px solid #000;
  overflow: hidden;
  margin: 0 auto;
  display: inline-block;
}

canvas {
  position: absolute;
  top: 0;
  left: 0;
}

#save_button {
  padding: 8px 16px;
  background-color: #3498db;
  color: #fff;
  border: none;
  border-radius: 5px;
  cursor: pointer;
  transition: background-color 0.2s;
}

#save_button:hover {
  background-color: #2980b9;
}

input[type="file"] {
  margin-bottom: 20px;
}
Inicializa variables y oyentes de eventos
Requisitos:
- Comprensión básica de la sintaxis, variables y oyentes de eventos de JavaScript.
Funcionalidad:
- Inicializa las propiedades y configuraciones de la herramienta de recorte. Agrega un oyente de eventos para procesar la imagen cargada.
En main.js, escribe el código para inicializar las propiedades de la herramienta de recorte y configurar los oyentes de eventos.
var postFile = {
  init: function () {
    var t = this;
    t.regional = document.getElementById("label");
    t.getImage = document.getElementById("get_image");
    t.editPic = document.getElementById("edit_pic");
    t.editBox = document.getElementById("cover_box");
    t.px = 0; //coordenada x de la imagen de fondo
    t.py = 0; //coordenada y de la imagen de fondo
    t.sx = 15; //coordenada x del área de recorte
    t.sy = 15; //coordenada y del área de recorte
    t.sHeight = 150; //altura del área de recorte
    t.sWidth = 150; //ancho del área de recorte
    document
      .getElementById("post_file")
      .addEventListener("change", t.handleFiles, false);
  }
};
Todas nuestras funciones y variables están encapsuladas dentro del objeto postFile. La función init mencionada anteriormente establece algunos valores iniciales.
t.px = 0;
t.py = 0;
t.sx = 15;
t.sy = 15;
t.sHeight = 100;
t.sWidth = 100;
Las variables t.px y t.py representan las coordenadas de la imagen de fondo en el área de vista previa en tiempo real; t.sx, t.sy, t.sHeight y t.sWidth representan las coordenadas x, y y el ancho, altura de la imagen respectivamente.
También obtenemos varios elementos en los que operaremos más adelante a través de document.getElementById.
document
  .getElementById("post_file")
  .addEventListener("change", t.handleFiles, false);
Escuchamos el evento change del formulario input con el id post_file para procesar los archivos cargados por el usuario. Aquí, delegamos esto a la función handleFiles. Entonces, a continuación, implementaremos la función handleFiles.
Manejar la carga y visualización de imágenes
Requisitos:
- Conocimientos básicos de la API FileReader en JavaScript.
Funcionalidad:
- Asegúrate de que cuando los usuarios cargan una imagen, se procese, lea y muestre correctamente en la pantalla.
Amplía tu main.js con las funciones para procesar y mostrar la imagen cargada.
Para implementar la función
handleFilesAquí, estamos utilizando la API File de HTML5. Primero, al invocar
new FileReader(), instanciamos un objeto FileReader llamadooFReader. Luego, llamamos a su métodoreadAsDataURL()para leer el contenido del archivo y convertirlo en un formato codificado en base64.Finalmente, cuando el archivo se ha leído y cargado completamente, procesamos la imagen que hemos leído utilizando
postFile.paintImage(oFREvent.target.result). En términos simples, estamos redibujando los datos de la imagen que hemos leído en el navegador.
handleFiles: function () {
        var fileList = this.files[0];
        var oFReader = new FileReader();
        oFReader.readAsDataURL(fileList);
        oFReader.onload = function (oFREvent) {
            postFile.paintImage(oFREvent.target.result);
        };
},
Para implementar la función
paintImageEl paso más crucial aquí es dibujar la imagen de acuerdo con el tamaño del contenedor utilizando canvas. En el paso anterior, utilizando el FileReader de la API File, ya hemos obtenido la URL de la imagen que queremos subir (el valor de
oFREvent.target.result). El siguiente paso es utilizar canvas para dibujar esta imagen. Primero, utilizamosgetImage.getContextpara obtener el contenido 2d de<canvas id="get_image"></canvas>, lo que se puede entender simplemente como el contenido de la imagen. Después, utilizamosnew Image()para crear un elemento<img>y establecemos el valor de su atributosrc.
paintImage: function (url) {
        var t = this;
        var createCanvas = t.getImage.getContext("2d");
        var img = new Image();
        img.src = url;
        img.onload = function () {
            if (
                img.width < t.regional.offsetWidth &&
                img.height < t.regional.offsetHeight
            ) {
                t.imgWidth = img.width;
                t.imgHeight = img.height;
            } else {
                var pWidth = img.width / (img.height / t.regional.offsetHeight);
                var pHeight = img.height / (img.width / t.regional.offsetWidth);
                t.imgWidth = img.width > img.height? t.regional.offsetWidth : pWidth;
                t.imgHeight =
                    img.height > img.width? t.regional.offsetHeight : pHeight;
            }
            t.px = (t.regional.offsetWidth - t.imgWidth) / 2 + "px";
            t.py = (t.regional.offsetHeight - t.imgHeight) / 2 + "px";

            t.getImage.height = t.imgHeight;
            t.getImage.width = t.imgWidth;
            t.getImage.style.left = t.px;
            t.getImage.style.top = t.py;

            createCanvas.drawImage(img, 0, 0, t.imgWidth, t.imgHeight);
            t.imgUrl = t.getImage.toDataURL();
            t.cutImage();
            t.drag();
        };
},
Dentro de la función img.onload, nuestro objetivo principal es redibujar la imagen en su tamaño original mientras mantiene sus proporciones, por eso tenemos una condición if. Finalmente, utilizamos la línea de código createCanvas.drawImage(img,0,0,t.imgWidth,t.imgHeight); para realmente renderizar la imagen.
Implementa el mecanismo de recorte
Requisitos:
- Conocimiento de la API Canvas en JavaScript para dibujo y manipulación de imágenes.
Funcionalidad:
- Agrega una región de recorte en la imagen mostrada y haz que esta región sea arrastrable. Esto le da a los usuarios la flexibilidad de seleccionar el área deseada para recortar.
Agrega los métodos correspondientes en main.js.
Crea un método
cutImageEl método
cutImagese encarga principalmente de dos tareas: una es crear una capa de máscara, y la otra es utilizar la propiedadbackgroundde CSS para proporcionar una vista previa en tiempo real de la área de recorte seleccionada.
cutImage: function () {
        var t = this;

        t.editBox.height = t.imgHeight;
        t.editBox.width = t.imgWidth;
        t.editBox.style.display = "block";
        t.editBox.style.left = t.px;
        t.editBox.style.top = t.py;

        var cover = t.editBox.getContext("2d");
        cover.fillStyle = "rgba(0, 0, 0, 0.5)";
        cover.fillRect(0, 0, t.imgWidth, t.imgHeight);
        cover.clearRect(t.sx, t.sy, t.sHeight, t.sWidth);

        document.getElementById("show_edit").style.background =
            "url(" + t.imgUrl + ")" + -t.sx + "px " + -t.sy + "px no-repeat";
        document.getElementById("show_edit").style.height = t.sHeight + "px";
        document.getElementById("show_edit").style.width = t.sWidth + "px";
},
- Crea un método
drag
drag: function () {
        var t = this;
        var draging = false;
        var startX = 0;
        var startY = 0;

        document.getElementById("cover_box").onmousemove = function (e) {
            var pageX = e.pageX - (t.regional.offsetLeft + this.offsetLeft);
            var pageY = e.pageY - (t.regional.offsetTop + this.offsetTop);

            if (
                pageX > t.sx &&
                pageX < t.sx + t.sWidth &&
                pageY > t.sy &&
                pageY < t.sy + t.sHeight
            ) {
                this.style.cursor = "move";

                this.onmousedown = function () {
                    draging = true;

                    t.ex = t.sx;
                    t.ey = t.sy;

                    startX = e.pageX - (t.regional.offsetLeft + this.offsetLeft);
                    startY = e.pageY - (t.regional.offsetTop + this.offsetTop);
                };
                window.onmouseup = function () {
                    draging = false;
                };

                if (draging) {
                    if (t.ex + (pageX - startX) < 0) {
                        t.sx = 0;
                    } else if (t.ex + (pageX - startX) + t.sWidth > t.imgWidth) {
                        t.sx = t.imgWidth - t.sWidth;
                    } else {
                        t.sx = t.ex + (pageX - startX);
                    }

                    if (t.ey + (pageY - startY) < 0) {
                        t.sy = 0;
                    } else if (t.ey + (pageY - startY) + t.sHeight > t.imgHeight) {
                        t.sy = t.imgHeight - t.sHeight;
                    } else {
                        t.sy = t.ey + (pageY - startY);
                    }

                    t.cutImage();
                }
            } else {
                this.style.cursor = "auto";
            }
        };
},
Para entender este método, debes comprender los siguientes puntos clave:
var pageX = e.pageX - (t.regional.offsetLeft + this.offsetLeft);
var pageY = e.pageY - (t.regional.offsetTop + this.offsetTop);
Con las dos líneas de código anteriores, obtenemos la distancia entre el mouse y la imagen de fondo. e.pageX representa la distancia desde el mouse hasta el borde izquierdo del navegador, y t.regional.offsetLeft + this.offsetLeft calcula la distancia desde la imagen hasta el borde izquierdo del navegador. Del mismo modo, se puede deducir la distancia superior.
if ( pageX > t.sx && pageX < t.sx + t.sWidth && pageY > t.sy && pageY < t.sy + t.sHeight )
Una vez que se ha comprendido la distancia entre el mouse y la imagen de fondo, esto debería ser fácil de entender: determina si el mouse está dentro de la región de la imagen.
t.ex = t.sx;
t.ey = t.sy;

startX = e.pageX - (t.regional.offsetLeft + this.offsetLeft);
startY = e.pageY - (t.regional.offsetTop + this.offsetTop);
Estos dos trozos de código merecen ser resaltados. Las dos primeras líneas registran las coordenadas de la última captura de pantalla (o si no hubo una anterior, entonces las coordenadas iniciales); las dos siguientes líneas registran las coordenadas cuando se presiona el mouse. Puedes inspeccionar estos valores por separado utilizando console.log().
if (draging) {
  if (t.ex + (pageX - startX) < 0) {
    t.sx = 0;
  } else if (t.ex + (pageX - startX) + t.sWidth > t.imgWidth) {
    t.sx = t.imgWidth - t.sWidth;
  } else {
    t.sx = t.ex + (pageX - startX);
  }

  if (t.ey + (pageY - startY) < 0) {
    t.sy = 0;
  } else if (t.ey + (pageY - startY) + t.sHeight > t.imgHeight) {
    t.sy = t.imgHeight - t.sHeight;
  } else {
    t.sy = t.ey + (pageY - startY);
  }

  t.cutImage();
}
El código anterior básicamente dice: si estamos en medio de arrastrar, necesitamos actualizar los valores de t.sx y t.sy en tiempo real según los cambios de coordenadas y llamar al método cutImage para proporcionar una vista previa en vivo.
Las coordenadas de la área de recorte durante el movimiento = última posición registrada + (posición actual del mouse - posición cuando se presionó el mouse)
Guarda la imagen recortada
Requisitos:
- Conocimiento del uso de canvas para extraer y mostrar datos de imágenes.
Funcionalidad:
- Después de recortar el área deseada de la imagen, permite a los usuarios guardar esta región recortada, mostrando el resultado en la pantalla.
Mejora la función de inicialización en main.js para manejar la guardado de la imagen recortada.
var postFile = {
  init: function () {
    //...
    document.getElementById("save_button").onclick = function () {
      t.editPic.height = t.sHeight;
      t.editPic.width = t.sWidth;
      var ctx = t.editPic.getContext("2d");
      var images = new Image();
      images.src = t.imgUrl;

      images.onload = function () {
        ctx.drawImage(
          images,
          t.sx,
          t.sy,
          t.sHeight,
          t.sWidth,
          0,
          0,
          t.sHeight,
          t.sWidth
        );
        document.getElementById("show_pic").getElementsByTagName("img")[0].src =
          t.editPic.toDataURL();
      };
    };
  }
};
postFile.init();
Similar a la implementación del método paintImage, primero escuchamos el evento de clic en el botón de guardado. Luego utilizamos el método drawImage para renderizar la región de la imagen seleccionada. Finalmente, empleamos el método toDataURL para convertir la imagen en un formato codificado en base64. Este valor se asigna luego al atributo src del img dentro de show_pic. De esta manera, se completa el recorte y guardado de la imagen.
Prueba la herramienta
- Abre
index.htmlen un navegador web.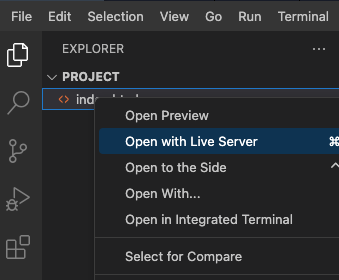
- Sube una imagen y prueba la funcionalidad de recorte.
- El efecto de la página es el siguiente:
Resumen
¡Felicidades! Has construido una herramienta básica de recorte de imágenes utilizando HTML5 y JavaScript. Esta base puede ser ampliada para funcionalidades más avanzadas o otras tareas de manipulación de imágenes. ¡Práctica mejorando la herramienta o explorando otros proyectos de desarrollo web!