
소개
이 프로젝트에서는 Python 과 Tkinter 를 사용하여 이미지 뷰어 애플리케이션을 만들 것입니다. 이 이미지 뷰어를 통해 이미지 파일을 열고, 표시하며, 확대, 축소 및 회전과 같은 작업을 수행할 수 있습니다. 이미지 처리를 위해 PIL (Python Imaging Library) 라이브러리를 사용하고, 그래픽 사용자 인터페이스 (GUI) 를 생성하기 위해 Tkinter 를 사용할 것입니다.
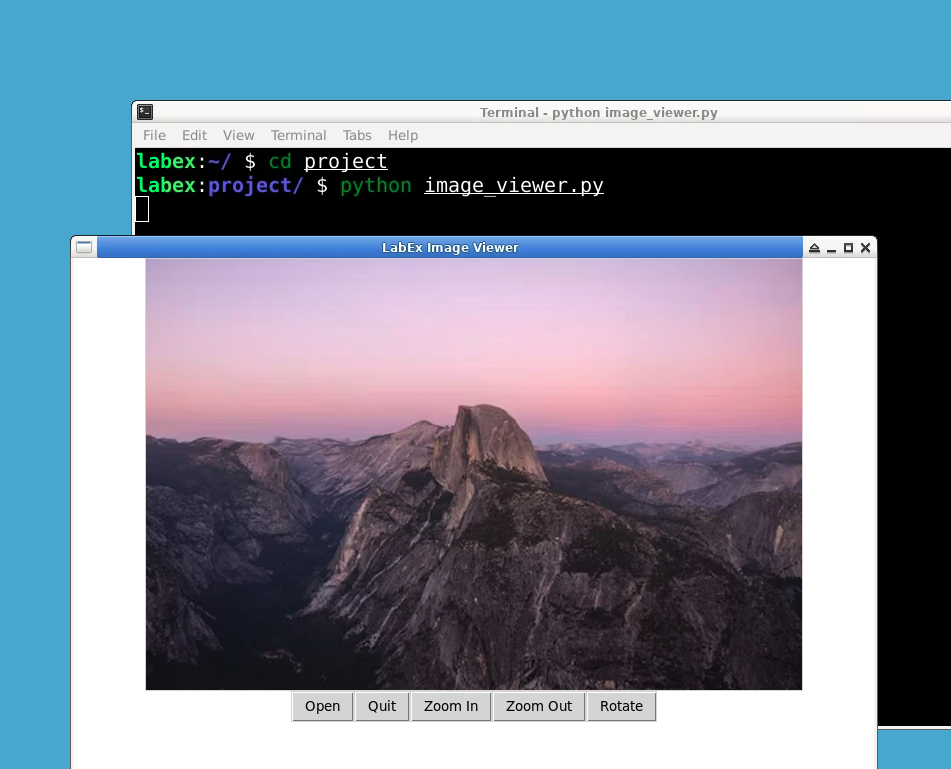
👀 미리보기
🎯 과제
이 프로젝트에서 다음을 배우게 됩니다:
- Tkinter 를 사용하여 GUI 애플리케이션을 만드는 방법.
- PIL 을 사용하여 이미지 로딩 및 표시를 처리하는 방법.
- 표시된 이미지에 대한 확대, 축소 및 회전 기능을 구현하는 방법.
🏆 성과
이 프로젝트를 완료하면 다음을 수행할 수 있습니다:
- Python 과 Tkinter 를 사용하여 기능적인 이미지 뷰어 애플리케이션을 개발할 수 있습니다.
- PIL 라이브러리를 사용하여 이미지 처리 기능을 통합할 수 있습니다.
- 확대 및 회전과 같은 기본적인 이미지 조작 기능을 구현할 수 있습니다.
프로젝트 파일 생성
먼저, ~/project/image_viewer.py라는 새 파일을 생성하고 텍스트 편집기 또는 통합 개발 환경 (IDE) 에서 엽니다.
cd ~/project
touch image_viewer.py
필요한 라이브러리 가져오기
image_viewer.py 파일에서 필요한 라이브러리를 가져옵니다:
import tkinter as tk
from tkinter import filedialog
from tkinter import messagebox
from PIL import Image, ImageTk
import os
tkinter 라이브러리는 GUI 요소를 생성하는 기능을 제공하고, filedialog는 이미지 파일을 선택하기 위한 파일 대화 상자를 열 수 있게 해주며, messagebox는 사용자에게 메시지를 표시하는 데 사용되고, PIL은 이미지 처리에 사용되며, os는 운영 체제와 상호 작용하기 위한 기능을 제공합니다.
ImageViewer 클래스 생성
이미지 뷰어 애플리케이션을 처리할 ImageViewer라는 새 클래스를 정의합니다:
class ImageViewer:
    def __init__(self, root):
        self.root = root
        self.root.title('LabEx Image Viewer')
        self.root.geometry('800x600')
        self.root.configure(background='white')

        self.image_label = tk.Label(self.root)
        self.image_label.pack()

        self.control_frame = tk.Frame(self.root)
        self.control_frame.pack()

        self.open_button = tk.Button(self.control_frame, text='Open', command=self.open_image)
        self.open_button.pack(side='left')

        self.close_button = tk.Button(self.control_frame, text='Quit', command=self.root.quit)
        self.close_button.pack(side='left')

        self.zoom_in_button = tk.Button(self.control_frame, text='Zoom In', command=self.zoom_in)
        self.zoom_in_button.pack(side='left')

        self.zoom_out_button = tk.Button(self.control_frame, text='Zoom Out', command=self.zoom_out)
        self.zoom_out_button.pack(side='left')

        self.rotate_button = tk.Button(self.control_frame, text='Rotate', command=self.rotate)
        self.rotate_button.pack(side='left')

        self.current_image_path = ''
        self.zoom_level = 1
__init__ 메서드에서 제목, 크기 및 배경색으로 루트 창을 초기화합니다. 그런 다음 이미지를 표시할 레이블과 제어 버튼 (Open, Quit, Zoom In, Zoom Out, Rotate) 을 담을 프레임을 생성합니다. 또한 현재 이미지 경로와 줌 레벨을 추적하기 위해 인스턴스 변수를 정의합니다.
open_image 메서드 구현
ImageViewer 클래스에 open_image 메서드를 추가합니다:
    def open_image(self):
        self.current_image_path = filedialog.askopenfilename(defaultextension=".jpg",
            filetypes=[("All Files", "*.*"), ("JPEG", ".jpg"), ("PNG", ".png"), ("GIF", ".gif")])
        if self.current_image_path:
            self.load_image()
open_image 메서드는 이미지 파일을 선택하기 위한 파일 대화 상자를 엽니다. 선택한 파일 경로로 current_image_path 변수를 설정하고 이미지를 표시하기 위해 load_image 메서드를 호출합니다.
load_image 메서드 구현
load_image 메서드를 구현합니다:
    def load_image(self):
        image = Image.open(self.current_image_path)

        ## Resize image for display
        max_size = (600, 600)
        image.thumbnail(max_size)

        ## Save a reference to the original image (for zooming/rotating)
        self.original_image = image

        ## Create a Tkinter-compatible image
        self.tk_image = ImageTk.PhotoImage(image)
        self.image_label.configure(image=self.tk_image)

        self.zoom_level = 1
load_image 메서드는 PIL 의 Image.open 메서드를 사용하여 선택한 이미지 파일을 엽니다. thumbnail 메서드를 사용하여 이미지를 최대 크기 600x600 픽셀 내에 맞게 크기를 조정합니다. 그런 다음, 확대/축소 및 회전을 위해 원본 이미지에 대한 참조를 저장합니다. 다음으로, ImageTk.PhotoImage를 사용하여 Tkinter 호환 이미지를 생성하고 로드된 이미지를 표시하도록 이미지 레이블을 업데이트합니다. 마지막으로 초기 줌 레벨을 1 로 설정합니다.
zoom_in 메서드 구현
zoom_in 메서드를 구현합니다:
    def zoom_in(self):
        if not self.current_image_path:  ## No image loaded
            return
        self.zoom_level *= 1.1  ## Increase zoom level by 10%
        self.zoom_or_rotate_image()
zoom_in 메서드는 이미지가 로드되었는지 확인합니다. 이미지가 로드되지 않은 경우, 메서드는 종료됩니다. 그렇지 않으면 줌 레벨을 10% 증가시키고, 표시된 이미지를 업데이트하기 위해 zoom_or_rotate_image 메서드를 호출합니다.
zoom_out 메서드 구현
zoom_out 메서드를 구현합니다:
    def zoom_out(self):
        if not self.current_image_path:  ## No image loaded
            return
        if self.zoom_level < 0.1:  ## Limit outwards zoom
            return
        self.zoom_level *= 0.9  ## Decrease zoom level by 10%
        self.zoom_or_rotate_image()
zoom_out 메서드는 이미지가 로드되었는지 확인합니다. 이미지가 로드되지 않은 경우, 메서드는 종료됩니다. 줌 레벨이 이미 0.1 미만인 경우, 즉 이미지가 최대한 축소된 경우에도 종료됩니다. 그렇지 않으면 줌 레벨을 10% 감소시키고, 표시된 이미지를 업데이트하기 위해 zoom_or_rotate_image 메서드를 호출합니다.
rotate 메서드 구현
rotate 메서드를 구현합니다:
    def rotate(self):
        if not self.current_image_path:  ## No image loaded
            return
        self.original_image = self.original_image.rotate(-90)
        self.zoom_or_rotate_image()
rotate 메서드는 이미지가 로드되었는지 확인합니다. 이미지가 로드되지 않은 경우, 메서드는 종료됩니다. 그렇지 않으면 PIL 의 rotate 메서드를 사용하여 원본 이미지를 -90 도 회전시키고, 표시된 이미지를 업데이트하기 위해 zoom_or_rotate_image 메서드를 호출합니다.
이미지 확대/회전 (zoom_or_rotate_image) 메서드 구현
zoom_or_rotate_image 메서드를 구현합니다:
    def zoom_or_rotate_image(self):
        ## Zoom and rotate original image, convert to Tk image, and display
        new_image = self.original_image.resize((int(self.original_image.width * self.zoom_level),
                                                int(self.original_image.height * self.zoom_level)))
        self.tk_image = ImageTk.PhotoImage(new_image)
        self.image_label.configure(image=self.tk_image)
zoom_or_rotate_image 메서드는 현재 줌 레벨을 기반으로 원본 이미지의 크기를 조정합니다. PIL 의 resize 메서드를 사용하여 업데이트된 크기의 새 이미지를 생성합니다. 그런 다음, ImageTk.PhotoImage를 사용하여 새 이미지를 Tkinter 호환 이미지로 변환하고, 업데이트된 이미지를 표시하도록 이미지 레이블을 업데이트합니다.
메인 애플리케이션 루프 생성
image_viewer.py 파일의 끝에 다음 코드를 추가하여 메인 애플리케이션 루프를 생성합니다:
if __name__ == '__main__':
    root = tk.Tk()
    app = ImageViewer(root)
    root.mainloop()
이 코드는 Tkinter 루트 윈도우를 생성하고, ImageViewer 클래스의 인스턴스를 초기화하며, 메인 애플리케이션 루프를 시작합니다.
데스크톱으로 전환하여 image_viewer.py 파일을 실행하여 애플리케이션을 테스트합니다. 다음 창이 표시되어야 합니다:
python image_viewer.py
요약
축하합니다! Python 과 Tkinter 를 사용하여 이미지 뷰어 애플리케이션을 만들었습니다. 이 애플리케이션을 사용하면 이미지 파일을 열고, 표시하고, 확대, 축소 및 이미지 회전과 같은 작업을 수행할 수 있습니다. 이미지 처리를 위해 PIL 라이브러리를 사용하고, 그래픽 사용자 인터페이스 (GUI) 를 만들기 위해 Tkinter 를 사용하는 방법을 배웠습니다. 애플리케이션을 더 자유롭게 사용자 정의하거나 추가 기능을 탐색해 보세요.


