
소개
이 프로젝트에서는 Python 과 tkinter 라이브러리를 사용하여 기본적인 GUI 계산기를 만드는 방법을 안내합니다. 이 계산기는 덧셈, 뺄셈, 곱셈, 나눗셈과 같은 간단한 산술 연산을 수행할 수 있습니다.
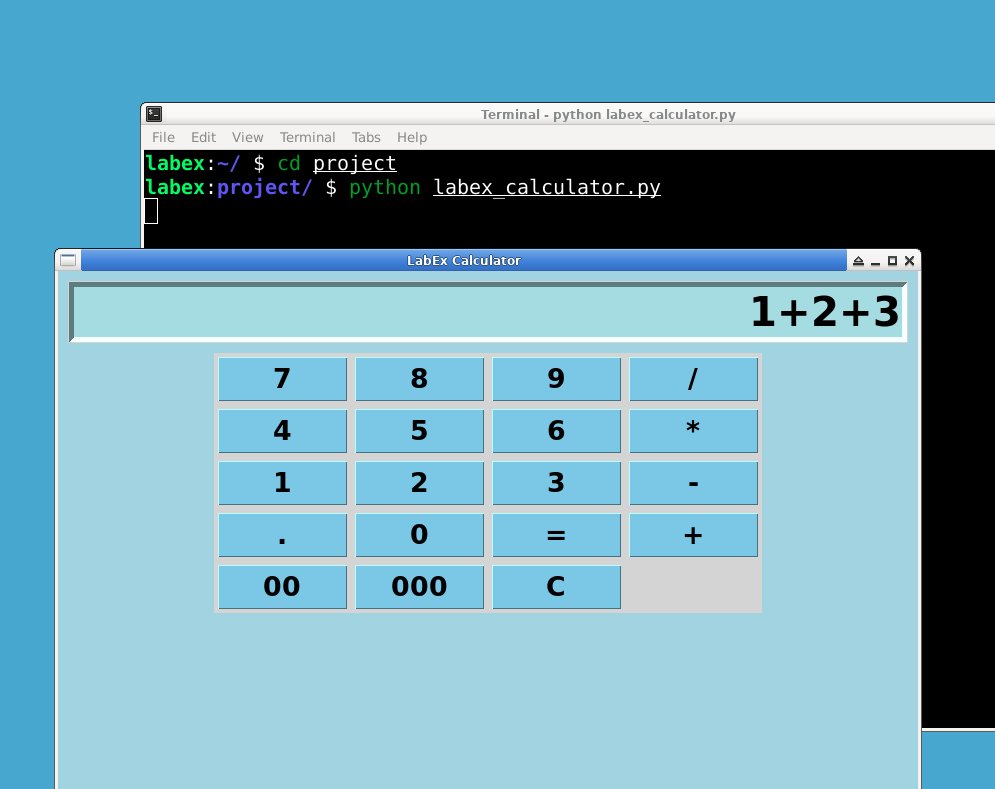
👀 미리보기
🎯 과제
이 프로젝트에서 다음을 배우게 됩니다:
- 계산기를 위한 tkinter 메인 윈도우 설정 방법
- 산술 연산을 수행하는 계산 함수 추가 방법
- 사용자가 숫자를 입력하고 결과를 볼 수 있는 입력 필드 생성 방법
- 숫자, 산술 연산 및 지우기 기능을 위한 버튼 추가 방법
- 계산기를 시작하기 위해 tkinter 이벤트 루프를 실행하는 방법
🏆 성과
이 프로젝트를 완료하면 다음을 수행할 수 있습니다:
- tkinter 라이브러리를 사용하여 그래픽 사용자 인터페이스 (GUI) 를 생성할 수 있습니다.
- 버튼에 함수를 바인딩하여 상호 작용을 활성화할 수 있습니다.
- Python 에서 기본적인 산술 연산을 수행할 수 있습니다.
- 입력 필드를 사용하여 결과를 표시하고 업데이트할 수 있습니다.
프로젝트 파일 생성
먼저, labex_calculator.py라는 새 Python 파일을 생성합니다. 이 파일은 계산기 코드를 담을 것입니다. 파일을 생성하기 위해 터미널 또는 운영 체제의 GUI 인터페이스를 사용할 수 있습니다.
## Creating a new python file
cd ~/project
touch labex_calculator.py
Tkinter 메인 윈도우 설정
계산기 제작을 시작하려면 텍스트 편집기에서 labex_calculator.py 파일을 엽니다. 계산기 GUI(그래픽 사용자 인터페이스) 를 생성하는 첫 번째 단계는 메인 윈도우를 만드는 것입니다. tkinter 라이브러리를 사용하여 이 작업을 수행합니다.
## Importing tkinter library
import tkinter as tk

## Creating main tkinter window/toplevel
root = tk.Tk()
root.title('LabEx Calculator') ## Setting the title of our calculator
root.geometry('400x600') ## Setting the size of our calculator
root.configure(background='light blue') ## Setting the background color of our calculator
계산 함수 추가
계산기가 산술 연산을 수행할 수 있도록 calculate 함수를 정의합니다.
def calculate(event):
    text = event.widget.cget('text') ## Getting the text from the button
    if text == '=':
        try:
            result = str(eval(entry.get())) ## Calculate the result
            entry.set(result) ## Set the entry to the result
        except Exception as e:
            entry.set('Error') ## In case of error, set the entry to 'Error'
        return

    if text == 'C':
        entry.set('') ## If 'C' is pressed, clear the entry
        return
    entry.set(entry.get() + text) ## Adding the pressed button's text to the entry
입력 필드 생성
사용자가 숫자를 입력하고 계산 결과를 볼 수 있도록 입력 필드를 생성합니다.
entry = tk.StringVar()
entry.set('') ## Setting the initial entry to an empty string
entry1 = tk.Entry(root, textvar=entry, font='lucida 30 bold', bd=5, insertwidth=4, bg='powder blue', justify='right') ## Creating the entry field
entry1.pack(fill=tk.X, ipadx=8, pady=10, padx=10) ## Positioning the entry field
버튼 추가
다음으로, 숫자, 산술 연산 및 지우기 기능을 위한 버튼을 계산기에 추가합니다.
button_frame = tk.Frame(root) ## Create a frame for the buttons
button_frame.pack() ## Add the frame to the tkinter window

## A list for the buttons' text
button_list = [
    '7', '8', '9', '/',
    '4', '5', '6', '*',
    '1', '2', '3', '-',
    '.', '0', '=', '+',
    '00', '000', 'C'
]

## Creating and positioning the buttons
i = 0
for btn_text in button_list:
    button = tk.Button(button_frame, text=btn_text, font='lucida 20 bold', bg='skyblue', padx=15, width=5)
    button.grid(row=int(i/4), column=i%4, padx=3, pady=3)
    i += 1
    button.bind('<Button-1>', calculate) ## Binding the 'calculate' function to the button
프로젝트 실행
마지막으로, tkinter 이벤트 루프를 실행하여 계산기를 시작합니다.
root.mainloop()
데스크톱으로 전환하여 프로젝트를 실행합니다.
python labex_calculator.py
요약
축하합니다! 이제 Python 과 tkinter 라이브러리를 사용하여 기본적인 GUI 계산기를 만들었습니다. labex_calculator.py 스크립트를 실행하여 계산기를 실행할 수 있습니다. 이 프로젝트에서는 tkinter 창 생성, 계산 기능 추가, 계산기 입력 필드 생성, 산술 연산을 수행하는 버튼 추가 및 계산기 실행을 다루었습니다.


