
소개
NumPy 라이브러리의 reshape() 함수는 데이터 변경 없이 배열의 형태를 변경할 수 있게 해줍니다. 이 강력한 함수는 특정 요구 사항에 따라 배열 요소를 다른 차원으로 재구성하는 데 도움이 됩니다. 1 차원 배열을 행렬로 변환하거나 데이터 처리를 위해 다차원 배열을 생성해야 할 때, reshape() 함수는 유연한 솔루션을 제공합니다.
이 Lab 에서는 reshape() 함수의 실용적인 응용 분야를 살펴보고, 구문을 이해하며, 다양한 매개변수를 사용하여 효과적으로 사용하는 방법을 배우겠습니다.
NumPy 시작하기 및 배열 생성
배열의 형태를 변경하기 전에, NumPy 배열이 무엇인지, 그리고 어떻게 생성하는지 이해해야 합니다. NumPy (Numerical Python) 는 대규모 다차원 배열과 행렬을 지원하고, 이러한 배열에 대한 연산을 수행하는 수학 함수 모음을 제공하는 강력한 라이브러리입니다.
WebIDE 에서 새로운 Python 파일을 생성하는 것으로 시작해 보겠습니다. 왼쪽 사이드바에서 "Explorer" 아이콘을 클릭한 다음 "New File" 버튼을 클릭합니다. 파일 이름을 numpy_reshape.py로 지정합니다.
이제 NumPy 라이브러리를 import 하고 기본 배열을 생성해 보겠습니다.
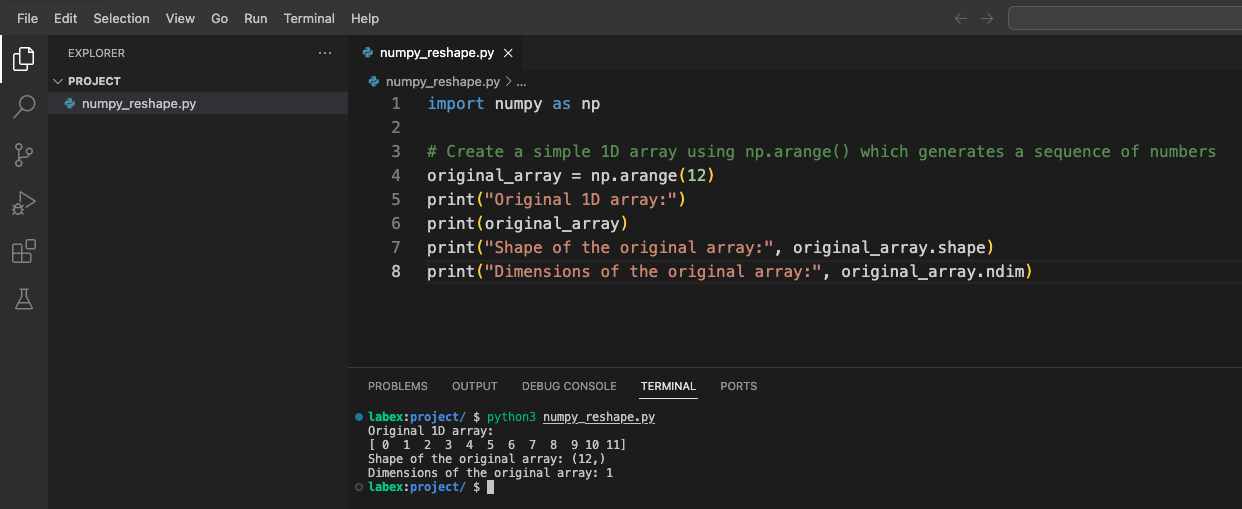
import numpy as np

## np.arange() 를 사용하여 0 부터 시작하는 숫자 시퀀스를 생성하여 간단한 1 차원 배열을 생성합니다.
original_array = np.arange(12)
print("Original 1D array:")
print(original_array)
print("Shape of the original array:", original_array.shape)
print("Dimensions of the original array:", original_array.ndim)
WebIDE 에서 터미널을 열고 스크립트를 실행합니다.
python3 numpy_reshape.py
다음과 유사한 출력을 볼 수 있습니다.
Original 1D array:
[ 0  1  2  3  4  5  6  7  8  9 10 11]
Shape of the original array: (12,)
Dimensions of the original array: 1
여기서 무슨 일이 일어나는지 이해해 보겠습니다.
np.arange(12)는 0 부터 11 까지의 값을 가진 1 차원 배열을 생성합니다.array.shape는 배열의 차원을 알려줍니다 (단일 차원에 12 개의 요소).array.ndim은 차원의 수를 알려줍니다 (이 경우 1).
기본 Reshape - 1 차원 배열을 2 차원으로 변환
이제 NumPy 배열의 기본 사항을 이해했으므로, reshape() 함수를 살펴보겠습니다. 이 함수를 사용하면 데이터를 변경하지 않고 배열의 형태를 변경할 수 있습니다.
numpy_reshape.py 파일을 열고 다음 코드를 추가합니다.
import numpy as np

## Create a simple 1D array
original_array = np.arange(12)
print("Original 1D array:")
print(original_array)
print("Shape of the original array:", original_array.shape)
print("Dimensions of the original array:", original_array.ndim)
print("-" * 50)  ## Separator line

## Reshape the array to a 2D array with 3 rows and 4 columns
reshaped_3x4 = np.reshape(original_array, (3, 4))
print("Reshaped array (3x4):")
print(reshaped_3x4)
print("Shape of the reshaped array:", reshaped_3x4.shape)
print("Dimensions of the reshaped array:", reshaped_3x4.ndim)
print("-" * 50)  ## Separator line

## Reshape the array to a 2D array with 4 rows and 3 columns
reshaped_4x3 = np.reshape(original_array, (4, 3))
print("Reshaped array (4x3):")
print(reshaped_4x3)
print("Shape of the reshaped array:", reshaped_4x3.shape)
print("Dimensions of the reshaped array:", reshaped_4x3.ndim)
터미널에서 스크립트를 실행합니다.
python3 numpy_reshape.py
원래 배열이 어떻게 다른 2D 구조로 reshape 되었는지 보여주는 출력을 볼 수 있습니다.
무슨 일이 일어나는지 이해해 보겠습니다.
- 먼저 12 개의 요소가 있는 1D 배열을 생성했습니다.
- 이를 3×4 행렬 (3 행, 4 열) 로 reshape 했습니다.
- 그런 다음 이를 4×3 행렬 (4 행, 3 열) 로 reshape 했습니다.
두 경우 모두 총 요소 수는 동일하게 유지되지만 (12), 구성이 변경됩니다. reshape() 함수는 새로운 형태가 원래 배열 크기와 호환되어야 합니다. 즉, 새로운 형태의 차원 곱이 원래 배열의 총 요소 수와 같아야 합니다.
고급 Reshape - 3 차원 배열 생성
이제 3 차원 배열을 생성하여 더 고급적인 reshaping 으로 넘어가 보겠습니다. 3D 배열은 본질적으로 2D 배열의 배열이며, 볼륨, 이미지의 시계열 또는 기타 복잡한 데이터 구조를 나타내는 데 유용합니다.
numpy_reshape.py 파일에 다음 코드를 추가합니다.
import numpy as np

## Create a simple 1D array
original_array = np.arange(24)
print("Original 1D array:")
print(original_array)
print("Shape of the original array:", original_array.shape)
print("-" * 50)  ## Separator line

## Reshape into a 3D array with dimensions 2x3x4
## This creates 2 blocks, each with 3 rows and 4 columns
reshaped_3d = np.reshape(original_array, (2, 3, 4))
print("Reshaped 3D array (2x3x4):")
print(reshaped_3d)
print("Shape of the 3D array:", reshaped_3d.shape)
print("Dimensions of the 3D array:", reshaped_3d.ndim)
print("-" * 50)  ## Separator line

## Accessing elements in a 3D array
print("First block of the 3D array:")
print(reshaped_3d[0])
print("\nSecond block of the 3D array:")
print(reshaped_3d[1])
print("\nElement at position [1,2,3] (second block, third row, fourth column):")
print(reshaped_3d[1, 2, 3])
스크립트를 다시 실행합니다.
python3 numpy_reshape.py
출력은 24 개의 요소가 있는 1D 배열이 어떻게 3D 구조로 변환될 수 있는지 보여줍니다. 이 구조는 2 개의 블록으로 시각화할 수 있으며, 각 블록은 3×4 행렬을 포함합니다.
3D 배열 이해:
- 첫 번째 차원 (2) 은 "블록" 또는 "레이어"의 수를 나타냅니다.
- 두 번째 차원 (3) 은 각 블록의 행 수를 나타냅니다.
- 세 번째 차원 (4) 은 각 행의 열 수를 나타냅니다.
이 구조는 이미지 처리 (각 "블록"이 색상 채널일 수 있음), 시계열 데이터 (각 "블록"이 시간 포인트일 수 있음) 또는 여러 행렬이 필요한 기타 시나리오에 특히 유용합니다.
Reshape 에서 Order Parameter 이해하기
배열을 reshape 할 때, NumPy 는 원래 배열에서 요소를 읽어 reshape 된 배열에 배치하는 방식을 제어하는 order라는 추가 매개변수를 제공합니다. 두 가지 주요 정렬 규칙이 있습니다.
- C-like ordering (row-major): NumPy 의 기본값으로, 마지막 축 인덱스가 가장 빠르게 변경됩니다.
- Fortran-like ordering (column-major): 첫 번째 축 인덱스가 가장 빠르게 변경됩니다.
numpy_reshape.py 파일에 이 코드를 추가하여 두 정렬 방식을 모두 살펴보겠습니다.
import numpy as np

## Create a 1D array
original_array = np.arange(12)
print("Original 1D array:")
print(original_array)
print("-" * 50)  ## Separator line

## Reshape using C-style ordering (default)
c_style = np.reshape(original_array, (3, 4), order='C')
print("Reshaped array with C-style ordering (row-major):")
print(c_style)
print("-" * 50)  ## Separator line

## Reshape using Fortran-style ordering
f_style = np.reshape(original_array, (3, 4), order='F')
print("Reshaped array with Fortran-style ordering (column-major):")
print(f_style)
print("-" * 50)  ## Separator line

## Alternative syntax using the array's reshape method
array_method = original_array.reshape(3, 4)
print("Using the array's reshape method:")
print(array_method)
print("-" * 50)  ## Separator line

## Using -1 as a dimension (automatic calculation)
auto_dim = original_array.reshape(3, -1)  ## NumPy will figure out that -1 should be 4
print("Using automatic dimension calculation with -1:")
print(auto_dim)
print("Shape:", auto_dim.shape)
스크립트를 실행하여 차이점을 확인합니다.
python3 numpy_reshape.py
이해해야 할 주요 사항:
- C-style ordering (row-major): 요소가 행별로 배치됩니다. 이것이 NumPy 의 기본값입니다.
- Fortran-style ordering (column-major): 요소가 열별로 배치됩니다.
- Array method syntax:
np.reshape(array, shape)대신array.reshape(shape)를 사용할 수 있습니다. - Automatic dimension calculation: 차원 중 하나에
-1을 사용하면 NumPy 가 배열의 크기를 기반으로 해당 차원을 자동으로 계산하도록 지시합니다.
order 매개변수는 특히 다음과 같은 경우에 중요합니다.
- 매우 큰 배열로 작업하고 메모리 레이아웃이 성능에 중요한 경우
- 다른 기본 정렬 방식을 사용하는 다른 라이브러리 또는 언어와 인터페이스하는 경우
- 특정 알고리즘과의 호환성을 보장해야 하는 경우
요약
이 랩에서는 NumPy 의 다재다능한 reshape() 함수를 탐구했습니다. 이 함수를 사용하면 기본 데이터를 변경하지 않고 배열 데이터를 다른 차원으로 재구성할 수 있습니다. 다음은 우리가 배운 내용입니다.
기본 reshaping: 1 차원 배열을 서로 다른 행 및 열 구성으로 2 차원 행렬로 변환하는 방법.
고급 reshaping: 볼륨, 이미지의 시계열 또는 기타 다차원 데이터를 나타내는 데 유용한, 더 복잡한 데이터 구조를 위한 3 차원 배열 생성.
Order parameters: C-style (row-major) 및 Fortran-style (column-major) 정렬 간의 차이점과, 이들이 reshape 된 배열에서 요소가 정렬되는 방식에 미치는 영향 이해.
Alternative syntax: 동일한 결과를 얻기 위해
np.reshape()함수와 배열의.reshape()메서드 모두 사용.Automatic dimension calculation:
-1을 자리 표시자로 사용하여 NumPy 가 적절한 차원을 자동으로 계산하도록 함.
reshape() 함수는 NumPy 를 사용한 데이터 조작의 기본 도구이며, 데이터 과학, 머신 러닝 및 과학 컴퓨팅의 다양한 응용 분야에서 데이터를 효율적으로 재구성할 수 있도록 합니다. 데이터를 적절하게 reshape 하는 방법을 이해하는 것은 모델에 대한 입력을 준비하고, 다차원 데이터를 시각화하며, 배열에 대한 복잡한 수학적 연산을 수행하는 데 필수적입니다.


