
소개
Hadoop 2.0 이상 버전에서는 YARN(Yet Another Resource Negotiator) 의 새로운 리소스 관리 패턴이 도입되어 클러스터의 활용도, 통합 리소스 관리 및 데이터 공유를 용이하게 합니다. Hadoop 의사 분산 클러스터 구축을 기반으로, 이 섹션에서는 YARN 프레임워크의 아키텍처, 작동 원리, 구성, 개발 및 모니터링 기술을 배우게 됩니다.
이 랩은 어느 정도의 Java 프로그래밍 기초를 필요로 합니다.
문서에 있는 모든 샘플 코드는 직접 입력하십시오. 가능한 한 복사하여 붙여넣지 마십시오. 이렇게 하면 코드를 더 잘 익힐 수 있습니다. 문제가 발생하면 문서를 주의 깊게 검토하거나, 포럼에서 도움을 받거나 소통할 수 있습니다.
YARN 아키텍처 및 구성 요소
Hadoop 0.23 에서 MapReduce 2.0 (MRv2) 의 일부로 도입된 YARN 은 Hadoop 클러스터의 리소스 관리 및 작업 스케줄링에 혁신을 가져왔습니다.
- JobTracker 분해:
MRv2는JobTracker의 기능을 별도의 데몬으로 분해합니다. - 리소스 관리를 위한ResourceManager와 작업 스케줄링 및 모니터링을 위한ApplicationMaster. - 글로벌 ResourceManager: 각 애플리케이션은 해당
ApplicationMaster를 가지며, 이는 MapReduce 작업 또는 작업을 설명하는 DAG(Directed Acyclic Graph) 일 수 있습니다. - 데이터 계산 프레임워크:
ResourceManager,Slave,NodeManager는 ResourceManager 가 모든 애플리케이션 리소스를 관리하는 프레임워크를 형성합니다. - ResourceManager 구성 요소:
Scheduler는 용량 및 큐와 같은 제약 조건에 따라 리소스를 할당하고,ApplicationsManager는 작업 제출 및 ApplicationMaster 실행을 처리합니다. - 리소스 할당: 리소스 요구 사항은 메모리, CPU, 디스크 및 네트워크와 같은 요소가 있는 리소스 컨테이너를 사용하여 정의됩니다.
- NodeManager 역할: NodeManager 는 컨테이너 리소스 사용량을 모니터링하고 ResourceManager 및 Scheduler 에 보고합니다.
- ApplicationMaster 작업: ApplicationMaster 는 Scheduler 와 리소스 컨테이너를 협상하고, 상태를 추적하며, 진행 상황을 모니터링합니다.
다음 그림은 관계를 보여줍니다.

YARN 은 이전 버전과의 API 호환성을 보장하여 MapReduce 작업을 원활하게 전환할 수 있도록 합니다. Hadoop 클러스터에서 효율적인 리소스 관리 및 작업 스케줄링을 위해서는 YARN 의 아키텍처와 구성 요소를 이해하는 것이 필수적입니다.
Hadoop 데몬 시작
관련 구성 매개변수 및 YARN 애플리케이션 개발 기술을 배우기 전에, 언제든지 사용할 수 있도록 Hadoop 데몬을 시작해야 합니다.
먼저 데스크톱에서 Xfce 터미널을 두 번 클릭하여 열고 다음 명령을 입력하여 hadoop 사용자로 전환합니다.
su - hadoop
팁: 비밀번호는 'hadoop' 사용자의 'hadoop'입니다.
전환이 완료되면 HDFS 및 YARN 프레임워크를 포함한 Hadoop 관련 데몬을 시작할 수 있습니다.
터미널에 다음 명령을 입력하여 데몬을 시작하십시오.
/home/hadoop/hadoop/sbin/start-dfs.sh
/home/hadoop/hadoop/sbin/start-yarn.sh
부팅이 완료되면 jps 명령을 사용하여 관련 데몬이 실행 중인지 확인할 수 있습니다.
hadoop:~$ jps
3378 NodeManager
3028 SecondaryNameNode
3717 Jps
2791 DataNode
2648 NameNode
3240 ResourceManager
설정 파일 준비
이 섹션에서는 Hadoop 의 주요 구성 파일 중 하나인 yarn-site.xml에 대해 배우고, 이 파일에서 YARN 클러스터에 대해 어떤 설정을 할 수 있는지 살펴보겠습니다.
구성 파일 변경으로 인한 오용을 방지하기 위해, Hadoop 구성 파일을 다른 디렉토리로 복사한 다음 여는 것이 가장 좋습니다.
이를 위해 터미널에 다음 명령을 입력하여 구성 파일을 위한 새 디렉토리를 만듭니다.
mkdir /home/hadoop/hadoop_conf
그런 다음 YARN 의 주요 구성 파일인 yarn-site.xml을 설치 디렉토리에서 새로 생성된 디렉토리로 복사합니다.
이 작업을 수행하려면 터미널에 다음 명령을 입력하십시오.
cp /home/hadoop/hadoop/etc/hadoop/yarn-site.xml /home/hadoop/hadoop_conf/yarn-site.xml
그런 다음 vim 편집기를 사용하여 파일을 열어 내용을 봅니다.
vim /home/hadoop/hadoop_conf/yarn-site.xml
설정 파일 작동 방식
YARN 프레임워크에는 ResourceManager와 NodeManager라는 두 가지 중요한 역할이 있다는 것을 알고 있습니다. 따라서 파일의 각 구성 항목은 위의 두 구성 요소의 설정입니다.
이 파일에서 설정할 수 있는 구성 항목이 많지만, 기본적으로 이 파일에는 사용자 지정 구성 항목이 포함되어 있지 않습니다. 예를 들어, 현재 열고 있는 파일에는 이전 의사 분산 Hadoop 클러스터를 구성했을 때 지정된 aux-services 속성만 있습니다. 다음 그림과 같습니다.
hadoop:~$ cat /home/hadoop/hadoop/etc/hadoop/mapred-site.xml

...
<configuration>
    <property>
        <name>mapreduce.framework.name</name>
        <value>yarn</value>
    </property>
</configuration>
이 구성 항목은 NodeManager에서 실행해야 하는 종속 서비스를 설정하는 데 사용됩니다. 우리가 지정한 구성 값은 mapreduce_shuffle이며, 이는 MapReduce 프로그램의 기본값을 YARN 에서 실행해야 함을 나타냅니다.
구성 항목이 작성되지 않으면 작동하지 않습니까? 정확하지 않습니다. 구성 매개변수가 파일에 명시적으로 지정되지 않은 경우 Hadoop 의 YARN 프레임워크는 내부 파일에 저장된 기본값을 읽습니다. yarn-site.xml 파일에 명시적으로 지정된 모든 구성 항목은 기본값을 재정의하며, 이는 Hadoop 시스템이 다양한 사용 시나리오에 적응할 수 있는 효과적인 방법입니다.
ResourceManager 구성 항목
yarn-site.xml 파일에서 ResourceManager 설정을 이해하고 올바르게 구성하는 것은 Hadoop 클러스터에서 효율적인 리소스 관리 및 작업 실행에 필수적입니다. ResourceManager 와 관련된 주요 구성 항목의 요약은 다음과 같습니다.
yarn.resourcemanager.address: 애플리케이션을 제출하고 애플리케이션을 종료하기 위해 클라이언트에 주소를 노출합니다. 기본 포트는 8032 입니다.yarn.resourcemanager.scheduler.address: 리소스를 요청하고 해제하기 위해 ApplicationMaster 에 주소를 노출합니다. 기본 포트는 8030 입니다.yarn.resourcemanager.resource-tracker.address: 하트비트를 보내고 작업을 가져오기 위해 NodeManager 에 주소를 노출합니다. 기본 포트는 8031 입니다.yarn.resourcemanager.admin.address: 관리 명령에 대해 관리자에게 주소를 노출합니다. 기본 포트는 8033 입니다.yarn.resourcemanager.webapp.address: 클러스터 정보를 보기 위한 WebUI 주소입니다. 기본 포트는 8088 입니다.yarn.resourcemanager.scheduler.class: 스케줄러의 주 클래스 이름을 지정합니다 (예: FIFO, CapacityScheduler, FairScheduler).- 스레드 구성:
yarn.resourcemanager.resource-tracker.client.thread-countyarn.resourcemanager.scheduler.client.thread-count
- 리소스 할당:
yarn.scheduler.minimum-allocation-mbyarn.scheduler.maximum-allocation-mbyarn.scheduler.minimum-allocation-vcoresyarn.scheduler.maximum-allocation-vcores
- NodeManager 관리:
yarn.resourcemanager.nodes.exclude-pathyarn.resourcemanager.nodes.include-path
- 하트비트 구성:
yarn.resourcemanager.nodemanagers.heartbeat-interval-ms
이러한 매개변수를 구성하면 Hadoop 클러스터에서 ResourceManager 동작, 리소스 할당, 스레드 처리, NodeManager 관리 및 하트비트 간격을 미세 조정할 수 있습니다. 이러한 구성 항목을 이해하면 문제를 방지하고 클러스터의 원활한 작동을 보장하는 데 도움이 됩니다.
NodeManager 구성 항목
yarn-site.xml 파일에서 NodeManager 설정을 구성하는 것은 Hadoop 클러스터 내에서 리소스와 작업을 효율적으로 관리하는 데 중요합니다. NodeManager 와 관련된 주요 구성 항목의 요약은 다음과 같습니다.
yarn.nodemanager.resource.memory-mb: NodeManager 에서 사용할 수 있는 총 물리적 메모리를 지정합니다. 이 값은 YARN 런타임 동안 일정하게 유지됩니다.yarn.nodemanager.vmem-pmem-ratio: 가상 메모리와 물리적 메모리 할당의 비율을 설정합니다. 기본 비율은2.1입니다.yarn.nodemanager.resource.cpu-vcores: NodeManager 에서 사용할 수 있는 총 가상 CPU 수를 정의합니다. 기본값은8입니다.yarn.nodemanager.local-dirs: NodeManager 에 중간 결과를 저장하기 위한 경로로, 여러 디렉토리 구성을 허용합니다.yarn.nodemanager.log-dirs: NodeManager 의 로그 디렉토리 경로로, 여러 디렉토리 구성을 지원합니다.yarn.nodemanager.log.retain-seconds: NodeManager 로그의 최대 보존 시간, 기본값은 10800 초 (3 시간) 입니다.
이러한 매개변수를 구성하면 Hadoop 클러스터에서 NodeManager 의 최적의 성능 및 리소스 활용을 위해 리소스 할당, 메모리 관리, 디렉토리 경로 및 로그 보존 설정을 미세 조정할 수 있습니다. 이러한 구성 항목을 이해하면 클러스터 내에서 원활한 작동과 효율적인 작업 실행을 보장하는 데 도움이 됩니다.
구성 항목 쿼리 및 기본 참조
YARN 및 기타 일반적인 Hadoop 구성 요소에서 사용할 수 있는 모든 구성 항목을 탐색하려면 Apache Hadoop 에서 제공하는 기본 구성 파일을 참조할 수 있습니다. 기본 구성에 액세스할 수 있는 링크는 다음과 같습니다.
YARN 구성 항목:
공통 구성 파일:
- core-default.xml (core-site.xml)
- hdfs-default.xml (hdfs-site.xml)
- mapred-default.xml (mapred-site.xml)
이러한 기본 구성을 탐색하면 각 구성 항목과 해당 목적에 대한 자세한 설명이 제공되어 Hadoop 아키텍처 설계에서 각 매개변수의 역할을 이해하는 데 도움이 됩니다.
구성을 검토한 후 vim 편집기를 닫아 Hadoop 구성 설정 탐색을 완료할 수 있습니다.
프로젝트 디렉토리 및 파일 생성
공식 YARN 인스턴스 애플리케이션을 모방하여 YARN 애플리케이션의 개발 프로세스를 알아보겠습니다.
먼저 프로젝트 디렉토리를 생성합니다. 디렉토리 생성을 수행하려면 터미널에 다음 명령을 입력하십시오.
mkdir /home/hadoop/yarn_app
그런 다음 프로젝트에 두 개의 소스 코드 파일을 별도로 생성합니다.
첫 번째는 Client.java입니다. 터미널에서 touch 명령을 사용하여 파일을 생성하십시오.
touch /home/hadoop/yarn_app/Client.java
그런 다음 ApplicationMaster.java 파일을 생성합니다.
touch /home/hadoop/yarn_app/ApplicationMaster.java
hadoop:~$ tree /home/hadoop/yarn_app/
/home/hadoop/yarn_app/
├── ApplicationMaster.java
└── Client.java

0 directories, 2 files
클라이언트 코드 작성
Client에 대한 코드를 작성하면 YARN 프레임워크에서 Client를 개발하는 데 필요한 API 와 해당 역할을 이해할 수 있습니다.
코드 내용이 다소 깁니다. 한 줄씩 읽는 것보다 방금 생성한 소스 코드 파일에 한 줄씩 입력하는 것이 더 효율적인 방법입니다.
먼저 vim 편집기 (또는 다른 텍스트 편집기) 로 방금 생성한 Client.java 파일을 엽니다.
vim /home/hadoop/yarn_app/Client.java
그런 다음 클래스 이름과 클래스에 대한 패키지 이름을 나타내기 위해 프로그램의 본문을 추가합니다.
package com.labex.yarn.app;

public class Client {
    public static void main(String[] args){
     //TODO: Edit code here.
    }
}
다음 코드는 세분화된 형태입니다. 작성할 때 주석 //TODO: Edit your code here가 있는 코드 블록인 Client 클래스에 다음 코드를 작성합니다.
클라이언트가 수행해야 할 첫 번째 단계는 YarnClient 객체를 생성하고 초기화한 다음 시작하는 것입니다.
YarnClient yarnClient = YarnClient.createYarnClient();
yarnClient.init(conf);
yarnClient.start();
Client를 생성한 후 YARN 애플리케이션과 해당 애플리케이션 ID 의 객체를 생성해야 합니다.
YarnClientApplication app = yarnClient.createApplication();
GetNewApplicationResponse appResponse = app.getNewApplicationResponse();
appResponse 객체에는 클러스터의 최소 및 최대 리소스 기능과 같은 클러스터에 대한 정보가 포함되어 있습니다. 이 정보는 ApplicationMaster가 관련 컨테이너를 시작할 때 매개변수를 올바르게 설정할 수 있도록 하는 데 필요합니다.
Client의 주요 작업 중 하나는 ApplicationSubmissionContext를 설정하는 것입니다. RM 이 AM 을 시작하는 데 필요한 모든 정보를 정의합니다.
일반적으로 Client는 컨텍스트에서 다음을 설정해야 합니다.
- 애플리케이션 정보: 앱의 ID 와 이름을 포함합니다.
- 큐 및 우선 순위 정보: 애플리케이션 제출에 대한 큐 및 할당된 우선 순위를 포함합니다.
- 사용자: 앱을 제출한 사용자입니다.
- ContainerLaunchContext: AM 을 시작하고 실행할 컨테이너의 정보를 정의합니다. 애플리케이션을 실행하는 데 필요한 모든 정보는
ContainerLaunchContext에 정의되어 있으며, 여기에는 로컬 리소스 (이진 파일, jar 파일 등), 환경 변수 (CLASSPATH등), 실행할 명령 및 보안 토큰 (RECT) 이 포함됩니다.
// Set the application to submit the context
ApplicationSubmissionContext appContext = app.getApplicationSubmissionContext();
ApplicationId appId = appContext.getApplicationId();

  appContext.setKeepContainersAcrossApplicationAttempts(keepContainers);
appContext.setApplicationName(appName);

// The following code is used to set the local resources of ApplicationMaster
/ / Local resources need to be local files or compressed packages etc.
// In this scenario, the jar package is in the form of a file as one of AM's local resources.
Map<String, LocalResource> localResources = new HashMap<String, LocalResource>();

LOG.info("Copy AppMaster jar from local filesystem and add to local environment.");

// Copy the jar package of ApplicationMaster into the file system
FileSystem fs = FileSystem.get(conf);

// Create a local resource that points to the jar package path
addToLocalResources(fs, appMasterJar, appMasterJarPath, appId.toString(), localResources, null);

// Set the parameters of logs, you can skip it
if (!log4jPropFile.isEmpty()) {
   addToLocalResources(fs, log4jPropFile, log4jPath, appId.toString(), localResources, null);
}

// The shell script will be available in the container that will eventually execute it
// So first copy it to the file system so that the YARN framework can find it
// You don't need to set it to the local resource of AM here because the latter doesn't need it
String hdfsShellScriptLocation = "";
long hdfsShellScriptLen = 0;
long hdfsShellScriptTimestamp = 0;
if (!shellScriptPath.isEmpty()) {
Path shellSrc = new Path(shellScriptPath);
String shellPathSuffix = appName + "/" + appId.toString() + "/" + SCRIPT_PATH;
Path shellDst = new Path(fs.getHomeDirectory(), shellPathSuffix);
fs.copyFromLocalFile(false, true, shellSrc, shellDst);
hdfsShellScriptLocation = shellDst.toUri().toString();
FileStatus shellFileStatus = fs.getFileStatus(shellDst);
hdfsShellScriptLen = shellFileStatus.getLen();
hdfsShellScriptTimestamp = shellFileStatus.getModificationTime();
}

if (!shellCommand.isEmpty()) {
addToLocalResources(fs, null, shellCommandPath, appId.toString(),
    localResources, shellCommand);
}

if (shellArgs.length > 0) {
addToLocalResources(fs, null, shellArgsPath, appId.toString(),
    localResources, StringUtils.join(shellArgs, " "));
}

// Set the environment parameters that AM requires
LOG.info("Set the environment for the application master");
Map<String, String> env = new HashMap<String, String>();

// Add the path to the shell script to the environment variable
// AM will create the correct local resource for the final container accordingly
// and the above container will execute the shell script at startup
  env.put(DSConstants.DISTRIBUTEDSHELLSCRIPTLOCATION, hdfsShellScriptLocation);

env.put(DSConstants.DISTRIBUTEDSHELLSCRIPTTIMESTAMP, Long.toString(hdfsShellScriptTimestamp));

env.put(DSConstants.DISTRIBUTEDSHELLSCRIPTLEN, Long.toString(hdfsShellScriptLen));

// Add the path to AppMaster.jar to the classpath
// Note that there is no need to provide a Hadoop-related classpath here, as we have an annotation in the external configuration file.
// The following code adds all the classpath-related path settings required by AM to the current directory
StringBuilder classPathEnv = new StringBuilder(Environment.CLASSPATH.$$())
    .append(ApplicationConstants.CLASS_PATH_SEPARATOR).append("./*");
for (String c : conf.getStrings(
    YarnConfiguration.YARN_APPLICATION_CLASSPATH,
    YarnConfiguration.DEFAULT_YARN_CROSS_PLATFORM_APPLICATION_CLASSPATH)) {
    classPathEnv.append(ApplicationConstants.CLASS_PATH_SEPARATOR);
    classPathEnv.append(c.trim());
  }
  classPathEnv.append(ApplicationConstants.CLASS_PATH_SEPARATOR).append(
    "./log4j.properties");

// Set the command to execute AM
Vector<CharSequence> vargs = new Vector<CharSequence>(30);

// Set the executable command for Java
LOG.info("Setting up app master command");
vargs.add(Environment.JAVA_HOME.$$() + "/bin/java");
// Set the memory numbers assigned by Xmx parameters under JVM
vargs.add("-Xmx" + amMemory + "m");
// Set class names
vargs.add(appMasterMainClass);
// Set the parameter of ApplicationMaster
vargs.add("--container_memory " + String.valueOf(containerMemory));
vargs.add("--container_vcores " + String.valueOf(containerVirtualCores));
vargs.add("--num_containers " + String.valueOf(numContainers));
vargs.add("--priority " + String.valueOf(shellCmdPriority));

for (Map.Entry<String, String> entry : shellEnv.entrySet()) {
    vargs.add("--shell_env " + entry.getKey() + "=" + entry.getValue());
  }
  if (debugFlag) {
    vargs.add("--debug");
  }

vargs.add("1>" + ApplicationConstants.LOG_DIR_EXPANSION_VAR + "/AppMaster.stdout");
vargs.add("2>" + ApplicationConstants.LOG_DIR_EXPANSION_VAR + "/AppMaster.stderr");

// Generate the final parameter and configure
StringBuilder command = new StringBuilder();
for (CharSequence str : vargs) {
    command.append(str).append(" ");
}

LOG.info("Completed setting up app master command " + command.toString());
List<String> commands = new ArrayList<String>();
commands.add(command.toString());

// Set container for AM to start context
ContainerLaunchContext amContainer = ContainerLaunchContext.newInstance(
    localResources, env, commands, null, null, null);

// The requirement of setting resource types, including memory and virtual CPU cores.
Resource capability = Resource.newInstance(amMemory, amVCores);
  appContext.setResource(capability);

// If needed, the data of YARN service is passed to the applications in binary format. But it's not needed in this example.
// amContainer.setServiceData(serviceData);

// Set the Token
if (UserGroupInformation.isSecurityEnabled()) {
    Credentials credentials = new Credentials();
    String tokenRenewer = conf.get(YarnConfiguration.RM_PRINCIPAL);
    if (tokenRenewer == null || tokenRenewer.length() == 0) {
      throw new IOException(
        "Can't get Master Kerberos principal for the RM to use as renewer");
    }

// Get the token of the default file system
final Token<?> tokens[] =
    fs.addDelegationTokens(tokenRenewer, credentials);
    if (tokens != null) {
      for (Token<?> token : tokens) {
        LOG.info("Got dt for " + fs.getUri() + "; " + token);
      }
    }
    DataOutputBuffer dob = new DataOutputBuffer();
    credentials.writeTokenStorageToStream(dob);
    ByteBuffer fsTokens = ByteBuffer.wrap(dob.getData(), 0, dob.getLength());
    amContainer.setTokens(fsTokens);
  }

  appContext.setAMContainerSpec(amContainer);
설정 프로세스가 완료되면 클라이언트는 지정된 우선 순위 및 큐로 애플리케이션을 제출할 수 있습니다.
 / / Set the priority of AM
Priority pri = Priority.newInstance(amPriority);
appContext.setPriority(pri);

// Set the queue where the application submits to RM
appContext.setQueue(amQueue);

// Submit the app to AM
yarnClient.submitApplication(appContext);
이 시점에서 RM 은 애플리케이션을 수락하고 백그라운드에서 할당된 컨테이너에서 AM 을 설정하고 시작합니다.
클라이언트는 다양한 방식으로 실제 작업의 진행 상황을 추적할 수 있습니다.
(1) 그 중 하나는 YarnClient 객체의 getApplicationReport() 메서드를 통해 RM 과 통신하고 애플리케이션 보고서를 요청하는 것입니다.
// Use the app ID to get its report
ApplicationReport report = yarnClient.getApplicationReport(appId);
RM 에서 수신된 보고서에는 다음이 포함됩니다.
- 일반 정보: 애플리케이션의 번호 (위치), 애플리케이션을 제출하기 위한 큐, 애플리케이션을 제출한 사용자 및 애플리케이션 시작 시간을 포함합니다.
- ApplicationMaster 세부 정보: AM 을 실행 중인 호스트, Client의 요청을 수신 대기하는 RPC 포트 및 Client와 AM 이 통신하는 데 필요한 토큰입니다.
- 애플리케이션 추적 정보: 애플리케이션이 일부 형태의 진행 상황 추적을 지원하는 경우 애플리케이션에서 보고한
getTrackingUrl()메서드를 통해 추적된 URL 을 설정할 수 있으며 클라이언트는 이 메서드를 통해 진행 상황을 모니터링할 수 있습니다. - 애플리케이션 상태:
getYarnApplicationState에서ResourceManager의 애플리케이션 상태를 볼 수 있습니다.YarnApplicationState가complete로 설정된 경우 클라이언트는getFinalApplicationStatus를 참조하여 애플리케이션의 작업이 실제로 성공적으로 실행되었는지 확인해야 합니다. 실패한 경우getDiagnostics를 사용하여 실패에 대한 자세한 정보를 찾을 수 있습니다.
(2) ApplicationMaster가 이를 지원하는 경우 Client는 애플리케이션 보고서에서 얻은 hostname:rpcport 정보를 사용하여 AM 자체의 진행 상황을 직접 쿼리할 수 있습니다.
경우에 따라 애플리케이션이 너무 오래 실행된 경우 클라이언트는 애플리케이션을 종료하려고 할 수 있습니다. YarnClient는 killApplication을 호출하는 것을 지원합니다. 이를 통해 클라이언트는 ResourceManager 를 통해 AM 에 종료 신호를 보낼 수 있습니다. 그렇게 설계된 경우 애플리케이션 관리자는 클라이언트가 활용할 수 있는 RPC 계층 지원을 통해 호출을 종료할 수도 있습니다.
구체적인 코드는 다음과 같지만 코드는 참조용일 뿐이며 Client.java에 작성할 필요가 없습니다.
yarnClient.killApplication(appId);
위의 내용을 편집한 후 내용을 저장하고 vim 편집기를 종료합니다.
ApplicationMaster 코드 작성
마찬가지로 vim 편집기를 사용하여 ApplicationMaster.java 파일을 열어 코드를 작성합니다.
vim /home/hadoop/yarn_app/ApplicationMaster.java
package com.labex.yarn.app;

public class ApplicationMaster {

    public static void main(String[] args){
   //TODO:Edit code here.
    }
}
코드 설명은 여전히 세그먼트 형식입니다. 아래에 언급된 모든 코드는 ApplicationMaster 클래스 (즉, 주석 //TODO:Edit code here.가 있는 코드 블록) 에 작성해야 합니다.
AM은 RM에 의해 시작되어 작업을 감독하고 완료하기 위해 Client 를 통해 필요한 모든 정보와 리소스를 제공하는 job의 실제 소유자입니다.
AM 은 단일 컨테이너에서 시작되므로 컨테이너가 다른 컨테이너와 동일한 물리적 호스트를 공유할 가능성이 높습니다. 클라우드 컴퓨팅 플랫폼의 다중 테넌시 기능 및 기타 문제를 고려할 때 처음부터 수신 대기할 사전 구성된 포트를 알 수 없을 수 있습니다.
따라서 AM 이 시작될 때 환경을 통해 여러 매개변수를 제공할 수 있습니다. 이러한 매개변수에는 AM 컨테이너의 ContainerId, 애플리케이션 제출 시간 및 AM 을 실행 중인 NodeManager 호스트에 대한 세부 정보가 포함됩니다.
RM 과의 모든 상호 작용에는 애플리케이션을 예약해야 합니다. 이 프로세스가 실패하면 각 애플리케이션이 다시 시도할 수 있습니다. AM 의 컨테이너 ID 에서 ApplicationAttemptId를 얻을 수 있습니다. 환경에서 얻은 값을 객체로 변환할 수 있는 관련 API 가 있습니다.
다음 코드를 작성합니다.
Map<String, String> envs = System.getenv();
String containerIdString = envs.get(ApplicationConstants.AM_CONTAINER_ID_ENV);
  If (containerIdString == null) {
    // The container ID should be set in the environment variable of the framework
    Throw new IllegalArgumentException(
        "Container ID not set in the environment");
  }
ContainerId containerId = ConverterUtils.toContainerId(containerIdString);
ApplicationAttemptId appAttemptID = containerId.getApplicationAttemptId();
AM 이 완전히 초기화되면 ResourceManager 및 NodeManager 에 대한 두 개의 클라이언트를 시작할 수 있습니다. 사용자 지정 이벤트 핸들러를 사용하여 설정하며 자세한 내용은 나중에 설명합니다.
AMRMClientAsync.CallbackHandler allocListener = new RMCallbackHandler();
amRMClient = AMRMClientAsync.createAMRMClientAsync(1000, allocListener);
amRMClient.init(conf);
amRMClient.start();

containerListener = createNMCallbackHandler();
nmClientAsync = new NMClientAsyncImpl(containerListener);
nmClientAsync.init(conf);
nmClientAsync.start();
AM 은 RM 이 AM 이 계속 실행 중임을 알 수 있도록 주기적으로 RM 에 하트비트를 보내야 합니다. RM 의 만료 간격은 YarnConfiguration에 의해 정의되며 기본값은 구성 파일의 YarnConfiguration.RM_AM_EXPIRY_INTERVAL_MS 구성 항목에 의해 정의됩니다. AM 은 하트비트 전송을 시작하기 위해 ResourceManager에 자체적으로 등록해야 합니다.
// Register yourself with RM and start sending heartbeats to RM
appMasterHostname = NetUtils.getHostname();
RegisterApplicationMasterResponse response = amRMClient.registerApplicationMaster(appMasterHostname, appMasterRpcPort, appMasterTrackingUrl);
등록 프로세스의 응답 정보에는 클러스터의 최대 리소스 용량이 포함될 수 있습니다. 이 정보를 사용하여 애플리케이션의 요청을 확인할 수 있습니다.
// Temporarily save information about cluster resource capabilities in RM
int maxMem = response.getMaximumResourceCapability().getMemory();
LOG.info("Max mem capability of resources in this cluster " + maxMem);

int maxVCores = response.getMaximumResourceCapability().getVirtualCores();
LOG.info("Max vcores capability of resources in this cluster " + maxVCores);

// Use the maximum memory limit to constrain the container's memory capacity request value
if (containerMemory > maxMem) {
    LOG.info("Container memory specified above max threshold of cluster."
        + " Using max value." + ", specified=" + containerMemory + ", max="
        + maxMem);
    containerMemory = maxMem;
}

if (containerVirtualCores > maxVCores) {
    LOG.info("Container virtual cores specified above max threshold of cluster."
      + " Using max value." + ", specified=" + containerVirtualCores + ", max="
      + maxVCores);
    containerVirtualCores = maxVCores;
}

List<Container> previousAMRunningContainers =
      response.getContainersFromPreviousAttempts();
LOG.info("Received " + previousAMRunningContainers.size()
          + " previous AM's running containers on AM registration.");
작업 요구 사항에 따라 AM 은 일련의 컨테이너를 예약하여 작업을 실행할 수 있습니다. 이러한 요구 사항을 사용하여 필요한 컨테이너 수를 계산하고 해당 컨테이너 수를 요청합니다.
int numTotalContainersToRequest = numTotalContainers - previousAMRunningContainers.size();

for (int i = 0; i < numTotalContainersToRequest; ++i) {
    //Set the request object to the RM request container
    ContainerRequest containerAsk = setupContainerAskForRM();
    //Send container request to RM
    amRMClient.addContainerRequest(containerAsk);

    // This loop means polling RM for containers after getting fully allocated quotas
  }
위의 루프는 모든 컨테이너가 시작되고 셸 스크립트가 실행될 때까지 (성공 또는 실패 여부에 관계없이) 계속 실행됩니다.
setupContainerAskForRM()에서 다음을 설정해야 합니다.
- 리소스 기능: 현재 YARN 은 메모리 기반 리소스 요구 사항을 지원하므로 요청은 필요한 메모리 양을 정의해야 합니다. 이 값은 메가바이트 단위로 정의되며 클러스터의 최대 및 최소 기능의 정확한 배수보다 작아야 합니다. 이 메모리 리소스는 작업 컨테이너에 부과된 물리적 메모리 제한에 해당합니다. 리소스 기능에는 계산 기반 리소스 (vCore) 도 포함됩니다.
- 우선 순위: 컨테이너 세트를 요청할 때 AM 은 컬렉션에 대해 다른 우선 순위를 정의할 수 있습니다. 예를 들어, MapReduce AM 은 Map 작업에 필요한 컨테이너에 더 높은 우선 순위를 할당할 수 있으며, Reduce 작업 컨테이너는 더 낮은 우선 순위를 갖습니다.
Private ContainerRequest setupContainerAskForRM() {
    / / Set the priority of the request
    Priority pri = Priority.newInstance(requestPriority);

    / / Set the request for the resource type, including memory and CPU
    Resource capability = Resource.newInstance(containerMemory,
      containerVirtualCores);

    ContainerRequest request = new ContainerRequest(capability, null, null, pri);
    LOG.info("Requested container allocation: " + request.toString());
    Return request;
  }
AM 이 컨테이너 할당 요청을 보낸 후 컨테이너는 AMRMClientAsync 클라이언트의 이벤트 핸들러에 의해 비동기적으로 시작됩니다. 이 로직을 처리하는 프로그램은 AMRMClientAsync.CallbackHandler 인터페이스를 구현해야 합니다.
(1) 컨테이너에 디스패치되면 핸들러는 스레드를 시작해야 합니다. 스레드는 컨테이너를 시작하기 위한 관련 코드를 실행합니다. 여기서는 시연을 위해 LaunchContainerRunnable을 사용합니다. 이 클래스에 대해서는 나중에 논의하겠습니다.
@Override
public void onContainersAllocated(List<Container> allocatedContainers) {
    LOG.info("Got response from RM for container allocation, allocatedCnt=" + allocatedContainers.size());
    numAllocatedContainers.addAndGet(allocatedContainers.size());
    for (Container allocatedContainer : allocatedContainers) {
      LaunchContainerRunnable runnableLaunchContainer =
          new LaunchContainerRunnable(allocatedContainer, containerListener);
      Thread launchThread = new Thread(runnableLaunchContainer);

      // Start and run the container with different threads, which prevents the main thread from blocking when all the containers cannot be allocated resources
      launchThreads.add(launchThread);
      launchThread.start();
    }
}
(2) 하트비트를 보낼 때 이벤트 핸들러는 애플리케이션의 진행 상황을 보고해야 합니다.
@Override
public float getProgress() {
// Set the progress information and report it to RM the next time you send a heartbeat
    float progress = (float) numCompletedContainers.get() / numTotalContainers;
Return progress;
}
컨테이너의 시작 스레드는 실제로 NM 에서 컨테이너를 시작합니다. 컨테이너를 AM 에 할당한 후에는 할당된 컨테이너에서 실행할 최종 작업을 위해 ContainerLaunchContext를 설정할 때 Client 가 따르는 것과 유사한 프로세스를 따라야 합니다. ContainerLaunchContext를 정의한 후 AM 은 NMClientAsync를 통해 시작할 수 있습니다.
// Set the necessary commands to execute on the allocated container
Vector<CharSequence> vargs = new Vector<CharSequence>(5);

// Set the executable command
vargs.add(shellCommand);
// Set the path of the shell script
if (!scriptPath.isEmpty()) {
    vargs.add(Shell.WINDOWS ? ExecBatScripStringtPath
      : ExecShellStringPath);
}

// Set parameters for shell commands
vargs.add(shellArgs);
// Add log redirection parameters
vargs.add("1>" + ApplicationConstants.LOG_DIR_EXPANSION_VAR + "/stdout");
vargs.add("2>" + ApplicationConstants.LOG_DIR_EXPANSION_VAR + "/stderr");

// Get the final command
StringBuilder command = new StringBuilder();
for (CharSequence str : vargs) {
command.append(str).append(" ");
}

List<String> commands = new ArrayList<String>();
commands.add(command.toString());

// Set ContainerLaunchContext to set local resources, environment variables, commands and tokens for the constructor.
ContainerLaunchContext ctx = ContainerLaunchContext.newInstance(
    localResources, shellEnv, commands, null, allTokens.duplicate(), null);
  containerListener.addContainer(container.getId(), container);
  nmClientAsync.startContainerAsync(container, ctx);
NMClientAsync 객체와 해당 이벤트 핸들러는 컨테이너 이벤트를 처리합니다. 여기에는 컨테이너의 시작, 중지, 상태 업데이트 및 오류가 포함됩니다.
ApplicationMaster가 완료되었음을 결정한 후에는 AM-RM 의 Client에 등록을 해제한 다음 Client를 중지해야 합니다.
try {
    amRMClient.unregisterApplicationMaster(appStatus, appMessage, null);
  } catch (YarnException ex) {
    LOG.error("Failed to unregister application", ex);
  } catch (IOException e) {
    LOG.error("Failed to unregister application", e);
  }

  amRMClient.stop();
위의 내용은 ApplicationMaster의 주요 코드입니다. 편집 후 내용을 저장하고 vim 편집기를 종료합니다.
Application 실행 과정
Hadoop 클러스터에서 애플리케이션을 실행하는 프로세스는 다음과 같습니다.
애플리케이션 컴파일 및 실행
이전 섹션의 코드가 완료되면 Maven 및 Gradle과 같은 빌드 도구를 사용하여 코드를 Jar 패키지로 컴파일하고 Hadoop 클러스터에 제출할 수 있습니다.
컴파일 프로세스에는 관련 종속성을 가져오기 위해 네트워킹이 필요하므로 시간이 오래 걸립니다 (약 1 시간 피크). 따라서 여기서는 컴파일 프로세스를 건너뛰고 후속 실험을 위해 Hadoop 설치 디렉터리에 이미 컴파일된 Jar 패키지를 사용합니다.
이 단계에서는 maven 으로 지정된 jar 를 빌드하는 대신 간단한 예제 jar 를 사용하여 yarn 애플리케이션을 실행합니다.
터미널에서 yarn jar 명령을 사용하여 실행을 제출하십시오. 다음 명령에 포함된 매개변수는 실행할 Jar 패키지의 경로, 기본 클래스의 이름, YARN 프레임워크에 제출된 Jar 패키지의 경로, 실행할 셸 명령의 수 및 컨테이너의 수입니다.
/home/hadoop/hadoop/bin/yarn jar /home/hadoop/hadoop/share/hadoop/mapreduce/hadoop-mapreduce-examples-3.3.6.jar pi 3 3
터미널에서 출력을 보고 애플리케이션 실행 진행 상황을 확인할 수 있습니다.
Estimated value of Pi is 3.55555555555555555556
작업을 실행하는 동안 터미널 출력에서 Client 초기화, RM 에 연결 및 클러스터 정보 획득과 같은 각 단계의 프롬프트를 볼 수 있습니다.
애플리케이션 실행 결과 보기
데스크톱에서 Firefox 웹 브라우저를 두 번 클릭하여 열고 주소 표시줄에 다음 URL 을 입력하여 Hadoop 클러스터의 YARN 패턴에서 노드의 리소스 정보를 볼 수 있습니다.
http://localhost:8088
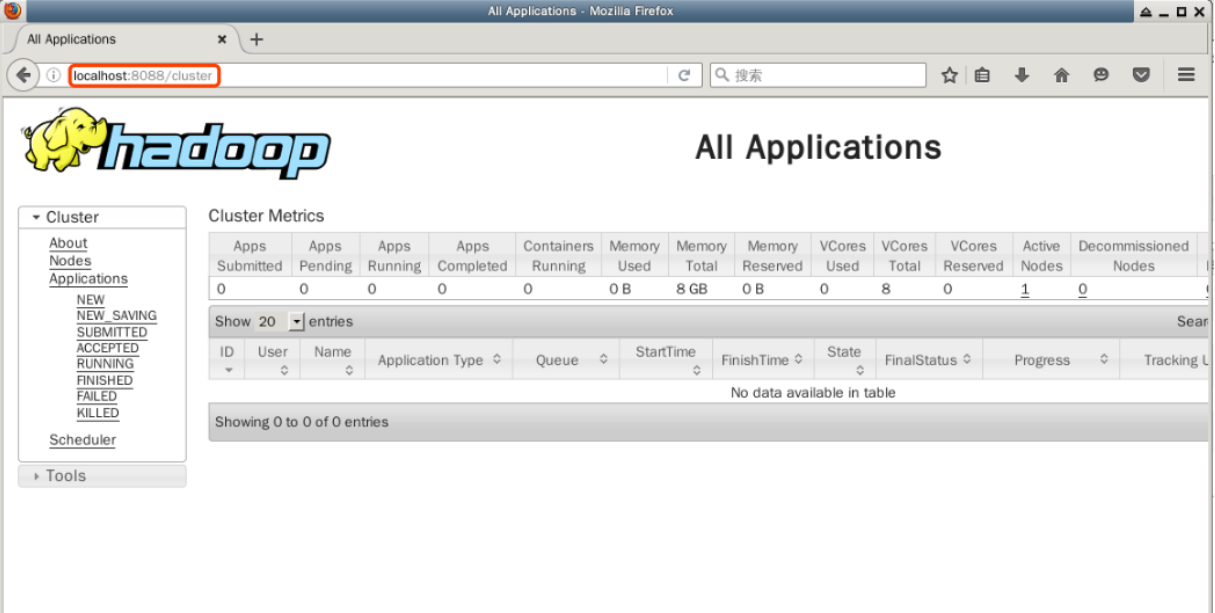
이 페이지에는 노드, 애플리케이션 및 스케줄러의 상태를 포함하여 Hadoop 클러스터에 대한 모든 정보가 표시됩니다.
이 중 가장 중요한 것은 애플리케이션 관리이며, 여기에서 나중에 제출된 애플리케이션의 실행 상태를 볼 수 있습니다. 지금은 Firefox 브라우저를 닫지 마십시오.
요약
Hadoop 의사 분산 클러스터의 완료를 기반으로, 이 랩은 YARN 프레임워크의 아키텍처, 작동 원리, 구성, 개발 및 모니터링 기술을 계속해서 가르칩니다. 이 과정에서는 많은 코드와 구성 파일이 제공되므로 주의 깊게 읽어보시기 바랍니다.


