소개
이 프로젝트에서는 HTML Canvas 를 사용하여 이미지에 확대경 효과를 만드는 방법을 배우게 됩니다. 이 효과는 이미지 갤러리나 제품 웹사이트에서 자주 볼 수 있으며, 사용자가 이미지 위에 마우스를 올리면 특정 부분의 확대된 보기를 얻을 수 있습니다. 확대경 효과는 새로운 창이나 페이지를 열지 않고도 상세한 보기를 제공합니다.
👀 미리보기
🎯 과제
이 프로젝트에서는 다음을 배우게 됩니다:
- HTML Canvas 요소를 초기화하고 설정하는 방법
- Canvas 에 이미지를 로드하는 방법
- 마우스 움직임에 대한 이벤트 리스너를 구현하는 방법
- 선택기 및 확대된 표시를 위한 헬퍼 함수를 만드는 방법
🏆 성과
이 프로젝트를 완료하면 다음을 수행할 수 있습니다:
- Canvas API 를 사용하여 이미지를 그리고 조작할 수 있습니다.
- 마우스 좌표를 추적하고 마우스 움직임 이벤트에 응답할 수 있습니다.
- 이미지의 일부를 복사하고 표시하여 확대경 효과를 만들 수 있습니다.
웹 페이지 디자인
두 개의 canvas (canvas 및 copycanvas) 와 확대 기능을 위한 선택기 역할을 할 사각형 div 를 사용하여 간단한 웹 페이지를 디자인합니다.
index.html에 다음을 추가합니다:
<!doctype html>
<html lang="en">
  <head>
    <title>Magnifying Effect Using Canvas</title>
    <meta http-equiv="Content-Type" content="text/html; charset=utf-8" />
    <style>
      #copycanvas {
        border: 1px solid #000;
        display: none;
      }
      #square {
        width: 90px;
        height: 90px;
        background-color: #cc3;
        border: 1px solid #f00;
        opacity: 0.5;
        position: absolute;
        z-index: 999;
        display: none;
        cursor: crosshair;
      }
    </style>
  </head>
  <body>
    <canvas id="canvas" width="500" height="400"></canvas>
    <canvas id="copycanvas" width="300" height="300"></canvas>
    <div id="square"></div>
    <script src="main.js"></script>
  </body>
</html>
Canvas 설정 및 이미지 로드
이제 canvas 를 초기화하고, 이미지 객체를 생성하고, 이미지를 canvas 에 로드합니다.
- canvas 와 컨텍스트를 초기화합니다.
// main.js
var canvas = document.getElementById("canvas");
var context = canvas.getContext("2d");

// Initialize the copy canvas and its context
var copycanvas = document.getElementById("copycanvas");
var copycontext = copycanvas.getContext("2d");

// Initialize the square selector
var square = document.getElementById("square");
var squaredata = {};
// getBoundingClientRect method can get the top, bottom, left and right coordinates of the element relative to the browser
box = canvas.getBoundingClientRect();
- 이미지를 로드하고 canvas 에 그립니다.
var image = new Image();
image.src = "corgi.png";
image.onload = function () {
  // Here the canvas method of drawing images is used
  context.drawImage(image, 0, 0, canvas.width, canvas.height);
};
마우스 움직임 이벤트 리스너 구현
확대 효과를 상호 작용하게 만들기 위해, 이미지 위로 마우스가 움직일 때를 감지하는 이벤트 리스너를 추가합니다.
- canvas 위에서 마우스 좌표를 캡처합니다.
// main.js
canvas.onmouseover = function (e) {
  var x = e.clientX;
  var y = e.clientY;
  createSquare(x, y);
};
- 이제 확대 효과가 마우스 움직임을 따라가도록 합니다. 이 움직임을 추적하고 그에 따라 효과를 업데이트하는 함수를 구현합니다.
// main.js
// Track the mouse movement to handle the magnifying effect
window.onmousemove = function (e) {
  var x = e.clientX;
  var y = e.clientY;
  // Determine if the mouse is over the canvas
  if (
    x >= canvas.offsetLeft &&
    x <= canvas.offsetLeft + canvas.width &&
    y >= canvas.offsetTop &&
    y <= canvas.offsetTop + canvas.height
  ) {
    createSquare(x, y); // Update the magnifying effect
  } else {
    hideSquare(); // Hide the magnifying effect when the mouse is out
    hideCanvas();
  }
};
선택자 및 확대 표시를 위한 헬퍼 함수 생성
스크립트의 주요 기능은 확대 효과를 생성하고 이미지의 필요한 부분을 복사하는 것입니다. 이제 이러한 기능을 정의해 보겠습니다.
- 사각형과 복사 canvas 를 표시하거나 숨기는 함수를 정의합니다.
// main.js
function showSquare() {
  square.style.display = "block";
}

function hideSquare() {
  square.style.display = "none";
}

function showCanvas() {
  copycanvas.style.display = "inline";
}

function hideCanvas() {
  copycanvas.style.display = "none";
}
- 확대 효과를 생성합니다.
function createSquare(x, y) {
  // Position adjustments to keep the square within canvas boundaries
  x = x - 45 < canvas.offsetLeft ? canvas.offsetLeft : x - 45;
  y = y - 45 < canvas.offsetTop ? canvas.offsetTop : y - 45;

  x = x + 90 < box.right ? x : box.right - 90;
  y = y + 90 < box.bottom ? y : box.bottom - 90;

  squaredata.left = x; // Update global state
  squaredata.top = y;

  moveSquare(x, y); // Position the square
  copy(); // Invoke the magnifying effect
}
- 사각형의 위치를 지정하고 확대를 호출합니다.
// Function to move the square selector and the magnified display
function moveSquare(x, y) {
  square.style.left = x + "px";
  square.style.top = y + "px";
  showCanvas();
  showSquare();
}
- 복사 canvas 에 확대 효과를 생성합니다.
function copy() {
  copycontext.drawImage(
    canvas, // Specify the source canvas
    squaredata.left - box.left, // Position to start copying from
    squaredata.top - box.top,
    90, // Width and height of the data to copy
    90,
    0, // Destination position on the copy canvas
    0,
    copycanvas.width,
    copycanvas.height
  );
}
프로젝트 실행
- 웹 브라우저에서
index.html을 엽니다.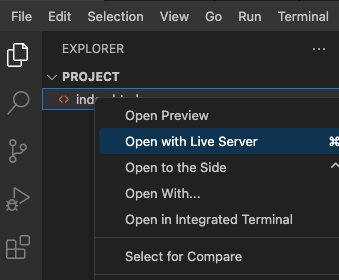
- 확대 효과를 보려면 이미지 위로 마우스를 가져갑니다.
- 페이지의 효과는 다음과 같습니다.
요약
이 프로젝트에서 HTML5 의 canvas 기능을 사용하여 확대경 효과를 성공적으로 구현했습니다. drawImage() 메서드와 상호 작용하고, 마우스 이벤트를 처리하며, 사용자 동작에 반응하도록 효과를 만드는 방법을 배웠습니다. 이는 기본 버전이며, 확대 수준 조정, 실제 확대경 오버레이 추가 등 많은 개선 사항을 만들 수 있습니다. 즐거운 코딩 되세요!