소개
이 프로젝트에서는 TCP 프로토콜을 사용하여 간단한 이미지 업로드 애플리케이션을 구축하는 방법을 배우게 됩니다. 애플리케이션은 클라이언트와 서버로 구성되며, 클라이언트는 서버에 이미지를 업로드할 수 있고, 서버는 이미지를 수신하여 저장합니다.
👀 미리보기


🎯 과제
이 프로젝트에서는 다음을 배우게 됩니다:
- 들어오는 클라이언트 연결을 수신하고 업로드된 이미지를 받기 위해 서버를 설정하는 방법
- 로컬 이미지 파일을 읽고 서버로 전송하는 클라이언트를 구현하는 방법
- TCP 소켓을 사용하여 클라이언트와 서버 간의 통신을 처리하는 방법
- 이미지 업로드 성공 시 클라이언트에게 피드백을 제공하는 방법
🏆 성과
이 프로젝트를 완료하면 다음을 수행할 수 있습니다:
- Java 를 사용하여 서버 - 클라이언트 아키텍처를 생성합니다.
- 클라이언트와 서버 간의 파일 전송에 TCP 소켓을 사용합니다.
- Java 에서 파일 I/O 작업을 처리합니다.
- 기본적인 오류 처리 및 피드백 메커니즘을 구현합니다.
서버 설정
이 단계에서는 업로드된 이미지를 수신하도록 서버를 설정하는 방법을 배우게 됩니다.
코드 편집기에서
org/labex/service/UploadService.java파일을 엽니다.main()메서드에서 포트10203에서 들어오는 클라이언트 연결을 수신 대기하는ServerSocket객체를 생성합니다:
import java.io.BufferedInputStream;
import java.io.BufferedOutputStream;
import java.io.FileOutputStream;
import java.io.IOException;
import java.io.InputStream;
import java.io.BufferedWriter;
import java.io.OutputStreamWriter;
import java.net.InetAddress;
import java.net.ServerSocket;
import java.net.Socket;
        try (ServerSocket server = new ServerSocket(10203)) {
            // Continuously accept client connections
            while (true) {
                // Server waits
                // Returns the client's Socket if there's a connection
                Socket client = server.accept();
                InetAddress clientAddress = client.getInetAddress();
                // Receive the uploaded image from the client
                // Input stream: Reads the image file stream sent by the client
                // Output stream: Writes to the local image
                String name = "/home/labex/project/pic/mn.jpg";

                try (BufferedOutputStream bos = new BufferedOutputStream(new FileOutputStream(name));
                     InputStream in = client.getInputStream();
                     BufferedInputStream bis = new BufferedInputStream(in);) {

                    // Read the image file stream from the client
                    // Write to the local file
                    byte[] buffer = new byte[1024];
                    int length = -1;
                    while ((length = bis.read(buffer)) != -1) {
                        bos.write(buffer, 0, length);
                    }

                    // Output message to the client
                    try (BufferedWriter writer = new BufferedWriter(
                            new OutputStreamWriter(client.getOutputStream()))) {
                        writer.write("Reception Complete");
                        writer.newLine();
                    }
                }
            }

        } catch (IOException e) {
            e.printStackTrace();
        }
서버는 지속적으로 클라이언트 연결을 수락하고 업로드된 이미지를 수신합니다. 수신된 이미지는
/home/labex/project/pic/mn.jpg파일에 저장됩니다.이미지를 수신한 후 서버는 클라이언트에게 "Reception Complete" 메시지를 보냅니다.
클라이언트 구현
이 단계에서는 서버에 이미지를 업로드하는 클라이언트를 구현하는 방법을 배우게 됩니다.
코드 편집기에서
org/labex/client/UploadClient.java파일을 엽니다.main()메서드에서127.0.0.1:10203의 서버에 연결하는Socket객체를 생성합니다:
import java.io.BufferedInputStream;
import java.io.BufferedReader;
import java.io.FileInputStream;
import java.io.IOException;
import java.io.InputStreamReader;
import java.io.OutputStream;
import java.net.Socket;
import java.net.UnknownHostException;
        try (
            // Socket: Component for client communication
            // Reading local image => Sending to server via output stream
            // OutputStream: Sends the local image file stream to the server
            // BufferedInputStream: Reads the local image
            Socket client = new Socket("127.0.0.1", 10203);
            OutputStream out = client.getOutputStream();
            BufferedInputStream in = new BufferedInputStream(new FileInputStream(
                    "/home/labex/project/timg.jpg"))
        ) {
            // Reading 1024 bytes each time
            byte[] buffer = new byte[1024];
            int length = -1;
            while ((length = in.read(buffer)) != -1) {
                // Sending the read content to the server via the output stream
                out.write(buffer, 0, length);
            }
            // Temporary end of "output" (Socket not closed)
            client.shutdownOutput();

            // Reading feedback from the server
            try (BufferedReader reader = new BufferedReader(new InputStreamReader(client.getInputStream()))) {
                String reply = reader.readLine();
                System.out.println(reply);
            }
        } catch (UnknownHostException e) {
            e.printStackTrace();
        } catch (IOException e) {
            e.printStackTrace();
        }
클라이언트는 로컬 이미지 파일
/home/labex/project/timg.jpg를 읽고 소켓의 출력 스트림을 사용하여 서버로 전송합니다.이미지를 전송한 후 클라이언트는 서버로부터 피드백 메시지를 읽고 콘솔에 출력합니다.
서버가 "Reception Complete" 메시지를 보내면 이미지 업로드가 성공했음을 의미합니다.
이제 서버와 클라이언트의 구현을 모두 완료했습니다. 프로그램을 컴파일하고 실행하여 이미지 업로드 기능을 테스트할 수 있습니다.
실행
터미널을 열고 다음 명령을 실행하여 클라이언트 및 서버 프로그램을 컴파일합니다:
javac org/labex/client/UploadClient.java
javac org/labex/service/UploadService.java
서버를 시작하여 클라이언트를 수신 대기합니다:
java org.labex.service.UploadService
다른 터미널을 열어 클라이언트를 시작하여 이미지를 업로드하면 "Reception Complete" 프롬프트가 표시됩니다.

java org.labex.client.UploadClient
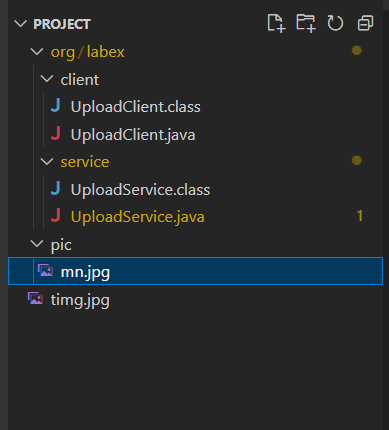
pic 폴더에 이미지가 포함되어 있는지 확인합니다:
ls pic
실행 결과는 다음과 같습니다:
요약
축하합니다! 이 프로젝트를 완료했습니다. LabEx 에서 더 많은 실습을 통해 기술을 향상시킬 수 있습니다.