
Introduction
This lab will guide you through creating a simple shell script that prints the classic "Hello, World!" message. You will learn the fundamentals of shell programming using the Bash shell, which is widely used in Unix-like operating systems such as Linux. This lab is designed for beginners, so don't worry if you're new to programming or using the command line.
If you are new to Linux or LabEx, it is recommended to begin with the Quick Start with Linux or Practice Linux Commands to learn the basics systematically. After completing the course, you can return here to practice your skills.
Introduction to WebIDE (VS Code)
In this step, you'll explore the WebIDE based on Visual Studio Code (VS Code). This integrated development environment provides a convenient way to edit scripts and access the terminal all in one place.
It's important to note that while the default shell in the WebIDE is Zsh, we'll be writing Bash scripts in this lab. Bash (Bourne Again SHell) is the most common and widely used shell in Unix-like systems. Zsh (Z Shell) is an extended version of Bash with some improvements and features. For the purposes of this lab, the differences won't affect our work, as our scripts will explicitly use Bash through the shebang line (#!/bin/bash).
Accessing the WebIDE
When you start the lab, you'll see the WebIDE interface in your browser. It consists of several key parts:
- File Explorer (left sidebar): Shows the directory structure and files.
- Editor (main area): Where you'll write and edit your scripts.
- Terminal (bottom panel): Where you'll run commands and execute scripts.
Opening the Terminal
To open the terminal in the WebIDE:
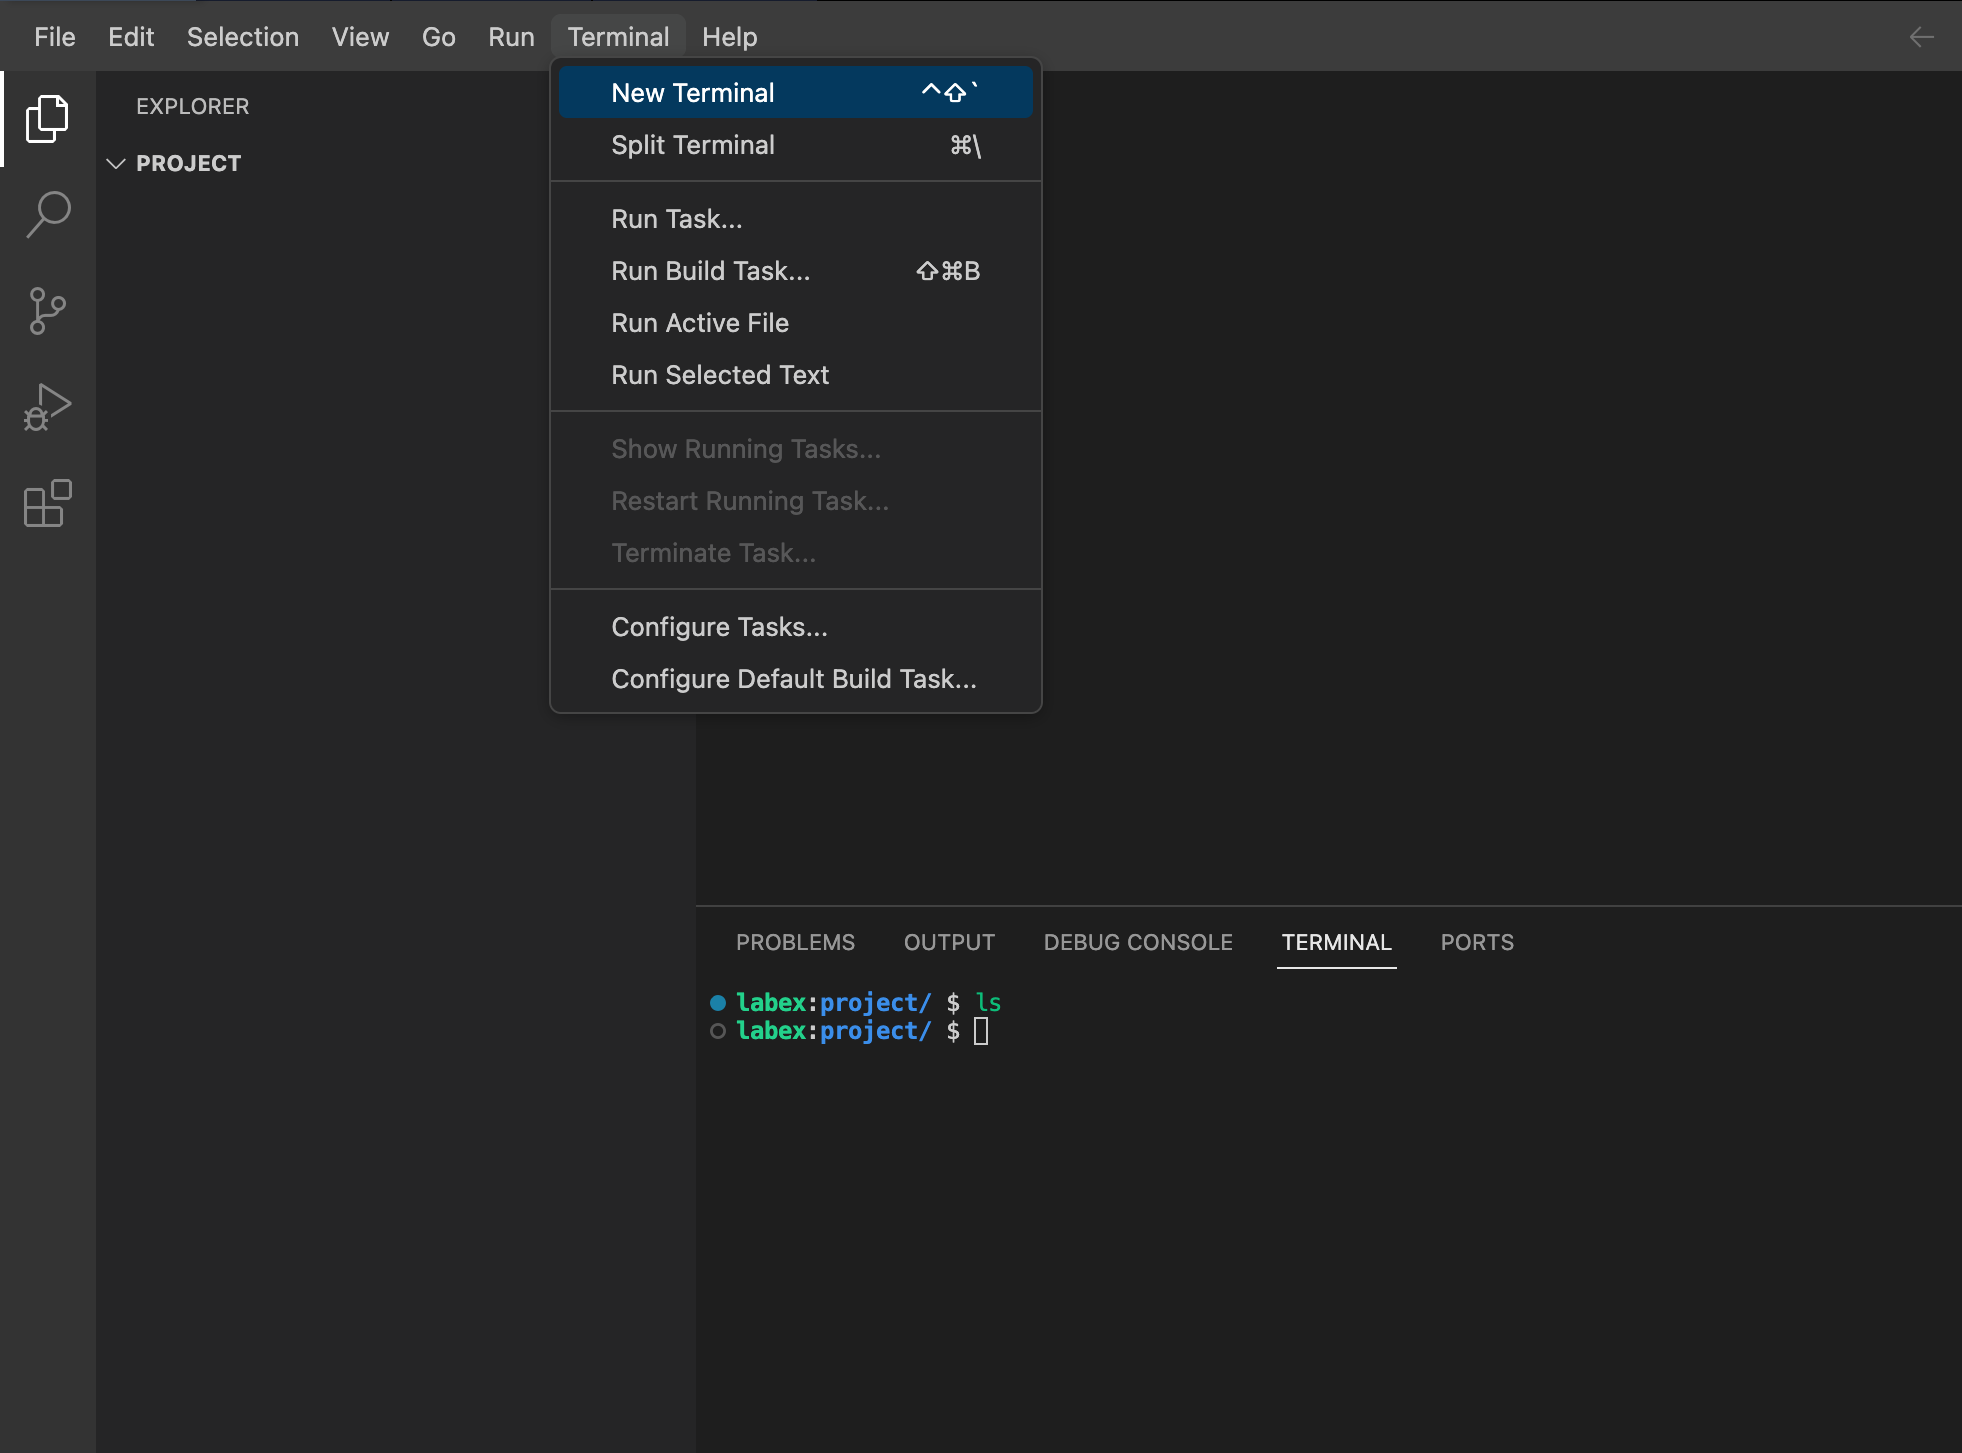
Click "Terminal" in the top menu, then select "New Terminal" from the dropdown.
This will open a new terminal panel at the bottom of the WebIDE. You'll see a command prompt that looks similar to this:
labex:project/ $
This indicates that you're logged in as the user labex, and your current directory is ~/project (which is shorthand for /home/labex/project).
Using the Terminal
You can use this terminal just like you would use a regular terminal on a Linux system. For example, to see the contents of your current directory, you can type:
ls
And press Enter. This will list all files and directories in your current location.
Create a Shell Script File
In this step, you'll create a new file for the shell script. We'll use the touch command in the terminal to do this. The touch command is used to create empty files or update the access and modification times of existing files.
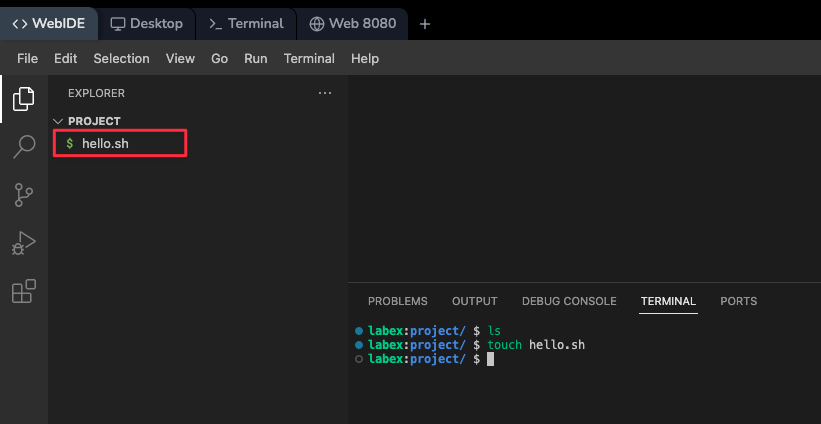
Type the following command in the terminal and press Enter:
touch hello.sh
This command creates an empty file named hello.sh in your current directory. The .sh extension is commonly used for shell scripts, but it's not mandatory.
You won't see any output after running this command. In Unix-like systems, no output usually means the command was successful.
Alternatively, you can create the file using the WebIDE interface:
In the File Explorer, right-click in the /home/labex/project directory, select "New File" from the context menu, type the filename hello.sh, and press Enter.
This will create a new file named hello.sh and open it in the editor.
Edit the Shell Script
In this step, you'll add content to the file using the WebIDE's built-in editor.
If the file isn't already open in the editor:
In the File Explorer, double-click hello.sh to open it.
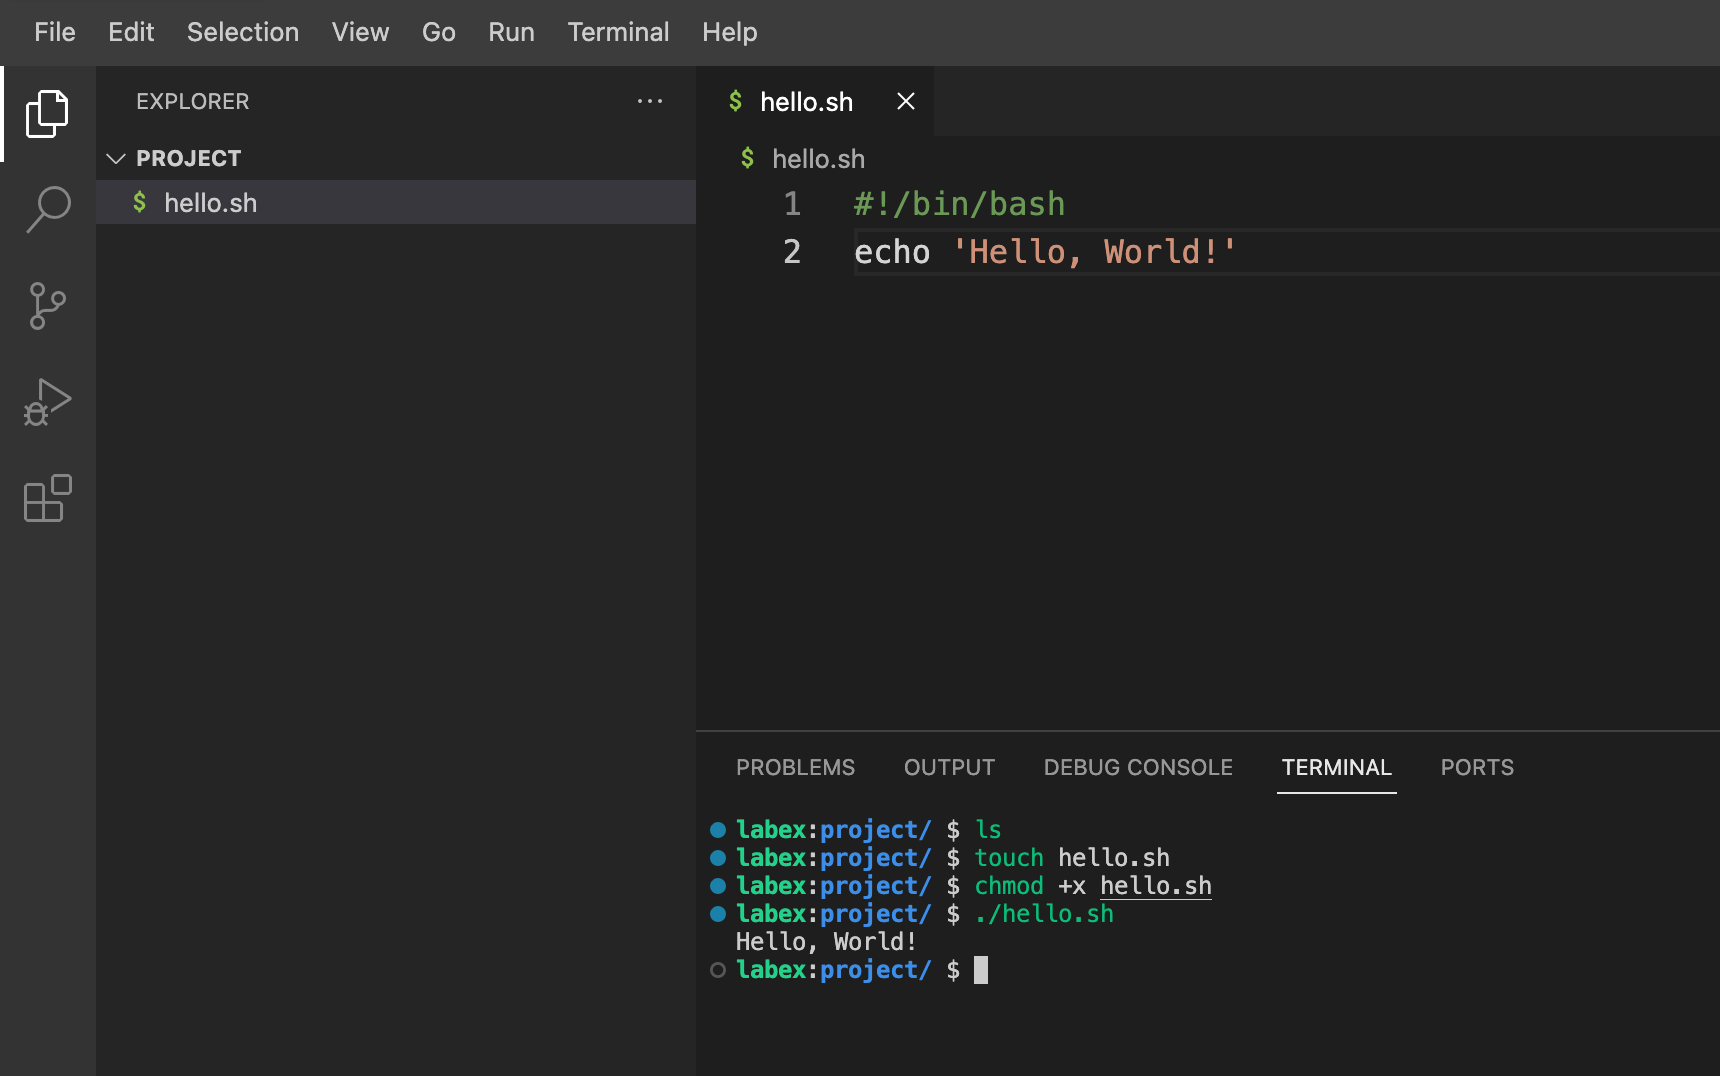
In the editor, type the following two lines exactly as shown:
#!/bin/bash
echo 'Hello, World!'
Let's break down what these lines mean:
#!/bin/bash- This is called a "shebang" line. It tells the system which interpreter should be used to run this script. In this case, we're specifying the Bash shell.echo 'Hello, World!'- This line uses theechocommand to print the text "Hello, World!" to the screen.
After typing these lines, save the file by pressing Ctrl + S or by going to File > Save in the top menu.
Make the Script Executable
In this step, you'll make the script executable. In Unix-like systems, files have permissions that control who can read, write, or execute them. By default, new files are not executable.
To make our script executable, we use the chmod command (which stands for "change mode"). Type the following command in the terminal and press Enter:
chmod +x hello.sh
Here's what this command does:
chmodis the command to change file permissions+xmeans "add execute permission"hello.shis the name of our file
You won't see any output from this command if it's successful.
Execute the Script
In this step, you'll run the executable script. To run a script in the current directory, we use ./ before the script name. This ./ tells the system to look for the script in the current directory.
Type the following command in the terminal and press Enter:
./hello.sh
If everything has been done correctly, you should see the output:
Hello, World!
Congratulations! You've just run your first shell script.
View the Script Contents
In this step, you'll view the script contents to confirm everything is correct. We can do this using the cat command, which displays the contents of a file in the terminal.
Type the following command in the terminal and press Enter:
cat hello.sh
You should see the contents of your script displayed:
#!/bin/bash
echo 'Hello, World!'
This is a good habit to get into when working with scripts – always double-check your work!
Summary
In this lab, you have successfully created and executed a simple Bash shell script. You've learned how to:
- Navigate the WebIDE and use its integrated terminal
- Create a new script file using either the
touchcommand or the WebIDE interface - Edit a file using the WebIDE's built-in editor
- Understand the purpose of the shebang line in shell scripts
- Use the
echocommand to print text - Make a script executable using the
chmodcommand - Run a shell script from the command line
- View the contents of a file using the
catcommand
These fundamental skills form the basis for more advanced shell scripting and automation tasks in Unix-like environments. As you continue to learn, you'll discover how powerful and flexible shell scripting can be for managing systems and automating tasks.
Remember, practice is key in programming. Try modifying the script to print different messages or create new scripts to perform other simple tasks. Don't be afraid to experiment – that's how you learn!


