
Introduction
Welcome to the Basic File Operations in Linux lab! In Linux, almost everything is treated as a file, which makes file operations fundamental to using the system. This lab will guide you through the most common commands for managing files and directories, helping you become more proficient in navigating and organizing your Linux system.
Understanding Your Working Environment
In Linux, each user typically has a "home directory," represented by ~. However, in this lab environment, we'll start in the /home/labex/project directory, which is our default working directory.
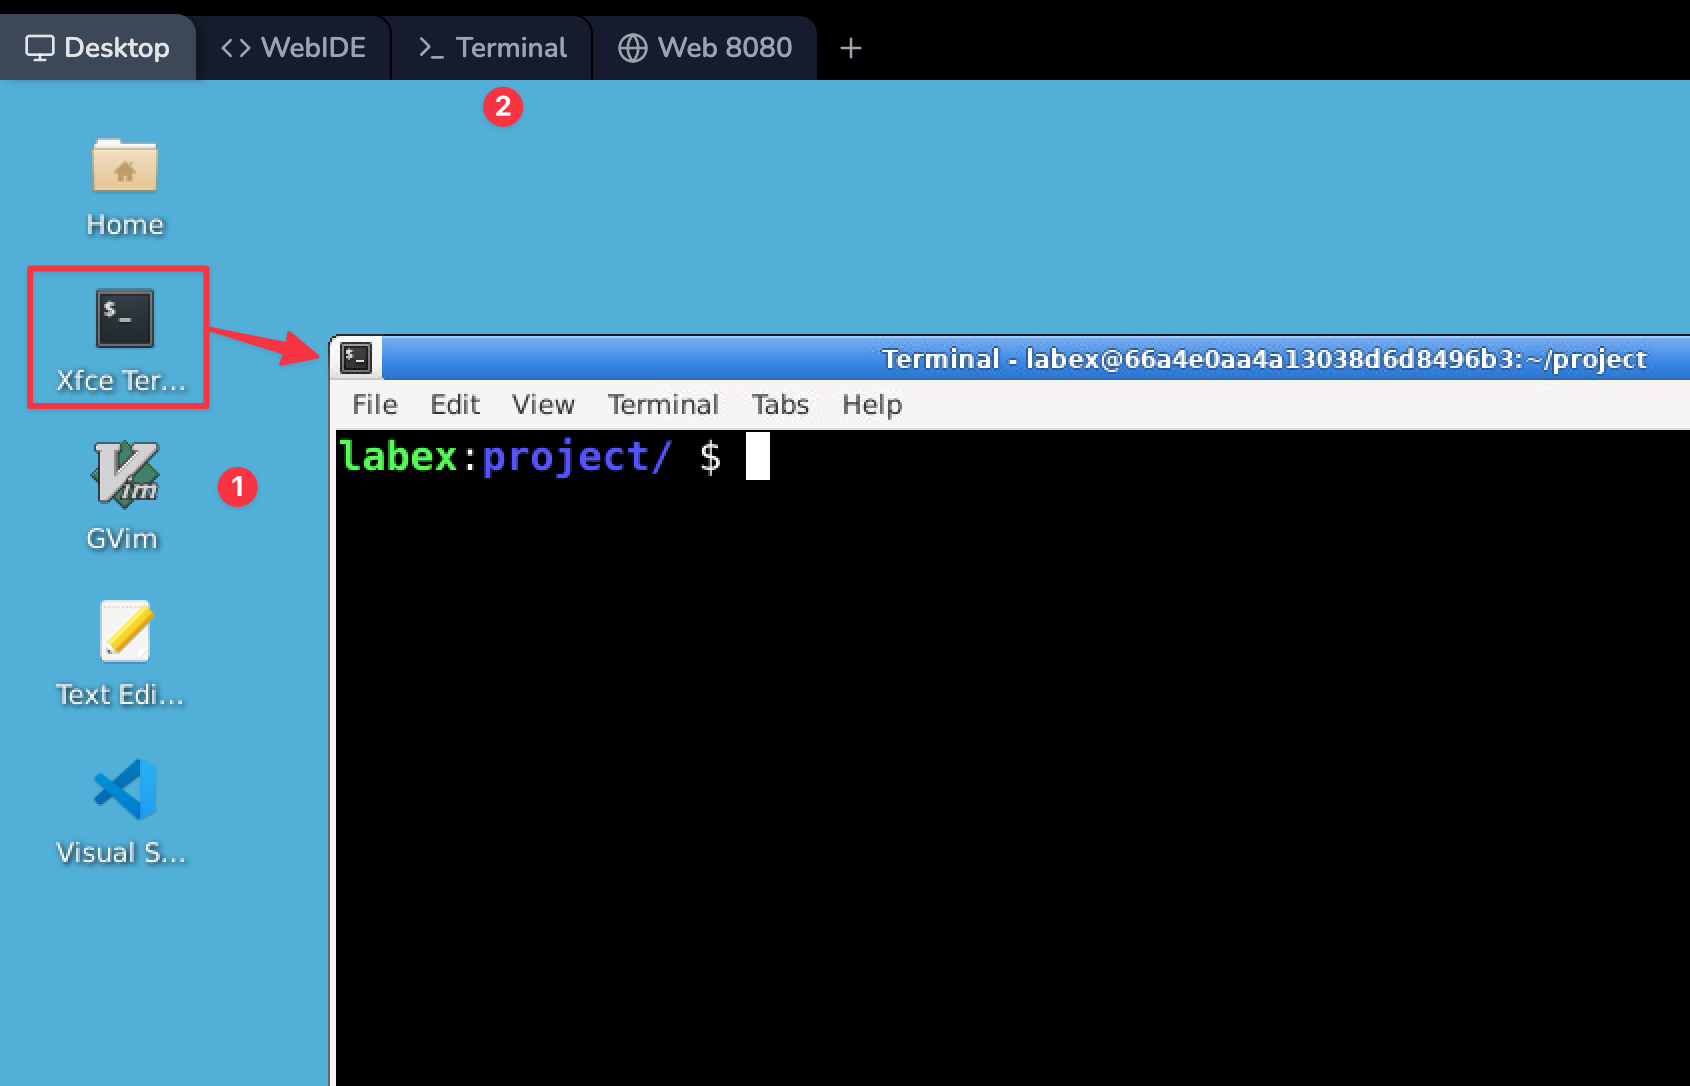
First, please open a terminal on the Desktop OR switch to the terminal tab in the lab environment.
Let's begin by understanding our current location:
pwd
pwd stands for "print working directory". It displays your current location in the file system. This command is crucial for orienting yourself in the Linux file structure. You should see /home/labex/project as the output.
Now, let's explore the relationship between the current directory and the home directory:
echo ~
Note: If you cannot type the
~symbol in the Desktop terminal due to keyboard layout differences in certain countries, you can try switching to the standalone Terminal tab in the upper left corner of the VM interface.
This command will display the path to your home directory, which should be /home/labex.
To see the contents of your current directory, use:
ls
This will list the files and directories in your current working directory (/home/labex/project).
Let's also check the contents of your home directory:
ls ~
This command lists the contents of your home directory, which may be different from your current working directory.
Understanding the distinction between your current working directory and your home directory is important for navigating the Linux file system effectively.
Navigating the File System
Linux uses what we call a "hierarchical file system". Think of it like a big tree with branches. The main trunk is called the "root directory", represented by a single forward slash /. All other directories and files branch out from this root.
Let's explore how to move around in this tree-like structure:
- Check your current location:
pwd
This should show /home/labex/project. If it doesn't, you might be in a different directory. Use cd /home/labex/project to get back to the starting point.
- View the contents of your current directory:
ls
This lists all files and folders in your current location. /home/labex/project is empty, so you won't see anything.
- Move up one level to the parent directory:
cd ..
The .. means "the directory above". After this command, do pwd again. You should now be in /home/labex.
- Return to your project directory:
cd project
This takes you back to /home/labex/project.
- Go to your home directory:
cd ~
The ~ is a shortcut for your home directory. Do pwd to confirm you're in /home/labex.
- Return to the project directory using an absolute path:
cd /home/labex/project
This is called an "absolute path" because it starts from the root (/) and gives the full location.
Creating Files and Listing Directory Contents
Now that we know how to navigate, let's create some files and explore how to list directory contents.
First, make sure you're in the /home/labex/project directory:
cd /home/labex/project
- Let's create a few files:
touch file1.txt
The touch command is used to create an empty file. If the file already exists, it updates the file's timestamp without changing its content. It's a simple way to create new, empty files.
echo "Hello, Linux" > file2.txt
This command does two things:
echois a command that prints text.- The
>symbol redirects the output ofechointo a file namedfile2.txt. If the file doesn't exist, it's created. If it does exist, its content is replaced.
echo "Hidden file" > .hiddenfile
This creates a hidden file. In Linux, any file or directory name that starts with a dot (.) is considered hidden.
- Now, let's create a directory:
mkdir testdir
The mkdir command (short for "make directory") creates a new directory named testdir.
- Basic listing:
ls

This shows the contents of your current directory. You should see file1.txt, file2.txt, and testdir.
- Detailed listing:
ls -l
The -l option (that's a lowercase L, not the number 1) provides a "long" format listing. You'll see additional details like file permissions, owner, size, and modification date.
- Show hidden files:
ls -a
This will show all files, including the hidden .hiddenfile we created.
- Combine options:
ls -la
This combines the long format (-l) with showing all files (-a).
- List contents of a specific directory:
ls -l testdir
This lists the contents of the testdir directory (which should be empty at this point).
The listing commands in this step are for hands-on practice and visual confirmation. Your progress is graded by checking that the required files and directory were created correctly.
Copying Files and Directories
Now that we have some files to work with, let's learn how to copy them:
- Copy a file:
cp file1.txt file1_copy.txt
This creates a copy of file1.txt named file1_copy.txt in the current directory.
Let's verify the copy:
ls
- Copy a file to another directory:
cp file2.txt testdir/
This copies file2.txt into the testdir directory.
- Copy a directory:
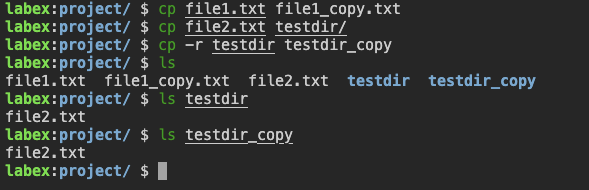
cp -r testdir testdir_copy
The -r option stands for "recursive". It's necessary when copying directories to ensure all contents are copied.
- Verify our copies:
ls
ls testdir
ls testdir_copy
Moving and Renaming Files and Directories
The mv command is used for both moving and renaming in Linux:
- Rename a file:
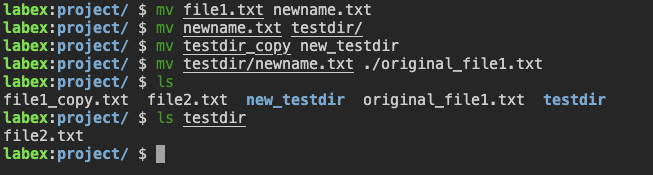
mv file1.txt newname.txt
This renames file1.txt to newname.txt.
- Move a file to a directory:
mv newname.txt testdir/
This moves newname.txt into the testdir directory.
- Rename a directory:
mv testdir_copy new_testdir
This renames testdir_copy to new_testdir.
- Move and rename in one command:
mv testdir/newname.txt ./original_file1.txt
This moves newname.txt out of testdir and renames it to original_file1.txt in the current directory.
- Verify our changes:
ls
ls testdir
Removing Files and Directories
Removing files and directories is a powerful operation. Unlike graphical interfaces, the command line often doesn't have a "Recycle Bin" or "Trash". Deletions made with rm are usually permanent. Always double-check your commands before executing them!
Let's clean up the files and directories we created. Make sure you are in the /home/labex/project directory.
pwd
ls -a
You should see files like original_file1.txt, .hiddenfile, file2.txt, and directories like testdir, new_testdir.
.
..
.hiddenfile
file1_copy.txt
file2.txt
new_testdir
original_file1.txt
testdir
Remove a single file:
rm original_file1.txtThe
rmcommand (short for "remove") deletes files. Let's check:lsoriginal_file1.txtshould be gone.Remove interactively (safer):
Let's try to remove
file2.txt, but this time using the interactive flag-i:rm -i file2.txtThe
-ioption prompts you for confirmation before deleting each file. Typey(for yes) and press Enter to confirm the deletion. If you typenor anything else, the file will not be deleted.lsIf you confirmed,
file2.txtwill be gone.See what happens with a non-empty directory:
Remember the
new_testdirwe created by renamingtestdir_copy? It still contains the copiedfile2.txt, sormdirwill fail. Let's confirm its contents first:ls new_testdirYou should see
file2.txt. Now tryrmdir:rmdir new_testdirrmdir(remove directory) only works on empty directories.lsnew_testdircan't be removed because it's not empty, so it should still appear in the listing.Attempt to remove a non-empty directory:
Now, let's try
rmdirontestdir, which still containsfile2.txt(copied in Step 4):ls testdir rmdir testdirYou will likely see an error message like
rmdir: failed to remove 'testdir': Directory not empty. This is expected becausermdircannot remove directories that contain files or other directories.Remove a directory and its contents (recursively):
To remove a directory that is not empty, we need to use
rmwith the-r(recursive) option:rm -r testdirThis command removes the
testdirdirectory and everything inside it. Use this command with caution.lstestdirshould now be gone.Force removal (use with extreme caution):
Sometimes, you might want to remove files without being prompted, even if they are write-protected (though we don't have any here). The
-f(force) option does this.Let's remove our hidden file:
rm .hiddenfile
ls -a
Now, let's combine
-rand-f. Therm -rfcommand is extremely powerful and potentially dangerous. It removes directories recursively (-r) and forces removal without prompting (-f).!!! DANGER ZONE !!! Be ABSOLUTELY SURE you know what you are deleting before running
rm -rf. A small typo could delete critical system files or your personal data. There is no undo. For example,rm -rf /could attempt to delete your entire system (if you have permissions). Always double-check the path.Let's create a temporary directory and file to demonstrate (safely):
mkdir temp_dir
touch temp_dir/temp_file.txt
ls -R temp_dir
Note: You might notice we used
-R(uppercase) withlsinstead of-r(lowercase) like we did withcpandrm. This is not just a case difference - they are completely different options! Forls,-Rmeans "recursive listing" (list subdirectories), while-rmeans "reverse sort order". Forcpandrm, the recursive option is-r(lowercase). Always check the manual (man command) to understand each command's specific options.Now, let's remove it forcefully:
rm -rf temp_dirVerify the removal:
lstemp_dirshould be gone.
Remember: In Linux command line, deleted files are generally gone forever. Use rm carefully!
Summary
Congratulations! You've learned the essential file operations in Linux:
- Navigating the file system with
cdandpwd - Creating files and directories with
touchandmkdir - Listing contents with
lsand its options - Copying files and directories with
cp - Moving and renaming with
mv - Removing files and directories with
rmandrmdir
These commands form the foundation of file management in Linux. With practice, you'll become proficient in managing your files and directories from the command line.
Remember to use these commands carefully, especially rm, as it permanently deletes files and directories without the possibility of recovery.
As you continue your Linux journey, explore man pages (e.g., man ls) to learn more about each command and its options. Happy exploring!


