
Introduction
In this step-by-step project, you'll learn how to create a Task Timer web application using HTML, CSS, and JavaScript. This web app will allow users to add tasks, start and stop timers for each task, and delete tasks. By the end of this project, you'll have a fully functional Task Timer web app with a modern and user-friendly interface.
👀 Preview
🎯 Tasks
In this project, you will learn:
- How to create the basic HTML structure for the Task Timer web app
- How to style the web app using CSS to make it visually appealing
- How to implement JavaScript functionality to add tasks to the app
- How to add timer functionality to start and stop timers for each task
- How to implement the ability to delete tasks from the app
🏆 Achievements
After completing this project, you will be able to:
- Handle user input and validation in web forms
- Start and stop timers dynamically using JavaScript
- Update and display time in a user-friendly format
- Delete elements from the Document Object Model (DOM) using JavaScript
- Structure and organize a simple web application project
- Create buttons and attach event listeners to them
- Clear input fields after user interaction
- Enable and disable buttons based on user actions
- Use data attributes to store information in HTML elements
Create the HTML Structure
Requirements:
- Open the
index.htmlfile. - Create the basic HTML structure with a title, header, input field for task names, an "Add Task" button, and an empty task list (
ul).
Functionality:
- Establish the initial structure of the Task Timer web app.
Steps:
<!doctype html>
<html lang="en">
  <head>
    <meta charset="UTF-8" />
    <meta name="viewport" content="width=device-width, initial-scale=1.0" />
    <title>Task Timer</title>
    <link rel="stylesheet" href="style.css" />
  </head>
  <body>
    <div class="container">
      <h1>Task Timer</h1>
      <div class="task-input">
        <input type="text" id="taskName" placeholder="Task Name" />
        <button Task</button>
      </div>
      <ul id="taskList"></ul>
    </div>
    <script src="script.js"></script>
  </body>
</html>
This HTML structure includes the main container, a header, an input field for task names, an "Add Task" button, and an empty task list (ul) that will be populated dynamically.
CSS Styling
Requirements:
- Open the
style.cssfile. - Add CSS styles to make the web app visually appealing.
Functionality:
- Apply basic styles to the web app elements.
Steps:
body {
  font-family: "Arial", sans-serif;
  background-color: #f3f3f3;
  margin: 0;
  padding: 0;
}

.container {
  max-width: 600px;
  margin: 20px auto;
  background-color: #fff;
  border-radius: 10px;
  box-shadow: 0 0 10px rgba(0, 0, 0, 0.2);
  padding: 20px;
}

h1 {
  text-align: center;
  color: #333;
}

.task-input {
  display: flex;
  margin-bottom: 20px;
}

input[type="text"] {
  flex: 1;
  padding: 10px;
  border: none;
  border-bottom: 2px solid #333;
  border-radius: 0;
  outline: none;
}

button {
  padding: 10px 20px;
  background-color: #333;
  color: white;
  border: none;
  border-radius: 5px;
  cursor: pointer;
  outline: none;
}

button:hover {
  background-color: #444;
}

ul {
  list-style-type: none;
  padding: 0;
}

li {
  display: flex;
  justify-content: space-between;
  align-items: center;
  border: 1px solid #ccc;
  border-radius: 5px;
  padding: 10px;
  margin-bottom: 10px;
  background-color: #f9f9f9;
}

.timer-controls {
  display: flex;
  gap: 10px;
}

.timer-controls button {
  padding: 8px 16px;
  background-color: #333;
  color: white;
  border: none;
  border-radius: 5px;
  cursor: pointer;
  outline: none;
}

.timer-controls button:hover {
  background-color: #444;
}

.task-time {
  font-size: 1.2rem;
  color: #555;
}
We will add the CSS styles in the next steps to ensure proper coordination with the JavaScript functionality.
Implement Task Adding Functionality
Requirements:
- Open the
script.jsfile. - Create the addTask function that adds tasks to the list when the "Add Task" button is clicked.
Functionality:
- Users can add tasks to the task list.
Steps:
// Function to add a new task
function addTask() {
  const taskNameInput = document.getElementById("taskName");
  const taskName = taskNameInput.value.trim();

  if (taskName === "") {
    alert("Please enter a task name.");
    return;
  }

  // Create a new list item (li)
  const li = document.createElement("li");
  li.innerHTML = `
        <span>${taskName}</span>
        <div class="timer-controls">
            <button
            <button
            <button
        </div>
        <span class="task-time">0:00</span>
    `;

  // Append the new task to the task list (ul)
  const taskList = document.getElementById("taskList");
  taskList.appendChild(li);

  // Clear the input field
  taskNameInput.value = "";
}
This code defines the addTask function, which creates a new task item when the "Add Task" button is clicked.
Implement Task Timer Start Functionality
Requirements:
- Expand the
script.jsfile. - Create the startTimer function that starts timers for tasks when the "Start" button is clicked.
Functionality:
- Users can start timers for specific tasks.
Steps:
// Function to start a timer
function startTimer(button) {
  // Retrieve the parent list item (li) of the clicked button
  const li = button.parentElement.parentElement;
  const taskTime = li.querySelector(".task-time");
  const startTime = Date.now();

  // Disable the "Start" button and enable the "Stop" button
  button.disabled = true;
  li.querySelector("button:nth-child(2)").disabled = false;

  // Update the timer display every second
  const interval = setInterval(() => {
    const elapsedTime = new Date(Date.now() - startTime);
    taskTime.textContent = elapsedTime.toISOString().substr(14, 5);
  }, 1000);

  // Store the interval ID in a data attribute for later use
  li.dataset.intervalId = interval;
}
This code defines the startTimer function, which starts a timer when the "Start" button is clicked.
Implement Task Timer Stop Functionality
Requirements:
- Continue in the
script.jsfile. - Create the stopTimer function that stops timers for tasks when the "Stop" button is clicked.
Functionality:
- Users can stop timers for specific tasks.
Steps:
// Function to stop a timer
function stopTimer(button) {
  const li = button.parentElement.parentElement;
  const taskTime = li.querySelector(".task-time");
  const intervalId = li.dataset.intervalId;

  clearInterval(intervalId);
  button.disabled = true;
  li.querySelector("button:nth-child(1)").disabled = false;

  // Display the final elapsed time
  const totalTime = taskTime.textContent;
  taskTime.textContent = totalTime;

  button.disabled = true;
}
This code defines the stopTimer function, which stops the timer when the "Stop" button is clicked.
Implement Task Deletion Functionality
Requirements:
- Still in the
script.jsfile. - Create the deleteTask function that allows users to delete tasks when the "Delete" button is clicked.
Functionality:
- Users can remove tasks from the list.
Steps:
// Function to delete a task
function deleteTask(button) {
  const li = button.parentElement.parentElement;
  li.remove();
}
This code defines the deleteTask function, which deletes a task when the "Delete" button is clicked.
Running the App
Open
index.htmlin a web browser.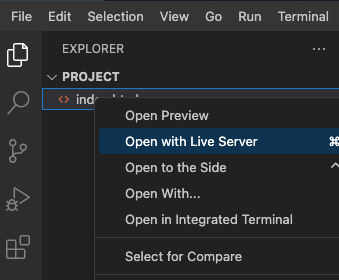
Test the application by adding expenses and verifying that the expense list and summary update correctly.
The effect of the page is as follows:
Summary
Congratulations! You've successfully created a Task Timer web app using HTML, CSS, and JavaScript. Users can add tasks, start and stop timers for each task, and delete tasks as needed. This web app provides a modern and user-friendly interface for tracking time spent on specific tasks or projects.


