
Introduction
In this lab, you will learn how to create your first HTML page using WebIDE (VS Code-like), a powerful and popular code editor for web development.
The comprehensive tutorial covers key aspects such as configuring WebIDE, generating an HTML5 boilerplate template, adding basic content to your web page, and previewing the result in a web browser. By following these step-by-step instructions, you will gain practical experience in web development fundamentals and develop a solid foundation for creating interactive and structured web pages.
Create a New HTML File
The LabEx WebIDE provides a modern, VS Code-like development environment for coding tasks. WebIDE is well-suited for web development projects, including HTML, CSS, and JavaScript.
To begin, open the WebIDE by clicking on the "WebIDE" tab in the LabEx interface. The WebIDE shows a file explorer on the left and a code editor on the right. There are also terminal and some other tools at the bottom.
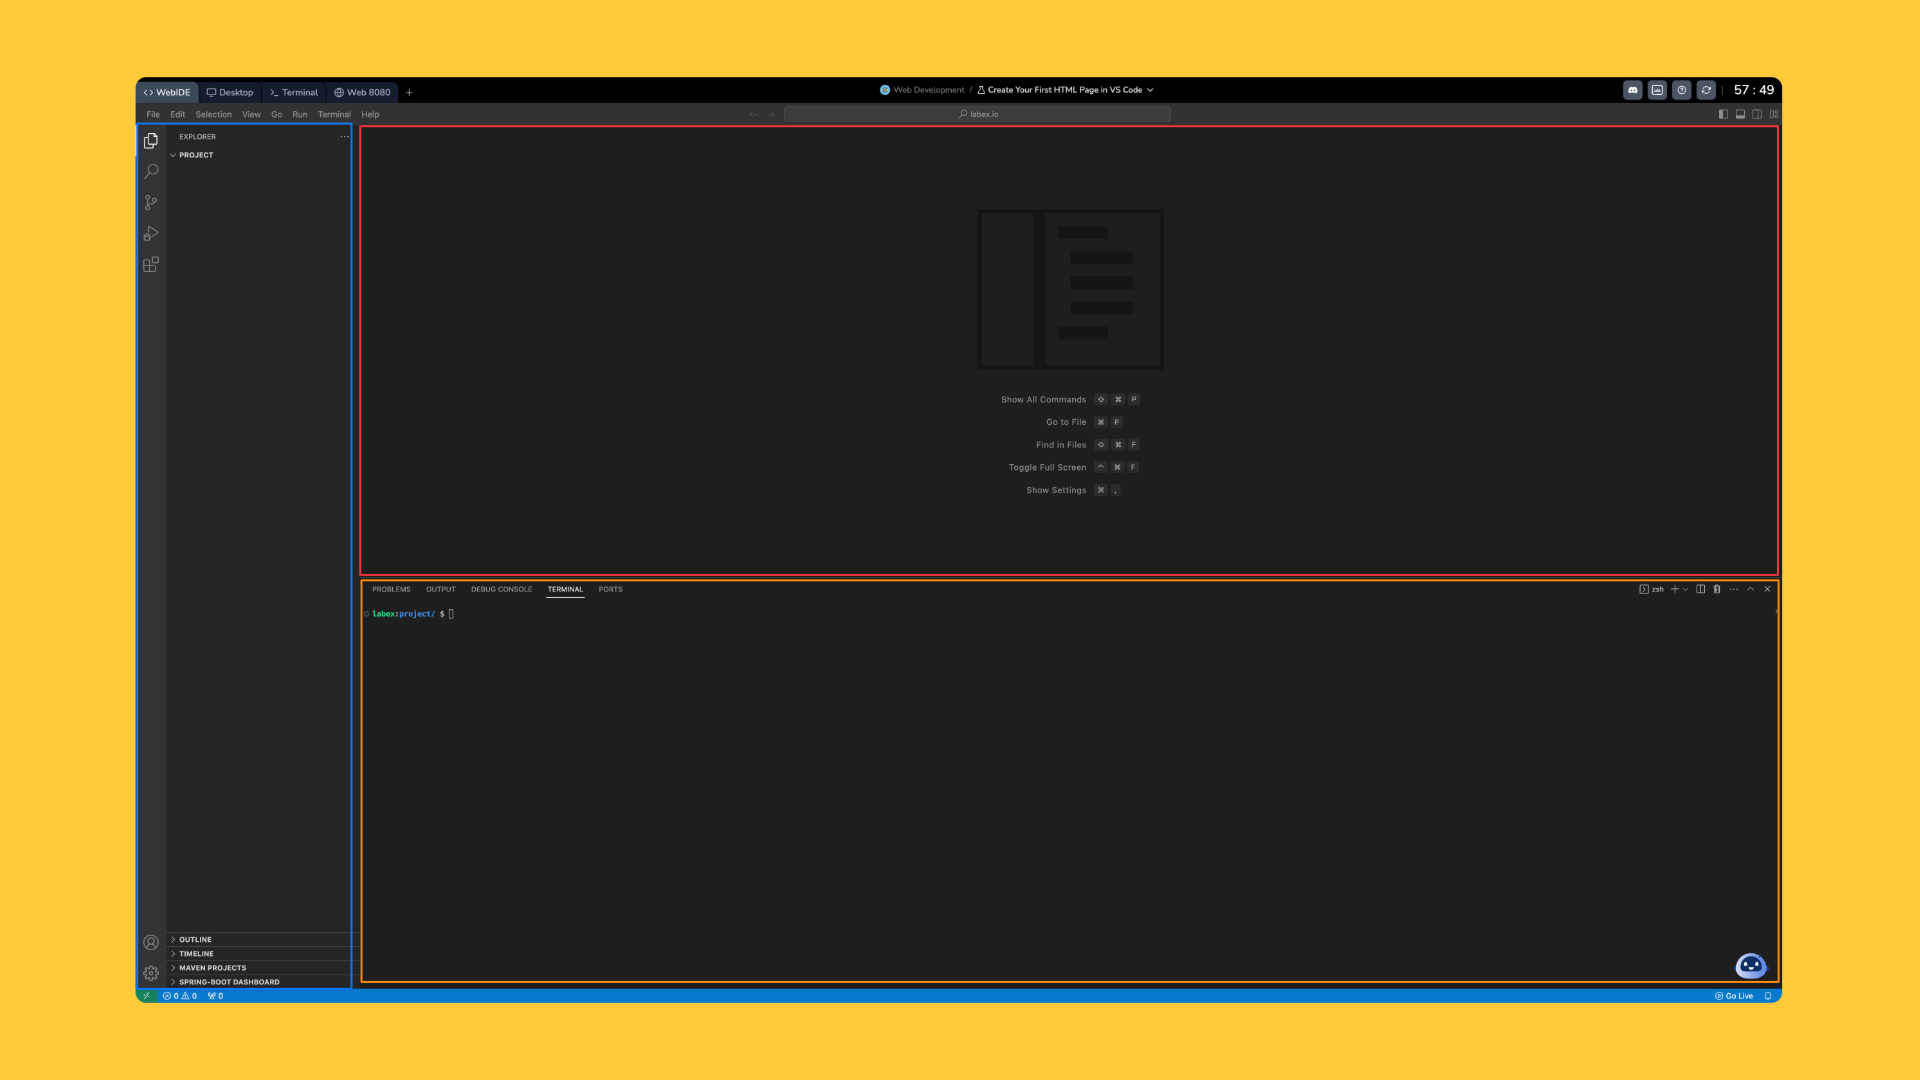
- File Explorer: Displays the project directory structure, where you can create, edit, and manage files. default working directory is
~/project. - Code Editor: Provides a text editor for writing and editing code. You can create new files, open existing files, and view code changes.
- Terminal: Offers a command-line interface for running shell commands, installing packages, and managing files. You can execute commands directly in the terminal. default working directory is
~/project.
In this step, you'll learn how to create a new HTML file in the WebIDE. HTML (HyperText Markup Language) is the standard markup language for creating web pages. Every web page starts with an HTML file.
In the WebIDE, follow these steps to create a new HTML file:
- Click on the "File" menu
- Select "New File"
- Save the file with the name
index.html
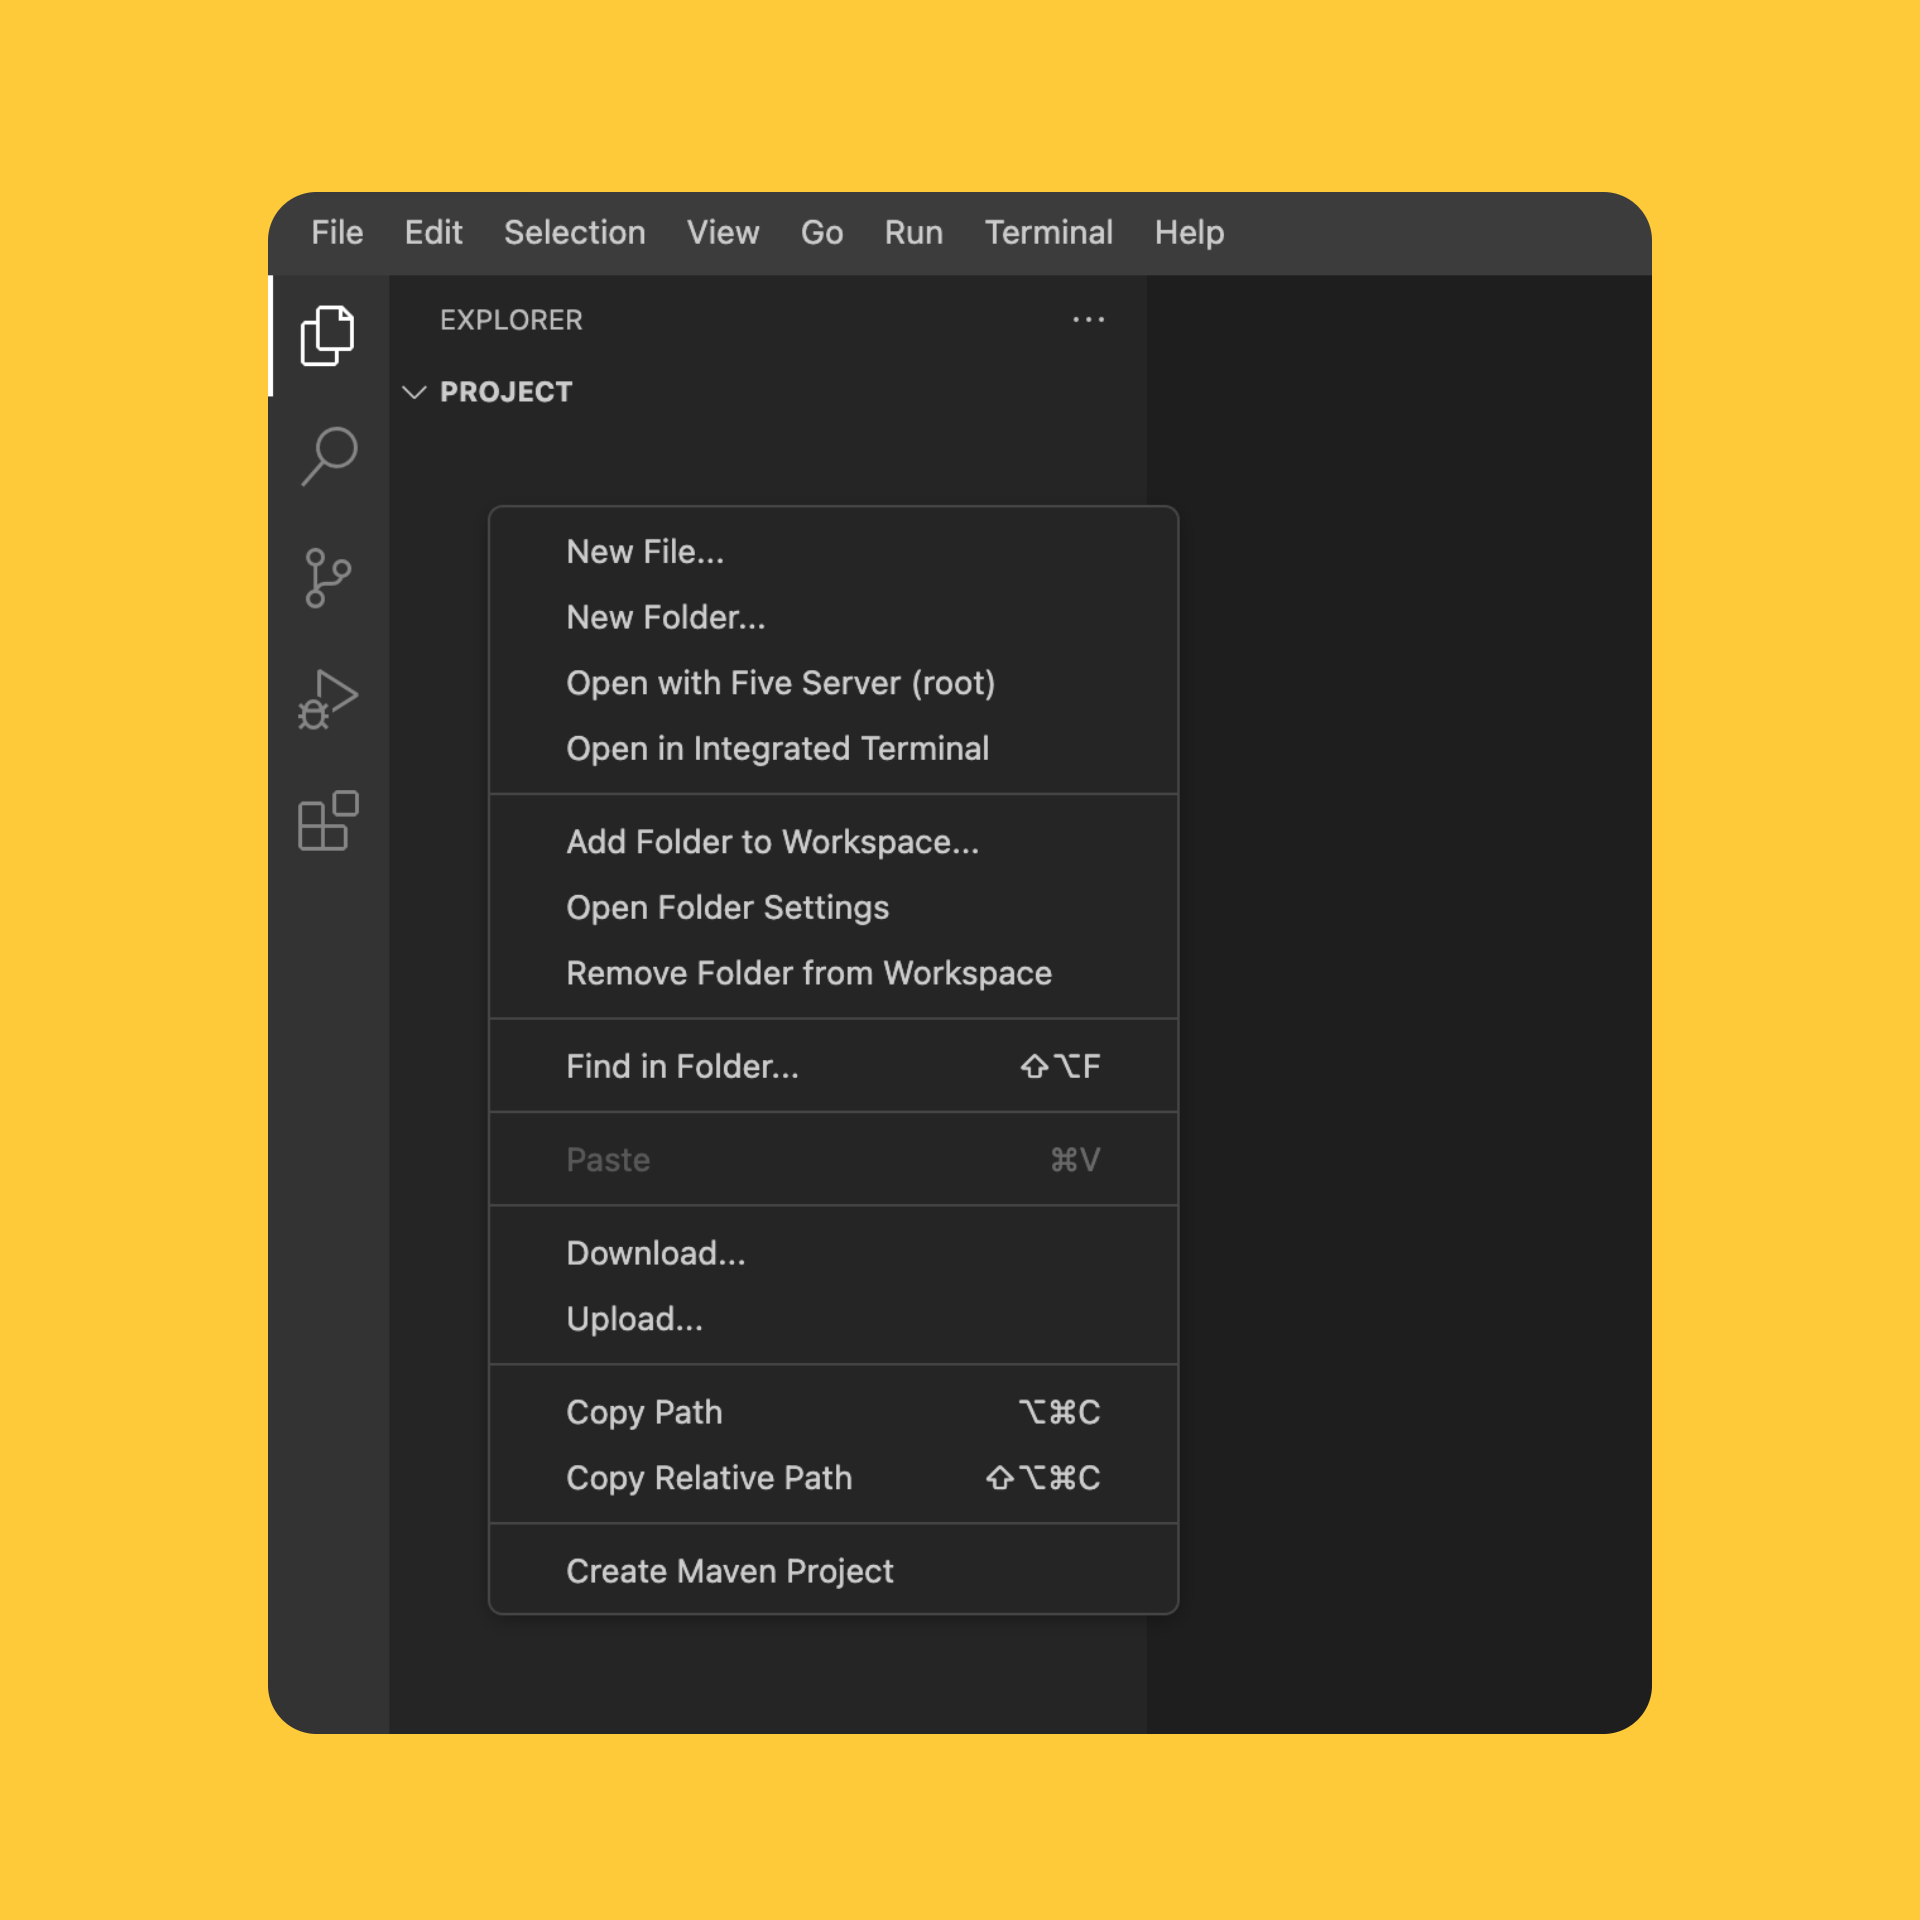
Alternatively, you can use the keyboard shortcut Ctrl+N to create a new file, and then save it as index.html.
When naming HTML files, remember these important rules:
- Use lowercase letters
- Use
.htmlfile extension - Avoid spaces in filenames
- Use descriptive names like
index.html,about.html, etc.
Let's verify the file has been created through the terminal:
ls ~/project
Example output:
index.html
The file is now ready for you to start adding HTML content in the next steps. The .html extension tells web browsers that this is an HTML document.
If you are familiar with the terminal, you can also create the file using the following command:
touch ~/project/index2.html
Learn more about Linux commands to enhance your terminal skills.
Generate HTML5 Boilerplate Template
In this step, you'll learn how to generate a standard HTML5 boilerplate template in WebIDE. A boilerplate is a standard template that provides the basic structure for an HTML document.
In the WebIDE, you can quickly generate an HTML5 template using a built-in shortcut. Follow these steps:
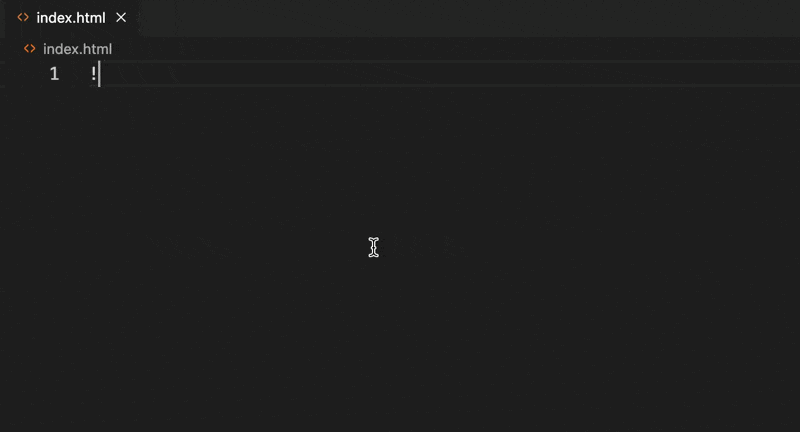
- Open your
index.htmlfile - Type
!(exclamation mark) - Press the
Tabkey
This will automatically generate a complete HTML5 template with all the essential elements:
<!doctype html>
<html lang="en">
  <head>
    <meta charset="UTF-8" />
    <meta name="viewport" content="width=device-width, initial-scale=1.0" />
    <title>Document</title>
  </head>
  <body></body>
</html>
Tips: You can copy-paste the template code to your
index.htmlfile if the shortcut doesn't work.
Let's break down the key components of this HTML5 template:
<!DOCTYPE html>declares this is an HTML5 document<html lang="en">is the root element with language specification<head>contains metadata about the document<meta charset="UTF-8">specifies character encoding<meta name="viewport">ensures proper rendering on mobile devices<title>sets the page title shown in browser tab<body>is where your page content will be added
You can modify the <title> to give your page a meaningful name.
Add Basic Content to HTML Page
In this step, you'll learn how to add basic content to your HTML page using different HTML elements. HTML uses tags to structure and display content on a web page.
Open your index.html file in the WebIDE and replace the empty <body> section with the following content:
Tips: Copy-paste the code snippet into your
index.htmlfile to add content. replace the existing<body></body>content. We will learn more about HTML elements in the next labs.
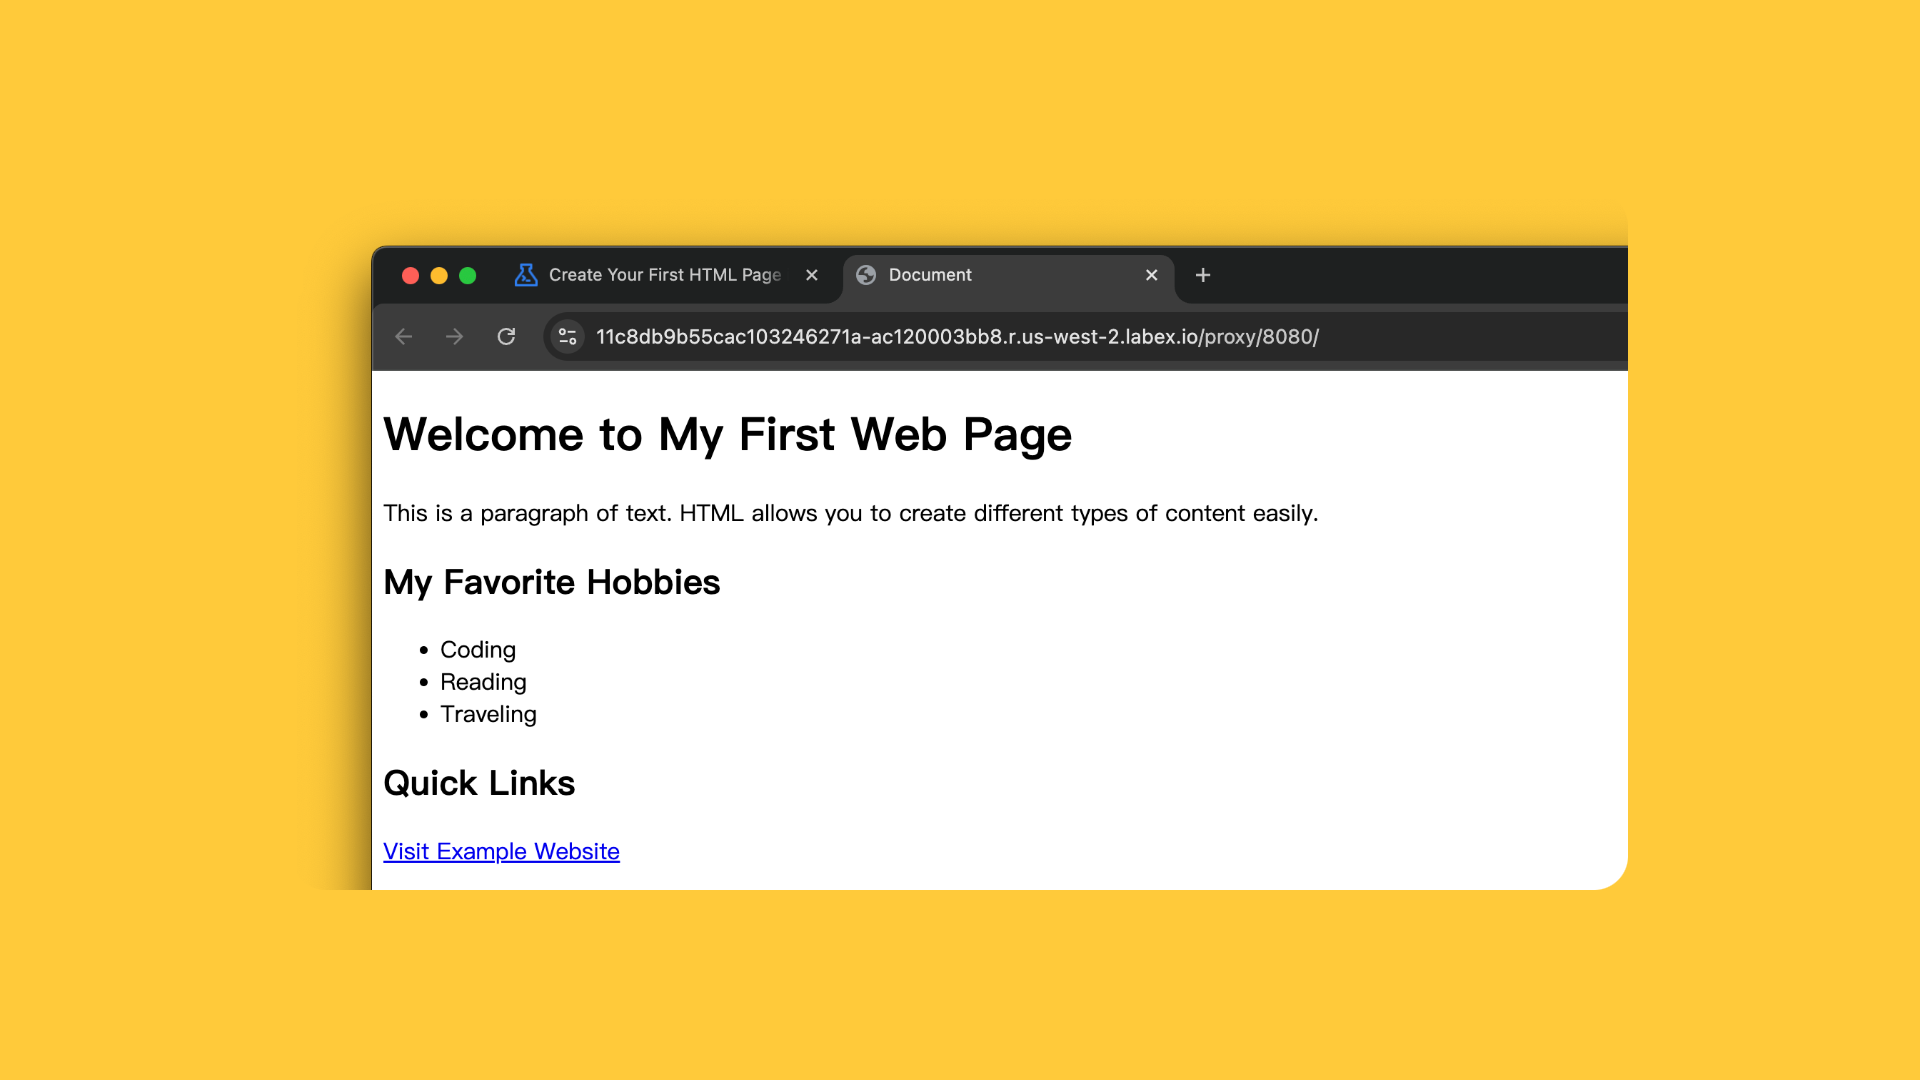
<body>
  <h1>Welcome to My First Web Page</h1>
  <p>
    This is a paragraph of text. HTML allows you to create different types of
    content easily.
  </p>

  <h2>My Favorite Hobbies</h2>
  <ul>
    <li>Coding</li>
    <li>Reading</li>
    <li>Traveling</li>
  </ul>

  <h2>Quick Links</h2>
  <a href="https://www.example.com">Visit Example Website</a>
</body>
Let's break down the HTML elements used:
<h1>and<h2>are heading tags (h1 is the main heading, h2 is a subheading)<p>is used for paragraphs of text<ul>creates an unordered (bulleted) list<li>represents list items<a>creates a hyperlink to another webpage
These basic elements help you structure and present content on your web page. Experiment with different tags to see how they change the appearance and layout of your content.
Some additional tips for beginners:
- Always close your HTML tags
- Use meaningful and descriptive content
- Indent your code for better readability
Preview and Render HTML in Browser
In this step, you'll learn how to preview and render your HTML page in a web browser. The LabEx VM provides a built-in browser preview feature in the WebIDE.
To preview your HTML file:
- In the WebIDE, click on the "Go Live" button at the bottom right corner.
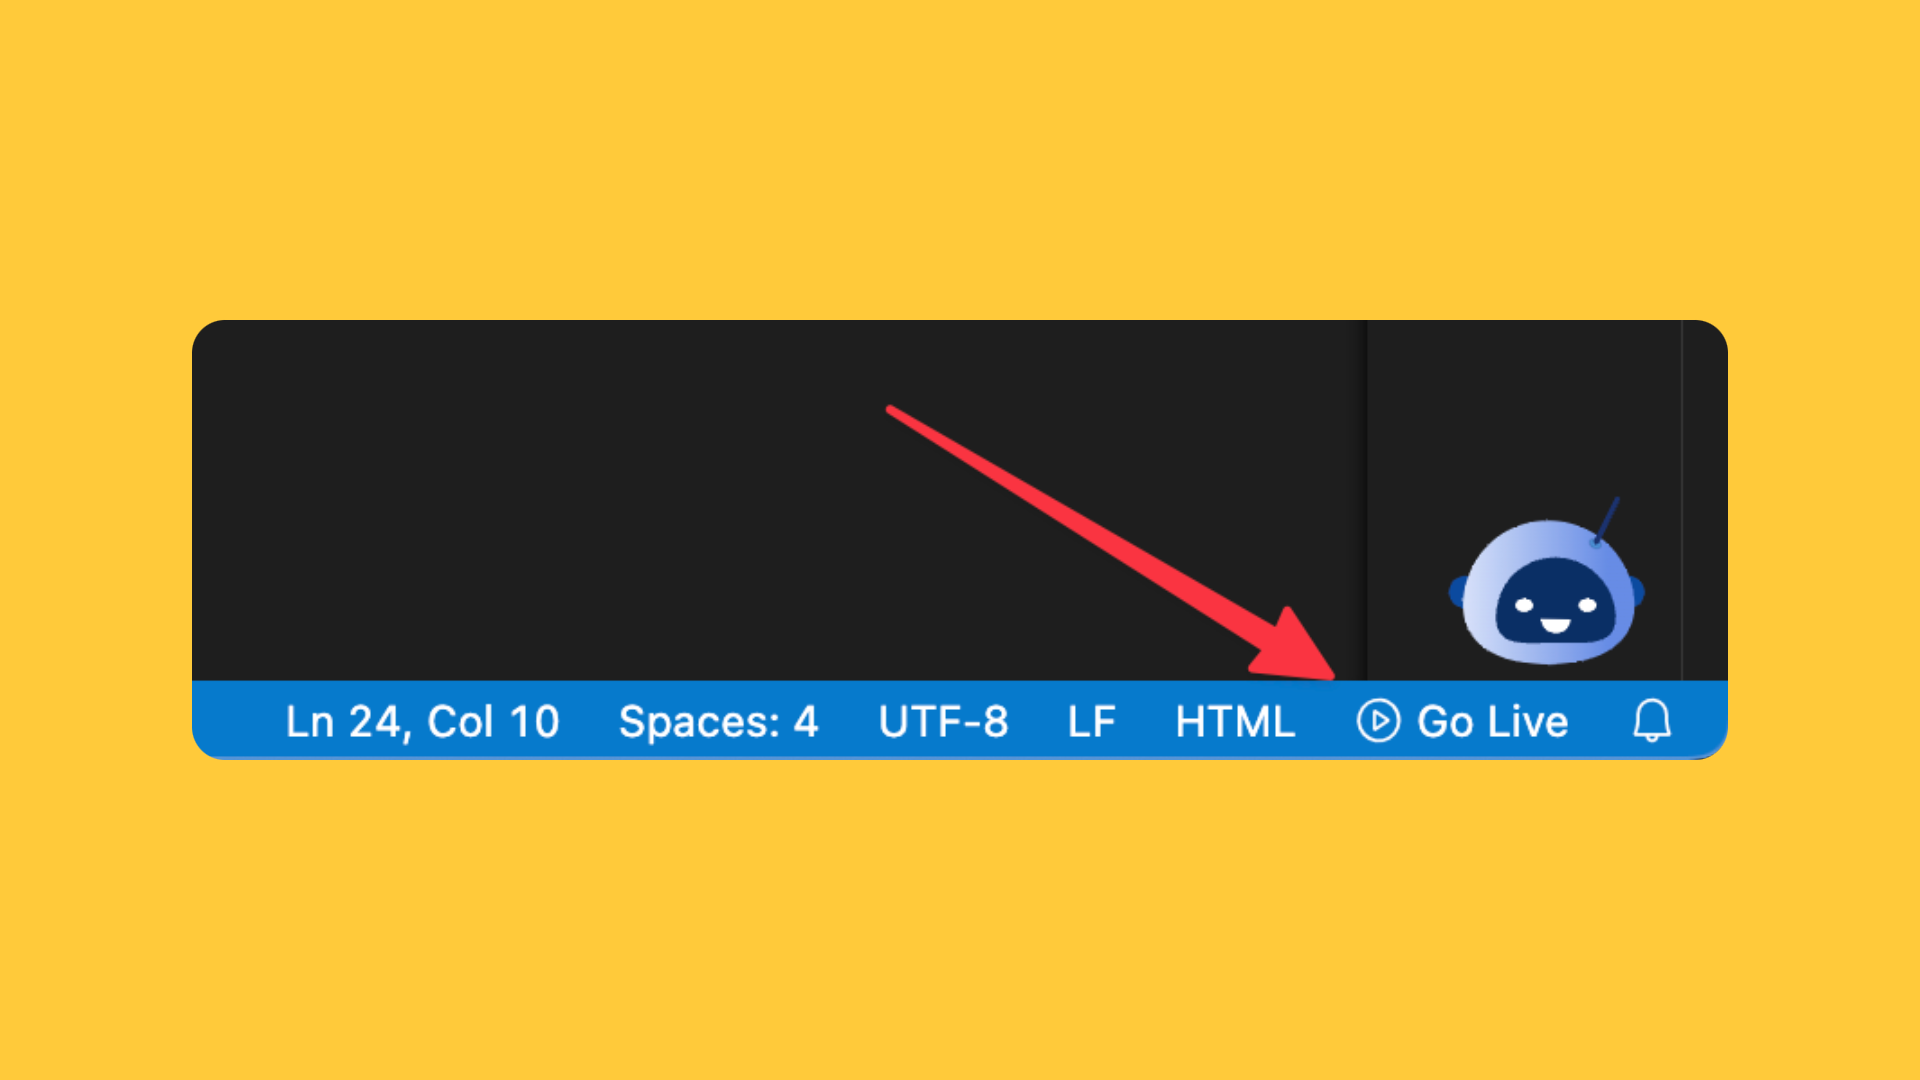
- A new browser tab will open with your HTML page rendered.
- Or, you can click on the "Web 8080" tab to open the preview.
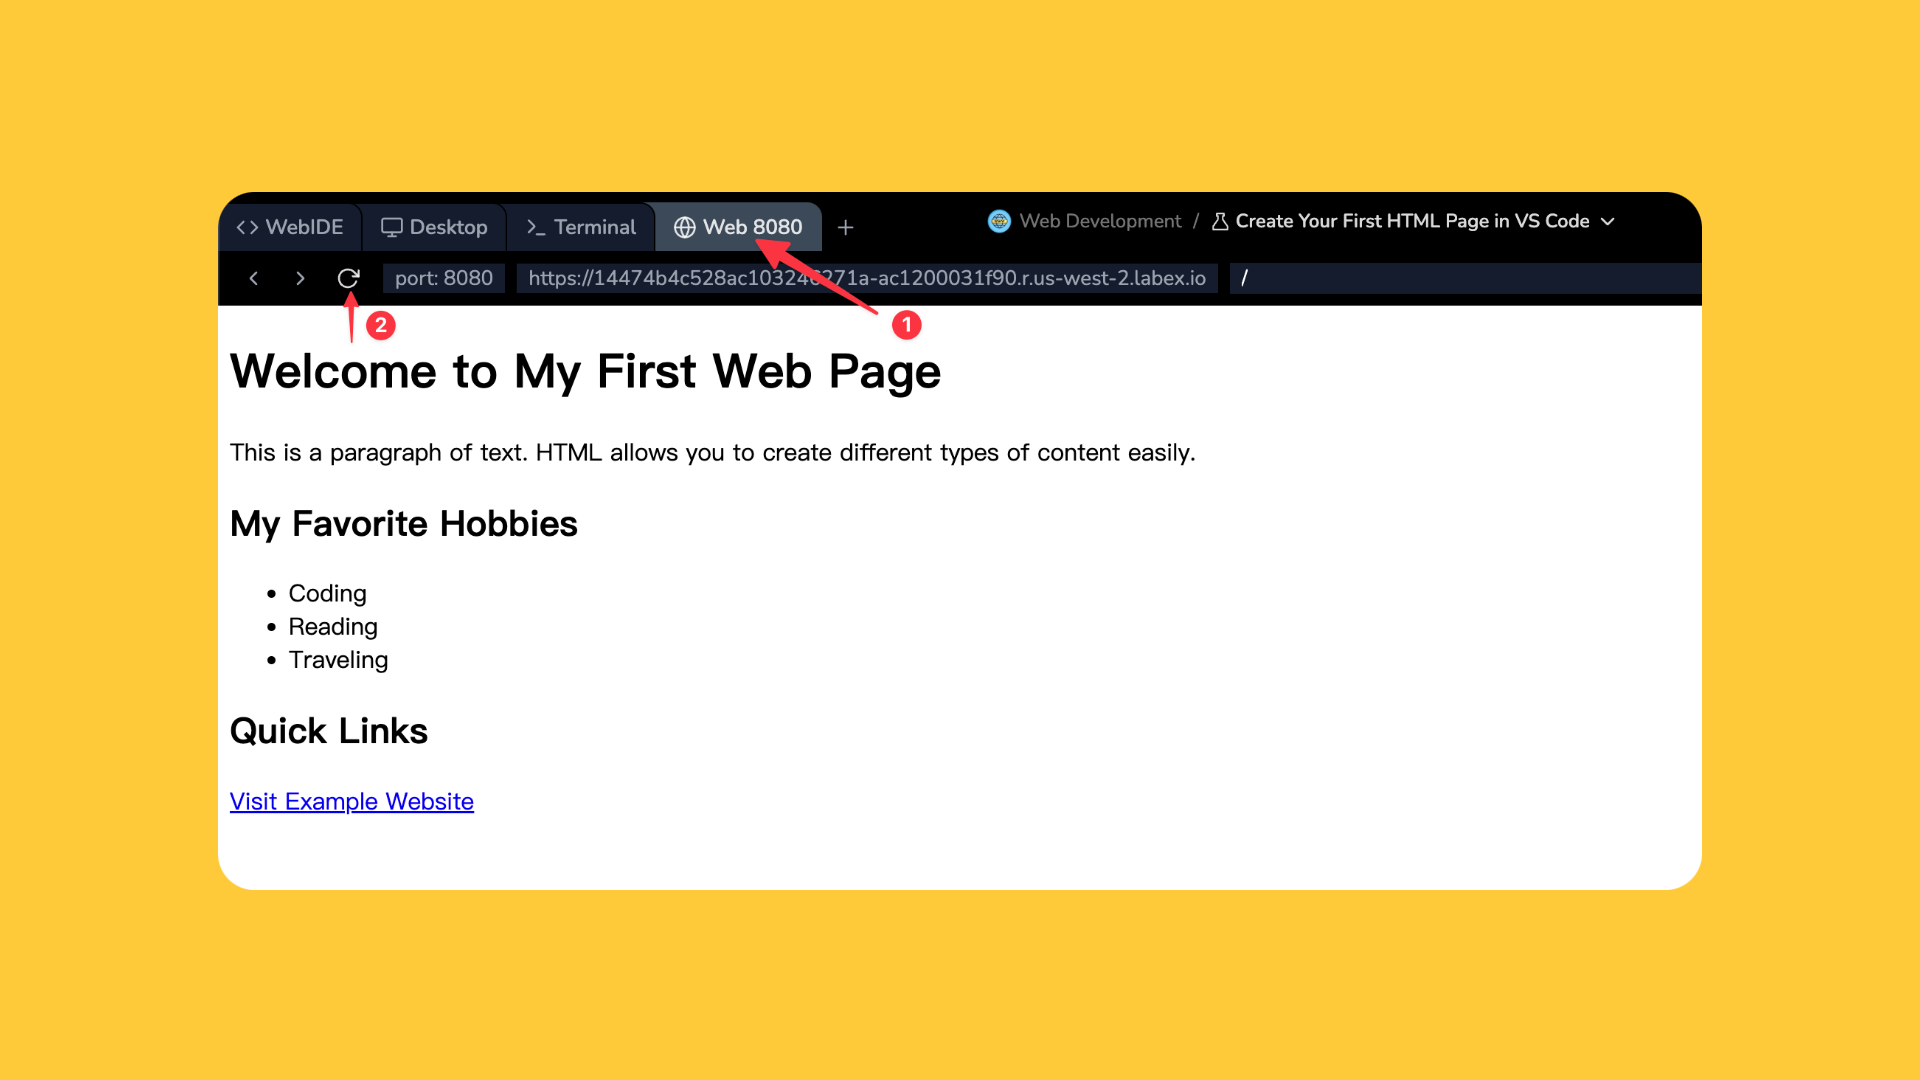
This will automatically:
- Start a web server
- Open your HTML page in a preview window
- Provide real-time updates as you modify your code
Tips: LabEx VM hosts the preview on port 8080. You can share the preview link with others to showcase your work. After your lab vm is stopped, the preview link will no longer work.
Key things to observe:
- The page renders with different heading sizes
- The list appears as bullet points
- The link is clickable
- The page title appears in the browser tab
Summary
The lab guided learners through the initial steps of HTML development, focusing on creating a new HTML file and understanding the fundamental structure of web page creation. By following the step-by-step instructions, participants gained practical experience in using WebIDE as a development tool and learned the essential skills needed to start building web pages with HTML5.


